Desserts
Easy Old Fashioned Peach Cobbler Simple Home Delight
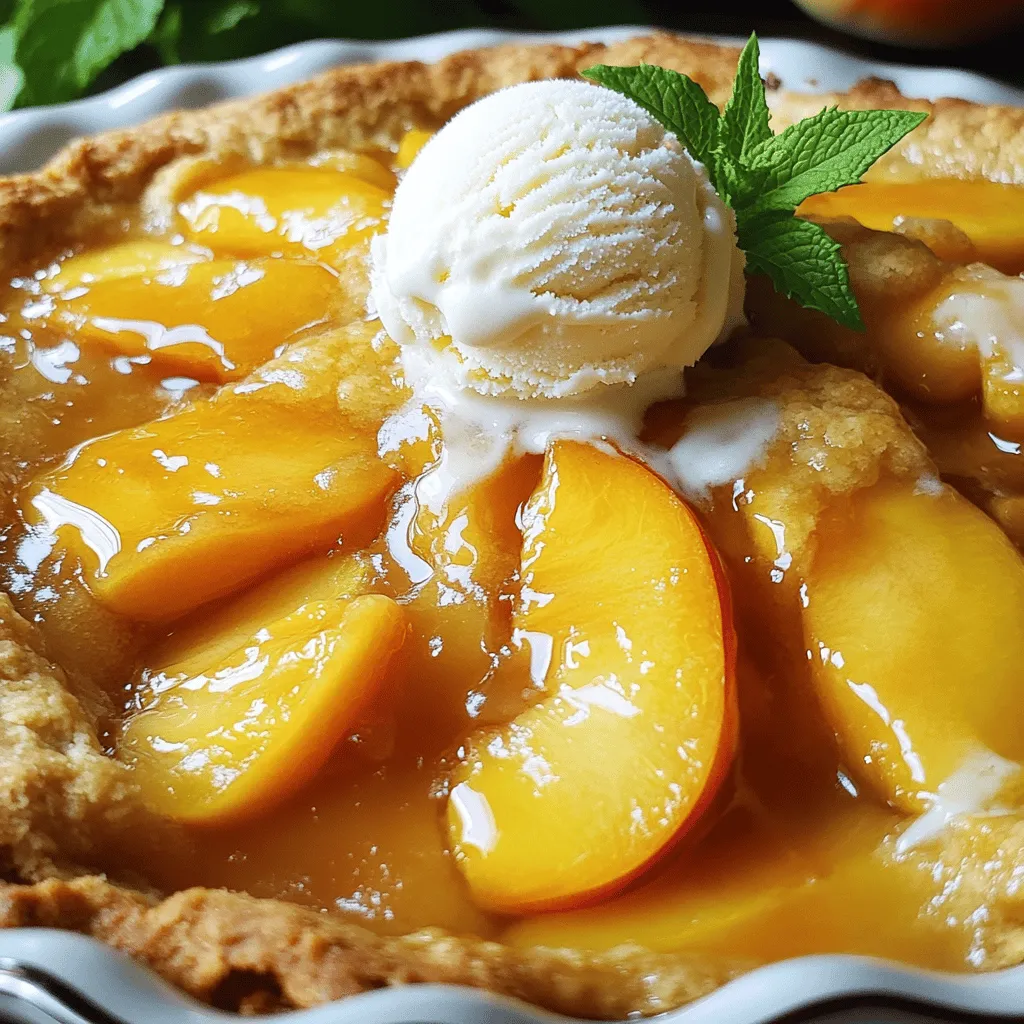
Peach cobbler is a comfort food classic that never disappoints. In this post, I’ll share my easy old-fashioned peach cobbler recipe, perfect for any home
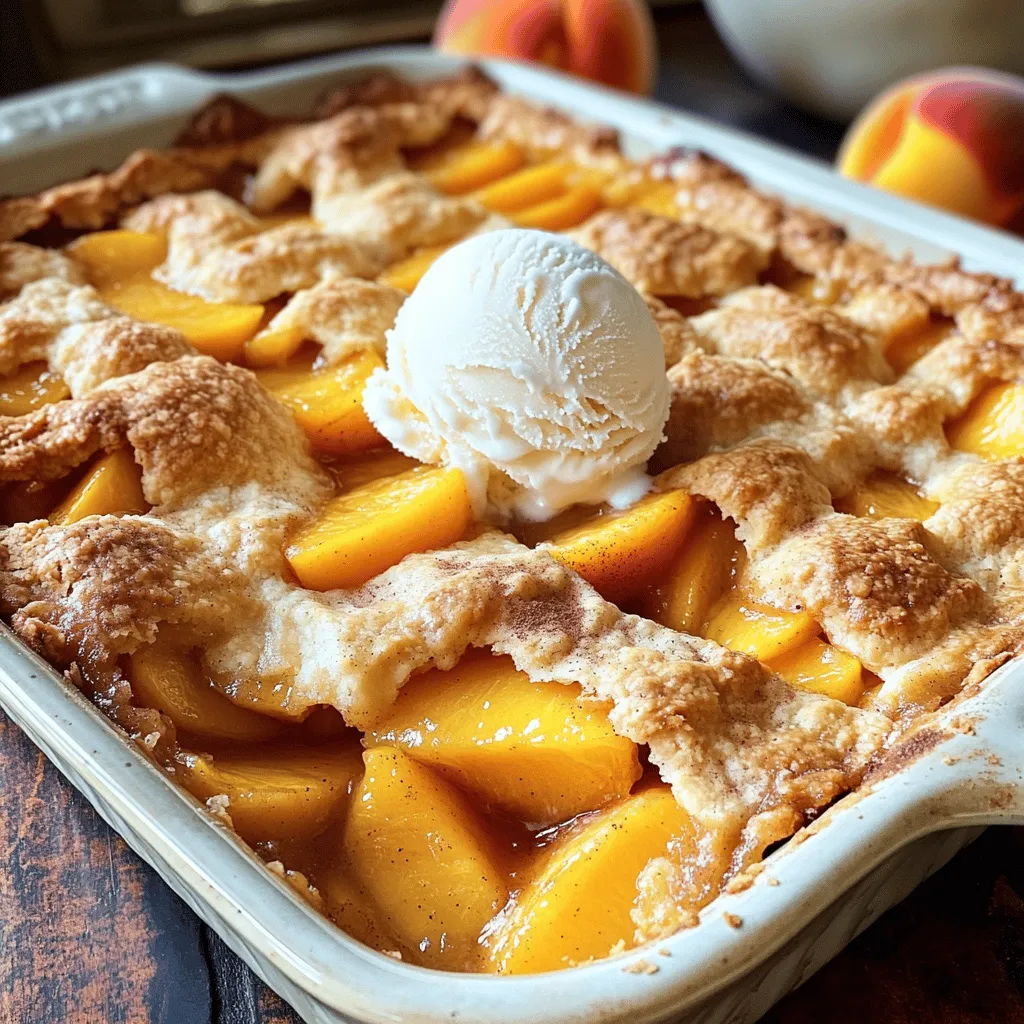
![To make a great peach cobbler, you need simple and fresh ingredients. Here’s what you will use: - 6 fresh peaches, peeled and sliced - 1 cup granulated sugar, divided - 1 teaspoon cinnamon - 1 tablespoon lemon juice - 1 cup all-purpose flour - 1 tablespoon baking powder - 1/2 teaspoon salt - 1 cup milk - 1/2 cup unsalted butter, melted - 1 teaspoon vanilla extract - 1/2 teaspoon nutmeg (optional) These ingredients come together to create a sweet, juicy filling and a soft, buttery topping. Choosing the right peaches is key to your cobbler. Look for peaches that are firm yet slightly soft when you press them. Their color should be bright yellow or golden, with a bit of red on the skin. Avoid any that have green patches, as they are not ripe yet. The best peaches offer a sweet aroma. If you find them a bit hard, let them sit at room temperature for a day or two. While the classic recipe is amazing, you can add some optional ingredients for a twist. A pinch of nutmeg can add warmth to the flavor. You can also try adding a splash of almond extract for a nutty taste. If you like a bit of crunch, consider sprinkling some toasted nuts on top before baking. These little touches can elevate your peach cobbler to the next level. For the full recipe, check out the section above. Start by washing your peaches. Peel them and slice them into thin pieces. This helps them cook evenly. In a bowl, mix the sliced peaches with 1/2 cup sugar, cinnamon, and lemon juice. Toss them well. Set this bowl aside. The juices from the peaches will mix with the sugar and spices. This will make your cobbler sweet and tasty. Next, grab another bowl. In this bowl, whisk together the flour, baking powder, salt, and the rest of the sugar. This gives your cobbler a nice rise. Slowly add in the milk, melted butter, and vanilla. Mix until smooth. If you like, you can fold in nutmeg for extra flavor. Now, it's time to put everything together. Grease a 9x13 inch baking dish with butter. Pour the batter into the dish. Spread it out evenly. Next, take the peach mixture and spoon it over the batter. Make sure to include all the juices. Do not stir it! Let the layers be. This helps create a beautiful cobbler as it bakes. Preheat your oven to 350°F (175°C). Once your oven is ready, place the baking dish inside. Bake it for 40 to 45 minutes. You want it to turn golden brown on top. To check if it’s done, insert a toothpick into the center. If it comes out clean, it’s ready! Allow the cobbler to cool for a bit before serving. This enhances the flavor and makes it easier to slice. For the best enjoyment, serve it warm. A scoop of vanilla ice cream on top makes it even better. This recipe is not just about taste; it's about making sweet memories. Try the Full Recipe for more details! To get the best texture for your peach cobbler, pay attention to your batter. Mix it just enough to combine the wet and dry ingredients. Overmixing can make it tough. The batter should be thick but still pourable. Pour it into the baking dish without stirring in the peaches. As it bakes, the batter rises and creates a light, fluffy texture that hugs the juicy peaches. One common mistake is using unripe or overly soft peaches. Choose peaches that are firm but yield slightly to gentle pressure. This balance gives your cobbler the perfect sweetness. Another mistake is stirring the peach mixture into the batter. This can ruin the layers. Remember, let the peaches sit on top. Finally, check your oven temperature. If it’s too hot, the cobbler may burn before it cooks through. Use an oven thermometer for accuracy. If you want a healthier option, you can swap some ingredients. Use whole wheat flour instead of all-purpose flour. This adds fiber and nutrients. For a dairy-free version, almond milk or oat milk works great in place of regular milk. If you need a sugar substitute, try maple syrup or agave nectar. Adjust the amount, as these sweeteners are sweeter than sugar. These simple swaps keep the dish tasty while meeting your needs. For the full recipe, check out the [Full Recipe]. {{image_2}} You can switch up the fruit in your cobbler. Try using berries like blueberries or strawberries. Apples and pears also work well. Each fruit gives a unique flavor. Mixing fruits can create a tasty twist too. For example, peach and raspberry make a fun combo. Just keep the same sugar and spice amounts for best results. The topping for your cobbler can change the whole dish. Instead of a batter, you can use biscuits. Just drop spoonfuls over the fruit. This gives a nice, flaky texture. You can also try a crumble topping. Mix oats, flour, and brown sugar for a crunchy finish. Both options bring new flavors and textures to your peach cobbler. Serving your peach cobbler is easy and fun. I love serving it warm. A scoop of vanilla ice cream on top makes it even better. Whipped cream is another great choice. For a fresh touch, add a sprig of mint. Pair your cobbler with a cup of coffee or sweet tea. It’s a perfect match for any gathering. You can find the full recipe at the end of the article. To keep leftover peach cobbler fresh, let it cool first. Then, cover it tightly with plastic wrap or aluminum foil. You can also store it in an airtight container. Place it in the fridge. It will stay good for about 3 to 4 days. If you want to enjoy it later, freezing is a great option. When you are ready to eat the cobbler, preheat your oven to 350°F (175°C). Place the cobbler in an oven-safe dish. Cover it with foil to keep it moist. Heat for about 15 to 20 minutes. If you like a crispy top, remove the foil for the last 5 minutes. You can also reheat it in the microwave for 30 to 60 seconds. Just make sure to keep an eye on it to avoid overheating. Freezing peach cobbler is simple. Slice it into portions and place them in freezer-safe bags. Remove as much air as you can to prevent freezer burn. You can store it this way for up to 3 months. When you want to enjoy it, thaw it in the fridge overnight. Then, follow the reheating instructions above. Enjoy the taste of summer any time of year with this peachy delight! For the full recipe, refer back to the earlier section. Southern Peach Cobbler has roots in the American South. It began as a way to use fresh peaches in summer. This dish became popular in the 19th century. Early settlers made it with simple ingredients. They wanted to make something sweet and comforting. Over time, cooks added their own spin. Each family has its special way of making it. Peach cobbler now represents Southern hospitality and love for good food. Yes, you can use canned peaches! Canned peaches save time and are easy to find. Be sure to choose peaches packed in juice or water, not syrup. Drain the peaches to avoid too much liquid in your cobbler. You might want to reduce sugar since canned peaches are often sweet. This way, you can still enjoy a tasty dessert. Making a gluten-free peach cobbler is simple. Substitute all-purpose flour with a gluten-free flour blend. Look for blends that work well in baking. You can also use almond flour or coconut flour, but adjust the amounts. Make sure to check labels to avoid hidden gluten. With these changes, you can still enjoy the same great taste without gluten. For the full recipe, visit the recipe section above. This blog post covered the key steps to make a classic Southern peach cobbler. We explored essential ingredients and tips for picking the best peaches. I shared easy instructions for prepping, assembling, and baking. You learned common mistakes to avoid and how to achieve the best texture. Remember, cobbler is versatile; feel free to try different fruits! Enjoy your homemade treat now or freeze it for later. Cobblers are fun and easy, making them great for any occasion. You’ll impress your friends and family with these simple techniques.](https://tossedrecipes.com/wp-content/uploads/2025/06/51abd898-d271-442c-b819-d5459d11e099.webp)
Classic Southern Peach Cobbler Simple and Delicious Recipe
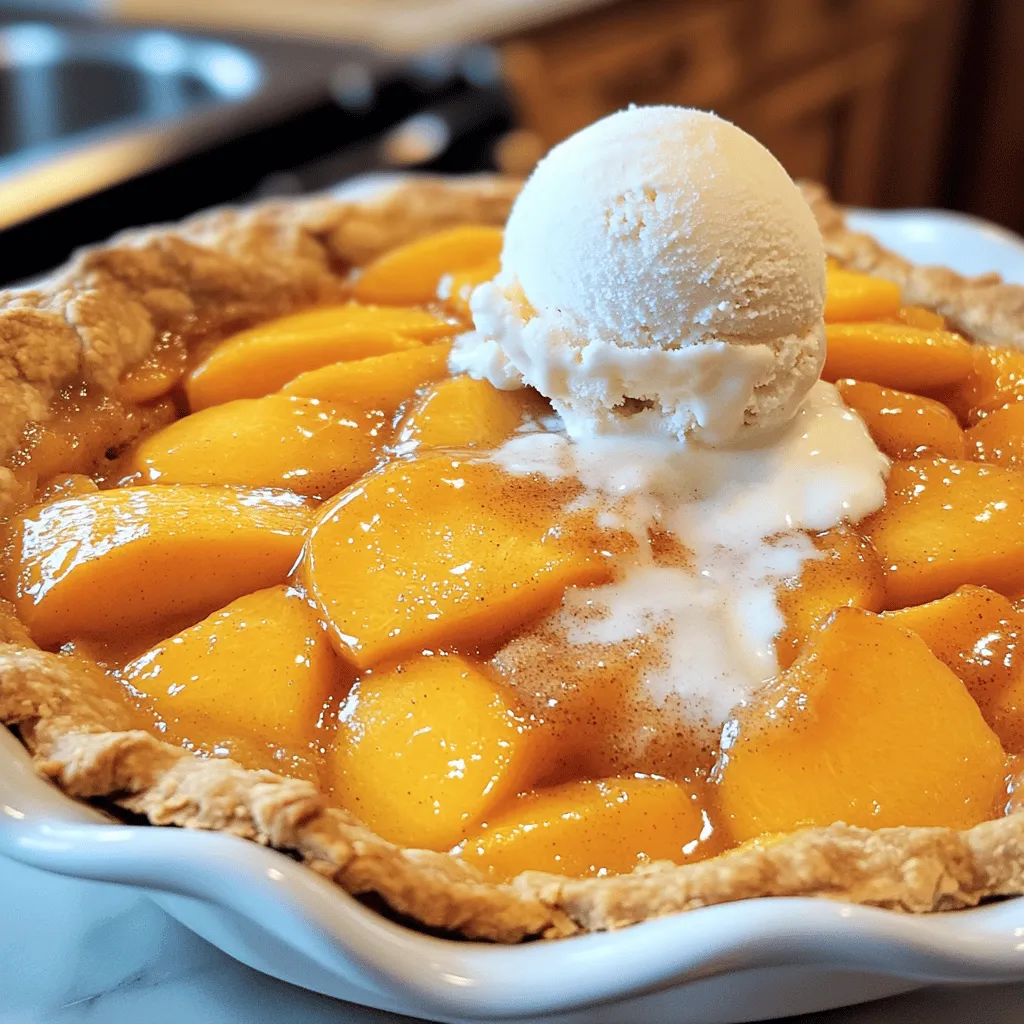
If you crave a dessert that shines with Southern charm, you need this Classic Southern Peach Cobbler recipe. This dish combines juicy peaches and a

Stuffed Baked Peaches Easy and Delicious Recipe
If you’re looking for a sweet and healthy treat, these stuffed baked peaches will delight your taste buds. This easy recipe combines juicy peaches with
Peach Cobbler Must-Try Delightful Sweet Treat
Peach cobbler is a classic dessert that brings sweet joy to any table. In this Peach Cobbler Must-Try: Delightful Sweet Treat guide, I will share
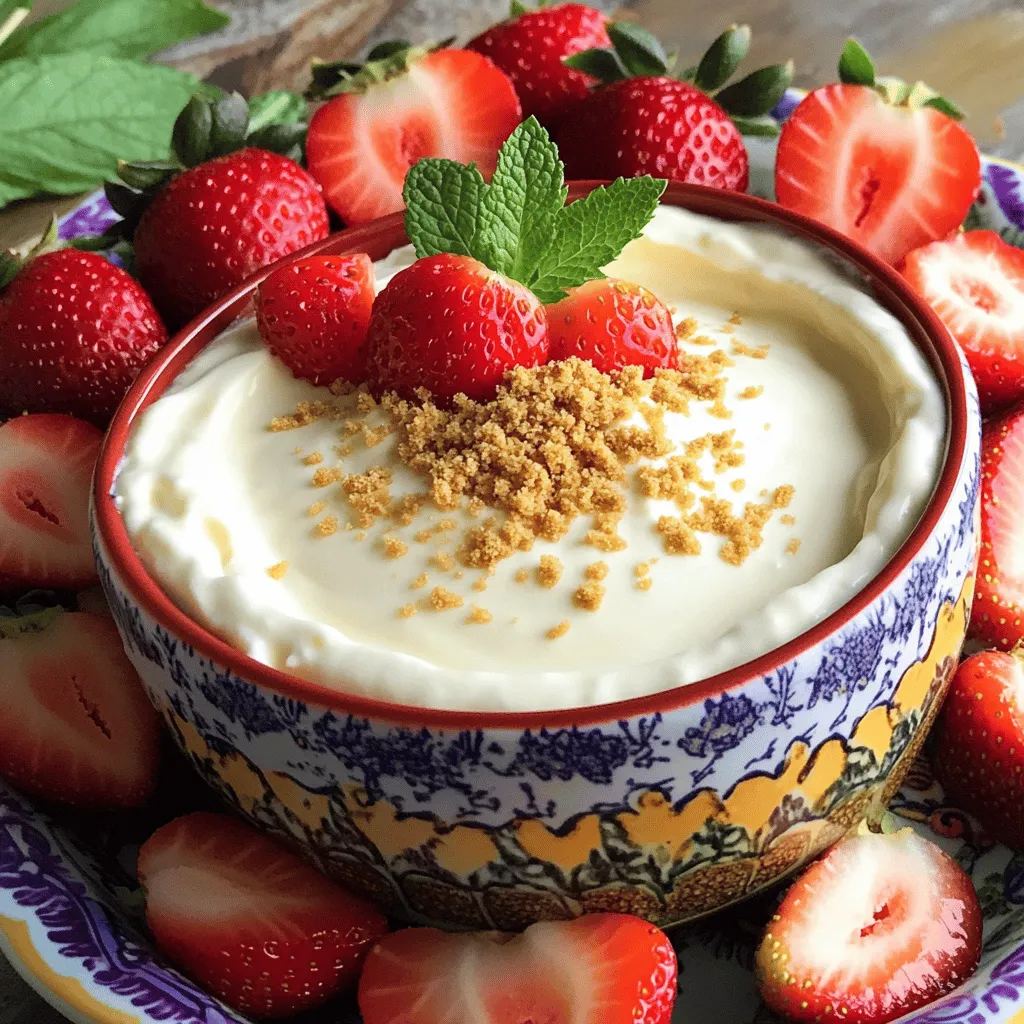
Cheesecake Dip with Strawberries Irresistible Delight
If you love cheesecake and fresh strawberries, you are in for a treat! This Cheesecake Dip combines creamy goodness with the sweet taste of ripe
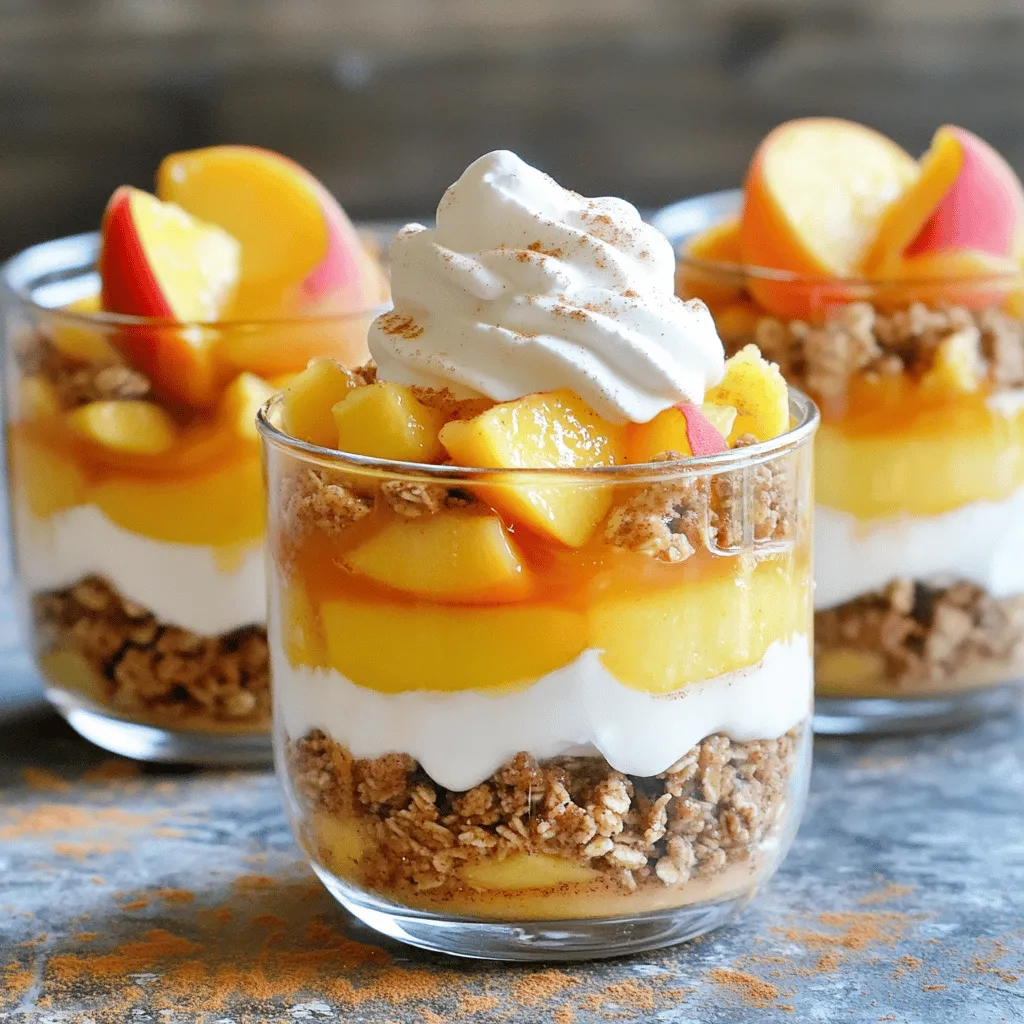
Peach Cobbler Cheesecake Salad Easy and Refreshing Treat
Craving a dessert that’s both easy and refreshing? Look no further! This Peach Cobbler Cheesecake Salad combines the creamy goodness of cheesecake with sweet, juicy
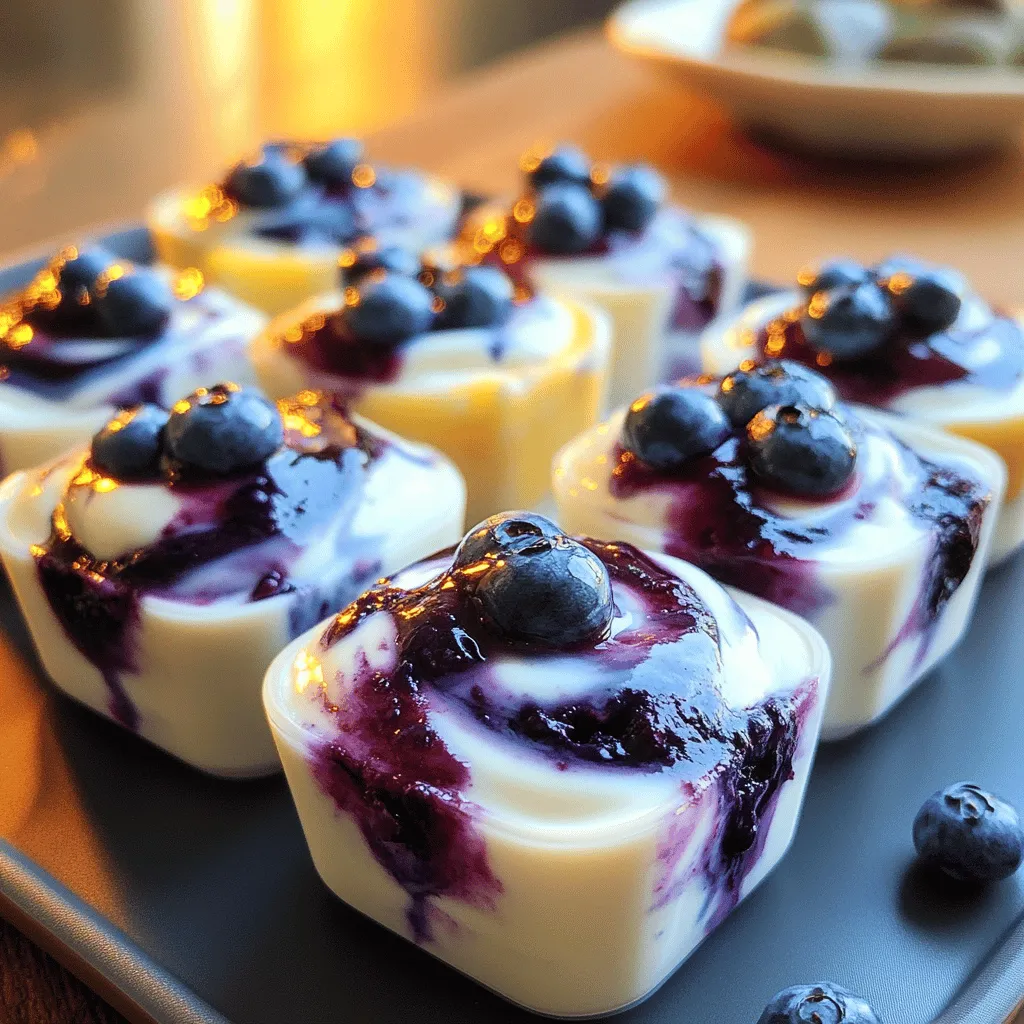
Blueberry Swirl Yogurt Bites Simple Frozen Snack
Looking for a fun and tasty snack that’s easy to make? Blueberry Swirl Yogurt Bites are the perfect treat! In just a few steps, you
![- 6 ripe peaches, pitted and sliced - 1 tablespoon lemon juice - 1/2 cup granulated sugar - 1 teaspoon cinnamon - 1 cup rolled oats - 1/2 cup all-purpose flour - 1/3 cup packed brown sugar - 1/2 cup unsalted butter, melted - 1/2 teaspoon vanilla extract - A pinch of salt Choosing ripe peaches is key to making a great peach crisp. Look for peaches that feel slightly soft and have a sweet aroma. These will be juicy and flavorful. If you can, go for organic peaches. They often taste better and have fewer pesticides. If you want to try different fruits, you can use apples or berries. Both add a nice twist. For gluten-free options, replace the all-purpose flour with a gluten-free flour blend. This way, everyone can enjoy your peach crisp! For the full recipe, check out the details above. To start, you need to preheat the oven. Set it to 350°F (175°C). This temperature helps the crisp bake evenly. Next, prepare the peach mixture. In a large bowl, combine the sliced peaches, lemon juice, granulated sugar, and cinnamon. Toss gently until the peaches are well-coated. This helps enhance their flavor. After mixing, place the peach mixture into a greased 9x13 inch baking dish. Now, let’s make the crisp topping. In another bowl, mix the dry ingredients: rolled oats, all-purpose flour, brown sugar, and salt. Then, pour in the melted butter and vanilla extract. Use a fork to mix it all together until it looks crumbly. This crumbly texture gives a nice crunch. For the baking process, put the dish in your preheated oven. Bake for about 30 to 35 minutes. You want the topping to turn golden brown and the peaches to bubble. You’ll know your peach crisp is done when you see these signs. The aroma will fill your kitchen, and the topping will have a lovely color. Enjoy the delightful smell as it bakes! - Tips for slicing peaches: Use a sharp knife for clean cuts. Cut around the pit, then twist to remove it. Slice the peaches into even pieces. Aim for a thickness of about 1/2 inch. This helps them bake evenly. - Ensuring even baking: Spread the peach mixture in a single layer in the baking dish. Avoid stacking the peaches too high. This allows the heat to circulate and cook the fruit well. Check halfway through baking to stir the topping gently. This helps it brown evenly. - Ideal pairings: Serve your peach crisp warm with a scoop of vanilla ice cream. The cold ice cream melts slightly, creating a creamy texture. You can also top it with whipped cream for extra richness. Fresh mint leaves add a nice touch of color and flavor. - Plating tips for presentation: Use a shallow bowl to show off the layers. Place the crisp in the bowl first, then add a scoop of ice cream. Drizzle some warm peach juice over the top. Garnish with a sprig of mint for a pop of green. - How to store leftovers: Keep any leftover peach crisp in an airtight container. Store it in the fridge for up to three days. Make sure it cools down completely before sealing to avoid moisture buildup. - Best methods for reheating: To reheat, place the crisp in the oven at 350°F (175°C) for about 10-15 minutes. This warms it evenly and keeps the topping crispy. You can also use the microwave, but be cautious. Heat in short bursts to prevent it from getting soggy. For the full recipe, check out the Peachy Paradise Crisp. {{image_2}} You can make your peach crisp even better with some simple tweaks. Adding nuts boosts flavor and crunch. Try chopped almonds or walnuts. You can also add warm spices like nutmeg or ginger. These spices add a cozy touch. Mix in other fruits for new tastes too. Berries like blueberries or raspberries pair well with peaches. You can even use apples for a twist. Each fruit adds its own flavor, making the crisp unique. Toppings can change the whole vibe of your peach crisp. You can choose between an oat topping or a crumble topping. Oat toppings are chewy and hearty, while crumble toppings are buttery and crisp. For a fun twist, try adding chocolate chips or shredded coconut. These toppings can surprise your taste buds. You can also sprinkle some crushed cookies on top for extra crunch. If you want a vegan version, it's easy to adapt. Replace the butter with coconut oil or a vegan butter substitute. Use maple syrup instead of granulated sugar for sweetness. For those watching sugar intake, consider low-sugar options. You can use less sugar in the peach mixture. Try a sugar substitute like stevia or erythritol in the topping. These changes keep the flavor while making it healthier. For the complete recipe, check out the [Full Recipe]. Each serving of peach crisp has about 250 calories. The exact count may vary based on the size of your peaches and how much sugar you use. Here’s a closer look at the macronutrients: - Carbohydrates: 40g - Protein: 3g - Fat: 10g - Fiber: 3g These numbers show a tasty balance of fruits, oats, and fats. Peaches bring many nutrients. They are low in calories and high in vitamins A and C. These vitamins boost your skin and eyes. Peaches also have fiber, which helps digestion and keeps you full. Including oats in your diet is great too. Oats are high in fiber, which helps lower cholesterol. They provide lasting energy and can help control blood sugar levels. This makes oats a smart choice for breakfast or dessert. This peach crisp recipe does have some common allergens. It includes oats and butter. If you have sensitivities, here are some alternatives: - For oats: Use gluten-free oats. - For butter: Substitute with coconut oil for a dairy-free option. - For sugar: Try using a sugar substitute like stevia or erythritol for a lower-calorie dessert. These swaps make the crisp safe for more people to enjoy. Can I use frozen peaches for this recipe? Yes, you can use frozen peaches! Just thaw and drain them. This helps avoid extra liquid. This makes it easy to enjoy peach crisp any time of year. How do I know when my peach crisp is cooked? Look for a golden topping and bubbly peaches. The crisp should smell sweet and warm. A toothpick can help check the topping; it should not be wet. What’s the best way to peel peaches? The best way is to blanch them. Boil water and add the peaches for 30 seconds. Then, plunge them in ice water. The skin will slip right off! Can I make peach crisp ahead of time? Yes, you can prepare it beforehand. Just assemble the crisp and store it in the fridge. Bake it fresh when ready to serve. This keeps it warm and tasty. How long can I store peach crisp? You can store peach crisp for about three days in the fridge. Cover it well to keep it fresh. If you want to keep it longer, freeze it for up to three months. What’s the best way to serve it warm? Serve it warm straight from the oven. A scoop of vanilla ice cream adds cool creaminess. You can also sprinkle fresh mint for a pop of color and flavor. This blog post covered all you need for a perfect peach crisp. We explored essential ingredients and tips for quality. I shared step-by-step instructions, so you can bake with ease. Remember to try different fruit combinations and toppings to make it your own. Whether you’re enjoying it warm with ice cream or storing leftovers, peach crisp is always a delight. I hope this recipe inspires you to bake and enjoy this sweet treat. Happy baking!](https://tossedrecipes.com/wp-content/uploads/2025/06/42d48f4d-72cd-4c4e-974f-eb8ef57726b6.webp)
Peach Crisp Delight Simple and Tasty Dessert Recipe
Are you craving a tasty treat that celebrates the season’s best fruit? Look no further than this simple Peach Crisp Delight recipe! With juicy peaches
Old Fashioned Peach Cobbler Irresistible Comfort Food
Are you craving a dessert that warms your heart? Dive into the world of Old Fashioned Peach Cobbler, a classic treat that brings comfort and
![To make a tasty peach crumble, you need some key ingredients. Here’s what you’ll need: - 4 ripe peaches, peeled and sliced - 1 tablespoon lemon juice - 1/3 cup granulated sugar - 1 teaspoon vanilla extract - 1 cup rolled oats - 1/2 cup all-purpose flour - 1/2 cup brown sugar - 1/2 teaspoon ground cinnamon - 1/4 teaspoon salt - 1/2 cup unsalted butter, melted These ingredients come together to create a warm and comforting dessert. Each one plays a key role in the final flavor and texture of the crumble. You can make your peach crumble even better with a few optional ingredients. Here are some ideas: - Add 1/4 cup chopped nuts for crunch. - Use 1/2 cup of mixed berries for extra flavor. - Top with vanilla ice cream for a creamy treat. These extras can add fun twists to the classic recipe. Experiment and find what you love. Choosing the right peaches is important for a great crumble. Here are tips to pick the best ones: - Look for peaches with a deep color. - Choose firm peaches that are slightly soft to touch. - Smell the peaches; they should have a sweet aroma. Fresh, ripe peaches will make your crumble tastier. Don’t rush; take your time to find the best fruit. Start by washing the peaches. Use warm water to remove any dirt. Next, peel the peaches. A sharp knife works best for this. After peeling, slice the peaches into thin pieces. Place them in a large bowl. Pour in one tablespoon of lemon juice. This helps keep the color fresh. Add one-third cup of granulated sugar to the bowl. Then, drizzle in one teaspoon of vanilla extract. Toss the peaches gently until they are coated. This mix will make the peaches sweet and flavorful. In a separate bowl, combine one cup of rolled oats, half a cup of all-purpose flour, and half a cup of brown sugar. Add half a teaspoon of ground cinnamon and a quarter teaspoon of salt. Mix these dry ingredients well. Now, take half a cup of melted unsalted butter and pour it over the dry mix. Stir until it looks crumbly. This topping will add a nice crunch to your dessert. Preheat your oven to 350°F (175°C). Grease a 9-inch pie dish. Pour the peach mixture into the dish and spread it evenly. Now, sprinkle the crumble topping over the peaches. Bake in your preheated oven for 30-35 minutes. Look for a golden brown top and bubbling peaches. When done, remove it from the oven. Let it cool for a few minutes. If you like, add a scoop of vanilla ice cream on top before serving. You can find the full recipe [Full Recipe]. When making peach crumble, small errors can change the dish. Here are key mistakes to watch out for: - Using unripe peaches: Always pick ripe peaches. They should feel soft but not mushy. - Not peeling the peaches: Peeling helps keep the texture light. The skins can add a chewiness that’s not always welcome. - Skipping the lemon juice: This adds brightness and balances sweetness. Don’t skip it for a better flavor. A crisp topping is key to a great peach crumble. Here’s how to get it just right: - Use cold butter: Make sure your butter is cold when mixing. This helps create that crunchy texture. - Mix gently: Combine your dry ingredients and melted butter carefully. You want it crumbly, not paste-like. - Don’t over-bake: Keep an eye on your crumble. It should be golden brown but not too dark. Peach crumble is great on its own, but you can enhance it even more. Here are some serving ideas: - Top with vanilla ice cream: The warm crumble pairs perfectly with cold ice cream. - Drizzle with honey: A little honey adds sweetness and makes it look fancy. - Serve with whipped cream: A dollop of whipped cream can make it feel extra special. These tips will help you create a peach crumble that shines. For more on making this dish, check the Full Recipe. {{image_2}} You can easily make this peach crumble gluten-free. Instead of using all-purpose flour, choose a gluten-free flour blend. Many blends work well and taste great. Make sure to check the labels for any added ingredients. You can also use gluten-free oats. This keeps the crumble light and tasty while being safe for those with gluten issues. Get creative with your toppings! You can add chopped nuts like almonds or walnuts for a crunchy twist. Just mix them into the crumble topping. You can also try adding other fruits. Berries or apples pair well with peaches. Just remember to adjust the sugar based on the fruit’s sweetness. This gives your peach crumble a fun twist! To make this recipe vegan, swap the butter for coconut oil or vegan butter. Use maple syrup or agave nectar instead of granulated sugar for a natural sweetener. The rest of the recipe stays the same. This vegan peach crumble is still full of flavor and easy to make. Enjoy it warm or cold, just like the classic version! Check out the Full Recipe for details on how to make this delicious dessert. To keep your peach crumble fresh, let it cool completely. Then, cover it tightly with plastic wrap or aluminum foil. You can also place it in an airtight container. Store it in the fridge for up to three days. This way, you can enjoy it later without losing flavor. When you want to eat your leftover peach crumble, reheating is easy. Preheat your oven to 350°F (175°C). Place the crumble in an oven-safe dish. Heat it for about 15-20 minutes. This brings back its warm, gooey goodness. If you prefer, you can microwave it. Heat it in short bursts, checking every 30 seconds. You can freeze peach crumble for later enjoyment. First, let it cool completely. Then, wrap it tightly in plastic wrap and foil. You can also use a freezer-safe container. It will stay good for up to three months. When you're ready to eat it, thaw it in the fridge overnight. Reheat it as mentioned before. Enjoy the taste of summer anytime! Yes, you can use frozen peaches. Just thaw them first and drain excess juice. This helps keep the crumble from becoming too watery. Using frozen peaches can save time and still taste great. You can tell the crumble is done when the top is golden brown and the peaches bubble. This usually takes about 30 to 35 minutes at 350°F (175°C). Keep an eye on it toward the end. A golden top means it's ready to enjoy. Peach crumble pairs well with vanilla ice cream or whipped cream. Both add a creamy touch that contrasts nicely with the warm crumble. You could also serve it with yogurt for a lighter option. This dessert is versatile and tastes great with many sides. Check the Full Recipe for more serving ideas. In this post, we explored how to make a great peach crumble. We covered the main ingredients and some tasty optional ones. I shared tips for picking the best peaches. You learned step-by-step instructions to prepare, bake, and serve your crumble. We discussed common mistakes and variations like gluten-free and vegan options. Finally, I provided storage tips for leftovers. Remember, the key to a delicious peach crumble is ripe peaches and a crisp topping. Enjoy your baking!](https://tossedrecipes.com/wp-content/uploads/2025/06/b851761f-fcdb-47c9-9262-ce3865be03ec.webp)
Peach Crumble Delight Simple and Delicious Recipe
Are you ready to enjoy a warm, comforting dessert? This Peach Crumble Delight recipe is both simple and delicious! With ripe peaches and a sweet