Desserts

- 1 cup apple cider - 2 cups all-purpose flour - 1 tablespoon baking powder - 1 teaspoon baking soda - 1 teaspoon ground cinnamon - ½ teaspoon ground nutmeg - ½ teaspoon salt - ½ cup granulated sugar - ¼ cup brown sugar, packed - 2 large eggs - ½ cup vegetable oil - 1 teaspoon vanilla extract - ½ cup apple sauce - ½ cup granulated sugar (for coating) - 3 tablespoons melted butter (for coating) - Additional ground cinnamon (optional, for coating) When measuring flour, use the scoop and level method. Spoon flour into the cup and level it off. This gives you the best texture. If you need gluten-free, use a 1:1 gluten-free flour blend. For a richer flavor, you can swap half the granulated sugar with maple syrup. Choose apple cider that is unfiltered for maximum flavor. Look for fresh apples if you want to make your own cider. For the best spices, buy whole spices and grind them yourself. This keeps their flavor strong. When buying eggs, look for ones that are firm and clean. Fresh eggs will make your muffins fluffier. First, you need to preheat your oven to 350°F (175°C). This step is key for even baking. While the oven heats, grease your muffin tin or line it with paper liners to prevent sticking. Next, let’s focus on the apple cider. Pour 1 cup of apple cider into a small saucepan. Heat it over medium heat until it boils. Once it boils, reduce the heat to a simmer. Let it cook for about 10 to 15 minutes. You want it to reduce to about ½ cup. This makes the flavor stronger. After that, take it off the heat and let it cool a bit. In a large bowl, whisk together the dry ingredients. Combine 2 cups of all-purpose flour, 1 tablespoon of baking powder, 1 teaspoon of baking soda, 1 teaspoon of ground cinnamon, ½ teaspoon of ground nutmeg, and ½ teaspoon of salt. Mix these well to ensure the baking powder and soda are evenly distributed. Now, grab another bowl. Mix ½ cup of granulated sugar, ¼ cup of brown sugar, and 2 large eggs. Stir these until they are well combined. Next, add ½ cup of vegetable oil, 1 teaspoon of vanilla extract, ½ cup of apple sauce, and the reduced apple cider. Whisk everything together until the mixture is smooth. Pour the wet mixture into the bowl with the dry ingredients. Stir gently, but don’t overmix it. Overmixing can make the muffins tough. Spoon the batter into the prepared muffin tin, filling each cup about ¾ full. Bake them for 15 to 18 minutes. You’ll know they’re ready when a toothpick inserted into the center comes out clean. Once baked, allow the muffins to cool in the pan for about 5 minutes. After that, transfer them to a wire rack to cool completely. While they cool, mix ½ cup of granulated sugar with some ground cinnamon in a shallow bowl if you like. Brush the warm muffins with melted butter. Then, roll each muffin in the cinnamon sugar mixture until they are well coated. Enjoy your delicious apple cider donut muffins! To get the right amount of flour, always use the spoon-and-level method. First, scoop flour into a measuring cup with a spoon. Avoid dipping the cup directly into the flour bag. This keeps the flour from packing down. After filling the cup, use a flat edge, like a knife, to level it off. This method gives you the best results every time. Mixing your batter too much can make muffins tough. After adding wet ingredients to dry, stir gently. Stop mixing when you see a few flour specks. Lumps are okay; they will cook out. This helps keep your muffins light and fluffy. Remember, less is more when it comes to mixing. You can make these muffins ahead of time. After baking, let them cool completely. Then, wrap each muffin in plastic wrap. Place them in an airtight bag or container. When you want to enjoy them later, just thaw them at room temperature. You can also reheat them in the oven for a warm, fresh taste. These tips help you enjoy apple cider donut muffins anytime! {{image_2}} You can make these muffins gluten-free. Use a gluten-free flour blend instead of all-purpose flour. Check that the blend contains xanthan gum, which helps with texture. This way, you keep the muffins light and fluffy. Mix-ins add fun and flavor. Try adding ½ cup of chopped nuts, like walnuts or pecans. You can also add chocolate chips for a sweet twist. Fold them into the batter gently to keep the muffins airy. Spices can change the flavor of your muffins. Try adding ¼ teaspoon of ground ginger for a warm kick. You can also use cloves or allspice for a deeper flavor. Just remember to keep the balance right so the apple flavor shines through. To keep your apple cider donut muffins fresh, store them in an airtight container. This helps prevent moisture loss. You can also wrap them in plastic wrap or foil. If you want to keep them longer, place them in the fridge. When stored correctly, these muffins last about 3 to 5 days at room temperature. If you refrigerate them, they can last up to a week. For longer storage, consider freezing them. To enjoy your muffins warm, preheat your oven to 350°F (175°C). Place the muffins on a baking sheet and heat for about 5 to 10 minutes. You can also microwave them for 15-20 seconds. Just be careful not to overheat them, or they may become dry. Serve Apple Cider Donut Muffins warm. They taste great on their own. You can also add a drizzle of honey or maple syrup. Pair them with coffee or apple cider for a cozy treat. Yes, you can use apple juice instead of apple cider. The flavor will change slightly, but it will still be tasty. You could also try using a mix of water and a splash of vinegar for a tangy twist. To make these muffins vegan, replace the eggs with flax eggs. Mix one tablespoon of ground flaxseed with three tablespoons of water for each egg. Use plant-based oil instead of vegetable oil. Lastly, ensure the apple sauce is unsweetened. One common mistake is overmixing the batter. This can lead to tough muffins. Another mistake is not preheating the oven. Muffins need a hot oven to rise properly. Absolutely! You can make mini muffins with this recipe. Just fill a mini muffin tin and bake for 10-12 minutes. Keep an eye on them, as they will bake faster than regular-sized muffins. We covered the key ingredients needed for apple cider donut muffins, how to prepare them, and tips for making great muffins every time. You now have tools to make delicious muffins, whether you're a novice or a pro. Remember, choosing fresh ingredients matters and perfect measuring helps. Don’t hesitate to try variations to suit your taste. With these tips, you can store and enjoy your muffins longer. Baking can be fun and rewarding. Enjoy every bite of your homemade treats!
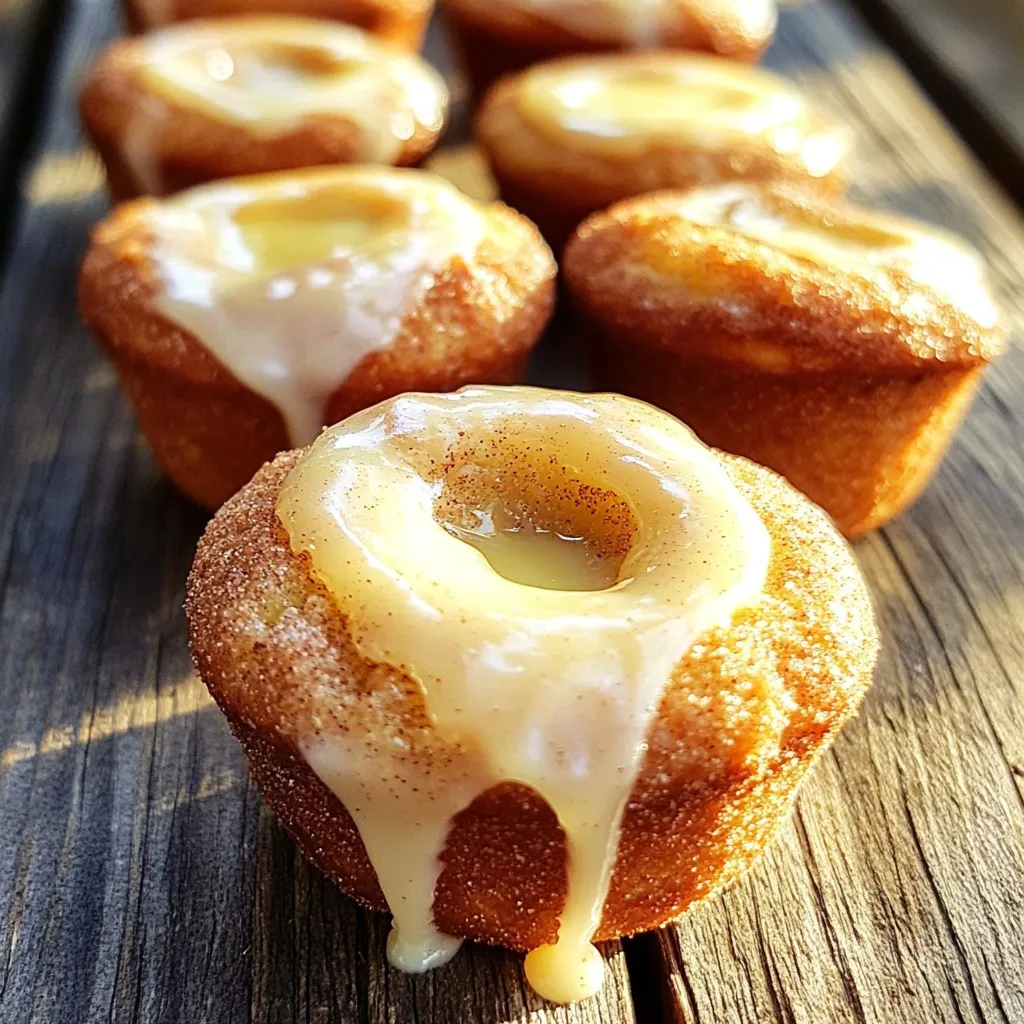
Apple Cider Donut Muffins Irresistible and Simple Recipe
If you’re craving a sweet treat that’s simple to make, you’re in the right place! My Apple Cider Donut Muffins are fluffy, flavorful, and packed
- 1 cup pumpkin puree - 1/2 cup granulated sugar - 1/2 cup brown sugar, packed - 1/2 cup vegetable oil - 2 large eggs - 1 teaspoon vanilla extract - 1 1/2 cups all-purpose flour - 1 teaspoon baking powder - 1/2 teaspoon baking soda - 1 teaspoon ground cinnamon - 1/2 teaspoon nutmeg - 1/4 teaspoon salt - 1 cup chopped pecans (divided) - 1/4 cup powdered sugar (for dusting) The ingredients for this Pumpkin Pecan Coffee Cake bring warm fall flavors to life. The pumpkin puree adds moisture and a rich taste. I love the mix of sugars. Granulated sugar gives sweetness, while brown sugar adds depth. Vegetable oil keeps the cake soft and fluffy. Eggs are key to binding the mix. They help the cake rise nicely and hold its shape. Don’t skip the vanilla extract; it adds a lovely aroma that enhances the flavor. For the dry ingredients, all-purpose flour is the base. Baking powder and baking soda create lift, making the cake light. Ground cinnamon and nutmeg bring warmth and spice, making every bite feel cozy. A touch of salt brings all the flavors together and balances the sweetness. The topping is where the crunch happens. Chopped pecans add a nice texture. When you sprinkle the powdered sugar on top, it gives a sweet finish. This cake is not only tasty; it also looks beautiful when served. First, you need to preheat your oven to 350°F (175°C). This step is key to baking the cake evenly. While the oven heats, grab a 9-inch round cake pan. You can grease it with some vegetable oil or butter. If you prefer, line it with parchment paper. This makes it easier to remove the cake later. In a large mixing bowl, add 1 cup of pumpkin puree, 1/2 cup of granulated sugar, 1/2 cup of brown sugar, and 1/2 cup of vegetable oil. Mix these wet ingredients until smooth. Next, beat in 2 large eggs, one at a time. Then, add 1 teaspoon of vanilla extract. Mix well after each addition. In another bowl, whisk together 1 1/2 cups of all-purpose flour, 1 teaspoon of baking powder, 1/2 teaspoon of baking soda, 1 teaspoon of ground cinnamon, 1/2 teaspoon of nutmeg, and 1/4 teaspoon of salt. Gradually add this dry mixture to the pumpkin mixture. Stir until just combined. Be careful not to overmix! Finally, gently fold in 3/4 cup of chopped pecans. Now, pour the batter into the prepared cake pan. Smooth the top with a spatula. Sprinkle the remaining 1/4 cup of pecans on top for added crunch. Bake the cake in your preheated oven for 30 to 35 minutes. To check for doneness, insert a toothpick in the center. If it comes out clean, the cake is ready. After baking, let the cake cool in the pan for about 10 minutes. Then, transfer it to a wire rack to cool completely. Once cooled, dust the top with powdered sugar for a lovely finish. This cake pairs perfectly with a warm cup of coffee. Enjoy this tasty fall treat! - Avoiding overmixing: When you mix the batter, do it gently. Stir the dry ingredients into the wet until just combined. This keeps your cake light and fluffy. Overmixing can lead to a dense texture. - Ensuring proper baking time: Bake the cake for 30 to 35 minutes. Check for doneness by inserting a toothpick. If it comes out clean, your cake is ready. Keep an eye on it as ovens can vary. - Adding spices or extracts: Feel free to boost flavors. A dash of ginger or allspice adds warmth. You can also try a bit of almond extract for a unique twist. - Tips for more pecan flavor: Toast your pecans before adding them to the batter. This enhances their flavor and adds a lovely crunch. Use fresh pecans for the best taste. - How to serve it warm: For a cozy treat, serve slices warm. A quick warm-up in the microwave works wonders. It enhances the cake's rich flavors. - Pairing with beverages: This cake pairs perfectly with a hot cup of coffee or tea. The warm spices in the cake blend well with the rich flavors of your drink. Enjoy it with a splash of cream or a sprinkle of cinnamon on top. {{image_2}} Gluten-free options: You can make this cake gluten-free. Simply swap the all-purpose flour for a gluten-free blend. Look for a blend that contains xanthan gum, which helps with the cake's texture. Vegan modifications: To make this cake vegan, replace the eggs with flax eggs. Mix one tablespoon of ground flaxseed with three tablespoons of water for each egg. Let it sit for a few minutes until it thickens. Use a plant-based oil instead of vegetable oil to keep it vegan. Adding chocolate chips: For a sweet twist, add chocolate chips. Stir in about 1/2 cup of semi-sweet chocolate chips with the pecans. This adds a rich flavor that pairs well with pumpkin. Incorporating other nuts: You can switch up the nuts in this recipe. Try walnuts or almonds instead of pecans. Each nut will give the cake a unique crunch and flavor. Using butternut squash instead: Butternut squash can replace pumpkin in this recipe. It has a similar taste and texture. Just mash it like you would with pumpkin puree for the same results. Adjusting spices for fall flavors: To boost the fall vibe, add more spices. Consider using ginger or allspice. Just a pinch can enhance the warm, cozy flavors of the cake. You can store leftover pumpkin pecan coffee cake at room temperature or in the fridge. If you plan to eat it within a few days, a cool, dry spot works well. Just cover the cake with plastic wrap or foil to keep it fresh. If you want it to last longer, place it in the fridge. Use an airtight container to prevent it from drying out. To freeze the cake, first, let it cool completely. Wrap it tightly in plastic wrap, then place it in a freezer-safe bag or container. This helps keep the cake moist. When you’re ready to eat, thaw it in the fridge overnight. Reheat slices in the microwave for about 15-20 seconds. Enjoy warm for the best taste! When stored properly, the cake lasts about 3-4 days at room temperature. In the fridge, it can stay fresh for up to a week. If frozen, the cake can last for about 2-3 months. Just remember to check for any signs of freezer burn before serving. Yes, you can use fresh pumpkin. To do this, you need to cook and puree the pumpkin yourself. Roast the pumpkin until soft, then scoop out the flesh and blend until smooth. Use the same amount, one cup, in your recipe. Fresh pumpkin may add a brighter flavor and a little more moisture to your cake. Check the cake with a toothpick. Insert it into the center of the cake. If it comes out clean, the cake is done. You can also look for a golden-brown top and a firm texture. If the toothpick has wet batter on it, bake for a few more minutes and check again. You can use applesauce or mashed banana. For each egg, use 1/4 cup of applesauce or 1/4 cup of mashed banana. These will keep the cake moist and add a bit of sweetness. Ground flaxseed mixed with water can also work. Mix 1 tablespoon of flaxseed with 2.5 tablespoons of water for each egg. Yes, you can adjust the sugar. If you prefer a less sweet cake, use less granulated or brown sugar. You could also add spices like cinnamon or nutmeg to enhance flavor without extra sugar. If you want it sweeter, add more sugar or a natural sweetener like honey or maple syrup. Absolutely! You can make the cake a day or two in advance. Store it in an airtight container at room temperature. For longer storage, refrigerate it. This cake tastes great even after a day or two. Just warm it slightly before serving to bring back its lovely flavors. This blog post covered all the key parts of making a tasty pumpkin cake. You learned about the main ingredients, step-by-step instructions, and helpful baking tips. We discussed a few fun ways to change the recipe to suit your taste. Remember, storing leftovers and freezing the cake can help keep it fresh longer. Try this recipe with a friend or family member for a great time in the kitchen! Enjoy your delicious cake and all the joy it brings.
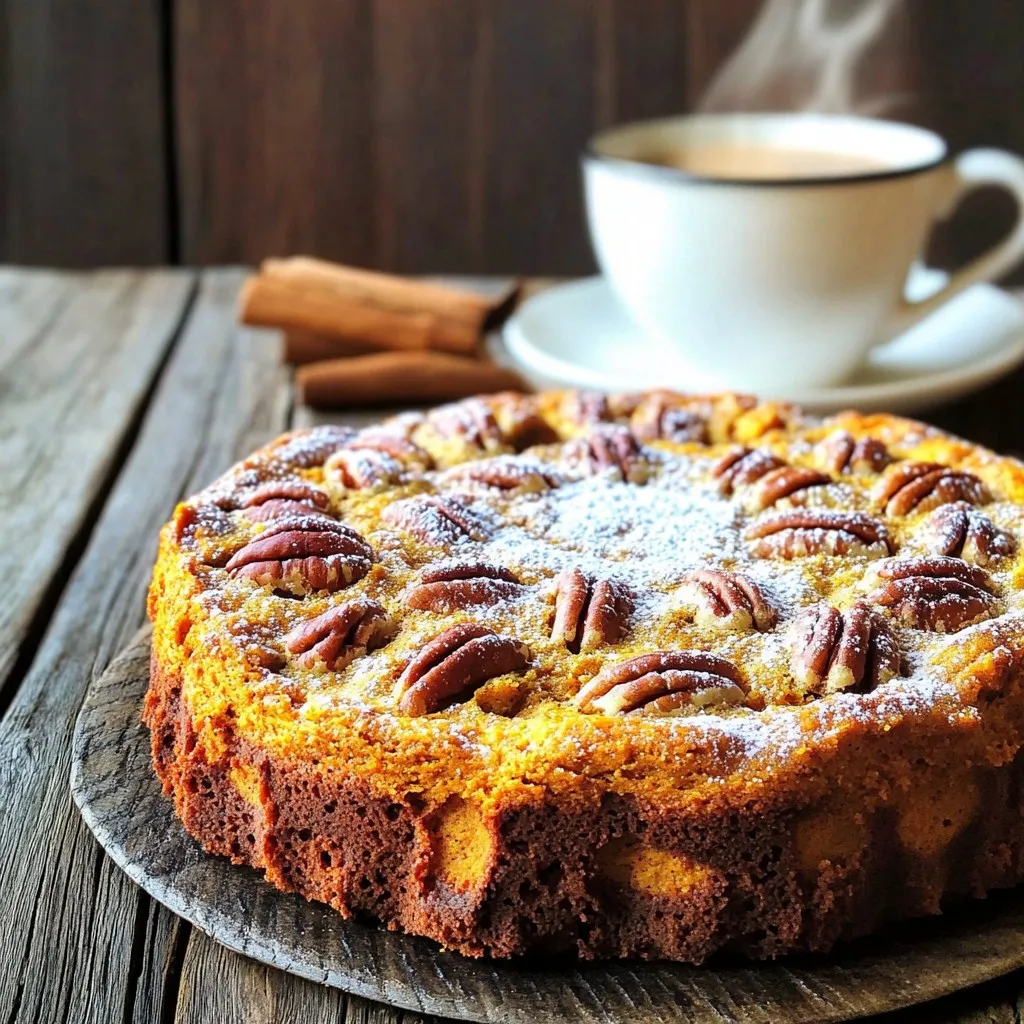
Pumpkin Pecan Coffee Cake Irresistible Fall Treat
Fall is here, and it’s the perfect time for a cozy treat. You’ll love this Pumpkin Pecan Coffee Cake! With rich flavors of pumpkin, warm
To make No-Bake Pumpkin Pie Cheesecake Cups, you need some simple ingredients. Here’s what you’ll need: - 1 cup pumpkin puree - 8 oz cream cheese, softened - 1/2 cup powdered sugar - 1 teaspoon vanilla extract - 1 teaspoon pumpkin pie spice - 1/2 cup heavy whipping cream - 1 cup crushed graham crackers - 4 tablespoons melted butter - 2 tablespoons brown sugar - Whipped cream for topping - Ground cinnamon for sprinkling Each ingredient plays a key role. The pumpkin puree gives a rich flavor and color. Cream cheese adds a creamy texture and sweetness. Powdered sugar sweetens the mix without graininess. Vanilla extract enhances overall taste. Pumpkin pie spice brings warmth and a classic fall flavor. Heavy cream ensures a light and fluffy filling. The graham crackers form a crunchy base, while melted butter helps bind it. Brown sugar adds extra depth. Finally, whipped cream and cinnamon make for a lovely finishing touch. Now that you have the ingredients, you’re ready to create a tasty treat that’s perfect for any occasion! 1. In a medium bowl, combine the crushed graham crackers, melted butter, and brown sugar. Mix until it looks like wet sand. 2. Divide this mixture into your serving cups. Press it down firmly to create a nice crust layer. 1. In a large bowl, beat the softened cream cheese with an electric mixer until it's smooth and creamy. 2. Add in the pumpkin puree, powdered sugar, vanilla extract, and pumpkin pie spice. Mix until everything blends well and is smooth. 1. Spoon or pipe the pumpkin cheesecake mixture over the graham cracker crust in each cup. Fill them about three-quarters full. 2. Chill the cups in the refrigerator for at least 4 hours or until they are set. This helps the flavors meld and the texture firm up. To whip cream well, start with a cold bowl. Use cold heavy cream too. Beat it until you see stiff peaks. This helps the filling stay light and airy. Chilling is key. After you fill the cups, let them chill for at least four hours. This helps the flavors blend and the texture set. You can garnish these cups in many ways. A dollop of whipped cream adds a nice touch. A sprinkle of ground cinnamon makes it look fancy. Pair these cups with a warm cup of cider or coffee. The flavors blend perfectly, and it makes a great dessert drink combo. One big mistake is overmixing the filling. Mix just until smooth. Overmixing can make it heavy. Also, make sure to press the crust firmly in the cups. A loose crust will crumble and make a mess when you serve. Keep these tips in mind for a perfect treat! {{image_2}} You can add fun flavors to your no-bake pumpkin pie cheesecake cups. Adding chocolate or caramel can make them extra special. Just drizzle chocolate or caramel sauce on top before serving. You can also mix in chocolate chips for a sweet surprise. Using different spices can change the vibe too. Try adding nutmeg or ginger to bring out more warmth. These little changes can take your dessert to a new level. If you need gluten-free options, use almond flour or gluten-free graham crackers for the crust. This way, everyone can enjoy the treat. For a dairy-free version, swap cream cheese with a dairy-free cream cheese. You can use coconut cream in place of heavy cream for the filling. These swaps keep the flavor while fitting different diets. Presentation matters! Use fun cups like mason jars or fancy glasses. This adds charm to your dessert. Layering the pumpkin filling and crust can make it look even better. You can alternate layers of crust and filling for a pretty effect. Don’t forget to top with whipped cream and a sprinkle of cinnamon for a beautiful finish. To keep your no-bake pumpkin pie cheesecake cups fresh, store them in the refrigerator. Use an airtight container to block moisture and odors. If you plan to eat them later, use plastic wrap or a sealed jar. This helps maintain their creamy texture and flavor. For freezing, these cheesecake cups can stay fresh for up to three months. Make sure they are fully set before freezing. Wrap each cup tightly with plastic wrap and then place them in a freezer bag. This keeps them from getting freezer burn. When you want to enjoy them, move them to the fridge to thaw overnight. The shelf life of your cheesecake cups is about four to five days in the fridge. Always check for signs of spoilage. If you see any mold or if the texture has changed, it’s best to discard them. Signs of spoilage include an off smell or separation of the filling. If the whipped cream has turned watery, that is also a sign. Keep these tips in mind to enjoy your tasty treats longer! Yes, you can make these cups ahead of time. I suggest making them a day before you plan to serve. This gives the flavors time to blend. Plus, the cheesecake will set better. Yes, you can use fresh pumpkin. Start with about 1 1/4 cups of fresh pumpkin. First, roast the pumpkin until soft, then puree it. This will add a nice fresh flavor to your cups. You can tell when they are set by looking for a firm texture. The tops should not jiggle when you gently shake them. They should feel cool and firm to the touch. This blog covers how to make delicious pumpkin cheesecake cups. You learned about the ingredients, step-by-step instructions, and useful tips. Remember to chill the cheesecake for the best texture and to avoid common mistakes like overmixing. Feel free to explore variations, like adding chocolate or making gluten-free options. Store them right in the fridge or freezer for longer freshness. With these easy steps, you can impress friends and family with a tasty fall dessert. Enjoy making these delightful cups!
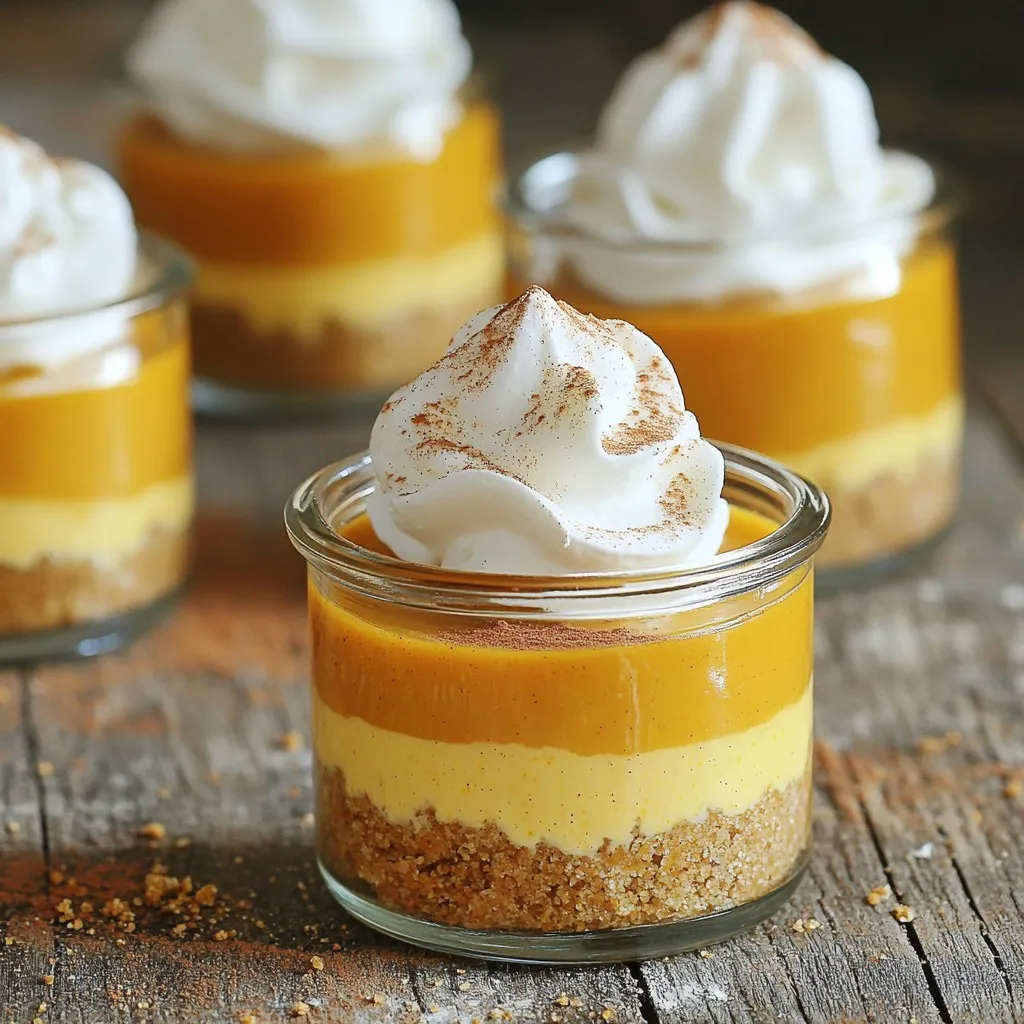
No-Bake Pumpkin Pie Cheesecake Cups Easy and Tasty
Looking for a dessert that’s both easy and delicious? You’ve found it! These No-Bake Pumpkin Pie Cheesecake Cups combine the creamy goodness of cheesecake with
- 2 cups all-purpose flour - 1/3 cup granulated sugar - 1 tablespoon baking powder - 1/2 teaspoon salt - 1/2 cup cold unsalted butter, cubed - 1/2 cup chopped pecans - 1/2 cup chocolate chips (semi-sweet or dark) - 3/4 cup heavy cream - 1 teaspoon vanilla extract - 1 large egg, beaten (for egg wash) Each ingredient plays a key role in making these scones. The flour gives structure. Sugar adds sweetness and helps with browning. Baking powder makes the scones rise. The salt enhances all the flavors. Cold butter creates a flaky texture. Chopped pecans add crunch and flavor. Chocolate chips bring rich sweetness, and cream keeps the dough moist. Vanilla extract adds depth to the taste. You can easily swap out ingredients based on your taste. If you want a different nut, try walnuts or almonds. For chocolate, use milk chocolate for a sweeter taste or white chocolate for a creamy touch. If you need a nut-free option, simply skip the pecans. The scones will still be delicious without them. 1. Preheat your oven to 400°F (200°C). Line a baking sheet with parchment paper. 2. In a large bowl, whisk together 2 cups of all-purpose flour, 1/3 cup of sugar, 1 tablespoon of baking powder, and 1/2 teaspoon of salt. Mix well. 3. Add 1/2 cup of cold, cubed unsalted butter. Use your fingers or a pastry cutter to blend the butter into the flour until it looks like coarse crumbs. 4. Stir in 1/2 cup of chopped pecans and 1/2 cup of chocolate chips. Make sure they’re evenly mixed in. 5. In a separate bowl, combine 3/4 cup of heavy cream with 1 teaspoon of vanilla extract. Pour this into the dry mix. Stir gently until it’s just combined. The dough should feel slightly sticky. 6. Turn the dough onto a floured surface. Pat it into a circle about 1-inch thick. Cut the circle into 8 equal wedges. 7. Place the scone wedges on the prepared baking sheet with space between them. Brush the tops with a beaten egg for a nice golden finish. 8. Bake for 15-20 minutes. They should be lightly browned, and a toothpick should come out clean when inserted in the center. 9. Let the scones cool slightly on a wire rack before serving. - Use cold butter for flaky scones. - Don’t overmix the dough; it should be slightly sticky. - Brush the tops of the scones for a beautiful finish. - Serve warm with powdered sugar or chocolate sauce for a treat. To get the best texture in your scones, keep your butter cold. Use cubed butter straight from the fridge. When you mix it with the flour, stop when it looks like coarse crumbs. This will keep your scones flaky. Also, don't overmix the dough. Mix until just combined. A slightly sticky dough is perfect for scones. One mistake is using warm butter. It can make your scones dense. Another mistake is overworking the dough. If you mix too much, your scones will be tough. Lastly, remember to space the scones on the baking sheet. They need room to rise and bake evenly. Serve your scones warm for the best taste. A dusting of powdered sugar adds a nice touch. You can also pair them with whipped cream or chocolate sauce. These options enhance the rich flavors of chocolate and pecans. Enjoy them with a cup of coffee or tea for a perfect treat! {{image_2}} You can change the flavors of your scones easily. Try adding orange zest for a fresh twist. A sprinkle of cinnamon can make them warm and cozy. You could also use different chocolate, like white chocolate or milk chocolate. Each option gives you a unique taste. Want to make gluten-free scones? Use a gluten-free flour blend instead of all-purpose flour. Check that your baking powder is gluten-free as well. You might need to add a bit more cream to keep the dough moist. This way, everyone can enjoy these tasty treats. Feel free to swap out the pecans for walnuts or almonds. Both nuts add a nice crunch and flavor. You can also mix in dried fruits like cranberries or cherries. For the chocolate chips, try butterscotch or peanut butter chips for something different. There are many ways to make these scones your own! To keep your Chocolate Pecan Scones fresh, store them in an airtight container. This helps to trap moisture and flavors. Line the container with parchment paper to absorb any excess moisture. You can keep them at room temperature for up to two days. If you want them to last longer, consider refrigeration. Freezing scones is a great way to enjoy them later. First, let the scones cool completely. Wrap each scone in plastic wrap and place them in a freezer bag. Remove as much air as you can to prevent freezer burn. Label the bag with the date. These scones can stay fresh in the freezer for up to three months. When you're ready to enjoy your scones, preheat your oven to 350°F (175°C). Unwrap the scones and place them on a baking sheet. Heat them for about 10-15 minutes. This warms them through and restores their crisp crust. You can also microwave individual scones for about 15-20 seconds, but they might lose some crunch. Enjoy your warm, tasty scones! Yes, you can use whole wheat flour. It adds a nutty taste. It also makes the scones a bit denser. I suggest mixing half whole wheat and half all-purpose flour. This mix keeps the scones light and fluffy while adding flavor. Leftovers can last for up to three days. Store them in an airtight container at room temperature. If you want them to last longer, you can freeze them. They will keep well in the freezer for up to three months. Yes, you can make the dough ahead of time. Wrap it tightly in plastic wrap and refrigerate it. Use the dough within two days for the best results. When you’re ready to bake, just cut and shape the scones. Then, bake them as usual for fresh treats. In this post, I covered how to make delicious scones, focusing on ingredients, steps, and tips. I shared ingredient notes and gave easy substitutions. You learned preparation, baking instructions, and the best tips for texture. Plus, I included variations and ways to store scones. Remember, baking is fun and meant to be shared. Enjoy experimenting with flavors and textures. Follow the tips, avoid common mistakes, and savor every bite!
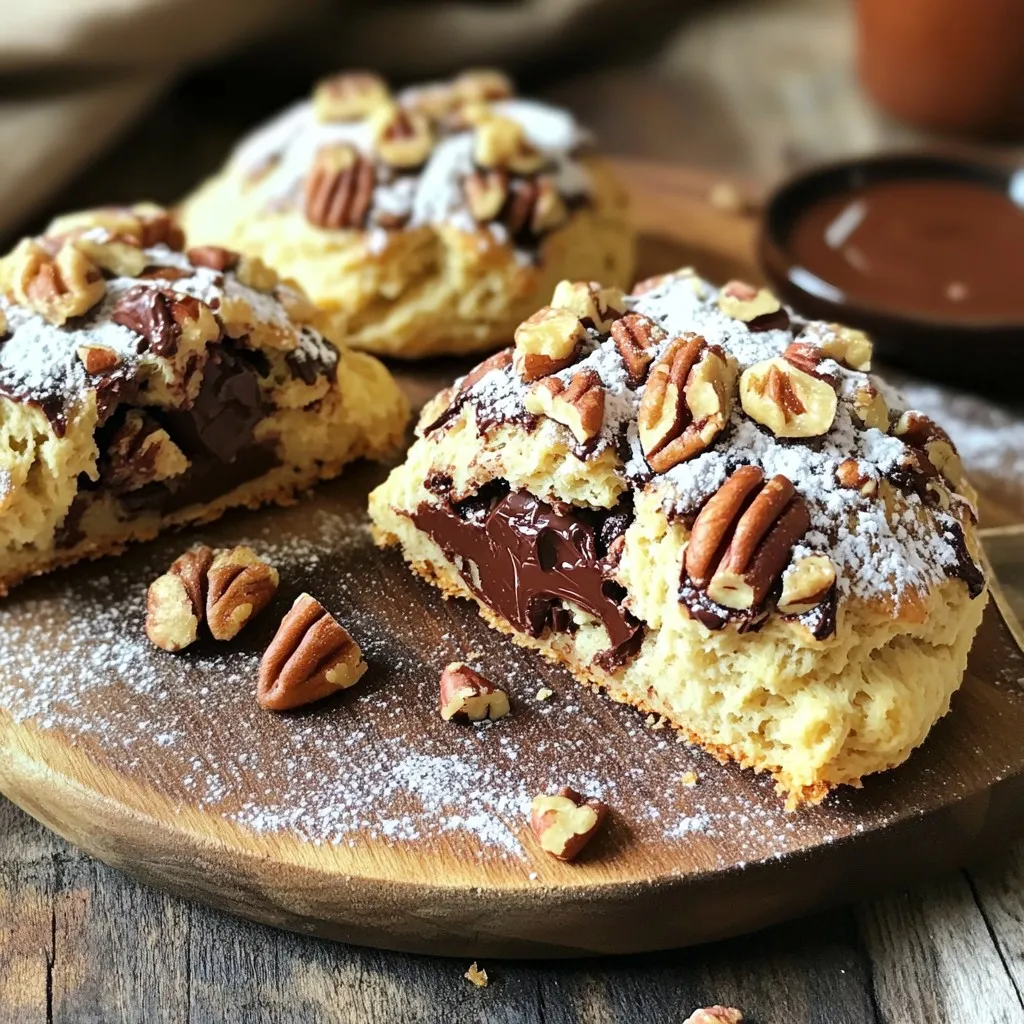
Chocolate Pecan Scones Fresh and Flavorful Delight
Are you ready to indulge in a sweet treat that’s both rich and nutty? Chocolate Pecan Scones are the perfect blend of flavors that will
- 1 cup pumpkin puree - 1/2 cup cream cheese, softened - 1/2 cup sugar - 1/2 cup brown sugar - 3/4 cup vegetable oil - 3 large eggs - 1 teaspoon vanilla extract These main ingredients create a soft and moist cake. Pumpkin puree gives it a lovely flavor and color. Cream cheese adds a rich and creamy layer. The sugars balance sweetness, while vegetable oil keeps it moist. Eggs bind everything together, and vanilla extract enhances the taste. - 2 cups all-purpose flour - 1 teaspoon baking powder - 1 teaspoon baking soda - 1 teaspoon ground cinnamon - 1/2 teaspoon ground nutmeg - 1/4 teaspoon ground ginger - 1/4 teaspoon salt The dry ingredients help the cake rise and provide structure. All-purpose flour forms the base. Baking powder and baking soda help it rise. Ground spices add warmth, while salt heightens the flavors. Each spice brings its unique aroma and taste. - 1/2 cup chopped walnuts - Powdered sugar for dusting Walnuts add a nice crunch. They also bring a nutty taste that pairs well with pumpkin. Dusting with powdered sugar gives a sweet finish. These add-ins can make your coffee cake even more special! First, you need to preheat your oven to 350°F (175°C). This step is key for even baking. Next, take a 9x13 inch baking pan and grease it well with butter or oil. Then, sprinkle flour over it and shake off the excess. This helps the cake come out easily after baking. In a mixing bowl, add 1/2 cup of softened cream cheese, 1/2 cup of sugar, and 1/2 cup of brown sugar. Beat these together until the mixture is smooth and creamy. This will add a rich texture to your cake. Now, it’s time to add the wet ingredients. Mix in 3/4 cup of vegetable oil, 1 cup of pumpkin puree, 3 large eggs, and 1 teaspoon of vanilla extract to the cream cheese mixture. Stir until everything is combined well. In a separate bowl, whisk 2 cups of all-purpose flour, 1 teaspoon of baking powder, 1 teaspoon of baking soda, 1 teaspoon of cinnamon, 1/2 teaspoon of nutmeg, 1/4 teaspoon of ginger, and 1/4 teaspoon of salt. Gradually add this dry mix to the wet ingredients. Stir until just combined. If you want to use walnuts, fold in 1/2 cup of chopped walnuts at this point. Pour half of the batter into your prepared baking pan. Spread it evenly across the bottom. Next, drop spoonfuls of the cream cheese mixture over the batter. Then, pour the remaining batter on top. Use a knife to gently swirl the batter for a marbled effect. This adds a nice look to your cake. Place the pan in the preheated oven. Bake for 30 to 35 minutes. To check if it’s done, insert a toothpick in the center. If it comes out clean, your cake is ready. Let the cake cool in the pan for about 15 minutes. After that, carefully transfer it to a wire rack to cool completely. If you like, dust the top with powdered sugar before serving. This adds a sweet touch and makes it look fancy. Enjoy your delicious pumpkin cream cheese coffee cake! To make the best pumpkin cream cheese coffee cake, focus on your mixing. Start by combining the cream cheese, sugar, and brown sugar. Beat them until the mix is smooth. This helps the cream cheese blend well into the cake. Next, when you add the flour mix, do it slowly. Stir gently until you see no dry flour. This keeps the batter light and fluffy. If you see lumps in the cream cheese mix, keep mixing until it is smooth. You want that creamy goodness spread throughout. After baking, let the cake cool. Store any leftovers in an airtight container. This keeps it fresh for up to four days. You can also freeze the cake. Just wrap it tightly in plastic wrap. Then, place it in a freezer bag. It can last for about three months in the freezer. This cake pairs well with coffee or tea. The warm spices in the cake complement both drinks. For a nice touch, serve it with a sprinkle of powdered sugar on top. You can also slice it into squares for easy serving. Placing it on a pretty plate adds to the presentation. {{image_2}} You can easily make this cake gluten-free. Use a gluten-free flour blend instead of all-purpose flour. Look for blends that contain xanthan gum. This helps mimic the texture of regular flour. You can find many gluten-free options in stores. Just measure the same amount as you would with regular flour. If you want a vegan coffee cake, replace the eggs and cream cheese. For eggs, use flax eggs or applesauce. Mix one tablespoon of flaxseed meal with three tablespoons of water. Let it sit for a few minutes to thicken. For cream cheese, use a dairy-free cream cheese alternative. These swaps keep the flavor and texture intact. You can add fun twists to this cake. Try mixing in chocolate chips for a rich taste. Dried fruits like raisins or cranberries also work well. They add a nice chew and sweetness. Just fold them into the batter before baking. This makes each bite even more exciting and tasty. To keep your Pumpkin Cream Cheese Coffee Cake fresh, use airtight containers. They prevent air from drying out the cake. Uncovered cakes can get stale and lose flavor. If you plan to enjoy it soon, a covered dish on the counter works fine. But for longer storage, choose airtight. In the fridge, this cake lasts about 5 days. It stays moist and tasty. If you want to keep it longer, freeze it. In the freezer, it can last up to 3 months. Just make sure to wrap it well. Use plastic wrap, then foil, to avoid freezer burn. To reheat your cake, use the oven for the best texture. Preheat the oven to 350°F (175°C). Place the slice on a baking sheet. Heat for about 10 minutes. This warms it through and keeps it soft. You can also use the microwave, but it may get a bit soggy. If using the microwave, heat in short bursts of 15-20 seconds. Check often to avoid overcooking. Yes, you can use fresh pumpkin. Start by choosing a sugar pumpkin, as it has a sweeter taste. Cut it in half, scoop out the seeds, and roast the halves at 350°F for about 45 minutes. Once soft, scoop out the flesh and mash it until smooth. This fresh puree will add a nice flavor to your cake. Yes, you can freeze this cake. After it cools completely, wrap it well in plastic wrap and then in foil. Store it in the freezer for up to three months. To thaw, place it in the fridge overnight. You can also warm slices in the microwave for a quick treat. If you don't have cream cheese, you can try using Greek yogurt. It gives a creamy texture and adds a bit of tang. You can also use ricotta cheese for a different flavor. Just make sure to blend it well, so it mixes smoothly with the other ingredients. To check if the cake is done, insert a toothpick into the center. If it comes out clean or with a few crumbs, the cake is ready. You can also gently press the top; if it springs back, it’s done. Watch for a golden brown color on top as a good sign of doneness. In this blog post, we explored how to make a delicious Pumpkin Cream Cheese Coffee Cake. We covered all the essential ingredients, step-by-step instructions, and useful tips for perfecting the recipe. Remember, mixing the cream cheese well is key to a smooth batter. You can also adapt the recipe to be gluten-free or vegan. With careful storage, your cake can stay fresh longer. Enjoy this cake with friends over coffee or tea. Experiment with add-ins to make it your own. Happy baking!
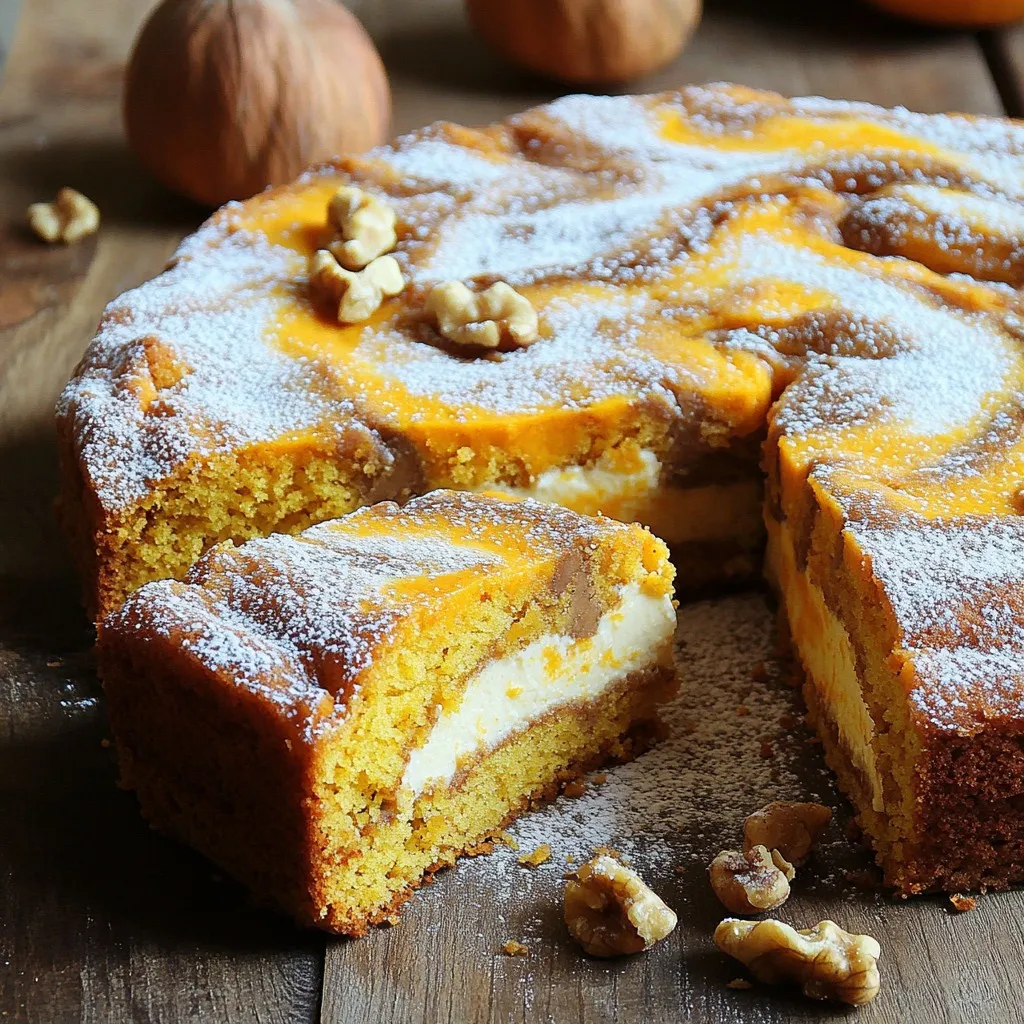
Pumpkin Cream Cheese Coffee Cake Easy and Delicious Recipe
Get ready to indulge in a delightful treat with my Pumpkin Cream Cheese Coffee Cake recipe! This easy and delicious cake combines the warm flavors
To make Healthy Chocolate Pumpkin Bread, gather these simple ingredients: - 1 cup pure pumpkin puree - ½ cup unsweetened applesauce - ½ cup honey or maple syrup - 2 large eggs - 1 teaspoon vanilla extract - 1 ½ cups whole wheat flour - ½ cup unsweetened cocoa powder - 1 teaspoon baking soda - ½ teaspoon baking powder - ½ teaspoon salt - 1 teaspoon ground cinnamon - ½ teaspoon ground nutmeg - ½ cup dark chocolate chips (dairy-free if desired) You can make some easy swaps to boost health: - Use mashed bananas instead of applesauce for a fruity flavor. - Replace honey or maple syrup with agave syrup for lower calories. - Swap whole wheat flour with almond flour for a gluten-free option. - Use apple butter instead of pumpkin puree for a different taste. - Choose sugar-free chocolate chips to cut added sugar. Each ingredient offers unique health perks: - Pumpkin puree is rich in vitamins and antioxidants. It helps with vision and skin health. - Unsweetened applesauce adds moisture and fiber, which aids digestion. - Honey or maple syrup provides natural sweetness and antioxidants. - Whole wheat flour is high in fiber, which supports heart health. - Cocoa powder is a source of flavonoids, boosting heart health and mood. - Dark chocolate chips contain healthy fats and can improve brain function. These ingredients work together to create a tasty and nutritious treat! {{ingredient_image_1}} First, you need to preheat your oven to 350°F (175°C). Grease a 9x5 inch loaf pan with oil or line it with parchment paper. Next, grab a large mixing bowl. Combine 1 cup of pure pumpkin puree, ½ cup of unsweetened applesauce, ½ cup of honey or maple syrup, 2 large eggs, and 1 teaspoon of vanilla extract. Whisk these ingredients together until the mix is smooth. In a separate bowl, mix 1 ½ cups of whole wheat flour, ½ cup of unsweetened cocoa powder, 1 teaspoon of baking soda, ½ teaspoon of baking powder, ½ teaspoon of salt, 1 teaspoon of ground cinnamon, and ½ teaspoon of ground nutmeg. Stir this dry mix well until it is fully combined. Now, slowly add the dry ingredients to the wet mixture. Stir gently until they just come together. Avoid overmixing, as this can make the bread dense. Finally, fold in ½ cup of dark chocolate chips. Set aside a few chips for the top if you like. Pour the batter into your prepared loaf pan. Use a spatula to smooth the top. If you saved some chocolate chips, sprinkle them on top now. Bake the bread for 50 to 60 minutes. Check if it’s done by inserting a toothpick into the center. If it comes out clean, your bread is ready. If the top browns too fast, tent it with foil for the last 15 minutes. Once baked, let the bread cool in the pan for about 10 minutes. Then, transfer it to a wire rack to cool completely. For serving, slice the bread and consider adding a dollop of Greek yogurt or a spread of almond butter. Dust it with cocoa powder or powdered sugar for a lovely finish. Enjoy this rich and flavorful treat! To keep your Healthy Chocolate Pumpkin Bread moist, use pure pumpkin puree. It adds natural moisture and flavor. Applesauce is another great choice. It replaces oil and keeps the bread soft. Don't overmix your batter when combining wet and dry ingredients. Overmixing makes the bread dense. Bake until a toothpick comes out clean, but don’t overbake. This keeps the inside fluffy and moist. One mistake is using canned pumpkin pie filling instead of pure pumpkin puree. The filling has added sugar and spices, which can change the taste. Use room temperature eggs for better mixing. Cold eggs can make the batter lumpy. Also, remember to check the freshness of your baking powder and soda. Old ingredients may not help the bread rise properly. To boost the flavor of your bread, add spices like cloves or ginger. They can add warmth and depth to your treat. You can also try mixing in nuts or seeds for a crunchy texture. Dark chocolate chips add richness and balance out the flavors. For a fun twist, top with a sprinkle of sea salt before baking. It enhances the chocolate flavor and makes every bite special. Pro Tips Use Fresh Pumpkin Puree: For the best flavor and texture, consider using homemade pumpkin puree made from roasted pumpkin instead of canned. Check for Doneness: To ensure your bread is perfectly baked, insert a toothpick in the center; it should come out clean or with just a few moist crumbs. Spice It Up: Feel free to adjust the spices according to your preference; adding a pinch of ginger or cloves can enhance the flavor profile. Store Properly: To keep your bread fresh, wrap it tightly in plastic wrap and store it in an airtight container at room temperature for up to 3 days or in the fridge for a week. {{image_2}} You can easily make this bread gluten-free. Use a gluten-free flour blend instead of whole wheat flour. Make sure it includes a binding agent like xanthan gum. This option keeps the bread moist and tasty while catering to gluten-free diets. Want to customize your bread? Here are some fun add-ins: - Nuts: Chopped walnuts or pecans add crunch. - Seeds: Pumpkin seeds give extra flavor and texture. - Dried Fruit: Raisins or cranberries add natural sweetness. For toppings, consider: - Nut Butter: Almond or peanut butter makes it extra creamy. - Greek Yogurt: A dollop adds protein and creaminess. - Cocoa Powder: Dust the top for a fancy touch. Mix and match flavors to create something new. Try adding: - Mint Extract: For a fresh, cool taste. - Orange Zest: Brightens the flavor with citrus notes. - Espresso Powder: Enhances the chocolate flavor. These combinations bring new life to your Healthy Chocolate Pumpkin Bread. Experiment and find your favorite! To keep your chocolate pumpkin bread fresh, wait until it cools completely. Once cooled, wrap it tightly in plastic wrap. You can also use aluminum foil. This keeps the bread moist and tasty. Store it at room temperature for up to 3 days. If you want it to last longer, consider freezing it. Freezing chocolate pumpkin bread is easy. First, slice the bread into individual pieces. This helps you take out just what you need. Wrap each slice in plastic wrap and then place them in a freezer bag. Make sure to squeeze out any air to avoid freezer burn. You can freeze the bread for up to 3 months. When you're ready to eat, just thaw it in the fridge overnight. Reheating chocolate pumpkin bread is simple. For the best taste, use an oven. Preheat the oven to 350°F (175°C). Place the slices on a baking sheet and warm them for about 10 minutes. You can also use a microwave. Heat a slice for about 15-20 seconds. Enjoy your warm, delicious chocolate pumpkin bread! Yes, you can make this recipe vegan. To do this, replace the eggs with flax eggs. A flax egg is made by mixing one tablespoon of ground flaxseed with three tablespoons of water. Let it sit for five minutes until it thickens. You can also swap honey or maple syrup for agave nectar. Healthy Chocolate Pumpkin Bread lasts for about five days at room temperature. Keep it in an airtight container to stay fresh. If you want it to last longer, you can store it in the fridge for up to a week. Yes, you can use other sweeteners. You might try coconut sugar, agave syrup, or stevia. Each sweetener has a different taste, so adjust the amount to your liking. Remember that some sweeteners are sweeter than others, so taste as you go! You can serve this bread with many tasty options. A dollop of Greek yogurt adds creaminess. Almond butter gives a nice nutty flavor. Dusting the slices with cocoa powder or powdered sugar makes them look fancy. You can also try fresh fruit on the side for a colorful touch. In this article, I covered the key elements of making Healthy Chocolate Pumpkin Bread. You learned about essential ingredients and healthy substitutions. I shared detailed steps for preparation and baking, plus tips for keeping the bread moist. Variations and storage tips help you customize and preserve your creation. This bread is tasty and nutritious, making it great for any meal. Enjoy baking and sharing this treat with family and friends.
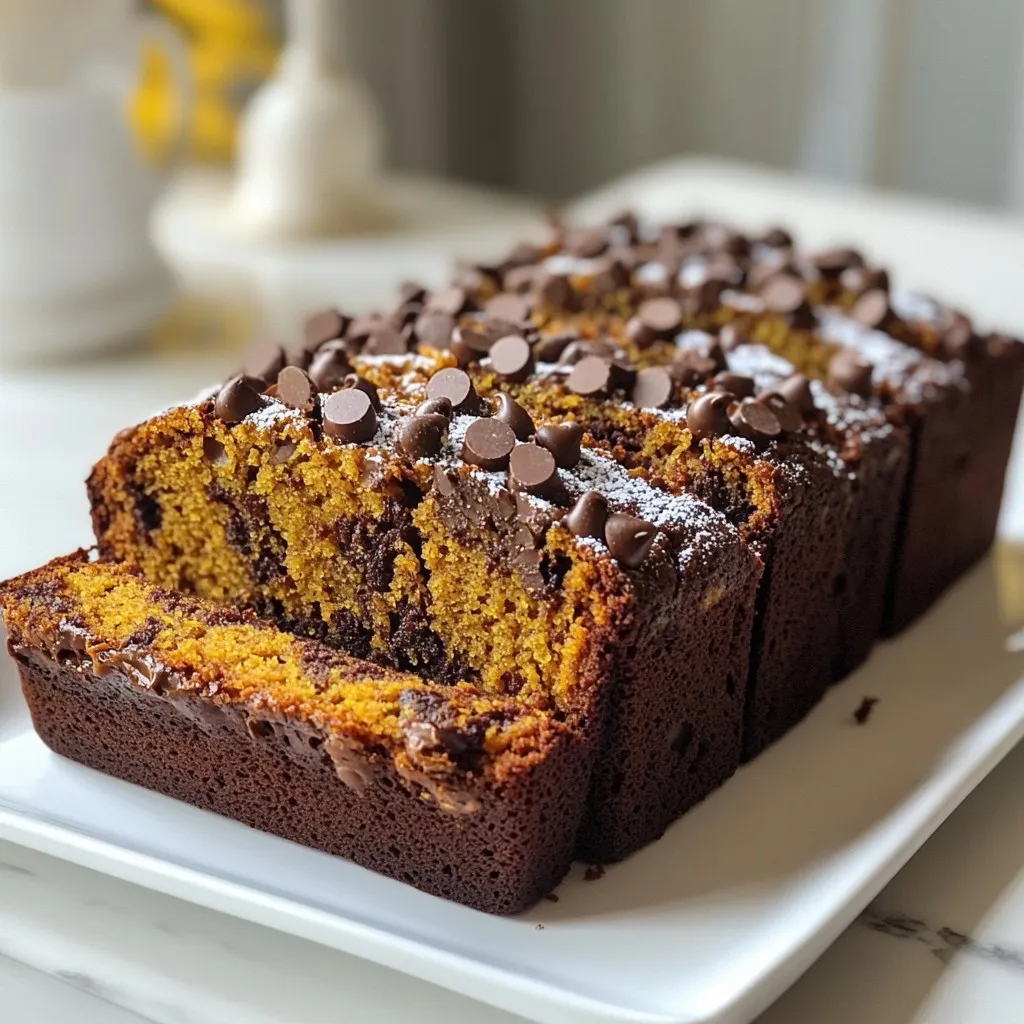
Healthy Chocolate Pumpkin Bread Rich and Flavorful Treat
Are you ready to enjoy a slice of comfort that’s both tasty and healthy? Our Healthy Chocolate Pumpkin Bread is a rich treat that combines
- 2 cups fresh strawberries - 1/4 cup granulated sugar - Fresh mint leaves for garnish (optional) - 1 cup heavy cream - 1 cup cream cheese, softened - 1/2 teaspoon vanilla extract - 1 package (14 ounces) of graham crackers Fresh strawberries shine in this recipe. They add bright color and sweet flavor. I choose ripe strawberries for the best taste. The granulated sugar helps soften them too. It brings out their natural juices. You can also toss in some fresh mint leaves for a pop of color. Next, we need creamy components. Heavy cream is key for making fluffy layers. Cream cheese adds richness and a smooth texture. Don't forget the vanilla extract; it enhances the flavor. Together, these ingredients create a light and dreamy filling. Finally, we have the base layer. Graham crackers give structure and crunch. They soak up the cream and strawberry juices. This creates a delightful contrast in textures. You can use any brand you like, but choose a plain flavor for best results. Now that we have all our ingredients, we are ready to create a no-bake delight! - Combine 2 cups of sliced strawberries with 1/4 cup of granulated sugar. - Toss gently and let them sit for 10 to 15 minutes to macerate. This step helps the strawberries soften and release their sweet juices. - In a large bowl, whip 1 cup of heavy cream, 1 cup of softened cream cheese, and 1/2 teaspoon of vanilla extract. - Use an electric mixer until soft peaks form. This mixture should be fluffy and well combined. - Take a 9x9 inch baking dish and spread a thin layer of the cream mixture on the bottom. - Place a layer of graham crackers over the cream, covering the bottom completely. - Spread some of the whipped cream mixture over the graham crackers, then add a layer of macerated strawberries on top. - Repeat these layers: graham crackers, cream mixture, and strawberries until you reach the top. - Finish with a layer of whipped cream on top. - Cover the dish with plastic wrap and refrigerate for at least 4 hours or overnight. This allows the flavors to meld and the graham crackers to soften. - When you’re ready to serve, cut the cake into squares and garnish with fresh mint leaves if desired. To get the right texture for whipped cream, start with cold heavy cream. Use a clean bowl and beaters. Whip the cream until soft peaks form. This means the cream holds its shape but is still soft. If you whip too long, it can turn into butter. To prevent this, watch it closely. Stop when it looks fluffy and smooth. Cutting the cake is easy. Use a sharp knife dipped in warm water to slice through. This helps make clean cuts. Serve each piece with a spoonful of strawberries on top. You can also add fresh mint leaves for a nice touch. They give a pop of color and flavor. You can prepare this cake in advance. Make it the day before you plan to serve it. It will taste great after chilling overnight. For best freshness, cover it tightly with plastic wrap. This keeps it moist and prevents it from absorbing odors. Store it in the fridge until you are ready to enjoy! {{image_2}} You can change up the fruit in this cake. Try using blueberries, peaches, or raspberries. Each fruit brings its own flavor and color. You can also use whatever is in season. Fresh, ripe fruit always tastes best. This way, you can enjoy a new flavor each time you make the cake. Want to add a twist? You can add citrus zest, like lemon or orange, to the cream. This gives a bright flavor that pairs well with the fruit. You can also mix in some chocolate layers. Just melt some chocolate and swirl it into the cream. This creates a rich and tasty treat. If you need to make this cake gluten-free, look for gluten-free graham crackers. They work well and taste great. For a vegan option, you can replace the cream cheese with a plant-based cream cheese. Use coconut cream instead of heavy cream for a lighter option. These simple swaps let everyone enjoy this delicious dessert. Store the cake in the fridge for up to three days. To keep it fresh, cover the dish tightly with plastic wrap. This helps prevent the cake from drying out or absorbing other odors. Yes, you can freeze the icebox cake. Wrap it tightly in plastic wrap and then in aluminum foil. When you are ready to serve, thaw it in the fridge overnight. This keeps the texture nice and creamy. Check for any odd smells or changes in color. If the whipped cream looks runny or separates, it’s best to toss it. To extend shelf life, always cover the cake well and keep it chilled. Yes, you can use frozen strawberries. They work well in this recipe. However, fresh strawberries give a better texture and flavor. Frozen strawberries may be softer and watery after thawing. If you choose frozen ones, let them thaw and drain excess juice. This helps keep the cake from getting soggy. The cake takes at least four hours to set. For best results, refrigerate it overnight. This time allows the graham crackers to soften. It also lets the flavors blend nicely. The longer it sits, the better the taste will be. You can use mascarpone cheese as a substitute. Greek yogurt is another great option. Both will add creaminess without losing flavor. Just remember to adjust the sweetness if needed. These alternatives keep the cake light and delicious. This blog post showed you how to make a delicious icebox cake. You learned about fresh ingredients, creamy components, and step-by-step instructions. We covered helpful tips, variations, and storage info to keep your cake fresh. Remember, this dessert is easy to adjust based on your favorite fruits and flavors. With these guidelines, you can create a treat that’s perfect for any occasion. Enjoy making your own icebox cake and impress your friends and family with your skills!
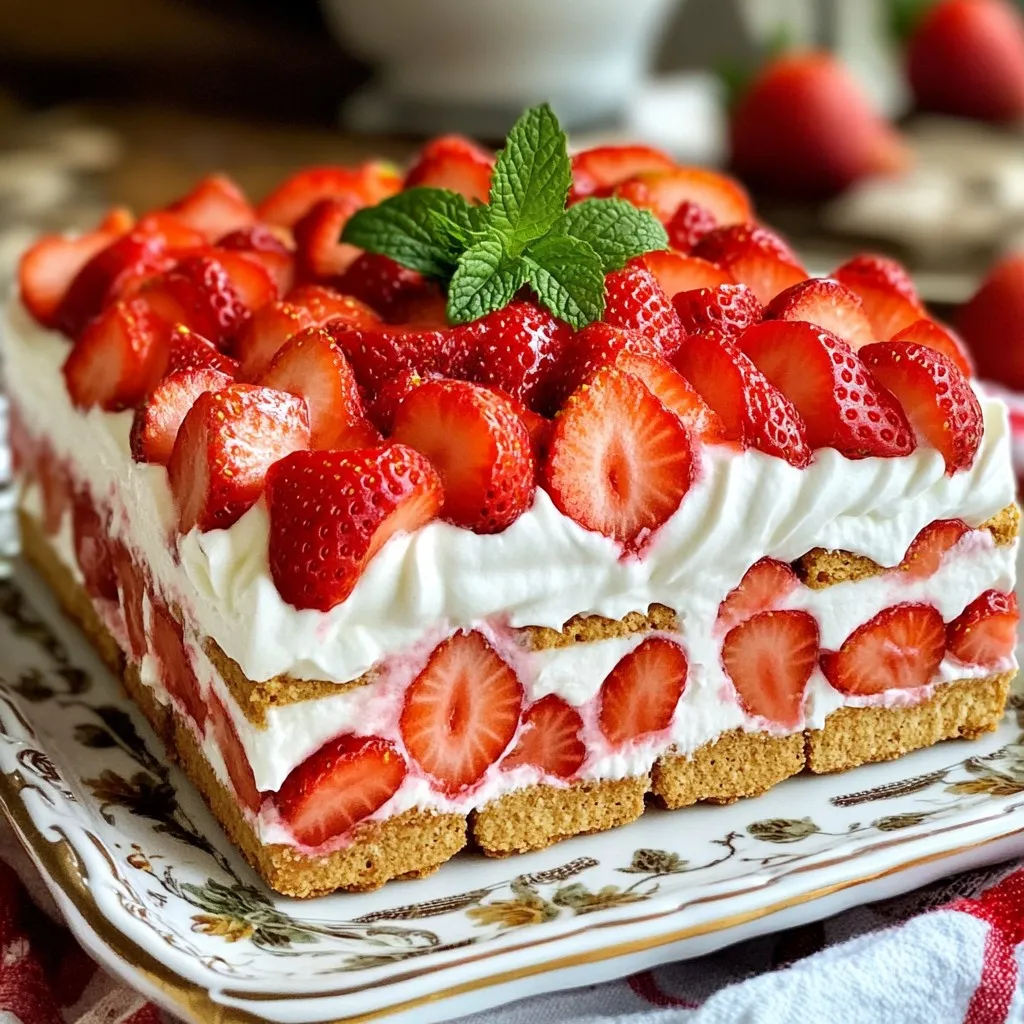
Strawberry Shortcake Icebox Cake No Bake Delight
If you’re craving a sweet treat that is easy to make, look no further! This no-bake Strawberry Shortcake Icebox Cake is the perfect dessert for
To make these delicious bars, you need the following ingredients: - 1 ½ cups graham cracker crumbs - ½ cup unsalted butter, melted - 1 cup cream cheese, softened - ½ cup granulated sugar - 1 teaspoon vanilla extract - 2 large eggs - 1 cup sour cream - 1 cup pecans, roughly chopped - 1 cup caramel sauce (store-bought or homemade) - Sea salt, for garnish These ingredients create a rich and creamy cheesecake with crunchy pecans and sweet caramel. When choosing ingredients, quality matters. Here are some tips: - Graham Cracker Crumbs: Use fresh crumbs for best flavor. You can crush whole crackers. - Unsalted Butter: Opt for high-quality butter. It enhances the taste of the crust. - Cream Cheese: Choose full-fat cream cheese for a creamy texture. Low-fat options may not set well. - Caramel Sauce: Homemade sauce tastes better but store-bought is fine. Just pick a good brand. - Pecans: Freshly chopped pecans add crunch. Toast them lightly for extra flavor. If you're missing an ingredient, don’t worry! Here are some substitutions: - Graham Cracker Crumbs: Use crushed cookies like Oreos or digestive biscuits. - Cream Cheese: Neufchâtel cheese can work if you want a lighter option. - Sour Cream: Greek yogurt is a great substitute for a tangy flavor. - Caramel Sauce: You can use chocolate sauce if you prefer a different taste. - Pecans: Walnuts or almonds can replace pecans for a different nutty flavor. These substitutions can still give you tasty bars. Enjoy your baking! First, preheat your oven to 325°F (165°C). This step is key for even baking. Next, line an 8x8 inch baking pan with parchment paper. Leave some paper hanging over the edges. This will help you lift out the bars later. In a medium bowl, mix 1 ½ cups of graham cracker crumbs with ½ cup of melted unsalted butter. You want the mix to feel like wet sand. Press this mixture firmly into the bottom of your prepared pan. This forms a sturdy base for your cheesecake. In a large bowl, beat 1 cup of softened cream cheese with ½ cup of granulated sugar. Mix until the texture is smooth and creamy. Add 1 teaspoon of vanilla extract and mix in 2 large eggs one at a time. It’s important to mix well after each egg. Scrape down the sides of the bowl as needed. Next, stir in 1 cup of sour cream until everything blends well. Now, gently fold in 1 cup of roughly chopped pecans. Save a small handful of pecans for later. This adds a nice crunch to your cheesecake. Pour half of the cheesecake batter over the crust. Spread it out evenly using a spatula. Then, drizzle half of your caramel sauce over this layer. Carefully pour the remaining cheesecake batter on top and smooth it out. Finish by drizzling the rest of the caramel sauce over the top. Use a knife or toothpick to swirl the caramel into the cheesecake batter. This creates a pretty marbled effect. Sprinkle the reserved pecans on top. Bake in the preheated oven for 35-40 minutes. The edges should set, but the middle should slightly jiggle. Once done, let the cheesecake cool to room temperature. Then, refrigerate it for at least 4 hours, or overnight for the best taste. After chilling, lift the cheesecake out of the pan using the parchment paper. Cut it into bars and drizzle more caramel sauce if you like. A sprinkle of sea salt on top adds a nice touch. Enjoy! To get a creamy texture, use room temperature cream cheese. Cold cream cheese makes it hard to mix smoothly. Beat it with sugar until fluffy. Add eggs one at a time to avoid lumps. Mixing sour cream in last helps keep it light. Do not overmix the batter. This can add too much air. Air bubbles create cracks when baking. Make sure the oven is preheated. If the oven is too hot, the bars can bake too fast. Always check the middle; it should jiggle slightly. Cut the bars neatly after chilling. Use a sharp knife for clean edges. Drizzle extra caramel sauce on top for a treat. Add a sprinkle of sea salt for contrast. Serve on a nice platter with whole pecans for a pretty look. {{image_2}} If you want to switch things up, try other nuts. Walnuts add a nice flavor and crunch. Almonds bring a sweet taste and pair well with caramel. Pecans are classic, but mixing in hazelnuts can give your bars a unique twist. Just chop them roughly and fold them into the batter like you do with pecans. While caramel is a must, you can try other sauces too. Chocolate sauce adds richness and pairs well with the cheesecake. A fruit sauce, like raspberry or strawberry, gives a fresh taste and bright color. You can even swirl in some peanut butter for a salty-sweet kick. Each sauce adds its own flair to the bars. To make these bars gluten-free, swap the graham cracker crumbs for gluten-free crumbs. Many brands offer tasty options. You can also use almond flour for the crust. Just make sure the other ingredients, like the caramel sauce, are gluten-free too. This way, everyone can enjoy these delicious treats! To keep your caramel pecan turtle cheesecake bars fresh, store them properly. First, let the bars cool completely in the pan. Then, cover them tightly with plastic wrap or foil. You can also place them in an airtight container. Store them in the fridge for up to five days. If you like, you can add a piece of parchment paper between layers to prevent sticking. Freezing your cheesecake bars is an excellent way to save them for later. First, cut the bars into individual pieces. Wrap each piece in plastic wrap. Then, place the wrapped bars in a freezer-safe bag or container. Make sure to remove as much air as possible to prevent freezer burn. You can freeze them for up to three months. When you are ready to enjoy, just thaw them in the fridge overnight. Reheating cheesecake bars can bring back their creamy texture. To do this, take a piece from the fridge or freezer. If it’s frozen, let it thaw first. Then, place it on a microwave-safe plate. Heat in the microwave for about 10-15 seconds. Check to see if it's warm enough. If not, heat it for another few seconds. Be careful not to overheat, as that can change the texture. Enjoy your delicious leftover bars! Yes, you can use reduced-fat cream cheese. It will still taste great. However, the texture might be a bit different. Full-fat cream cheese gives a creamier, richer taste. If you use reduced-fat, make sure to mix it well for a smooth filling. The cheesecake is done when the edges are set. The center should jiggle slightly when you shake the pan. It will firm up as it cools. If it looks too loose, give it a few more minutes in the oven. You can serve these bars with whipped cream. A scoop of vanilla ice cream also pairs well. Fresh fruit, like berries, adds a nice touch, too. Drizzle more caramel sauce for extra flavor. Enjoy with coffee or tea for a perfect dessert experience! You learned how to make Caramel Pecan Turtle Cheesecake Bars with this guide. We covered essential ingredients, tips for quality, and helpful substitutions. The step-by-step instructions ensured ease in preparation, from the crust to cooling. You now know how to avoid common mistakes and achieve the perfect cheesecake texture. Remember, experiment with variations and store leftovers properly for future treats. Enjoy creating and sharing this delightful dessert with friends and family!
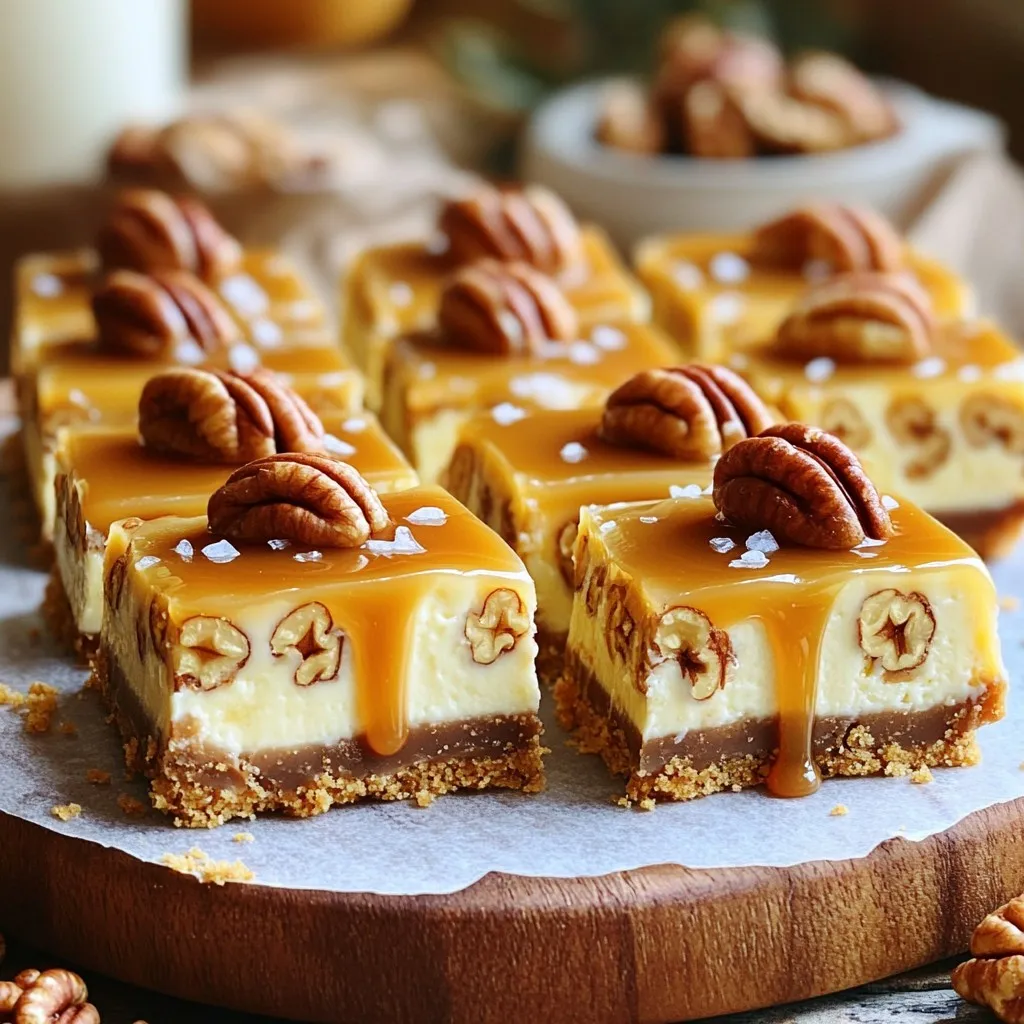
Caramel Pecan Turtle Cheesecake Bars Irresistible Treat
Are you ready to dive into a sweet treat that will make your taste buds dance? Caramel Pecan Turtle Cheesecake Bars are the dessert of
For these tasty bites, you need just a few main items: - 1 cup rolled oats - 1/2 cup pumpkin puree - 1/4 cup nut butter (almond or peanut) - 1/4 cup honey or maple syrup - 1 teaspoon vanilla extract - 1 tablespoon pumpkin pie spice - Pinch of salt These ingredients come together to create a soft and chewy texture. The oats provide fiber, and the pumpkin puree adds moisture and flavor. Nut butter gives richness and protein, while honey or maple syrup brings sweetness. You can mix in some fun extras for more taste: - 1/4 cup chopped walnuts or pecans (optional) - 1/4 cup chocolate chips or raisins (optional) Adding nuts gives crunch. Chocolate chips or raisins add sweetness. Feel free to choose what you like best! These bites are not just tasty; they are also nutritious. Each bite provides healthy fats, fiber, and protein. They are great for a quick snack or a pick-me-up. The pumpkin is rich in vitamins A and C. The oats help keep you full, making them a smart choice for busy days. Enjoy these bites guilt-free! To start, grab a large bowl. Add 1 cup of rolled oats. Next, add 1/2 cup of pumpkin puree for creaminess. Now, mix in 1/4 cup of nut butter. You can choose almond or peanut butter based on your taste. Then, pour in 1/4 cup of honey or maple syrup. This will give the bites a touch of sweetness. Add 1 teaspoon of vanilla extract for extra flavor. Finally, sprinkle in 1 tablespoon of pumpkin pie spice and a pinch of salt. Stir everything until it blends well. Once the mixture is ready, it’s time to shape it. Use your hands or a cookie scoop. Form small balls, about 1 inch in size. This size is perfect for snacking. If you like, fold in 1/4 cup of chopped walnuts or pecans. You can also add 1/4 cup of chocolate chips or raisins for a sweet twist. Place the formed bites on a parchment-lined baking sheet. This keeps them from sticking. Now, let’s firm them up! Put the baking sheet in the fridge. Let the energy bites chill for at least 30 minutes. This step is key to making them hold their shape. After chilling, they will be ready to enjoy! If you have leftovers, store them in an airtight container. Keep them in the fridge for up to one week. Enjoy these bites as a tasty snack or a quick energy boost! For the best energy bites, aim for a sticky yet firm mix. The oats should hold together but not be too wet. If your mixture feels dry, add a touch more pumpkin puree or nut butter. If it’s too wet, add more oats. This balance helps each bite stay together while being soft enough to enjoy. You can easily change these bites to fit your taste. Swap pumpkin puree with sweet potato or butternut squash for a twist. Try different nut butters like cashew or sunflower for new flavors. You can also add seeds like chia or flax for extra crunch and nutrients. Mixing in dried fruits like cranberries or apricots can boost sweetness too. To keep cleanup simple, use parchment paper for your mixing bowl. This way, you can just lift it out and clean up easily. Use a cookie scoop to form the bites; this keeps your hands clean. After forming, wash your bowl and scoop right away to avoid sticky messes. Keep your workspace organized to make the process smooth and fun. {{image_2}} You can change the flavor of your energy bites to match the seasons. In fall, use extra pumpkin pie spice for a strong taste. In winter, try adding peppermint extract for a festive twist. In spring, mix in lemon zest for a fresh flavor. In summer, you can add dried fruits like cranberries or apricots for a fruity punch. If you have nut allergies, sunflower seed butter works well instead of nut butter. For a vegan option, use maple syrup instead of honey. Gluten-free folks can choose certified gluten-free oats. If you're avoiding sugar, use a sugar substitute like stevia or erythritol. Each swap keeps the bites tasty and safe for everyone. These bites are great on their own, but pairing them enhances the experience. Serve them with coffee or tea for a cozy snack. You can also add them to yogurt or oatmeal for extra energy. For a fun twist, use them as a topping on smoothies or smoothie bowls. They make a great grab-and-go snack for busy days. To keep your No-Bake Pumpkin Pie Energy Bites fresh, store them in an airtight container. I recommend using a glass or plastic container with a tight lid. This way, they stay moist and tasty. Avoid leaving them out at room temperature for too long. These energy bites last about one week in the fridge. Make sure to check for any signs of spoilage before eating. If they start to smell off or change in color, it's best to toss them. For a little extra flavor, add a sprinkle of pumpkin pie spice on top before you store them. If you want to keep them longer, freezing is a great option. Place the energy bites in a single layer on a baking sheet. Freeze them for about two hours. Once firm, transfer them to a freezer bag or container. They can stay frozen for up to three months. When you want a bite, just take them out and let them thaw in the fridge. Enjoy the taste of fall anytime! Yes, you can use different nut butters. Almond and peanut butter work well. You can also try cashew butter or sunflower seed butter. Each one brings its own flavor. Just make sure it’s creamy to mix well. To adjust sweetness, add more honey or maple syrup for a sweeter bite. If you want less sweetness, reduce the syrup. You can also add unsweetened cocoa powder or extra spices. This will help balance the flavor. Serve these bites in a fun bowl. They pair nicely with coffee or tea. You can sprinkle some pumpkin pie spice on top for a nice look. These bites also make great snacks for parties or lunch boxes. Energy bites are simple to make and loaded with nutrition. We covered key ingredients like oats and nut butter, plus tasty options for customization. I shared steps for blending, forming, and refrigerating your bites. You learned tips for texture and flavors, and how to clean up easily. I also explained storage methods to keep your bites fresh. In the end, you have a versatile snack that's easy to prepare. Enjoy experimenting with flavors and ingredients to make your perfect energy bite!
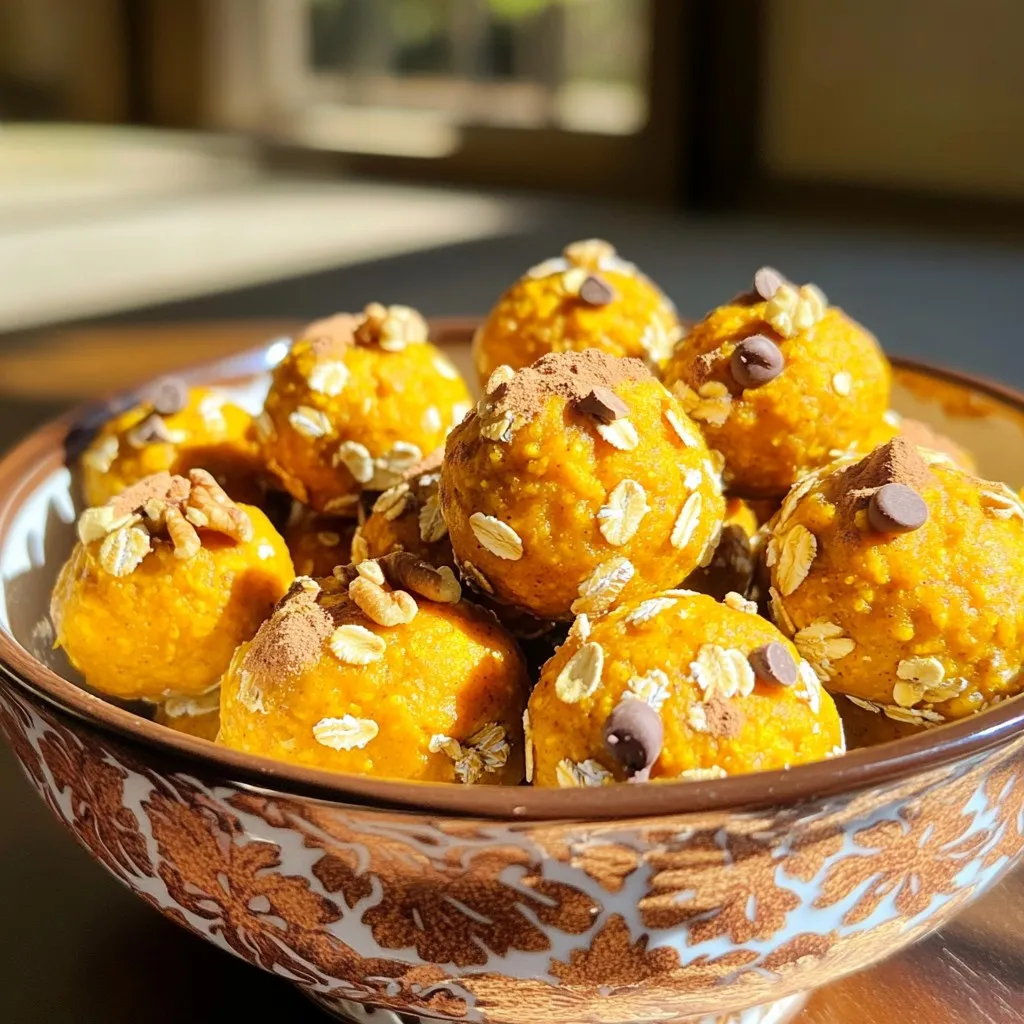
No-Bake Pumpkin Pie Energy Bites Simple and Tasty
Are you looking for a tasty and healthy snack? No-Bake Pumpkin Pie Energy Bites are your perfect solution! These simple bites combine pumpkin flavors with
To make these tasty muffins, you need: - 2 cups all-purpose flour - 1 teaspoon baking powder - 1 teaspoon baking soda - 1 teaspoon ground cinnamon - 1 teaspoon ground ginger - ½ teaspoon ground cardamom - ¼ teaspoon ground cloves - ½ teaspoon salt - ¾ cup brown sugar, packed - 2 large eggs - 1 cup plain yogurt - ¼ cup vegetable oil - 1 teaspoon vanilla extract These spices give the muffins a warm and cozy flavor. The yogurt helps keep them moist. To create a sweet topping, gather these items: - 1 cup powdered sugar - 2 tablespoons milk (or a non-dairy substitute) - ½ teaspoon vanilla extract - A pinch of ground cinnamon This glaze adds a delightful sweetness and makes your muffins shine. You can add chopped walnuts for extra crunch. Use about: - 1 cup chopped walnuts These nuts enhance the texture and flavor. If you love nuts, don’t skip this step! Start by preheating your oven to 350°F (175°C). This step is key for even baking. While the oven heats, line your muffin tin with paper liners. You can also grease it with butter or cooking spray. This helps the muffins release easily after baking. In a medium bowl, combine your dry ingredients. Whisk together 2 cups of all-purpose flour, 1 teaspoon of baking powder, 1 teaspoon of baking soda, 1 teaspoon of ground cinnamon, 1 teaspoon of ground ginger, ½ teaspoon of ground cardamom, ¼ teaspoon of ground cloves, and ½ teaspoon of salt. Mixing these ingredients well ensures even flavor. In a large bowl, beat together ¾ cup of packed brown sugar and 2 large eggs. Mix until they are well combined. Next, add in 1 cup of plain yogurt, ¼ cup of vegetable oil, and 1 teaspoon of vanilla extract. Stir these until the mixture is smooth and creamy. Now, gradually add the dry ingredients to the wet mixture. Stir gently until everything is just combined. Be careful not to overmix. If you want, you can fold in 1 cup of chopped walnuts for added crunch and flavor. Scoop the batter evenly into your prepared muffin tin. Fill each cup about ¾ full. Bake the muffins in your preheated oven for 18-20 minutes. They are done when a toothpick inserted comes out clean. After baking, let them cool in the tin for about 5 minutes. Then, transfer the muffins to a wire rack to cool further. While the muffins cool, make the glaze. In a small bowl, whisk together 1 cup of powdered sugar, 2 tablespoons of milk, ½ teaspoon of vanilla extract, and a pinch of ground cinnamon. Mix until the glaze is smooth. Adjust the milk to get your desired consistency. Once the muffins are cool, drizzle the glaze over them for a sweet finish. To make the best Chai Spiced Muffins, follow these tips: - Measure flour correctly: Use a spoon to scoop flour into your measuring cup. This helps avoid too much flour. - Preheat your oven: Always preheat your oven to 350°F (175°C). This gives even baking. - Use room temperature ingredients: Let eggs and yogurt sit out for about 30 minutes. This helps the batter mix better. - Fill muffin cups properly: Fill each cup about ¾ full. This lets muffins rise nicely without spilling over. Overmixing can make muffins tough. To avoid this: - Mix gently: When adding dry ingredients to wet, stir just until combined. - Look for lumps: Some lumps are okay! They will bake out. - Use a spatula: Fold the batter with a spatula instead of a whisk. This helps prevent overmixing. A smooth glaze makes muffins shine. To get the right consistency, try this: - Start with powdered sugar: Use 1 cup of powdered sugar as your base. - Add milk slowly: Mix in 2 tablespoons of milk. Add more if the glaze is too thick. - Whisk well: Whisk until there are no lumps. A smooth glaze looks great on muffins. - Test the glaze: Drizzle some on a muffin to check if it flows nicely. Adjust as needed. {{image_2}} You can change the flavor of your Chai Spiced Muffins easily. Adding chocolate chips gives a sweet twist. Use half a cup of mini chocolate chips for a rich taste. You can also swap in dried fruits like raisins or cranberries. They add a chewy texture and fruity flavor. Try using pumpkin puree instead of yogurt for a fall twist. This makes the muffins moist and flavorful. Toppings can change your muffin experience. You can sprinkle nuts like pecans or almonds on top. They add crunch and extra taste. Dried fruits like apricots or figs work well too. For a sweet finish, try a sprinkle of coconut. You can also drizzle honey on top for extra sweetness. Making these muffins gluten-free is simple. Just swap the all-purpose flour for gluten-free flour. Make sure it has a good binding agent. For a dairy-free version, use almond milk or coconut milk in place of regular milk. You can also use dairy-free yogurt. This keeps the muffins moist while making them suitable for everyone. To keep your Chai Spiced Muffins fresh, store them in an airtight container. This method helps to keep the muffins moist. You can place a paper towel inside the container to absorb extra moisture. This will keep your muffins fluffy for a few days. If you have a lot of muffins, you might want to separate them with parchment paper. This prevents them from sticking together. Freezing muffins is a great way to save them for later. First, let the muffins cool completely. Wrap each muffin tightly in plastic wrap. Then, place them in a freezer bag. Make sure to remove as much air as possible from the bag. Label the bag with the date. You can freeze muffins for up to three months. When you're ready to eat them, just take out how many you need. To reheat your muffins, you have a couple of options. You can use the microwave or the oven. If using the microwave, heat one muffin for about 15-20 seconds. Check to see if it's warm. For the oven, preheat it to 350°F (175°C). Place the muffins on a baking sheet. Heat for about 10 minutes. This method helps them regain their fresh-baked texture. Enjoy your muffins warm with a cup of tea or coffee! Yes, you can use different types of flour. All-purpose flour is best for these muffins. If you want, try whole wheat flour. It adds fiber and a nutty taste. Just remember, whole wheat flour may make your muffins denser. You can also mix in some almond flour for a nutty touch. To make the muffins healthier, you can swap some ingredients. Use less brown sugar, or try honey or maple syrup instead. You can replace half the oil with unsweetened applesauce. This keeps the muffins moist and lowers fat. Adding in some oats or shredded carrots is another great way to boost nutrition. Yes, you can prepare the batter in advance. Mix everything and store it in the fridge. Just make sure to cover it well. Use it within 24 hours for the best results. This way, you can bake fresh muffins in the morning without much hassle. If your muffins sink in the middle, it usually means they were underbaked or overmixed. Check your oven temperature. Make sure it’s correct before baking. Also, try not to overmix the batter. Mix until just combined to keep air in. If they sink, you can still enjoy them; just eat them warm with glaze! Chai spiced muffins offer a warm, delightful flavor with easy steps. We covered key ingredients, tips for perfect baking, and fun variations. Just remember to store them right for lasting freshness. Explore different toppings to make them unique. I hope you enjoy baking these muffins as much as I do. Create your version and savor every tasty bite!
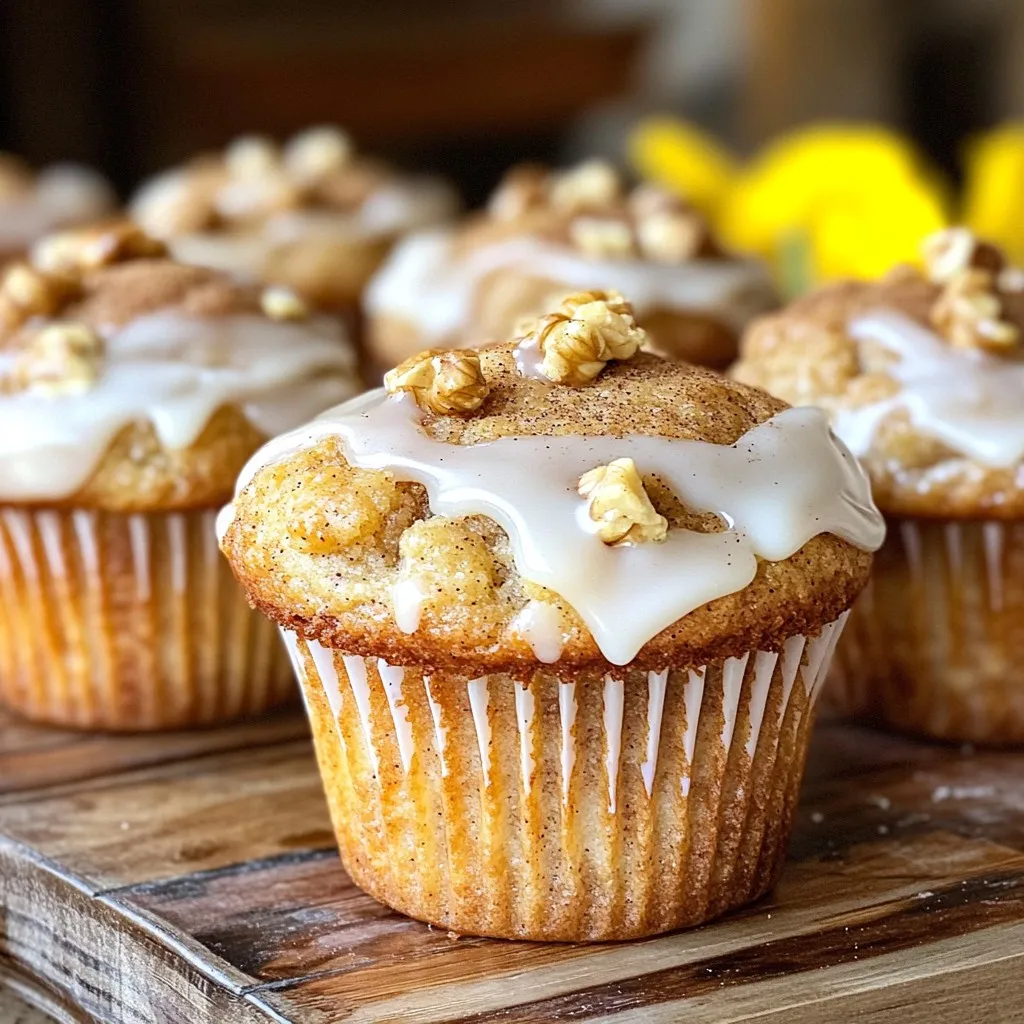
Chai Spiced Muffins with Glaze Perfect for Breakfast
Start your day with a cozy treat! Chai Spiced Muffins with glaze offer rich flavor and warmth. Imagine biting into a soft muffin packed with