Desserts
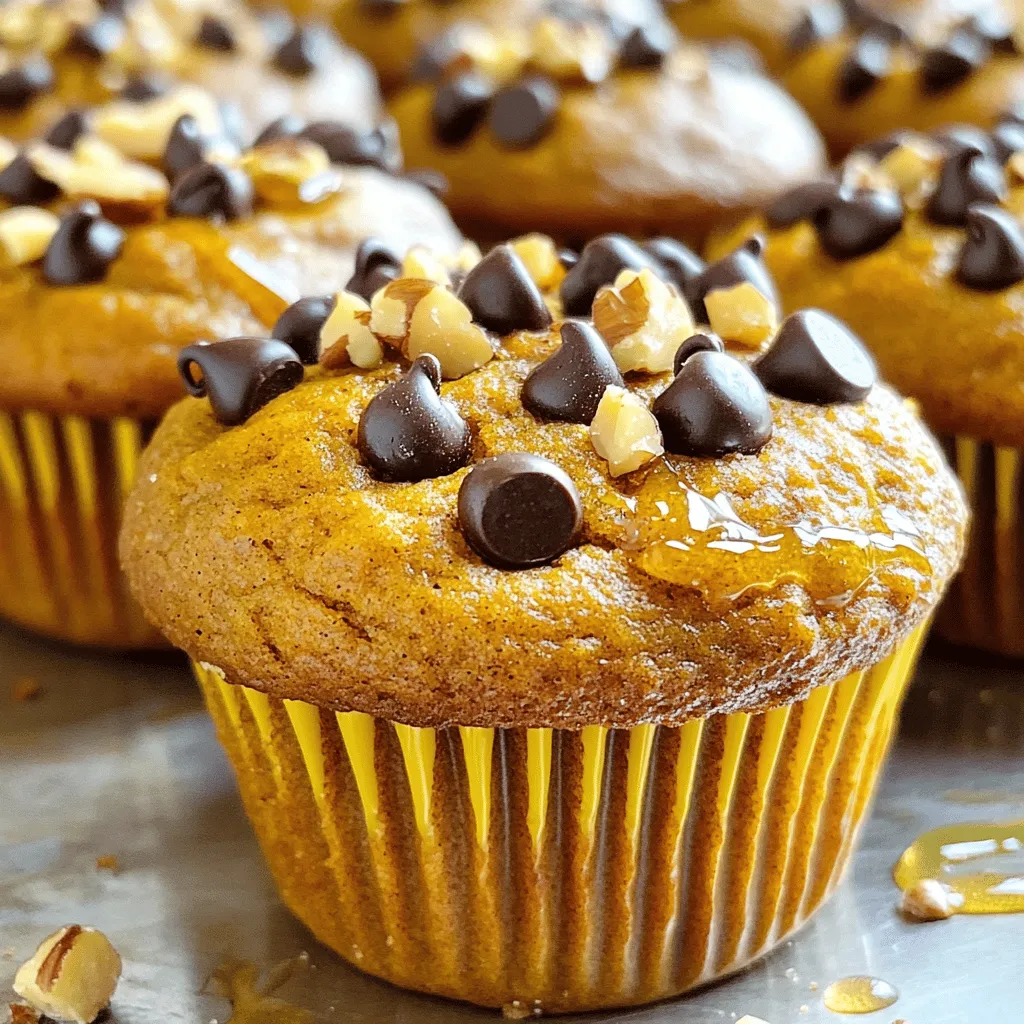
Flourless Pumpkin Muffins Healthy and Simple Recipe
Are you ready for a delicious twist on fall baking? These flourless pumpkin muffins are not only healthy but also incredibly simple to make. With
![- Fresh raspberries - Cream cheese - Powdered sugar The main ingredients for Raspberry Cream Cheese Bites are fresh raspberries, cream cheese, and powdered sugar. Fresh raspberries add a burst of flavor and color. Cream cheese gives a rich, creamy texture. Powdered sugar sweetens the filling and helps it stay smooth. Together, they create a tasty filling that is hard to resist. - Graham cracker crumbs - Melted butter The crust is made from graham cracker crumbs and melted butter. Graham crackers provide a sweet and crunchy base. Mixing them with melted butter creates a sticky texture that holds together well. This crust balances the creaminess of the filling and adds a nice crunch with every bite. - Mint leaves for garnish - Vanilla extract You can add some optional ingredients for extra flair. Mint leaves make a great garnish, adding freshness and color. A splash of vanilla extract enhances the flavor of the cream cheese. These simple touches elevate your bites and make them even more delightful. For the full recipe, see above. First, preheat your oven to 350°F (175°C). This helps the bites bake evenly. While the oven heats up, grab a mixing bowl. Combine 8 oz of softened cream cheese, 1/4 cup of powdered sugar, and 1 teaspoon of vanilla extract. Mix everything until it is smooth and creamy. This filling will be rich and tasty. Next, take 1/2 cup of graham cracker crumbs. Mix it with 2 tablespoons of melted butter until it is well blended. This mixture will form the crust. Now, line a mini muffin pan with mini cupcake liners. Press the graham cracker mixture into the bottom of each liner, making a solid base for your bites. Now it's time to fill the liners. Spoon the cream cheese mixture over the crust in each liner. Fill them about two-thirds full. Next, take 1 cup of fresh raspberries and place one on top of each filled bite. Bake these in the preheated oven for about 15-18 minutes. You want the edges to be slightly golden and the filling to be set. Once done, remove them from the oven and let them cool at room temperature. Refrigerate for at least 30 minutes before serving. These steps ensure a delicious treat. For the full recipe, check out the detailed instructions. To make the cream cheese mixture smooth, start with softened cream cheese. If it is cold, it will be hard to mix. Leave it out for about 30 minutes before you use it. This helps create a nice, creamy texture. Mix the cream cheese with powdered sugar and vanilla extract until no lumps remain. A smooth filling makes each bite a delight. Keep a close eye on the baking time. Bake the bites for about 15-18 minutes. They should look slightly golden around the edges. If you bake them too long, they can dry out. After baking, let them cool at room temperature. This helps the filling set properly. For the best results, chill them in the fridge for at least 30 minutes before serving. They will taste even better when cold. These bites pair well with many drinks. A nice cup of tea or coffee complements the flavors. For a fun twist, serve them with a scoop of vanilla ice cream. You can also arrange them on a platter with fresh mint leaves for a pop of color. This makes them look fancy for guests. Enjoy exploring different ways to serve these tasty treats! {{image_2}} You can change the flavor of your Raspberry Cream Cheese Bites easily. Try different fruit toppings like blueberries or strawberries for a fun twist. Each fruit brings a unique taste and color. You can even use flavored cream cheese, like strawberry or vanilla. This small change adds a burst of flavor and keeps things exciting. If you want a gluten-free version, there are great options. You can use almond flour or oats instead of graham crackers for the crust. Just grind them into fine crumbs and mix with a bit of melted butter. This will create a tasty base that is still crunchy. Make sure to check that all ingredients are gluten-free to keep your bites safe. For a vegan option, you can use dairy-free cream cheese. Brands like Tofutti or Kite Hill offer tasty choices. Instead of powdered sugar, try using plant-based sweeteners like agave syrup or maple syrup. These swaps make the bites vegan and just as delicious. You can enjoy a creamy, sweet treat that fits your diet! For the complete recipe, check out the [Full Recipe]. To keep Raspberry Cream Cheese Bites fresh, store them in the fridge. Use an airtight container to prevent moisture loss. They last about three to four days in the fridge. Always check for any off smells or changes in texture before eating. If you want to keep them longer, freezing is a great option. Place the bites in a single layer on a baking sheet. Freeze them for about two hours. Once frozen, transfer them to a freezer-safe bag. They can stay good for up to two months. For best results, thaw them in the fridge overnight before serving. To reheat leftovers, the oven works best. Preheat the oven to 350°F (175°C). Place the bites on a baking sheet and heat for about 10 minutes. This method keeps the crust crispy. Avoid the microwave, as it can make them soggy. For great texture, let them cool for a few minutes before enjoying again. The prep time for these bites is about 15 minutes. The cook time takes 15 to 18 minutes. In total, you will spend about 1 hour from start to finish. This includes cooling time before serving. Yes, you can make these bites ahead. Prepare them and bake as directed. Let them cool completely. Once cooled, store them in the fridge. They will taste great for up to three days. You will know they are done when the edges are slightly golden. The filling should look set, not jiggly. A nice golden hue means they are ready to cool. This gives you the perfect texture for serving. In this post, I covered how to make delightful Raspberry Cream Cheese Bites. We went through the key ingredients, including fresh raspberries and graham cracker crust. I shared easy steps for preparation, baking tips, and creative variations to try. Remember, these bites can be stored well and enjoyed anytime. Don’t hesitate to experiment with flavors or toppings. With just a few ingredients, you can create a tasty treat that pleases everyone. Enjoy your baking!](https://tossedrecipes.com/wp-content/uploads/2025/06/bd908d1b-ff0c-4fac-bfce-a3a4036aa286.webp)
Raspberry Cream Cheese Bites Simple and Delightful Snack
Looking for a quick and tasty snack? Raspberry Cream Cheese Bites are simple to make and bursting with flavor. With just a few fresh ingredients
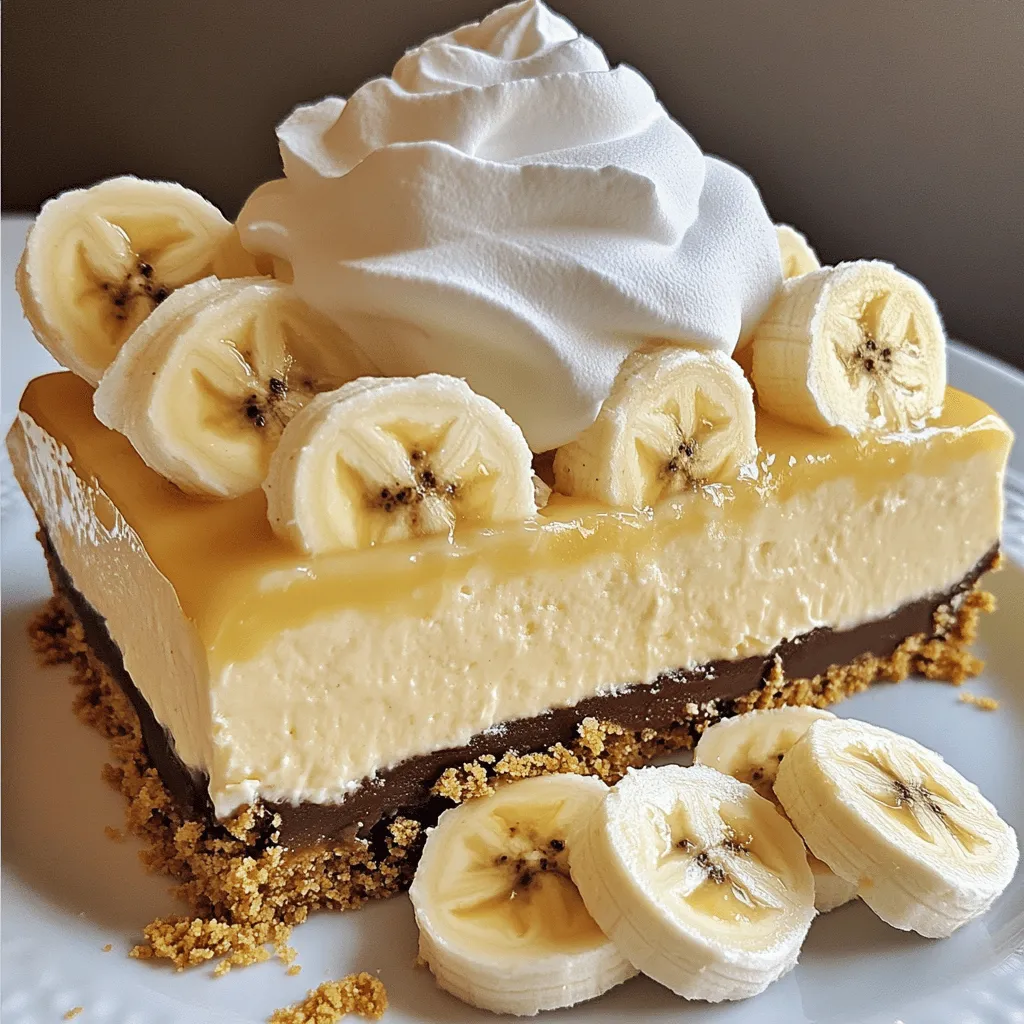
Best Recipe For No Bake Banana Pudding Cheesecake Delight
Are you ready to wow your family and friends with an easy dessert? Today, I’m sharing my best recipe for a no-bake banana pudding cheesecake
![To make these tasty mini cheesecakes, gather these ingredients: - 1 cup graham cracker crumbs - 4 tablespoons unsalted butter, melted - 1/4 cup granulated sugar - 2 (8 oz) packages cream cheese, softened - 1/2 cup sour cream - 2/3 cup granulated sugar - 2 large eggs - 1/4 cup fresh lemon juice - Zest of 1 lemon - 1 cup fresh raspberries - Additional raspberries and lemon zest for garnish Using high-quality ingredients makes a big difference. Choose fresh raspberries, as they add vibrant flavor. Opt for full-fat cream cheese for a rich, creamy texture. Fresh lemons yield the best juice and zest. Using unsalted butter allows you to control the sweetness. Organic ingredients can elevate taste and support sustainable farming. You can easily swap ingredients to fit dietary needs. For a gluten-free option, use gluten-free graham crackers. If you're dairy-free, try coconut cream or a vegan cream cheese. To make it lower in sugar, use a sugar substitute like stevia or erythritol. Always check labels for allergens when choosing substitutions. For egg-free cheesecakes, use flaxseed meal or chia seeds mixed with water to mimic eggs. Creating delicious mini lemon raspberry cheesecakes is fun and flexible. For the full recipe, refer back to the ingredients list! To make the crust, start by preheating your oven to 325°F (160°C). Grab a muffin tin and line it with cupcake liners. In a medium bowl, mix together 1 cup of graham cracker crumbs, 4 tablespoons of melted unsalted butter, and 1/4 cup of granulated sugar. Stir until the crumbs are well coated with the butter. Now, take this crumb mixture and press it firmly into the bottom of each lined muffin cup. Aim for a nice, even layer. Bake the crusts for 7 to 8 minutes, until they turn lightly golden. Once baked, remove them from the oven and let them cool slightly while you prepare the filling. In a large mixing bowl, add 2 packages of softened cream cheese. Use an electric mixer to beat it until smooth and creamy. Next, add 1/2 cup of sour cream, 2/3 cup of sugar, 2 large eggs, 1/4 cup of fresh lemon juice, and the zest of 1 lemon. Mix until everything is well combined and smooth. Scrape down the sides of the bowl as needed. Now, gently fold in 1 cup of fresh raspberries. Be careful not to crush them too much; we want those lovely bursts of flavor in each bite! Pour the cream cheese mixture over the cooled crusts in the muffin tin. Fill each cup about 3/4 full. Place the muffin tin back in the oven and bake for 15 to 20 minutes. You want the edges to be set, but the centers should still jiggle a bit. After baking, turn off the oven and crack the door open. Let the cheesecakes cool in the oven for an additional 10 minutes. This helps prevent cracks. Once cooled, remove them from the oven and let them cool completely at room temperature. Finally, refrigerate the cheesecakes for at least 2 hours, or even overnight if you can wait! For the full recipe, check out the details above. Enjoy making these delightful mini lemon raspberry cheesecakes! To get the best texture in your mini lemon raspberry cheesecakes, always use softened cream cheese. This helps you mix it smoothly with other ingredients. Make sure to beat the mixture until it is creamy. This step is key! Also, remember to fold in the raspberries gently. You want them to stay whole for a nice bite. One common mistake is overmixing the batter after adding eggs. This can cause cracks when baking. Another mistake is not letting the cheesecakes cool gradually. Cracking can happen if you move them to the fridge too soon. Lastly, be careful not to overbake. The centers should jiggle a bit when you take them out. For a beautiful presentation, add fresh raspberries and lemon zest on top. This gives a nice pop of color. You can also serve them on a pretty plate or a cake stand. If you're feeling creative, drizzle a lemon glaze over them for added sweetness. These little tricks make your mini cheesecakes look as great as they taste! For the full recipe, click [Full Recipe]. {{image_2}} You can change the fruit in these mini cheesecakes. Fresh strawberries or blueberries work great. Chop the strawberries into small pieces and fold them in like the raspberries. Blueberries can stay whole for a nice burst of flavor. You can mix fruits too. This will give you new tastes and colors. To make this recipe vegan, use plant-based cream cheese. Brands like Tofutti or Kite Hill are good choices. Replace sour cream with coconut cream for a rich taste. Use flax eggs instead of regular eggs. Mix one tablespoon of ground flaxseed with three tablespoons of water. Let it sit for a few minutes to thicken. This will help bind the mixture. You can also switch up the crust. Use chocolate graham crackers for a rich flavor. Crush them the same way you do regular graham crackers. For a nut-based crust, use ground almonds or pecans. Mix them with melted coconut oil for a gluten-free option. Each crust will change the taste and feel of your mini cheesecakes. For the complete recipe, check the Full Recipe provided earlier. To keep your mini lemon raspberry cheesecakes fresh, use an airtight container. Place parchment paper between layers if stacking. This helps avoid sticking. Store them in the fridge right after they cool. They taste best cold and firm. When stored correctly, these mini cheesecakes last about 5 days in the fridge. After that, they may lose flavor and texture. Always check for any signs of spoilage before eating. If they look or smell off, it's best to toss them. You can freeze mini cheesecakes for longer storage. Place them in a single layer on a baking sheet. Freeze until solid, then transfer to an airtight container. They can last up to 2 months in the freezer. To eat, thaw them in the fridge overnight. This keeps them creamy and delicious. For the full recipe, check out the complete guide provided earlier. Yes, you can make these mini cheesecakes ahead. They chill well in the fridge. I often prepare them a day in advance. This extra chill time enhances the flavor. Just cover them tightly with plastic wrap. When serving, you can add fresh raspberries and lemon zest. To make larger cheesecakes, you can double the recipe. Use a 9-inch springform pan instead of muffin tins. Adjust the baking time as well. A larger cheesecake may need 30 to 40 minutes in the oven. Check for doneness by gently shaking the pan. The center should still jiggle a bit but not be liquid. To prevent cracks, avoid overmixing the batter. Mix until just combined. Also, bake at a lower temperature. A gentle bake helps it set slowly. Cracking can also happen if the cheesecake cools too fast. I recommend cracking the oven door after baking. Letting it cool slowly helps keep it smooth. You learned how to make Mini Lemon Raspberry Cheesecakes from start to finish. We covered the ingredients, step-by-step instructions, helpful tips, and fun variations. You can adapt the recipe to fit your needs and preferences. Remember to store your cheesecakes properly for the best taste. These treats are easy to make and fun to share. Enjoy impressing friends and family with your tasty creations!](https://tossedrecipes.com/wp-content/uploads/2025/06/cb3aa9f9-9103-41ec-a3f4-e745bae4aeb3.webp)
Mini Lemon Raspberry Cheesecakes Delightful Sweet Treat
Craving a sweet treat that’s both refreshing and easy to make? My Mini Lemon Raspberry Cheesecakes are the perfect solution! With their creamy filling and
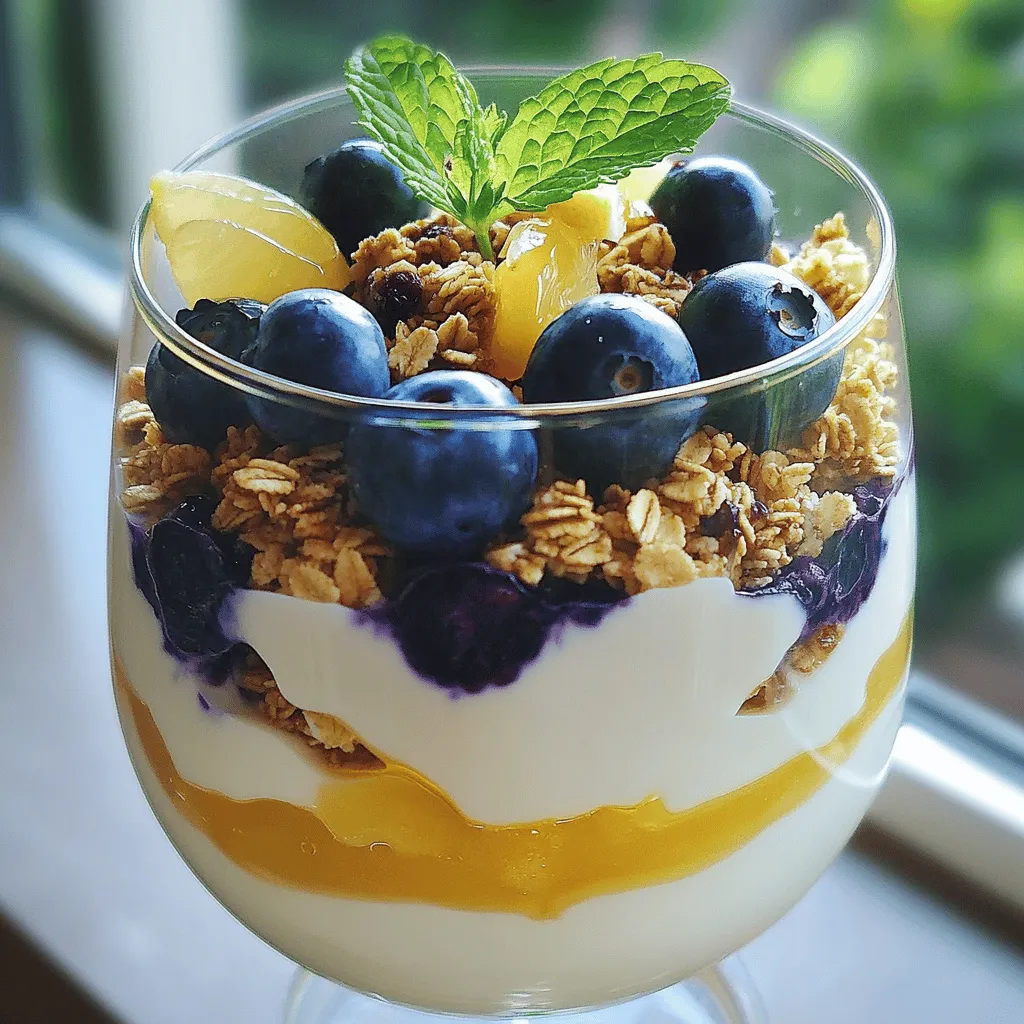
Best Blueberry Yogurt Recipe Simple and Delicious Treat
Craving a tasty treat that’s healthy and easy to make? My Best Blueberry Yogurt Recipe is the answer! With creamy Greek yogurt and fresh blueberries,
![- 1 ½ cups graham cracker crumbs - ½ cup unsalted butter, melted - ¼ cup sugar - 16 oz cream cheese, softened - ¾ cup sugar - 2 large eggs - 1 tsp vanilla extract - ½ cup sour cream - 1 tsp cinnamon - ⅓ cup brown sugar - 1 tbsp cinnamon - 2 tbsp unsalted butter, melted - ½ cup powdered sugar - 1-2 tbsp milk (to achieve desired consistency) To make the crust, mix the graham cracker crumbs, melted butter, and sugar in a bowl. Press this mixture firmly into the bottom of a springform pan. This gives the cheesecake a nice base. For the cheesecake filling, you will need softened cream cheese. Beat it until smooth. Then, add sugar and mix well. Add the eggs one at a time, mixing after each. Next, stir in the vanilla extract, sour cream, and cinnamon. This part makes the filling creamy and flavorful. For the cinnamon swirl, mix brown sugar, cinnamon, and melted butter in a small bowl. Set this aside for later. Finally, for the topping, mix powdered sugar with milk until smooth. Adjust the milk until you get your desired thickness. Drizzle this over the cheesecake for a sweet finish. You can find the full recipe in the article above. Enjoy making this delightful treat! - Preheat the Oven: Set to 325°F (160°C). - Prepare the Crust: In a medium bowl, combine 1 ½ cups graham cracker crumbs, ½ cup melted unsalted butter, and ¼ cup sugar. Mix well. Press this mixture firmly into the bottom of a 9-inch springform pan. Bake for 10 minutes, then remove it and let it cool. - Make the Swirl: In a small bowl, mix ⅓ cup brown sugar, 1 tablespoon cinnamon, and 2 tablespoons melted butter until crumbly. Set aside. - Mixing the Filling: In a large bowl, beat 16 oz softened cream cheese until smooth. Add ¾ cup sugar and mix well. Add 2 large eggs, one at a time, mixing after each. Stir in 1 teaspoon vanilla extract, ½ cup sour cream, and 1 teaspoon cinnamon until smooth. - Layer the Ingredients: Pour half of the cheesecake filling over the cooled crust. Sprinkle half of the cinnamon swirl mixture over this layer. Pour the remaining cheesecake filling on top. Finally, sprinkle the rest of the cinnamon swirl mixture over everything. Use a knife to gently swirl the filling and cinnamon together. - Bake the Cheesecake: Place the springform pan in the oven. Bake for 50-60 minutes, until the center is set but still slightly jiggly. Turn off the oven and crack the door open. Let the cheesecake cool in the oven for about 1 hour to prevent cracks. - Chill: After it has cooled, refrigerate the cheesecake for at least 4 hours or overnight. - Prepare the Glaze: In a small bowl, mix ½ cup powdered sugar with 1-2 tablespoons milk until smooth. Drizzle over the chilled cheesecake before serving. For the Full Recipe, check the earlier section. Enjoy the creamy, delightful layers of this Cinnamon Roll Cheesecake! - Use Room Temperature Ingredients: Cream cheese and eggs should be at room temp. This helps in creating a smooth filling. - Avoid Overmixing: Mix only until combined. Too much mixing adds air, which can cause cracks. - Use a Knife for Swirls: Take a knife and gently swirl the batter. This creates a nice marble effect and keeps the layers intact. - Adjust Glaze Consistency: Add more or less milk to the glaze. This will help you get the thickness you like. - Optional Garnishes: You can sprinkle cinnamon or chopped pecans on top for a pretty look. Remember, these tips will help you create a delightful Cinnamon Roll Cheesecake. For a full recipe, check out the [Full Recipe]. {{image_2}} One fun part of making cinnamon roll cheesecake is adding your own twist. You can try different flavors to make it unique. - Chocolate Swirl Variation: Add cocoa powder to the filling. This gives a rich chocolatey taste. You will love the mix of chocolate and cinnamon. - Fruit Additions: Top your cheesecake with fresh fruits. Berries or mandarin segments add a nice touch. They provide a bright flavor contrast. If you need a gluten-free dessert, don’t worry. You can use gluten-free graham crackers for the crust. This makes the cheesecake safe for those with gluten sensitivities. It tastes just as good! Sometimes, a whole cheesecake is too much. You can make mini cheesecake cups for smaller servings. - Mini Cheesecake Cups: Use muffin tins or mini springform pans. This is perfect for parties or gatherings. Each guest gets their own little treat. They are easy to serve and even easier to enjoy! Try out these variations to make your cinnamon roll cheesecake even more delightful. For the full recipe, check out the full recipe section! Keeping it fresh is simple. Store leftover cheesecake covered in the refrigerator for up to 5 days. This way, you can enjoy the creamy goodness later. Just make sure it is well-wrapped or in an airtight container to prevent it from drying out. Freezing the cheesecake is a great option. You can freeze slices or the entire cheesecake. Wrap it tightly in plastic wrap and then in foil. This keeps it fresh for up to 2 months. When you’re ready to enjoy, simply take it out of the freezer. How to thaw your cheesecake is easy. Defrost it overnight in the refrigerator before serving. This method helps maintain the best texture and taste. Avoid thawing it at room temperature, as this can cause the cheesecake to become too soft. Enjoy your treat fresh and delicious! Typically, it lasts up to 5 days when stored properly in the refrigerator. Keep it in an airtight container to maintain freshness. I find that wrapping it well helps prevent any drying out. Yes, it's ideal to prepare it a day prior. This allows it to chill thoroughly and develop flavor. Making it ahead also saves time on the day you plan to serve it. Cracks can be mitigated by cooling the cheesecake slowly in the oven. After baking, turn off the oven and leave the door ajar. This gradual cooling helps keep the texture smooth. Also, avoid overbaking, as that can cause cracks. Yes! You can substitute with cookie crumbs like Oreos or a nut-based crust for variation. A chocolate crust adds a rich twist, while a nut crust provides a nice crunch and depth of flavor. While it's recommended for easy removal, you can use a regular cake pan. Just ensure proper greasing and lining to help with serving. A parchment paper lining works well for easy lifting. This cinnamon roll cheesecake is a delightful mix of flavors and textures. We covered the crust, filling, and swirl, giving you a complete guide. Remember to chill it well for the best taste. Also, feel free to add your personal twist with fruit or chocolate. Store leftovers properly to keep them fresh. Enjoy this treat often, as it's perfect for any occasion!](https://tossedrecipes.com/wp-content/uploads/2025/06/fa8e0297-3714-4cb3-8c3c-bd897969f51a.webp)
Cinnamon Roll Cheesecake Delightful and Creamy Recipe
Are you ready to indulge in a dessert that perfectly blends two favorites: cinnamon rolls and cheesecake? In this delightful recipe for Cinnamon Roll Cheesecake,
![- 2 cans refrigerated crescent roll dough - 16 oz softened cream cheese - 1 cup granulated sugar The main ingredients create a rich and creamy filling. The cream cheese brings a smooth texture. The granulated sugar adds just the right sweetness. The crescent roll dough forms a flaky base. - 1 teaspoon vanilla extract - 3 large eggs - ½ cup sour cream These additional ingredients enhance the flavor and texture. Vanilla extract gives a warm aroma. The eggs help bind the filling together. Sour cream adds a nice tanginess. - ½ teaspoon lemon zest - 1 tablespoon cornstarch - Powdered sugar for dusting - Fresh berries for garnish The optional ingredients allow you to customize your casserole. Lemon zest brightens the flavor. Cornstarch helps thicken the filling. Powdered sugar adds a sweet touch on top. Fresh berries make the dish look beautiful and taste fresh. For the full recipe, check out the details to create this delightful dish. - Preheat the oven to 350°F (175°C). - Grease a 9x13 inch baking dish. This helps the casserole release easily. - Lay the first crescent roll layer in the baking dish. Make sure to press the seams together. - Prepare the cheesecake filling. In a bowl, mix cream cheese, sugar, and vanilla extract. Add the eggs, sour cream, and cornstarch. Beat until smooth. Pour this filling over the crescent dough. Spread it evenly. - Add the second layer of crescent rolls on top. Pinch the dough to seal it over the filling. - Bake in the preheated oven for 30-35 minutes. Look for a golden brown top. The filling should be set. - Remove from the oven and let it cool for 15-20 minutes. Slice into squares. Serve it warm or at room temperature. Dust with powdered sugar and add fresh berries if you like. For the full recipe, check out the details above. Enjoy this delicious treat! To know when your casserole is perfectly baked, look for a golden top. The filling should be set but still slightly jiggly in the center. If you have a different oven, your baking time may change. Check for doneness at 25 minutes. If it needs more time, add 5-minute intervals until done. Serve the casserole warm or at room temperature for the best taste. Slice it into squares and place them on a nice plate. For an elegant finish, add a dollop of whipped cream and some fresh berries on top. This makes the dish look as good as it tastes! You can adjust sweetness by adding more or less sugar to the filling. For flavor, consider adding more vanilla or a bit of lemon zest. If you have dietary needs, you can swap ingredients. Use gluten-free crescent rolls or dairy-free cream cheese. These simple changes keep the dish delicious for everyone! [Full Recipe] {{image_2}} You can change the taste of this casserole in fun ways. Try adding chocolate chips or fruit flavors to the cream cheese filling. For a chocolate twist, mix in cocoa powder or mini chocolate chips. If you love fruit, consider adding pureed strawberries or blueberries for a fresh taste. Another idea is to add spices like cinnamon or nutmeg. Just a pinch can warm up the flavors and make your casserole feel cozy. You can also top it with a sprinkle of cinnamon sugar before baking. This simple change gives a delightful crunch. If you follow a gluten-free diet, look for gluten-free crescent roll dough. Many brands offer great options that taste just as good. For a vegan version, you can use dairy-free cream cheese and flax eggs instead of regular eggs. Flax eggs are easy to make: just mix one tablespoon of ground flaxseed with three tablespoons of water and let it sit for a few minutes. You can also swap the sour cream with a plant-based yogurt. These changes keep the flavor while fitting your dietary needs. Seasonal toppings make this casserole even more special. In summer, add fresh berries like strawberries or raspberries on top. In fall, consider using sliced apples or pumpkin spice for a festive touch. For holiday-themed fun, you can decorate with crushed peppermint or chocolate shavings during winter. This not only looks pretty, but it also makes the dish more festive. Try these variations to make your cheesecake crescent rolls casserole unique! For the full recipe, check out the link above. To store cheesecake crescent rolls casserole, let it cool completely. Wrap it tightly in plastic wrap or foil. You can also place it in an airtight container. This keeps the flavors fresh and prevents drying out. The best containers for storage are glass or plastic with tight-fitting lids. These containers help maintain moisture and taste. Make sure to label the container with the date for easy tracking. You can freeze the casserole before or after baking. If freezing before baking, wrap it well with plastic wrap and foil. This keeps it safe from freezer burn. When ready to bake, just remove the wrap and bake from frozen, adding extra time as needed. If you freeze after baking, allow it to cool first. Then, wrap it tightly and place it in the freezer. To reheat, thaw it in the fridge overnight. Bake at 350°F (175°C) for about 20-25 minutes until warmed through. In the fridge, the casserole lasts about 3-4 days. Keep an eye on it for signs of spoilage. If you see any mold or it smells off, throw it away. Proper storage helps keep it tasty for longer. Can I use a different type of cheese for the filling? Yes, you can use mascarpone or ricotta. Both bring a creamy texture. Just remember, they will change the flavor a bit. Mixing cream cheese with other cheeses can also work well. How can I make the casserole more rich and creamy? To boost richness, add extra cream cheese or a splash of heavy cream. You can also use full-fat sour cream for a creamier texture. Don’t forget to mix well to blend flavors. Can I prepare this dish ahead of time? Absolutely! You can prepare the casserole the night before. Just cover it tightly and store it in the fridge. Bake it the next day. This makes for a quick breakfast or dessert. What should I do if the crescent rolls don’t come off the can easily? If the rolls stick, try warming the can in your hands. This can help loosen the dough. You can also gently tap the can on the counter to get it started. What if my casserole is undercooked in the center? If the center is jiggly, return the casserole to the oven. Bake for an extra 5-10 minutes. Check it every few minutes to avoid overcooking the edges. Can I bake this in a different dish size? Yes, you can use a smaller or larger dish. Just adjust the baking time. A smaller dish may need longer, while a larger one may bake faster. Always keep an eye on it! The blog post shared a simple way to make Cheesecake Crescent Rolls Casserole. You learned about the main and optional ingredients, along with step-by-step instructions. We covered baking tips and some tasty variations to suit your taste. Remember, you can adjust flavors and store leftovers properly. This dish is easy to customize and perfect for any occasion or season. Enjoy creating your own version of this tasty treat!](https://tossedrecipes.com/wp-content/uploads/2025/06/8448e68f-c88d-4837-98c2-43818e274dc7.webp)
Irresistible BEST Cheesecake Crescent Rolls Casserole
Are you ready to treat yourself to a sweet delight? This Irresistible BEST Cheesecake Crescent Rolls Casserole combines creamy cheesecake goodness with buttery crescent rolls.
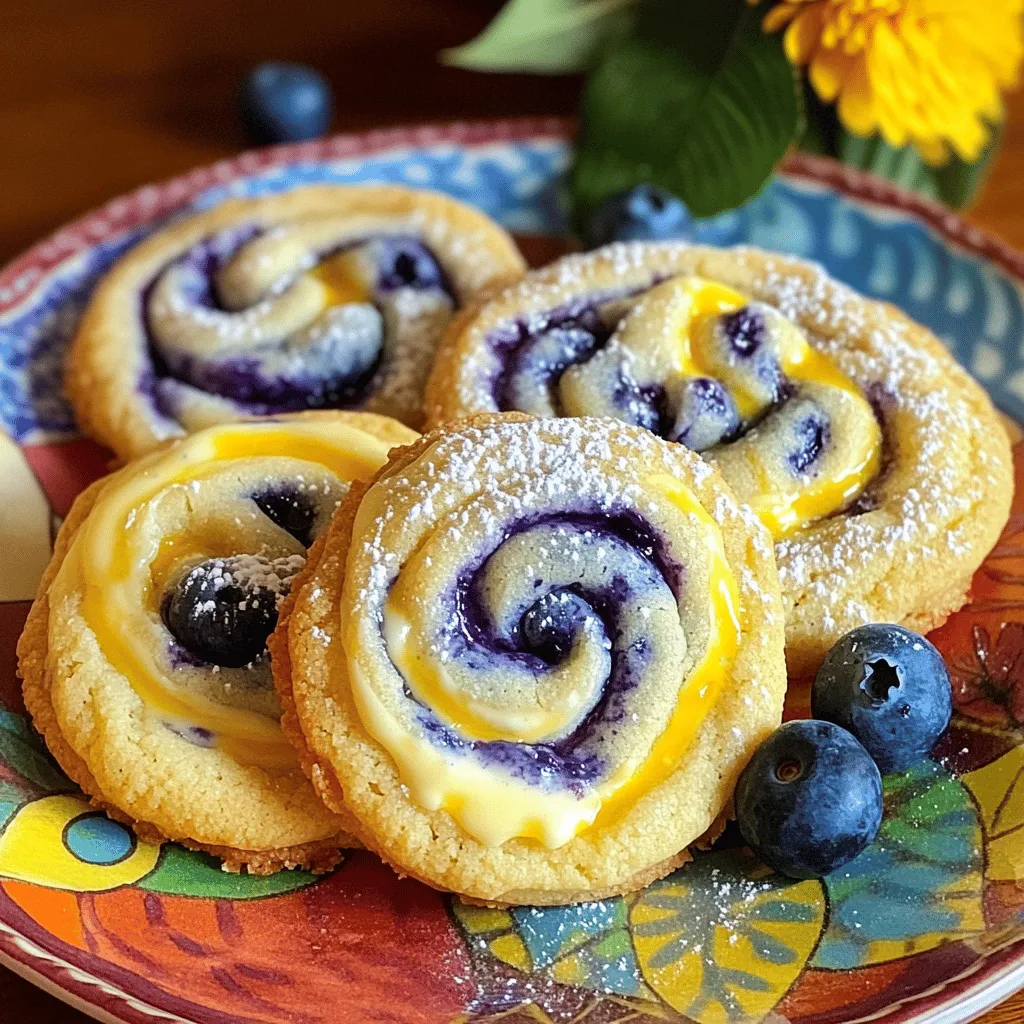
Blueberry Cheesecake Swirl Cookies Fluffy Delight
Imagine biting into a soft, chewy cookie that bursts with blueberry flavor and creamy cheesecake swirls. In this post, I’ll guide you through making Blueberry

Easy King’s Hawaiian Cheesecake Danish Delight
Are you ready to impress your family with a sweet and creamy treat? This Easy King’s Hawaiian Cheesecake Danish Delight will be your new go-to
![To make the 20-Minute Mini Lemon Blueberry Cheesecakes, gather these simple ingredients: - 1 cup graham cracker crumbs - 4 tablespoons unsalted butter, melted - 8 oz cream cheese, softened - 1/2 cup powdered sugar - 1 teaspoon vanilla extract - 1 tablespoon lemon juice - Zest of 1 lemon - 1 cup fresh blueberries - Optional: Fresh mint leaves for garnish Each ingredient plays a key role in creating the perfect balance of flavors. The graham cracker crumbs form a sweet and crunchy base. They pair perfectly with the creamy filling. The butter adds richness, helping the crust hold together. Cream cheese is the star of the cheesecake. It gives a rich and smooth texture. The powdered sugar sweetens the mix just right. Vanilla extract adds depth of flavor. Lemon juice and zest brighten everything up with a zesty kick. Fresh blueberries add a burst of sweetness and color. They contrast nicely with the tart lemon. The optional mint leaves can make your dessert look even prettier. They also add a fresh aroma. This ingredient list makes it easy for you to create a delightful dessert in just 20 minutes. For the full recipe, check out the details above! 1. Preheat your oven to 350°F (175°C). This ensures the crust bakes evenly. 2. Grab a medium bowl. Mix 1 cup of graham cracker crumbs with 4 tablespoons of melted butter. Stir until it looks like wet sand. 3. Line a muffin tin with cupcake liners. Press about 1 tablespoon of the crumb mixture into each liner. Make it firm and even. Bake for 5 minutes. Then, take them out and let them cool. 1. In a large bowl, beat 8 oz of softened cream cheese with an electric mixer. Mix until it is creamy and smooth, with no lumps. 2. Gradually add in 1/2 cup of powdered sugar. Keep mixing until it blends in well. 3. Add 1 teaspoon of vanilla extract, 1 tablespoon of lemon juice, and the zest of 1 lemon. Beat this mixture until it is fluffy. 4. Carefully fold in 1 cup of fresh blueberries. Be gentle so you don’t break them. 1. Spoon the creamy cheesecake filling over the cooled crusts in the muffin tin. Fill each liner nearly to the top. 2. Place the mini cheesecakes in the refrigerator. Let them chill for at least 10 minutes. This helps them set nicely. You can find the full recipe to explore more details and tips. Enjoy making these delightful mini lemon blueberry cheesecakes! To get the best texture for your mini lemon blueberry cheesecakes, start with softened cream cheese. Softening cream cheese makes it easier to blend. This helps you avoid lumps in your filling. Let it sit at room temperature for about 30 minutes before mixing. When folding in the blueberries, be gentle. Use a spatula to lift and turn the mixture. This way, the blueberries stay whole and vibrant. If you stir too hard, they can break apart. To make your cheesecakes look amazing, serve them chilled. Top each cheesecake with a few extra blueberries. Add a sprig of mint for a pop of color. This makes your dessert not just tasty but pretty too! For leftovers, store them in an airtight container. They stay fresh in the fridge for up to three days. If you want to keep them longer, you can freeze them. Just wrap each one in plastic wrap, then place them in a container. This keeps them safe from freezer burn. For the full recipe, check out [Full Recipe]. {{image_2}} You can have fun with these mini cheesecakes by changing the flavors. For instance, try using strawberries or raspberries instead of blueberries. Fresh strawberries add a sweet touch, while raspberries bring a tart flavor. Both fruits pair well with the creamy cheesecake base. Another great option is to swap lemon for lime. Lime gives a bright and zesty twist to the recipe. It offers a fresh taste that is perfect for summer. Just use the same amount of lime juice and zest as you would lemon. Your guests will love this fun and tasty change. If you need a gluten-free option for the crust, use gluten-free graham crackers. They work just as well, and you can enjoy the same great taste without any gluten. Simply crush them as you would with regular graham crackers. For a healthier choice, consider using sugar alternatives. Products like erythritol or stevia can replace powdered sugar. This keeps sweetness but cuts down on calories. Just be sure to use the right amount, as these substitutes can vary in sweetness. You can now enjoy these mini cheesecakes while sticking to your dietary needs. To keep your mini lemon blueberry cheesecakes fresh, proper storage is key. - Refrigeration: Place the cheesecakes in an airtight container. This helps maintain their creamy texture. Store them in the fridge for up to five days. Just make sure they are fully chilled before sealing. - Freezing: If you want to save some for later, freezing works well. Wrap each cheesecake in plastic wrap, then put them in a freezer-safe bag. They can last up to three months frozen. When ready to eat, thaw them in the fridge overnight. How long do these mini cheesecakes last in the fridge? If stored correctly, they stay fresh for about five days. Watch for signs of spoilage. If you see any mold, or the cheesecake smells off, it's best to toss them. Always trust your senses! Fresh cheesecakes should smell sweet and tangy, not sour. For the full recipe, check out the section above. Yes, you can make these cheesecakes ahead of time. Prepare them a day before serving. Just keep them in the fridge. This gives the flavors time to blend well. If you want to prepare the crust early, you can do that too. Just store it in an airtight container until you're ready to use it. This way, you save time on the day of your event. The mini cheesecakes need at least 10 minutes in the fridge to set. For the best results, I suggest chilling them for about 30 minutes. This extra time helps them firm up nicely. A longer chill also improves the taste. Serve them cold for that perfect bite! Yes, you can easily double or halve this recipe. If you double it, use a larger muffin tin or bake in batches. Halving the recipe is also simple. Just divide the ingredients by two. This way, you can adjust to your needs without losing flavor. Use the Full Recipe as a guide for any changes. These mini cheesecakes are a fun and tasty treat. You learned about the key ingredients, the step-by-step process, and helpful tips. You can customize them with different fruits or adjust for dietary needs. Remember to store them properly for the best taste and freshness. These cheesecakes are simple to make and sure to please everyone. Enjoy your delicious creation, and don’t be afraid to get creative with flavors!](https://tossedrecipes.com/wp-content/uploads/2025/06/4df1ac9c-7cb4-4e66-8e10-e9321537538b.webp)
20-Minute Mini Lemon Blueberry Cheesecakes Delight
If you’re craving a sweet treat that’s quick and easy, these 20-Minute Mini Lemon Blueberry Cheesecakes are for you! With just a handful of simple