Desserts

To make blueberry muffin cookies, gather these simple items: - 1 cup all-purpose flour - 1/2 teaspoon baking powder - 1/4 teaspoon baking soda - 1/4 teaspoon salt - 1/2 cup unsalted butter, softened - 1/2 cup brown sugar, packed - 1/4 cup granulated sugar - 1 large egg - 1 teaspoon vanilla extract - 1/2 teaspoon ground cinnamon - 1 cup fresh blueberries (or frozen, if preferred) - 1/4 cup rolled oats - 1/4 cup chopped walnuts (optional) These ingredients blend well to create a sweet and soft cookie. You can swap some ingredients if needed. Here are a few ideas: - Use coconut oil instead of butter for a dairy-free option. - Replace brown sugar with coconut sugar for a different sweetness. - Omit walnuts if you want a nut-free cookie. - For gluten-free cookies, use a gluten-free flour blend. These swaps keep your cookies delicious while meeting your needs. Both fresh and frozen blueberries work well in these cookies. Fresh blueberries add a burst of flavor. They also look great in the cookie. Frozen blueberries are a good choice too. They can be easier to find and store. If you use frozen berries, do not thaw them. Adding them straight from the freezer helps keep the cookie dough from being too wet. This choice ensures your cookies stay thick and chewy. To start, gather all your ingredients. You will need: - 1 cup all-purpose flour - 1/2 teaspoon baking powder - 1/4 teaspoon baking soda - 1/4 teaspoon salt - 1/2 cup unsalted butter, softened - 1/2 cup brown sugar, packed - 1/4 cup granulated sugar - 1 large egg - 1 teaspoon vanilla extract - 1/2 teaspoon ground cinnamon - 1 cup fresh blueberries (or frozen) - 1/4 cup rolled oats - 1/4 cup chopped walnuts (optional) Next, preheat your oven to 350°F (175°C). Line a baking sheet with parchment paper. This will help prevent sticking and make clean-up easy. In a small bowl, mix the flour, baking powder, baking soda, salt, and cinnamon. Set this aside. In a large bowl, cream the softened butter, brown sugar, and granulated sugar together until it is light and fluffy. This step is important for the texture. Add in the egg and vanilla extract to the butter mixture. Beat until everything is mixed well. Gradually stir in the dry ingredients. Mix until just combined. Be careful not to over-mix; this keeps your cookies soft. Now, gently fold in the blueberries, rolled oats, and walnuts if you choose to use them. Use a cookie scoop or a spoon to drop rounded tablespoons of dough onto your prepared baking sheet. Space them a couple of inches apart to give them room to spread. Bake the cookies for 12-15 minutes or until the edges are lightly golden. After baking, let the cookies cool on the baking sheet for about 5 minutes. This helps them set and makes them easier to move. Then, transfer them to a wire rack to cool completely. For a lovely presentation, arrange the cookies on a decorative plate. You can dust them with powdered sugar for a cute finish. Serve them with honey or maple syrup on the side for dipping. These cookies are perfect for any occasion and sure to please! When baking blueberry muffin cookies, avoid these common mistakes: - Overmixing the dough: This can make your cookies tough. Mix just until combined. - Using cold butter: Cold butter does not blend well. Always use softened butter for best results. - Skipping the parchment paper: This can lead to sticking. Always line your baking sheet. - Not measuring ingredients correctly: Use the right tools to measure flour and sugar. Too much flour can ruin texture. To get soft and chewy cookies, follow these steps: - Use room temperature ingredients: This helps them blend better and creates a smooth dough. - Cream butter and sugars well: Mix until light and fluffy. This adds air and makes cookies rise nicely. - Chill the dough: If you have time, chill the dough for 30 minutes before baking. This helps control spread. - Check baking time: Remove cookies when edges are golden. They will firm up as they cool. To boost the flavor of your blueberry muffin cookies, try these tips: - Add lemon zest: A teaspoon of lemon zest brightens the taste. - Include vanilla bean: For a richer flavor, use vanilla bean instead of extract. - Sprinkle with sea salt: A pinch of salt on top adds a nice contrast to the sweetness. - Mix in spices: Try adding nutmeg or cardamom for a unique twist. For the full recipe, check out the details above. {{image_2}} You can change the texture and taste by adding different nuts or fruits. Try chopped pecans or almonds for a nutty crunch. If you love fruit, add some diced apples or raspberries. Mix in dried cranberries for a tart twist. Each choice gives a new spin on the classic cookie! You can make these cookies vegan by swapping the egg for a flax egg. To do this, mix one tablespoon of ground flaxseed with three tablespoons of water. Let it sit for five minutes. For gluten-free cookies, use a gluten-free flour blend. Both options keep the cookies tasty and fun! Change the flavors with the seasons. In fall, add pumpkin spice or chopped apples. For winter, try a hint of peppermint extract. In summer, mix in lemon zest or fresh peaches. These twists make the cookies feel new and exciting all year long. For a full guide on how to bake these delicious treats, check the Full Recipe. To keep your blueberry muffin cookies fresh, store them in an airtight container. This helps keep moisture in and prevents them from drying out. Place parchment paper between layers if you stack them. This step keeps them from sticking together. Store the cookies at room temperature for the best taste. You can freeze blueberry muffin cookies for later. Just place them in a single layer on a baking sheet. Freeze for a couple of hours. Once firm, transfer them to a freezer bag. They will stay fresh for up to three months. To reheat, take them out and let them thaw. Heat in the oven at 300°F (150°C) for 5-7 minutes. This makes them warm and soft again. Blueberry muffin cookies last about a week at room temperature. If you store them in the fridge, they can last up to two weeks. Remember, the fresher the cookie, the better it tastes! For the best experience, enjoy them within a week. If you want to have a sweet snack on hand, make a double batch. You will love having extra cookies ready to go. For the full recipe, check out the details above. Blueberry muffin cookies are a mix of cookies and muffins. They have a soft, chewy texture. These cookies are sweet and packed with juicy blueberries. The flavors remind you of fresh blueberry muffins. You can enjoy them as a snack or dessert. They are great for any occasion, from breakfast to afternoon tea. To make blueberry muffin cookies healthier, use whole wheat flour instead of all-purpose flour. You can also reduce the sugar by half. Adding less butter will cut down on fat. Using unsweetened applesauce can replace some butter for moisture. Add ground flaxseed for extra fiber and nutrients. Yes, you can use other fruits in these cookies. Raspberries, strawberries, or chopped apples work well. Just cut the fruit into small pieces. Adjust the sugar based on the fruit's sweetness. Each fruit will give a unique flavor to the cookies. Absolutely! You can freeze blueberry muffin cookies for later. After baking, let them cool completely. Place the cookies in an airtight container or freezer bag. They can last up to three months in the freezer. When you want one, just thaw at room temperature. Blueberry muffin cookies last about a week at room temperature. Store them in an airtight container to keep them fresh. You can keep them for two weeks in the fridge. For longer storage, freeze them as mentioned before. Yes, adding nuts can enhance the flavor and texture. Chopped walnuts or pecans add crunch. Just mix them in with the blueberries. Make sure no one has nut allergies before serving these cookies. For toppings, you can sprinkle powdered sugar on top. A drizzle of honey or maple syrup works great too. You can also serve them with yogurt or whipped cream for a treat. This adds extra flavor and makes them look nice. Yes, these cookies are simple to make. The steps are easy to follow, even for beginners. In about 30 minutes, you can have fresh cookies ready. The recipe is fun for kids and adults. You can find the full recipe for blueberry muffin cookies in the earlier sections of this article. It lists all the ingredients and steps clearly. Enjoy baking these delightful treats! Blueberry muffin cookies bring joy to any meal. They mix the taste of muffins and cookies. You can enjoy them for breakfast, snacks, or dessert. Let’s dive into the fun details of this tasty treat. - 1 cup all-purpose flour - 1/2 teaspoon baking powder - 1/4 teaspoon baking soda - 1/4 teaspoon salt - 1/2 cup unsalted butter, softened - 1/2 cup brown sugar, packed - 1/4 cup granulated sugar - 1 large egg - 1 teaspoon vanilla extract - 1/2 teaspoon ground cinnamon - 1 cup fresh blueberries (or frozen, if preferred) - 1/4 cup rolled oats - 1/4 cup chopped walnuts (optional) When you gather these ingredients, take a moment to appreciate their freshness. This recipe uses simple items you can find in any store. The blueberries shine as the star of this recipe. They add a burst of flavor and color. The flour gives a nice base for your cookies. The butter makes them rich and soft. Brown sugar adds depth, while granulated sugar adds sweetness. The egg keeps everything together. Cinnamon adds warmth, making the cookies feel cozy. Using fresh blueberries gives the best taste. You can use frozen ones if needed, but fresh makes a difference. Walnuts add crunch, but they are optional. Each ingredient plays a role in making your cookies delightful. You can find the full recipe above. Follow the steps closely for the best results. Enjoy baking these blueberry muffin cookies! To make the perfect Blueberry Muffin Cookies, focus on key ingredients and alternatives. A clear baking process ensures your cookies turn out great every time. Avoid common mistakes to achieve the best texture. You can also explore fun variations and seasonal flavors. In conclusion, these cookies are simple and delicious. With the right tips and tricks, you can customize them to your taste. Following the storage tips keeps them fresh longer. Enjoy baking and sharing these delightful treats!
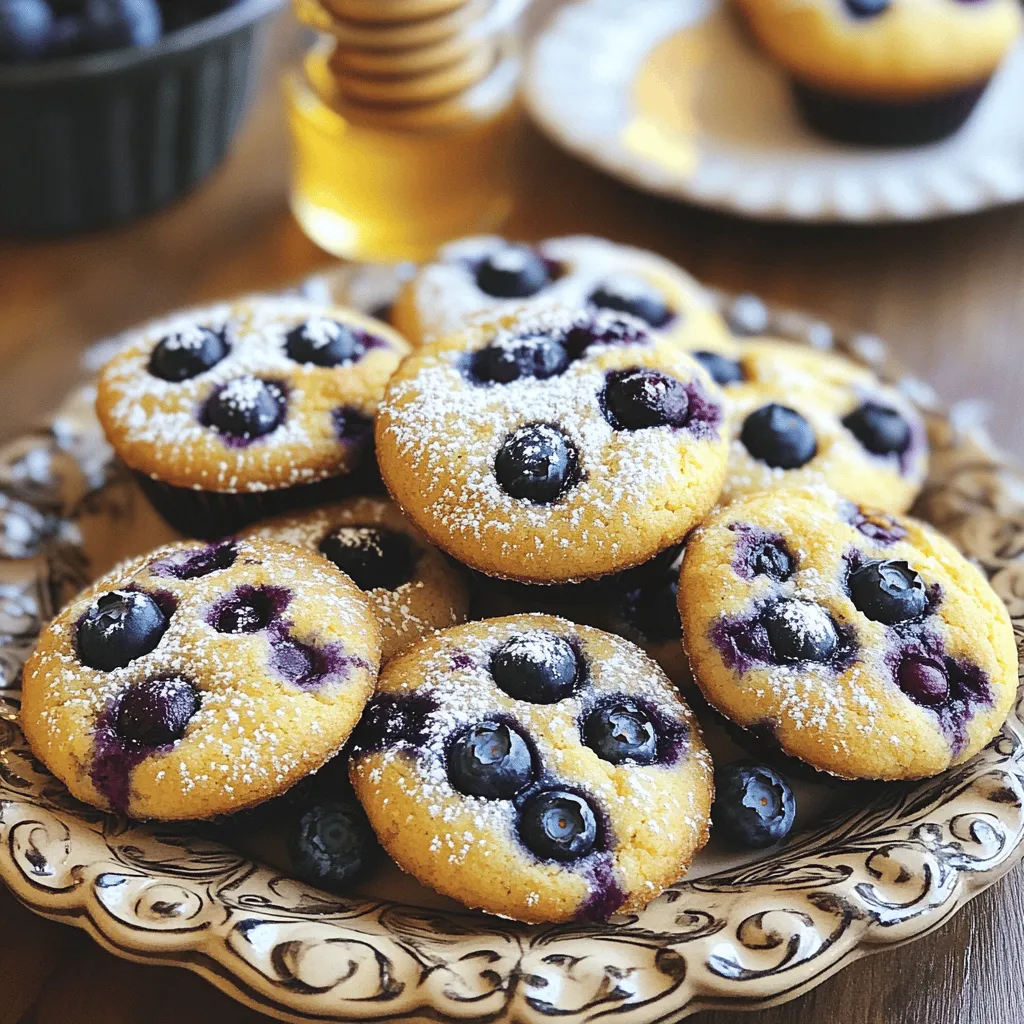
Blueberry Muffin Cookies Perfect for Any Occasion
Are you ready to indulge in a treat that combines the best of muffins and cookies? Blueberry muffin cookies are soft, chewy, and bursting with
To make these peanut butter brownie cookies, you will need: - 1 cup creamy peanut butter - 1 cup granulated sugar - 1 large egg - 1 teaspoon vanilla extract - 1/2 cup unsweetened cocoa powder - 1/2 teaspoon baking soda - 1/4 teaspoon salt - 1/2 cup chocolate chips (optional) These ingredients blend together to create rich, chewy cookies. You can swap some ingredients if needed. Use: - Natural peanut butter instead of creamy for a more intense flavor. - Brown sugar instead of granulated sugar for extra moisture. - Egg replacers like flaxseed meal for a vegan option. - Dairy-free chocolate chips if you want a dairy-free treat. These swaps can keep the cookies tasty and fun. Selecting the right ingredients matters. Here are some tips: - Choose creamy peanut butter with no added sugar or oils. This helps the cookies stay chewy. - Go for pure vanilla extract instead of imitation for better flavor. - Use fresh cocoa powder for a rich chocolate taste. Check the expiration date! - Pick high-quality chocolate chips for a delightful bite. Good ingredients make a big difference in your cookies. For the full process, check out the Full Recipe. First, you need to preheat your oven to 350°F (175°C). This step is key. It ensures your cookies bake evenly. While the oven warms up, grab a baking sheet and line it with parchment paper. This helps prevent sticking and makes clean-up easy. Now, let’s make the batter. In a large mixing bowl, add 1 cup of creamy peanut butter and 1 cup of granulated sugar. Mix until it looks smooth and well combined. Next, crack in 1 large egg and pour in 1 teaspoon of vanilla extract. Stir until everything blends nicely. In a separate bowl, whisk together 1/2 cup of unsweetened cocoa powder, 1/2 teaspoon of baking soda, and 1/4 teaspoon of salt. Slowly add these dry ingredients to your peanut butter mix. Stir gently to combine, but don’t overmix. If you want more chocolate flavor, fold in 1/2 cup of chocolate chips. Time to shape your cookies! Using a tablespoon or a cookie scoop, drop rounded balls of dough onto your lined baking sheet. Space them about 2 inches apart. This gives them room to spread. After that, flatten each ball slightly with a fork or your fingers. This helps them bake evenly. Place the baking sheet in your preheated oven and bake for about 10-12 minutes. The edges should be set, while the centers might look soft. Remember, they will firm up as they cool. After baking, let the cookies cool on the sheet for 5 minutes before moving them to a wire rack. Now, you can enjoy these chewy treats! For a full recipe, check the earlier section. To make these cookies chewy, focus on mixing. Blend the peanut butter and sugar well. This step helps create a soft base. When adding dry ingredients, mix just until combined. Overmixing can lead to tough cookies. Baking time is key too. Aim for 10-12 minutes. The edges should set, while the center remains soft. One mistake is using too much cocoa powder. Stick to half a cup for balanced flavor. Another error is not preheating the oven. Always preheat; this helps the cookies bake evenly. Lastly, don’t skip the parchment paper. It prevents sticking and ensures easy removal. Want to add a twist? Try folding in chocolate chips. They add extra sweetness and texture. You can also sprinkle in crushed peanuts for a crunchy bite. If you like spice, a pinch of cinnamon can elevate the flavor. For a fun twist, add a swirl of caramel before baking. Check out the Full Recipe for more ideas! {{image_2}} You can make your Peanut Butter Brownie Cookies even more fun with mix-ins. Try adding chopped nuts for a crunchy texture. Walnuts or pecans work great. If you love coconut, add some shredded coconut for a tropical twist. You can also toss in some caramel bits for a gooey surprise. Each mix-in changes the taste and feel, making your cookies unique. If you need gluten-free cookies, swap regular sugar with coconut sugar. For a vegan option, use flaxseed eggs. Mix one tablespoon of flaxseed with three tablespoons of water. Let it sit for a few minutes until it thickens. Use a gluten-free flour mix instead of regular flour if you decide to add any. These swaps keep your cookies tasty and safe for everyone. Think outside the box! Use flavored peanut butter like chocolate or honey for extra depth. Add spices, like cinnamon or nutmeg, to change the taste. Want a minty flavor? Mix in some peppermint extract. You can even drizzle melted chocolate on top after baking. These twists let you play with flavors and keep things exciting. For the full recipe, check out the Peanut Butter Brownie Cookies section. Store your peanut butter brownie cookies in an airtight container. This keeps them fresh. To prevent sticking, add parchment paper between layers. Keep them at room temperature for the best taste. If you like them cold, the fridge works too! Just remember, cold cookies may not be as chewy. To freeze these cookies, let them cool completely first. Then, place them in a single layer on a baking sheet. Freeze for about one hour, then transfer them to a freezer-safe bag. It helps to remove extra air to prevent freezer burn. When you're ready to enjoy them, thaw in the fridge or at room temperature. These cookies last about one week at room temperature. If stored properly in the freezer, they can last up to three months. Watch for signs of spoilage like a dry texture or a strange smell. If they look hard or stale, it’s time to toss them. Always trust your senses! To make these cookies chewy, focus on not overbaking them. Bake until the edges set but the centers look soft. Pull them from the oven at the right time. They will firm up as they cool. Using creamy peanut butter also helps create a tender texture. Yes, you can use natural peanut butter. It may change the texture slightly. Natural peanut butter has less sugar and added oils. This can make the cookies a bit drier. If you prefer natural peanut butter, add a little more sugar or oil to balance it. To reheat leftover cookies, place them in the microwave for about 10 seconds. This warms them up without making them hard. You can also use an oven. Heat it to 350°F (175°C) and warm the cookies for about 5 minutes. This helps keep them soft and chewy. Peanut Butter Brownie Cookies are smaller and easier to grab than traditional brownies. They have a chewy texture similar to brownies but are shaped like cookies. The flavor is rich and nutty, thanks to the peanut butter. You get a different eating experience, but the taste remains delightful. Check out the Full Recipe for the full list of ingredients and step-by-step instructions. You learned about making the perfect Peanut Butter Brownie Cookies. We covered all the key ingredients, from swaps to choosing quality items. The step-by-step guide showed how to mix, form, and bake. I shared tips for great texture and tasty variations. You now know how to store cookies and avoid common mistakes. Enjoy your baking journey. These cookies will delight anyone who tries them. Happy baking!
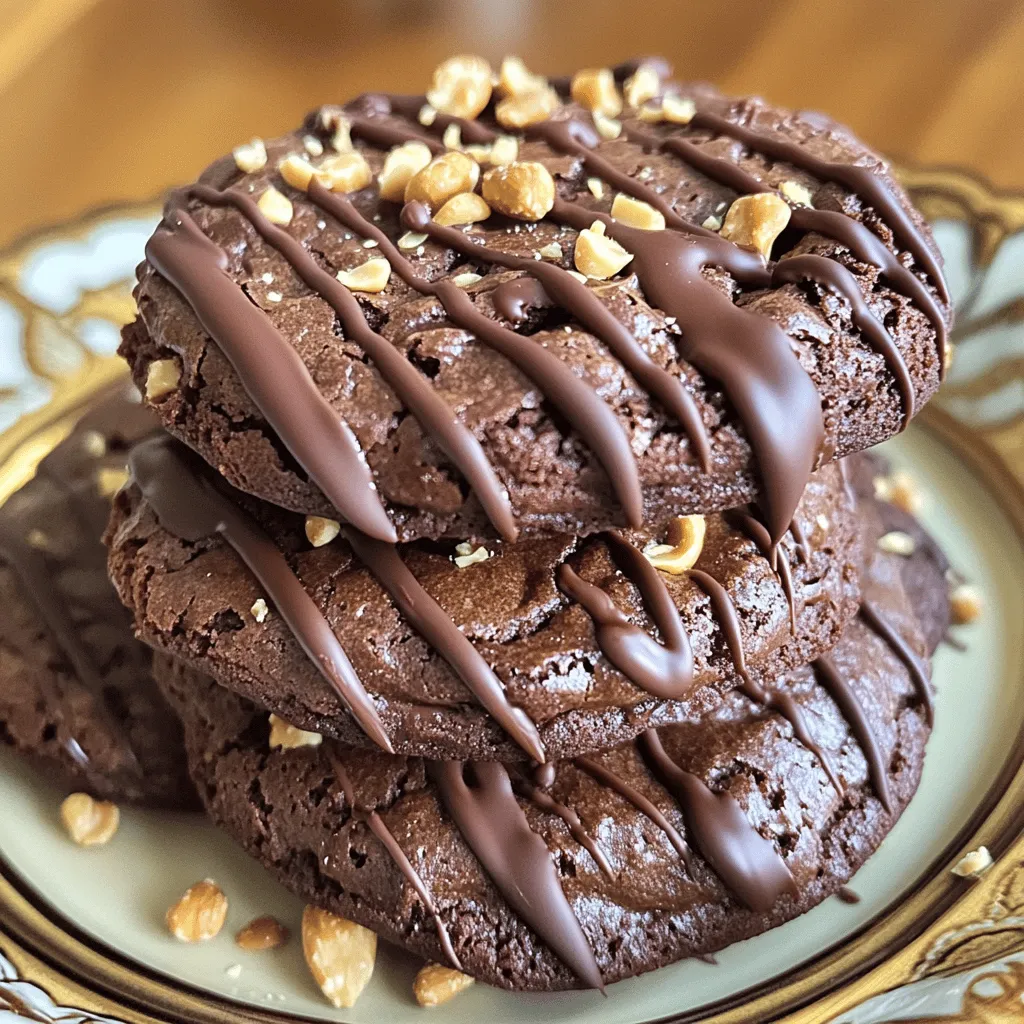
Peanut Butter Brownie Cookies Deliciously Chewy Treat
Are you ready to indulge in a sweet treat that combines the best of brownies and cookies? You’ll love these Peanut Butter Brownie Cookies. They
- 1 cup unsalted butter, softened - 1 cup brown sugar - 1/2 cup granulated sugar - 2 large eggs - 2 teaspoons vanilla extract - 3 cups all-purpose flour - 1 teaspoon baking soda - 1/2 teaspoon salt - 1 cup blue chocolate candies (like M&M’s) - 1/2 cup chocolate chips - 1/2 cup crushed Oreos You might want to change some ingredients. Here are a few ideas: - Alternatives for butter: You can use coconut oil or margarine. Both give great results. - Sugar replacements: Try using coconut sugar or maple syrup. Both add a nice flavor. - Options for gluten-free flour: Use a gluten-free blend instead of all-purpose flour. This keeps the cookies tasty. These changes can help you make COOKIE MONSTER COOKIES!!! just the way you like them. Enjoy the fun and flavor! 1. Preheat and prepare baking sheets Start by preheating your oven to 350°F (175°C). Line two baking sheets with parchment paper. This step helps the cookies bake evenly and prevents sticking. 2. Mixing wet ingredients In a large bowl, cream together 1 cup of softened unsalted butter, 1 cup of brown sugar, and 1/2 cup of granulated sugar. Mix until the mixture is light and fluffy. Next, add 2 large eggs one at a time. Then, stir in 2 teaspoons of vanilla extract. Mix well after each addition. 3. Combining dry ingredients In another bowl, whisk together 3 cups of all-purpose flour, 1 teaspoon of baking soda, and 1/2 teaspoon of salt. Gradually add this dry mixture to your wet mixture. Stir until just combined. Avoid overmixing to keep your cookies soft. 4. Folding in the chocolate and Oreos Now, gently fold in 1 cup of blue chocolate candies, 1/2 cup of chocolate chips, and 1/2 cup of crushed Oreos. This adds fun flavors and textures to your cookies. 5. Baking instructions Scoop tablespoons of cookie dough onto the prepared baking sheets. Leave enough space between each cookie as they will spread. Bake in your preheated oven for 10-12 minutes. The cookies should be lightly golden at the edges. The centers may seem a bit underbaked, but they will firm up as they cool. 6. Cooling and serving suggestions Once baked, remove the cookies from the oven. Let them cool on the baking sheets for about 5 minutes. After that, transfer them to a wire rack to cool completely. For a fun touch, stack the cookies on a colorful plate and drizzle with melted white chocolate. Add extra blue candies on top for a great look. Enjoy your COOKIE MONSTER COOKIES!!! You can find the full recipe in the previous section! To get the perfect cookie texture, start with softened butter. Soft butter helps the dough mix well. Cream it with sugars until fluffy. This step adds air, making cookies light. Use the right flour amount. Too much can make cookies dry. Use a spoon to fill your measuring cup, then level it off. To keep cookies soft and chewy, underbake them slightly. Remove the cookies when edges turn golden but centers look soft. They will firm up as they cool. For a fun presentation, stack the cookies on a colorful plate. Drizzle melted white chocolate on top for a sweet touch. Add more blue chocolate candies on the cookies. This boosts the Cookie Monster theme and adds color. For extra flair, use fun cupcake liners to serve them. Each cookie becomes a treat that kids and adults will love. Explore more ideas in the Full Recipe for other fun ways to present your Cookie Monster cookies! {{image_2}} You can change the flavors of your COOKIE MONSTER COOKIES!!! to keep things fun. Try adding different candies or nuts. For example, swap the blue chocolate candies for peanut butter cups or butterscotch chips. Add chopped nuts like walnuts or pecans for a crunchy surprise. Experimenting with extracts can also boost flavor. Besides vanilla, try almond extract for a nutty taste. Just a little can change the whole cookie. You can mix and match these ideas to create your dream cookie! Themed cookies make any occasion special. For Halloween, create Cookie Monster Halloween cookies. Use orange and black candies instead of blue ones. You can also add spooky decorations like edible eyes or ghost shapes. If you want to serve cookies at a party, try mini cookie versions. They are cute and easy to eat. Just scoop smaller amounts of dough and bake them for a shorter time. Everyone will love these fun bites! For the full recipe, check out the detailed instructions above and start baking! To keep your Cookie Monster cookies fresh, use an airtight container. Place parchment paper between layers to prevent sticking. Store at room temperature for up to one week. If you want to keep them longer, freezing is a great option. To freeze your cookies, let them cool completely first. Then, arrange them in a single layer on a baking sheet. Freeze for about an hour. Once firm, place them in a freezer-safe bag or container. They can last up to three months in the freezer. For the best taste and texture, enjoy your cookies within a week. If stored properly, they will remain soft and tasty. Look for signs of staleness, like a dry texture or crumbly edges. If you see any mold or an off smell, it’s time to toss them out. Always remember, it’s better to be safe than sorry when it comes to food! How to make COOKIE MONSTER COOKIES!!! from scratch? To make COOKIE MONSTER COOKIES!!! from scratch, follow these simple steps. First, gather your ingredients. You need butter, sugars, eggs, vanilla, flour, baking soda, salt, blue chocolate candies, chocolate chips, and crushed Oreos. Mix the butter and sugars until fluffy. Then add eggs and vanilla. In another bowl, whisk flour, baking soda, and salt. Combine both mixtures and fold in the candies and Oreos. Scoop dough onto a baking sheet and bake at 350°F for 10-12 minutes. Check the [Full Recipe] for all the details. Can I use regular chocolate chips instead of blue chocolate candies? Yes, you can use regular chocolate chips. They will taste great too! However, the blue candies give a fun Cookie Monster look. If you want a more colorful cookie, mix in both blue candies and chocolate chips. Why are my cookies spreading too much during baking? Cookies can spread too much for a few reasons. If your butter is too warm, the cookies may spread. Also, using too little flour can cause spreading. Make sure to measure your flour correctly. Chill the dough for 30 minutes for thicker cookies. What’s the best way to decorate COOKIE MONSTER COOKIES!!!? To decorate COOKIE MONSTER COOKIES!!!, stack them on a bright plate. Drizzle with melted white chocolate for a nice touch. Add more blue candies on top for fun eyes. You could also use small chocolate pieces for pupils. This makes your cookies look extra special! You can now make fun Cookie Monster cookies at home. We covered key ingredients and substitutions for those with dietary needs. I shared step-by-step instructions, baking tips, and creative ideas for presentation. Plus, we explored flavor variations and storage methods to keep your treats fresh. Remember, experimenting is part of the fun. So, gather your ingredients and start baking these tasty cookies. They'll be a hit at any gathering!
COOKIE MONSTER COOKIES!!! Delightful and Fun Treats
Are you ready to bake some fun? These COOKIE MONSTER COOKIES!!! are the perfect treat for kids and adults alike. With vibrant blue candies and
To create a Quick Italian Cream Cake, you will need the following ingredients: - 1 ½ cups all-purpose flour - 1 cup sugar - 1 teaspoon baking powder - ½ teaspoon baking soda - ½ teaspoon salt - ½ cup unsalted butter, softened - 1 cup buttermilk - 3 large eggs - 1 teaspoon vanilla extract - ½ cup shredded sweetened coconut - ½ cup chopped pecans - 1 cup heavy cream - ¼ cup confectioners’ sugar - 1 teaspoon vanilla extract (for whipping cream) - Fresh berries and mint leaves for garnish (optional) These ingredients create a soft and tasty cake. The flour forms the base, while sugar adds sweetness. Baking powder and baking soda help it rise, giving it that light texture. Using unsalted butter adds richness, while buttermilk keeps it moist. Eggs bind everything together. The vanilla extract adds great flavor. Shredded coconut and pecans give it a unique twist. For the whipped cream, heavy cream and confectioners' sugar make it light and sweet. The extra vanilla in the whipped cream offers a nice touch. Feel free to add fresh berries or mint leaves on top for a lovely finish. This cake is simple yet full of flavor. You can find the full recipe for more details. Set your oven temperature to 350°F (175°C). This is the perfect heat for baking. While the oven warms up, grease and flour two 9-inch round cake pans. This helps the cake slide out easily once it is baked. Start by combining the dry ingredients. In a medium bowl, whisk together 1 ½ cups of all-purpose flour, 1 teaspoon of baking powder, ½ teaspoon of baking soda, and ½ teaspoon of salt. Set this bowl aside. In a large mixing bowl, cream together ½ cup of softened unsalted butter and 1 cup of sugar. Beat them until the mixture is light and fluffy. This should take about 2-3 minutes. Next, add the eggs, one at a time. Mix well after adding each egg. Then, stir in 1 teaspoon of vanilla extract. Gradually add the dry flour mixture into the butter mixture. Alternate this with 1 cup of buttermilk. Start and end with the dry ingredients. Mix until just combined. Finally, fold in ½ cup of shredded sweetened coconut and ½ cup of chopped pecans until you see an even mix. Divide the batter evenly between the prepared cake pans. Smooth the tops with a spatula. Bake for 25-30 minutes. To check if your cakes are done, insert a toothpick into the center. If it comes out clean, they are ready. Let the cakes cool in the pans for 10 minutes. After that, transfer them to a wire rack to cool completely. - Using premade whipped cream: If you are short on time, use store-bought whipped cream. It saves time and tastes great. Just spread it between the cake layers and on top. - Substituting ingredients: You can use a box cake mix instead of making the batter from scratch. Just add the coconut and pecans as directed in the recipe. - Tips for mixing techniques: Mix the butter and sugar until light. This step adds air to your cake. When adding dry and wet ingredients, stir gently. Do not overmix. - Importance of room temperature ingredients: Use room temperature butter and eggs for the best results. They mix better and help create a light texture. Let your eggs sit out for about 30 minutes before using. This cake is simple and full of flavor. For the full recipe, check out the instructions above. {{image_2}} You can make Quick Italian Cream Cake even more fun by adding flavors. Try using different extracts like almond or citrus. Almond extract gives a nutty taste, while citrus adds a fresh zing. Both can change the cake's character and make it unique. You can also add spices like cinnamon or nutmeg. These spices bring warmth and depth to the cake. Just a pinch can make a big difference. Experiment with what you like! If you need to change some ingredients, that's easy! You can use gluten-free flour instead of all-purpose flour. Many great blends work well in cakes. Look for ones that say they’re good for baking. For a dairy-free option, you can swap buttermilk with almond milk or coconut milk. You can add a splash of vinegar to make it tangy. For the whipped cream, coconut cream is a great substitute. It whips up nicely and tastes amazing! To keep your Quick Italian Cream Cake fresh, you have two great options. You can store it in an airtight container. This method helps keep moisture in and stops the cake from drying out. If you don’t have a container, you can cover it with plastic wrap. This also works well to seal in freshness. When it comes to the whipped cream, you should keep it in the fridge. If you leave it out, it can spoil quickly. Store it in a separate container. This way, it stays fluffy and tasty for longer. If you want to save some cake for later, freezing is a good idea. The best way to freeze cake layers is to wrap each layer in plastic wrap. Then, put them in a freezer bag. Label the bag with the date so you know when you froze it. This keeps the cake fresh for up to three months. When you are ready to eat your cake, take it out of the freezer. Let it thaw in the fridge for several hours or overnight. If you want to warm it up, you can use the oven. Preheat it to 350°F (175°C) and heat the cake for about 10-15 minutes. This step makes it taste fresh again! Enjoy your delicious treat! For the full recipe, check out the earlier section. Yes, you can make this cake ahead of time. Bake the cake layers and let them cool completely. Wrap each layer in plastic wrap. Store them in the fridge for up to three days. If you want to keep them longer, freeze them for up to three months. Thaw the layers in the fridge before frosting. To check if the cake is done, look for a few signs. The cake should be golden brown and spring back when you touch it lightly. A toothpick inserted in the center should come out clean. If it has wet batter, bake it a few more minutes. If you don't have buttermilk, you can make a simple substitute. Mix 1 cup of milk with 1 tablespoon of lemon juice or white vinegar. Let it sit for about five minutes. This makes a good stand-in for buttermilk. You can also use plain yogurt or sour cream mixed with a little water. This blog post covered the key ingredients and steps to bake a delicious cake. We also shared tips for texture and quick shortcuts. Variations offered exciting flavors and dietary options. Finally, we discussed how to store and freeze your cake. Now, you can confidently create your own tasty cake, knowing the essential details. Enjoy experimenting with flavors and techniques! Your baking skills will surely impress everyone.
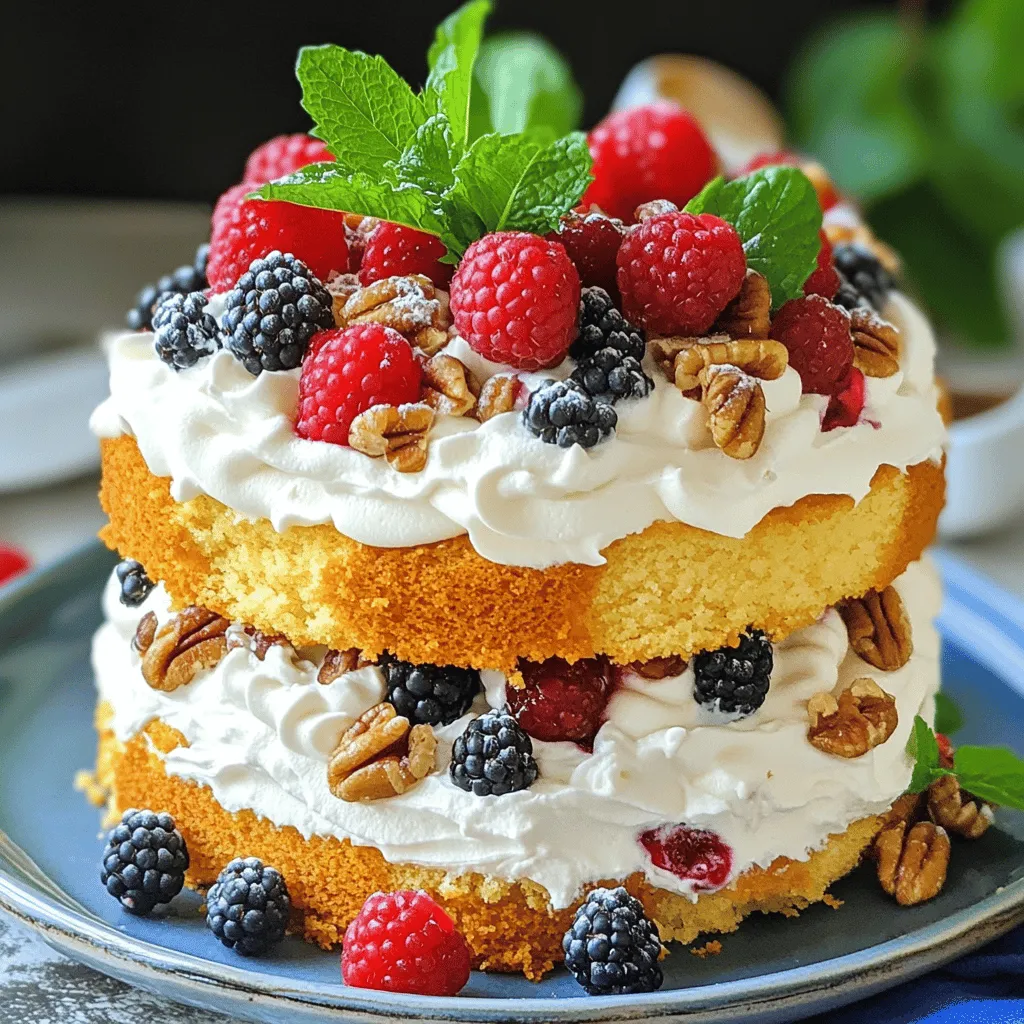
Quick Italian Cream Cake Simple and Flavorful Recipe
Looking for a quick and tasty dessert? You’ll love this Quick Italian Cream Cake! It’s simple to make and packed with rich flavors like coconut
- 1 package (14-16 Oreo cookies, crushed) - 4 tablespoons unsalted butter, melted - 16 ounces cream cheese, softened - 1 cup powdered sugar - 1 teaspoon vanilla extract - 2 cups heavy whipping cream - 12 Oreo cookies, finely crushed for topping - Chocolate syrup (optional for drizzling) - Mixing bowls - Hand mixer - Measuring cups and spoons - Individual cups or jars Gather these ingredients before you start. Each item plays a vital role in creating your Oreo no-bake cheesecake cups. The crushed Oreos provide a rich, chocolatey crust. The cream cheese gives the filling that creamy texture we love. You will need to melt the butter. This helps the cookie crumbs stick together. Make sure the cream cheese is softened. It blends easier and makes the filling smooth. The heavy cream is key for that light, fluffy texture. For the best results, use a hand mixer. It makes it easy to beat the cream cheese and whip the cream. Individual cups or jars are great for serving. They make each dessert look lovely and ready to enjoy. If you want to add a twist, consider the optional chocolate syrup. It makes a great drizzle and adds extra sweetness. Trust me, these little details can elevate your dessert. For the full recipe, check out the complete guide. Enjoy the fun of making this easy dessert delight! To start, gather your crushed Oreo cookies and melted butter. In a medium bowl, combine them well. You want the crumbs fully coated in butter. Next, divide this mixture into individual cups or jars. Press the crumbs down gently to create a solid base. This crust sets the stage for your cheesecake filling. Now, let’s make the filling. In a large mixing bowl, beat the softened cream cheese with a hand mixer. Your goal is to have it smooth and creamy. Slowly add the powdered sugar and vanilla extract. Keep mixing until everything is well blended. This step is key for a sweet, rich flavor. Once your crust is ready, remove the cups from the fridge. Spoon the cheesecake filling over the crust, filling each cup nearly to the top. This creates a lovely layer of creamy goodness. Finish off by sprinkling finely crushed Oreo cookies on top. This adds texture and extra Oreo flavor. Now, it’s time to chill. Cover the cups and place them in the fridge for at least 4 hours. This helps the filling set perfectly. For a fun twist, consider drizzling chocolate syrup just before you serve. It adds a delicious touch that everyone will love. Enjoy the tasty treat! For the full recipe, check out the [Full Recipe]. To get the best cheesecake, you must start with softened cream cheese. If it's too cold, it will not mix well. You want a smooth and creamy mixture. When you whip the heavy cream, make sure to get stiff peaks. Then, gently fold the whipped cream into the cream cheese mixture. This keeps it light and fluffy. A beautiful dessert is a joy to see. Use garnishes like a dollop of whipped cream and a half Oreo on top of each cup. This adds a nice touch. For serving, place the cups on a decorative platter. This makes your dessert stand out even more. If you find the cheesecake too sweet, you can adjust it. Simply lower the amount of powdered sugar. Taste as you go. You can also use less sweet toppings, like fresh fruit or dark chocolate. This way, you can create a balance that suits your taste. {{image_2}} You can change the flavor of your cheesecake cups easily. Try adding a tablespoon of cocoa powder for a richer taste. This small addition can give you a chocolate twist that is hard to resist! You can also experiment with flavored extracts. Almond extract can bring a nice nutty flavor to your cups. Just a little can make a big difference. Toppings can change the whole look and taste of your dessert. Instead of just using more Oreos, you can use crushed candies or fresh fruit. Think about strawberries or raspberries for a fruity touch. Drizzling caramel or berry sauce on top can add a sweet, sticky element. This gives your cheesecake cups a fun and unique style. If you need gluten-free options, it’s easy to adapt this recipe. Simply substitute regular Oreos with gluten-free versions. These cookies taste just as good and keep the right texture. For drizzling, you can use gluten-free melted chocolate. This way, everyone can enjoy these tasty treats without worry. For the full recipe, check the detailed instructions above. Keep your Oreo no-bake cheesecake cups covered in the refrigerator. They stay fresh for up to 3 days. Use an airtight container to keep them safe from other smells. This way, you enjoy every last bite of that creamy goodness. Can the cheesecake cups be frozen? Yes, you can! They freeze well for up to 2 months. To enjoy them later, just thaw in the fridge before serving. This keeps the texture smooth and creamy, just like when you made them fresh. Yes, but it may alter the texture slightly. Low-fat cream cheese can make the filling less rich. If you want a lighter dessert, this is a good choice. They are best consumed within 3 days if stored properly. Keep them in the fridge, covered well. This helps maintain their fresh taste and creamy texture. Yes, substitute dairy ingredients with non-dairy equivalents. Use vegan cream cheese and non-dairy whipped cream. This way, you can enjoy these delicious cups without dairy! This blog post shared a simple recipe for delicious Oreo cheesecake cups. We covered the ingredients, equipment, and easy step-by-step instructions. You learned tips for perfecting texture, presentation ideas, and ways to reduce sweetness. I introduced tasty variations, including alternative toppings and gluten-free options. Finally, we discussed storage tips to keep your treats fresh. Enjoy making these cups for your next gathering. They are sure to impress!
Oreo No-Bake Cheesecake Cups Easy Dessert Delight
If you’re craving a sweet treat without the fuss, you’re in luck! These Oreo No-Bake Cheesecake Cups are easy to make and oh-so-delicious. I’ll guide
These cupcakes need fresh flavors. Here’s what you will need: - 1 ½ cups all-purpose flour - 1 cup granulated sugar - ½ teaspoon baking powder - ½ teaspoon baking soda - ¼ teaspoon salt - ½ cup unsalted butter, softened - 2 large eggs - 1 teaspoon vanilla extract - ½ cup sour cream - 1 cup fresh peaches, diced - 4 oz cream cheese, softened - ⅓ cup honey - 1 teaspoon ground cinnamon Each ingredient plays a role. The flour gives structure. The sugar adds sweetness. Butter brings moisture and richness. Eggs help bind everything together. The peaches provide a juicy burst. If you need to change some ingredients, here are some ideas: - Use whole wheat flour for a healthier choice. - Swap granulated sugar for brown sugar for a richer taste. - You can use Greek yogurt instead of sour cream. - If you do not have fresh peaches, canned peaches work too. Make sure to adjust the amounts if you change any item. The texture might change, but the taste will still be delightful. To make your cupcakes even more special, consider these garnishes: - A slice of fresh peach on top. - A drizzle of honey for extra sweetness. - A sprinkle of ground cinnamon for a warm spice note. These small touches add beauty and flavor. They make your Honey Peach Cream Cheese Cupcakes shine even more. Enjoy every bite! For the full recipe, check the details above. First, preheat your oven to 350°F (175°C). This step is key for even baking. Next, take a 12-cup muffin tin and line it with cupcake liners. This makes for easy removal and clean-up after baking. In a large mixing bowl, combine the dry ingredients. Whisk together 1 ½ cups of all-purpose flour, ½ teaspoon baking powder, ½ teaspoon baking soda, and ¼ teaspoon salt. This mix gives the cupcakes their structure. Set this bowl aside for later use. Now, take another bowl for the wet ingredients. Start by creaming ½ cup of softened butter and 1 cup of granulated sugar. Use an electric mixer on medium speed. Mix for about 3-4 minutes until the mixture looks light and fluffy. This step adds air, which helps make the cupcakes rise. Next, add 2 large eggs, one at a time, mixing well after each. Then, mix in 1 teaspoon of vanilla extract and ½ cup of sour cream. Blend until smooth. Gradually add the dry mix to the wet mix. Stir until just combined. Be careful not to over-mix; this keeps the cupcakes light. Gently fold in 1 cup of diced peaches and a sprinkle of 1 teaspoon ground cinnamon. Use a spatula to make sure they are even. Fill each cupcake liner about 2/3 full with the batter. Bake in the preheated oven for 18-20 minutes. To check if they are done, insert a toothpick in the center. It should come out clean. Once baked, let them cool before adding frosting. For the full recipe, check below. To make your cupcakes light and fluffy, start with room temperature butter and eggs. This helps them blend well. When you cream the butter and sugar, mix until it is pale and fluffy. This can take about 3-4 minutes. Avoid over-mixing the batter after adding flour. Just mix until everything is combined. This keeps the cupcakes tender. When adding peaches, be gentle. Use a spatula to fold them in. This keeps the peaches from breaking apart. If you want a peachy surprise in every bite, make sure they are evenly spread. Don't stir too hard; you want to keep that fluffy batter intact. For the frosting, use softened cream cheese. This makes it smooth and easy to spread. Mix the cream cheese and honey until creamy. If you want a thicker frosting, add more cream cheese. For a fun twist, add a pinch of cinnamon to the mix. It pairs well with the peach flavor. Once the cupcakes cool, frost them generously. You can use a piping bag for a fancy look. For the best taste, frost just before serving. Check out the Full Recipe for more tips! {{image_2}} You can add fun flavors to your cupcakes. Nuts like walnuts or pecans bring a nice crunch. Spices like nutmeg or ginger can add warmth and depth. Try mixing in chocolate chips for a sweet twist. Each addition can change the flavor and texture. Experiment until you find your favorite combo! The honey cream cheese frosting is tasty, but feel free to mix it up. Whipped cream gives a light, airy touch. You can also use flavored creams, like vanilla or almond, to enhance the taste. For a fruity twist, try adding peach puree to your frosting. Each option opens up new flavor paths. You can make these cupcakes fit different diets. For gluten-free cupcakes, swap all-purpose flour with a gluten-free blend. Make sure the blend has a good structure for baking. If you need a vegan option, replace eggs with flax eggs or applesauce. Use vegan butter and cream cheese for the frosting. These tweaks keep flavor while meeting your needs. For the Full Recipe, check out the steps to make these delightful treats! To keep your leftover Honey Peach Cream Cheese Cupcakes fresh, store them in an airtight container. This helps lock in moisture. You can keep them at room temperature for one day. If you need more time, place them in the fridge for up to five days. Just remember, the frosting may firm up in the fridge. If you have extra cupcakes, freezing is a great option. First, let the cupcakes cool completely. Then, wrap each cupcake tightly in plastic wrap. Place them in a freezer-safe bag or container. You can freeze them for up to three months. To enjoy, thaw them overnight in the fridge before serving. Frosted cupcakes need special care. To keep your frosted Honey Peach Cream Cheese Cupcakes fresh, store them in the fridge. Use an airtight container to avoid drying. If you want to freeze frosted cupcakes, place them in the freezer for a few hours until the frosting sets. After that, wrap them carefully, as mentioned above. This way, your cupcakes stay tasty and pretty! To make your cupcakes sweeter, you can add more honey or sugar. Try using 1/3 cup of honey in the cream cheese frosting. You can also sprinkle extra sugar on top, right before baking. This extra touch caramelizes and gives a nice crunch. Yes, you can use canned peaches. Just make sure to drain them well. Canned peaches can be softer, so chop them into small pieces. This will help them blend in better with the batter. Fresh peaches do have a brighter flavor, so keep that in mind. For decoration, pipe the honey cream cheese frosting high on each cupcake. You can add a slice of fresh peach on top. A drizzle of honey adds shine and taste. For a fun touch, sprinkle some cinnamon on top for warmth and flavor. These cupcakes stay fresh for about 3 to 4 days in the fridge. Keep them in an airtight container to keep them moist. If you want to keep them longer, you can freeze them. Just place them in a freezer-safe container or wrap them well. For the full recipe, check out the ingredients and instructions above. It’s simple and fun to make! You learned how to make Honey Peach Cream Cheese Cupcakes. We covered ingredients, measurements, and tips for baking. I shared ways to store your treats and answered some common questions. These cupcakes are delicious and versatile. You can mix flavors and adjust for dietary needs. With practice, you'll perfect this sweet treat. Enjoy baking, and share them with friends!
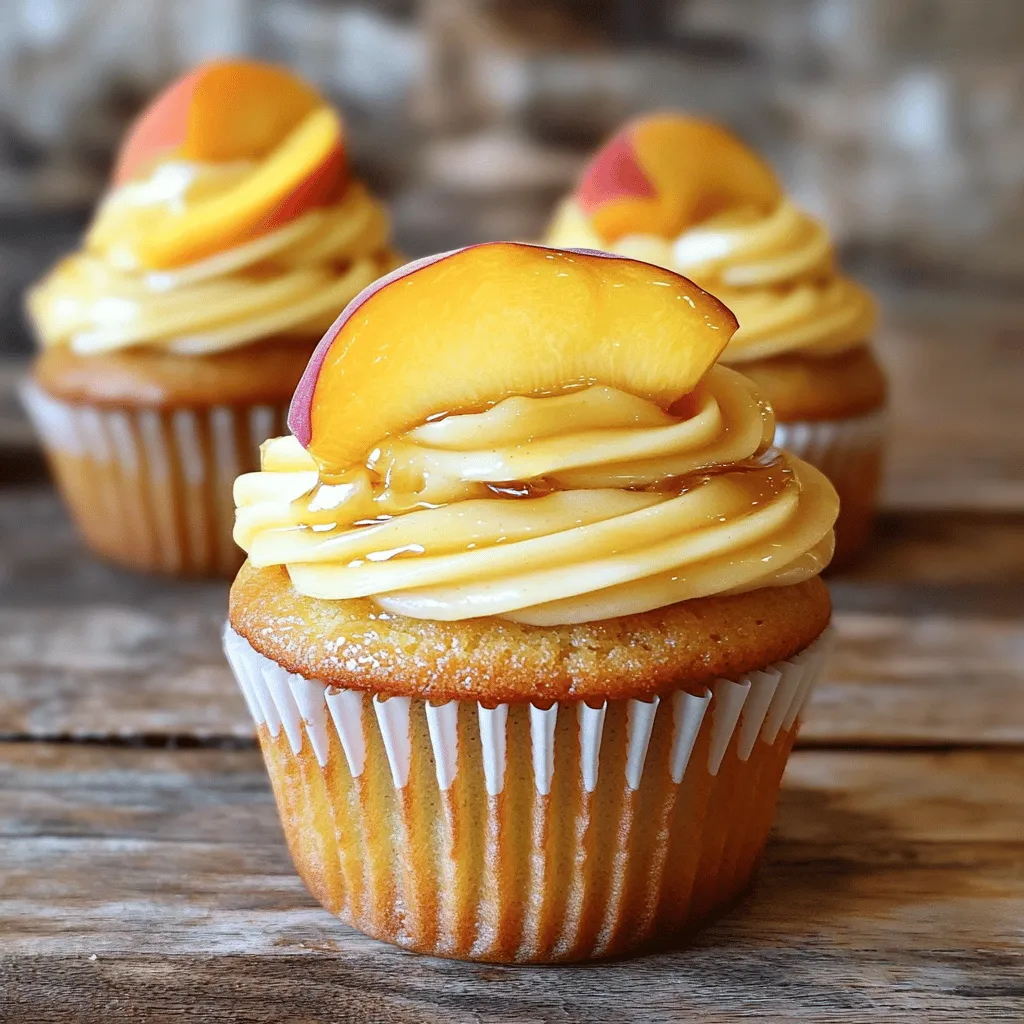
Honey Peach Cream Cheese Cupcakes Delightful Treat
Get ready to indulge in a flavor explosion! My Honey Peach Cream Cheese Cupcakes are a delightful treat perfect for any celebration. These sweet, fluffy
To make the perfect chocolate cake base, gather these simple ingredients: - 1 cup all-purpose flour - 1 cup granulated sugar - 1/2 cup unsweetened cocoa powder - 1/2 teaspoon baking powder - 1/2 teaspoon baking soda - 1/4 teaspoon salt - 1/2 cup unsalted butter, melted - 2 large eggs - 1/2 cup whole milk - 1 teaspoon vanilla extract These ingredients come together to create a rich and moist base. The cocoa powder gives it that deep chocolate flavor. The mousse layers are the stars of this cake. You will need: - 4 ounces dark chocolate (70% cocoa), chopped - 4 ounces milk chocolate, chopped - 4 ounces white chocolate, chopped - 3 cups heavy whipping cream - 3 tablespoons powdered sugar - 1 teaspoon vanilla extract Each chocolate layer brings its unique taste. The dark chocolate is bold, while the milk chocolate is creamy. The white chocolate adds sweetness and lightness. To make your cake look even better, consider these garnish options: - Chocolate shavings or curls - Whipped cream (optional) - Fresh berries (optional) These garnishes not only add beauty but also extra flavor. Fresh berries can cut through the richness. You can find the full recipe for this delightful treat with all the steps to make it perfect. Start by preheating your oven to 350°F (175°C). Grease and flour a 9-inch round cake pan. In a big bowl, mix the flour, sugar, cocoa powder, baking powder, baking soda, and salt. This blend gives your cake a rich chocolate taste. In another bowl, combine melted butter, eggs, milk, and vanilla. Mix the wet ingredients into the dry ones until they just come together. Don’t overmix! Pour this batter into your prepared pan. Bake for 25 to 30 minutes. To check if it's done, insert a toothpick. If it comes out clean, your cake is ready. Let it cool completely before moving on. For the dark chocolate mousse, place your dark chocolate in a bowl over simmering water. This method helps it melt smoothly. Stir until it’s fully melted. In a separate bowl, whip 1 cup of heavy cream until it forms soft peaks. Add 1 tablespoon of powdered sugar and the vanilla extract. Gently fold the whipped cream into the melted chocolate. Be careful not to deflate the cream. Once mixed, set it aside in the refrigerator to firm up. After your cake has cooled, place it on a serving plate. Start with the dark chocolate mousse. Spoon it over the top and spread it evenly. Next, layer the milk chocolate mousse on top. Finally, add the white chocolate mousse. Each layer adds a different flavor and texture. Refrigerate the cake for at least 4 hours, or overnight if you can wait. This chilling time lets all the layers set perfectly. When ready, garnish with chocolate shavings or curls, fresh berries, and whipped cream if you like. This cake is sure to impress at any gathering. For the complete recipe, check the [Full Recipe]. To get the best mousse texture, use cold cream. Cold cream whips better and faster. Start by whipping each cream until soft peaks form. Be gentle when folding the chocolate into the cream. This keeps the mousse light and airy. If you overmix, the mousse will be dense. Chill each layer before adding the next. This helps the layers stay separate and firm. When baking the cake, use room temperature ingredients. This helps them mix well. Grease and flour your cake pan to avoid sticking. Check your cake at the 25-minute mark. Use a toothpick to test doneness. If it comes out clean, your cake is ready. Let the cake cool completely in the pan before removing it. This prevents breakage and keeps the shape. For a stunning presentation, use a cake stand. Add a touch of elegance when serving. Decorate the top with chocolate shavings or curls. Fresh berries add color and flavor. You can also pipe some whipped cream for a fancy look. Slice the cake with a warm knife for clean edges. Serve with a side of extra berries or whipped cream for fun! {{image_2}} You can easily change the flavors in your triple chocolate mousse cake. Try adding a splash of espresso to the chocolate mousse. This gives it a rich coffee flavor. You can also use flavored extracts, like almond or orange, in the mousse layers. This small change makes a big impact. If you love fruit, mix in some pureed raspberries or strawberries. They add a refreshing twist to the cake. Want a lighter version? Swap the heavy cream for coconut cream. It still gives a rich texture but with fewer calories. You can also use unsweetened applesauce instead of some butter in the cake base. This keeps moisture while cutting fat. Use dark chocolate with a higher cocoa content. It has less sugar and more health benefits. These substitutions keep the taste while making it better for you. Get creative with your garnishes! Instead of chocolate shavings, try crushed nuts. Almonds or hazelnuts add a nice crunch. You can also use mint leaves for a fresh look. Fresh fruit like berries or sliced kiwi brightens up the dessert. You could drizzle some caramel or chocolate sauce over the top for extra sweetness. Each garnish can change the look and feel of your cake. For the Full Recipe, check out the main article. Enjoy experimenting with these fun variations! To keep your Triple Chocolate Mousse Cake fresh, store it in the fridge. Place it in an airtight container. This helps to lock in moisture and flavor. If you can, cover the top with plastic wrap. This avoids any unwanted odors from other foods. When stored properly, this cake lasts about 3 to 4 days in the fridge. After that, the mousse layers may start to lose their fluffiness. If you notice any changes in texture or smell, it’s best to discard it. Yes, you can freeze this cake! First, let it cool completely. Cut it into slices for easier thawing later. Wrap each slice tightly in plastic wrap. Then, place them in a freezer-safe bag or container. This keeps the cake fresh for up to 2 months. When you're ready to enjoy, thaw it in the fridge overnight. For all the details on making this dessert, check the Full Recipe. Yes, you can use different types of chocolate. Each type gives a unique taste. Dark chocolate adds deep flavor, while milk chocolate offers sweetness. White chocolate brings creaminess. Feel free to mix or match! Just keep the same amounts for each type. This flexibility allows you to personalize your cake. To check if the cake is done, use a toothpick. Insert it into the center of the cake. If it comes out clean, the cake is ready. If it has wet batter on it, bake a little longer. The edges should slightly pull away from the pan. This tells you the cake is cooked through. Yes, you can make this dessert in advance. The cake and mousse layers store well. Make the cake and mousse a day ahead. Just assemble them before serving. Refrigerate the cake to keep it fresh. This gives the flavors more time to blend, enhancing the taste. You’ll impress your guests with this make-ahead treat! For the detailed recipe, check the Full Recipe. This blog post covered how to create a rich chocolate mousse cake. We explored the key ingredients, steps, and expert tips to get the best results. You learned how to prepare the cake base, make the mousse, and assemble it all. Plus, we shared storage tips and ways to enhance the flavors. The tips will help you enjoy your cake longer. Use these ideas to impress friends and family. Now, get baking and savor every bite of your sweet creation!
Triple Chocolate Mousse Cake Decadent and Rich Dessert
If you crave a rich dessert that delights at every bite, the Triple Chocolate Mousse Cake is for you. I will guide you through each
To make this delightful treat, you need a few key ingredients. Here’s what you will need: - 1 package (8 oz) cream cheese, softened - 1/4 cup granulated sugar - 1/2 teaspoon vanilla extract - 1 tablespoon lemon juice - 1 package (1 lb) refrigerated crescent dough - 1 egg, beaten (for egg wash) - 1/4 cup powdered sugar (for drizzling) - Fresh berries (raspberries, blueberries, or strawberries) for garnish - Optional: 1/2 teaspoon almond extract for added flavor These ingredients create a creamy filling and a flaky crust that make the Danish irresistible. If you don’t have a few of the main ingredients, don’t worry! You can easily substitute them: - Cream cheese: Use mascarpone or ricotta cheese for a different texture. - Granulated sugar: Brown sugar or coconut sugar works well too. - Vanilla extract: Use almond extract or maple syrup for a unique twist. - Crescent dough: You can use puff pastry if you prefer a different dough. These swaps keep the recipe flexible while still tasting great. To take your cheesecake Danish to the next level, consider adding some fun extras: - Fruit: Mix in chopped fruits like peaches or cherries into the cream cheese filling. - Spices: A pinch of cinnamon or nutmeg adds warmth and depth. - Chocolate: Swirl in melted chocolate for a decadent touch. These add-ins make your Danish even more enjoyable and unique. For the full recipe, check out the complete instructions above. To make the cheesecake filling, start by gathering your ingredients. You will need cream cheese, granulated sugar, vanilla extract, lemon juice, and optional almond extract. 1. Mix Ingredients: In a bowl, add the softened cream cheese. Then, add the granulated sugar, vanilla extract, lemon juice, and almond extract if you want extra flavor. 2. Beat Until Smooth: Use a hand mixer to blend these together. Mix until the filling is smooth and creamy. Make sure there are no lumps left. This filling is the heart of the cheesecake danish. It adds that rich and tangy flavor we all love. Shaping your danish is fun and simple. Follow these steps for perfect pastries: 1. Prepare Dough: Open the refrigerated crescent dough package. Unroll it on a clean surface. 2. Cut into Rectangles: Separate the dough into four rectangles. Each rectangle uses two triangles. Pinch the seams to seal them. Flatten the rectangles slightly with your hands or a rolling pin. 3. Add Filling: Spoon two tablespoons of your cream cheese filling into the center of each rectangle. Leave about an inch around the edges. 4. Fold and Seal: Fold the edges over the filling to create a square. Pinch the seams tightly to keep the filling inside. 5. Brush with Egg: Brush the tops of your danishes with the beaten egg. This gives them that golden finish. 6. Bake: Place them on a lined baking sheet and bake in a preheated oven at 375°F (190°C) for about 12-15 minutes. Watch for a golden brown color. Baking them gives a lovely crisp texture that pairs well with the creamy filling. Now that your danishes are baked and cooled, it’s time to serve them up! - Drizzle Icing: In a small bowl, mix powdered sugar with a bit of water to create a light icing. Drizzle this over the cooled danishes. - Add Fresh Berries: Top each danish with fresh berries like raspberries, blueberries, or strawberries. They add a nice pop of color and flavor. - Serve Warm or Cold: You can serve these danishes warm or at room temperature. They taste great either way! For the full recipe, check out the ingredients and instructions above. Enjoy your delightful creation! If your pastry turns out tough, you may have overworked the dough. Always handle it gently. If your danish leaks filling, ensure you seal the edges well. A bit of egg wash can help hold things together. If they puff too much, reduce the oven temperature slightly. To get a flaky dough, keep everything cold. Use chilled cream cheese and butter. When rolling out the dough, do it quickly. Avoid warming it with your hands. Also, make sure to fold the dough over itself a few times. This creates layers for that perfect flakiness. You can boost the flavor of your danish easily. Add zest from a lemon or orange to the cream cheese mix. This adds a fresh taste. A dash of almond extract gives a nice touch too. Top your danish with fresh berries for added sweetness and color. You can also drizzle some honey for extra richness. For the complete recipe, check out the Full Recipe. {{image_2}} You can change the fruit on top of your cheesecake Danish to fit your taste. Fresh berries are a great choice. Try raspberries for a tart touch. Blueberries add sweetness, while strawberries give a classic flavor. You can also mix fruits for a colorful twist. Consider using peaches or cherries for a summer vibe. Each fruit brings a different taste and texture, making your Danish unique. While crescent dough works well, you can try other dough types too. Puff pastry creates a flaky and buttery base. You can also use phyllo dough for a lighter option. This will give your Danish a crunchy texture. If you prefer a more wholesome choice, consider whole wheat dough. Each dough type adds its own charm to the dish. You can make your cheesecake Danish vegan or gluten-free with a few simple swaps. For a vegan version, use silken tofu instead of cream cheese. Add a bit of nutritional yeast for a cheesy flavor. You can also use coconut cream for richness. For gluten-free, choose gluten-free dough or make your own from almond flour. These adaptations let everyone enjoy this treat without missing out. Check out the Full Recipe to explore all the delicious ways to enjoy your cheesecake Danish! To keep your cheesecake danish fresh, place it in an airtight container. Store it in the fridge for up to three days. If you leave it out, it may dry out or get stale. Always let it cool completely before sealing it up. This keeps the texture nice and creamy. When you want to enjoy your leftover danish, reheating is easy. Preheat your oven to 350°F (175°C). Place the danish on a baking sheet. Heat for about 5-7 minutes. This warms it through and keeps the pastry crisp. You can also use a microwave if you're short on time. Heat it for about 10-15 seconds. Just be careful not to overdo it, or it might get soggy. Freezing is a great way to save your cheesecake danish for later. Wrap each danish tightly in plastic wrap. Then, place them in a freezer bag or container. They can last up to three months in the freezer. When you want to eat one, thaw it in the fridge overnight. Then, reheat it in the oven for the best taste. Enjoy your delicious treat anytime! For the full recipe, check the earlier section. To make cheesecake Danish from scratch, follow these steps. First, gather your ingredients. You need cream cheese, sugar, vanilla extract, lemon juice, and crescent dough. Combine the cream cheese, sugar, vanilla, and lemon juice in a bowl. Mix until smooth. Unroll the crescent dough and cut it into rectangles. Place the cream cheese mix in the center of each rectangle. Fold the dough over the filling and seal the edges. Brush with egg wash and bake at 375°F for 12-15 minutes. You can find the detailed steps in the Full Recipe. Yes, you can use different types of cheese. Cream cheese is the classic choice, but alternatives exist. Mascarpone adds a rich, creamy taste. Ricotta brings a lighter texture and a slightly grainy feel. Neufchâtel offers a lower-fat option, with a similar taste to cream cheese. Mixing cheeses can create unique flavors. For instance, try blending cream cheese with mascarpone for a richer filling. Experiment and find your favorite combination! The best way to serve cheesecake Danish is warm and fresh from the oven. Allow them to cool slightly before serving. Drizzle with icing made from powdered sugar and water for sweetness. Top with fresh berries like raspberries, blueberries, or strawberries for color and flavor. You can also serve them with a dollop of whipped cream or a scoop of vanilla ice cream. This adds a delightful touch. Enjoy with a cup of coffee or tea for a perfect treat! This blog post covered how to make a delicious cheesecake Danish. We explored essential ingredients, substitutes, and add-ins for flavor. I shared clear steps for prepping, shaping, and baking the pastry. You learned tips for great results, variations to try, and best storage practices. Making this treat can be fun and rewarding. With these tips, you can enjoy tasty cheesecake Danish at home. Start experimenting today!
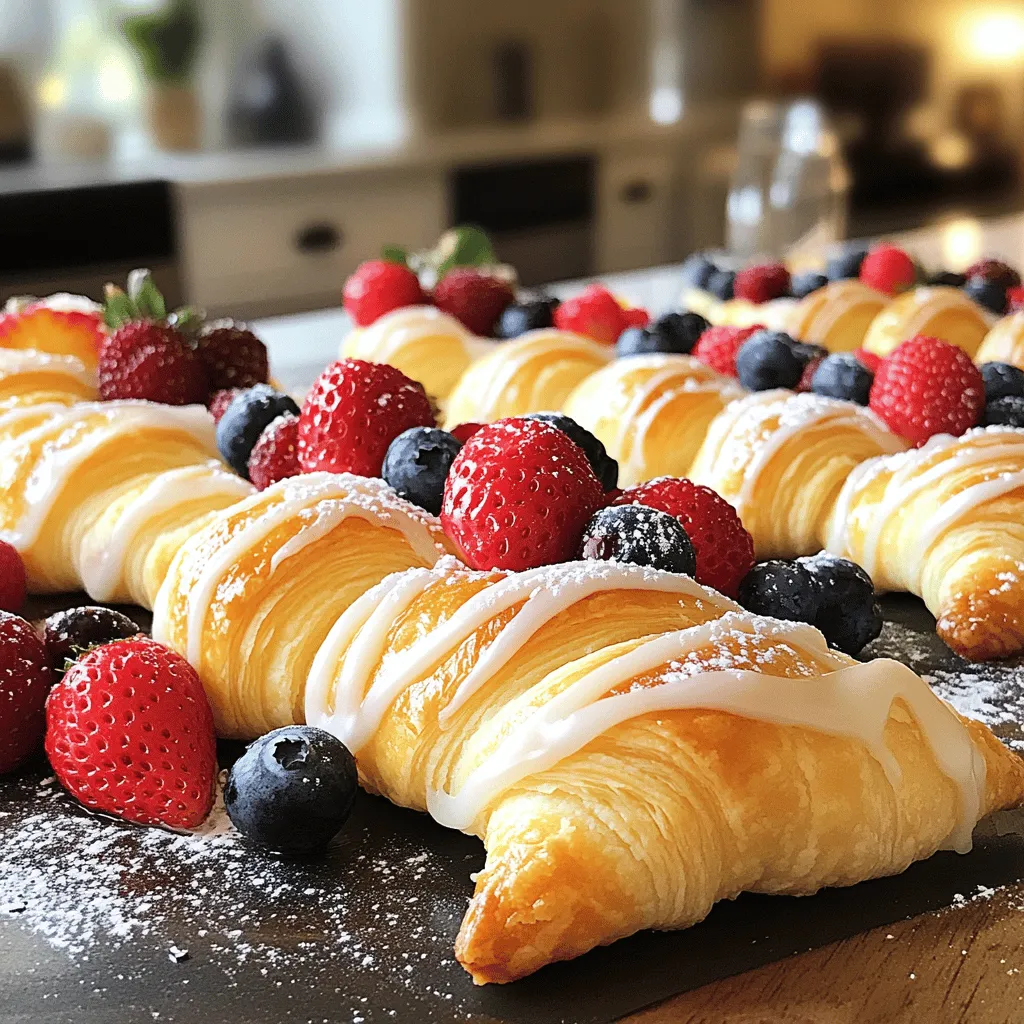
Irresistible Cheesecake Danish Delightful and Easy Recipe
Are you ready to whip up a treat that will impress everyone? This Irresistible Cheesecake Danish is both delightful and easy to make. With creamy
- 1 pre-made graham cracker pie crust - 1 cup chocolate chips (semi-sweet or milk chocolate) - 1 cup mini marshmallows - 1/2 cup heavy cream - 1/4 cup powdered sugar - 1 teaspoon vanilla extract - 1/4 cup crushed graham crackers (for topping) - Optional garnishes: chocolate shavings, additional mini marshmallows The main ingredients for Easy S'mores Pie are simple and easy to find. The graham cracker pie crust forms a sweet and crunchy base. You can choose either semi-sweet or milk chocolate chips for the filling. I love mini marshmallows for their soft texture and sweet flavor. For the additional ingredients, powdered sugar adds sweetness, while vanilla extract boosts flavor. Crushed graham crackers on top give a nice crunch. You can also add chocolate shavings or extra mini marshmallows for a fun touch. You can find the full recipe for this delicious pie above. - Preheat your oven to 350°F (175°C). - In a medium pot, heat the heavy cream until it simmers. - Stir in the chocolate chips until the mix is smooth. - Pour the chocolate into the graham cracker pie crust. - Scatter mini marshmallows over the chocolate layer. - Place the pie in the oven and bake for 5-7 minutes. - Watch for the marshmallows to turn golden and puffy. - Once baked, cool the pie for 10 minutes on the counter. - In a bowl, whip powdered sugar and vanilla into the remaining heavy cream. - Spread the whipped cream over the pie evenly. - Top with crushed graham crackers for a crunchy finish. For the full recipe, be sure to check the [Full Recipe] section. - Use room temperature ingredients for easier mixing. This helps blend everything smoothly. - Monitor marshmallows closely to prevent burning. They can go from golden to charred quickly. - Slice the pie into wedges for individual servings. It makes sharing easy and fun. - Drizzle with chocolate sauce for an elegant presentation. This adds a nice touch to each slice. - Experiment with flavored chocolate or toppings for a unique twist. Try adding mint or orange zest. - Chill the pie longer for enhanced flavor melding. This step makes the taste even better. For the full recipe, check out the Easy S'mores Pie. {{image_2}} You can change the taste of your Easy S'mores Pie. Here are a couple of fun ideas: - Substitute dark chocolate chips for a richer taste. Dark chocolate adds depth and complexity to the pie. - Incorporate peanut butter or Nutella for a different flavor profile. Both options give a creamy, nutty twist that pairs well with chocolate. If you or your guests have dietary needs, I have options for you: - Use gluten-free graham cracker crust for a gluten-free option. Most stores have gluten-free options that work great. - Consider dairy-free chocolate and cream for a vegan version. This choice makes the pie suitable for those avoiding animal products. You can find the full recipe above, which makes it easy to adapt to any of these variations! - Store in the refrigerator for up to 3 days. - Cover with plastic wrap to keep it fresh. When the pie is in the fridge, it stays cool and tasty. Keeping it covered helps prevent it from drying out. You can slice it before storing if you like. - Freeze for up to 2 months in an airtight container. - Thaw in the refrigerator before serving. If you want to save some pie for later, freezing works great. Just make sure to use a good container. When you are ready to enjoy it again, let it thaw in the fridge overnight. This keeps the flavors intact and makes it just as delicious as the first time. Don’t forget this recipe for your next treat: [Full Recipe]. - Follow the simple step-by-step directions outlined above. Start by melting the heavy cream and chocolate chips. Pour this smooth mix into your graham cracker pie crust. Then, add mini marshmallows on top and bake until golden. - Yes, you can choose semi-sweet, milk, or dark chocolate according to your preference. Each type will give a different taste. Milk chocolate is sweet, while dark adds richness. Semi-sweet is a great middle ground. - You can make a homemade crust or use a cookie crust instead. Consider using crushed cookies like Oreos or vanilla wafers. This swap can add a fun twist to your s'mores pie. This recipe for Easy S'mores Pie takes just a few ingredients and simple steps. You can whip up a tasty treat with chocolate, marshmallows, and a graham cracker crust. Remember, room temperature ingredients help mix well, and keeping an eye on the marshmallows prevents burning. Feel free to explore different flavors or toppings. Whether you enjoy it fresh or frozen, this pie is sure to delight. Enjoy making and sharing this sweet dish with friends and family!
Easy S’mores Pie Delightful and Simple Recipe
Craving a sweet treat that’s quick and easy? You’ll love this Easy S’mores Pie! With just a few simple ingredients and straightforward steps, you can
- 1 cup graham cracker crumbs - 1/4 cup unsalted butter, melted - 2 tablespoons granulated sugar - 16 ounces cream cheese, softened - 1 cup granulated sugar - 3 large eggs - 1/4 cup fresh lemon juice - Zest of 2 lemons - 1 teaspoon vanilla extract - 1/4 teaspoon salt - Powdered sugar, for dusting - Fresh berries, for garnish (optional) Gather these ingredients before you start. This setup makes the cooking process smooth. Each item plays a key role. The graham cracker crumbs form a sweet base. The cream cheese gives the squares their rich and creamy texture. Zesty lemon juice adds a bright, fresh flavor. The eggs help bind everything together. Using fresh lemon juice and zest enhances the taste. It provides a vibrant zing you will love. The vanilla extract adds warmth and depth. Remember to soften your cream cheese. This step helps achieve a smooth filling. If you want a sweet finish, use powdered sugar for dusting. Fresh berries can add a lovely touch. They make the dish look more inviting. You can find the full recipe at the end. Enjoy the fun of making these tasty lemon cheesecake squares! First, preheat your oven to 325°F (160°C). This step ensures even baking. Next, prepare an 8x8-inch square baking pan. Grease it well and line it with parchment paper. Leave some paper hanging over the sides. This makes it easy to lift the cheesecake out later. In a medium bowl, combine 1 cup of graham cracker crumbs, 1/4 cup of melted unsalted butter, and 2 tablespoons of granulated sugar. Mix until every crumb is moist. Press this mixture firmly into the bottom of the pan. It should form a nice, even layer. Bake the crust for 10 minutes. Once done, take it out and let it cool slightly. Now, let's make the filling. In a large bowl, beat 16 ounces of softened cream cheese with an electric mixer. Mix until it’s smooth and creamy. This takes about 2-3 minutes. Gradually add 1 cup of granulated sugar. Keep beating until it is fluffy and well combined. Next, add 3 large eggs, one at a time. Mix on low speed after each egg. This helps keep the filling light. Now, mix in 1/4 cup of fresh lemon juice, zest from 2 lemons, 1 teaspoon of vanilla extract, and 1/4 teaspoon of salt. Make sure everything is well mixed. Pour the cream cheese mixture over your cooled crust. Spread it evenly to cover the crust. Bake in the preheated oven for 30-35 minutes. The edges should be set, but the center will still jiggle a bit. When it is done, take it out and let it cool in the pan for 1 hour at room temperature. After cooling, place the cheesecake in the refrigerator. Chill it for at least 4 hours or overnight. This helps it set perfectly. Once chilled, lift the cheesecake out of the pan with the parchment paper. Cut it into squares. Dust with powdered sugar before serving. You can add fresh berries on top for a nice touch. For the full recipe, check above. To get a creamy filling, start with room temperature cream cheese. Cold cream cheese can lead to lumps in your mix, which we want to avoid. Beat the cream cheese for about 2-3 minutes until it is smooth. This step is key for a silky texture in your cheesecake. Using room temperature eggs also helps. When eggs are cold, they do not blend well. Let them sit out for about 30 minutes. This way, they mix smoothly with the other ingredients. Once your lemon cheesecake squares are ready, dust them with powdered sugar. This adds a sweet touch and makes them look fancy. Use a fine sieve to sprinkle the sugar evenly. Add fresh berries as a garnish for color and flavor. Berries like strawberries, blueberries, or raspberries work great. They not only look pretty but also add a nice contrast to the creamy lemon filling. Store your cheesecake squares in the fridge. Keep them covered with plastic wrap to stay fresh. They will last about 3-5 days. If you want to keep them longer, freezing is an option. Wrap each square in plastic wrap, then place them in an airtight container. This helps keep them fresh for up to 2 months. Just thaw them in the fridge before serving. {{image_2}} You can add fun flavors to your lemon cheesecake squares. For a twist, try adding different citrus zest. Lime or orange zest brightens the flavor. Just mix in a teaspoon or two into the filling. This small change makes a big difference! Another great option is adding chocolate. You can swirl in melted chocolate for a rich taste. Dark chocolate pairs well with lemon. You can also use chocolate chips for a nice surprise in each bite. If you want a lighter version, use low-fat cream cheese. It still gives a creamy texture but cuts calories. You won’t lose the taste. It’s a simple swap that keeps your dessert delicious. You can also try sweetener substitutes. Instead of sugar, use honey or maple syrup. This makes it a bit healthier. Just remember, adjust the amount to taste. Each sweetener has a different power. Explore these variations to create your perfect lemon cheesecake squares! For the full recipe, check out the section above. Lemon cheesecake squares last about 5 to 7 days in the fridge. Keep them in an airtight container. This helps to keep them fresh and tasty. If you notice any signs of spoilage, it is best to discard them. Yes, you can freeze lemon cheesecake squares! Wrap each square in plastic wrap. Then place them in a freezer-safe bag or container. They can last up to 3 months in the freezer. To enjoy, thaw them in the fridge overnight before serving. This keeps their creamy texture. Lemon cheesecake squares pair well with many treats. You can serve them with fresh whipped cream for extra creaminess. A scoop of vanilla ice cream also works great. Add some fresh berries on the side for a colorful touch. You might even try a drizzle of chocolate sauce for a fun twist. These additions enhance the flavor and look of your dessert. Zesty Lemon Cheesecake Squares This recipe is simple and fun to make. You will enjoy the fresh lemon taste in every bite! - Prep time: 15 minutes - Cook time: 30-35 minutes - Chill time: at least 4 hours - Total time: 5 hours and 45 minutes - Servings: 16 squares You start by making a tasty crust with graham cracker crumbs. Then, you mix cream cheese with sugar and eggs. Fresh lemon juice and zest add a bright flavor. This blend makes the filling smooth and creamy. When you bake these squares, the edges set first. The center will jiggle a bit. Let them cool and chill for the best taste. Dust with powdered sugar to make them look pretty. For a fun touch, add fresh berries on the side. This will make your dessert pop! Check out the Full Recipe for exact steps and measurements. Enjoy making these delightful treats! You learned how to make zesty lemon cheesecake squares. We covered the ingredients, steps, tips, and variations. You can enjoy this treat while impressing friends and family. Remember to keep your ingredients at room temperature for the best texture. Store them right to keep them fresh. With these easy steps, you can create a lemony dessert that delights everyone. Enjoy your baking journey and have fun experimenting with flavors!
Lemon Cheesecake Squares Delightful and Creamy Treat
If you love desserts that are both tangy and sweet, you need to try these Lemon Cheesecake Squares! This delightful treat combines a creamy filling