Desserts

- 1 cup graham cracker crumbs - 1/4 cup unsalted butter, melted - 2 tablespoons granulated sugar - 16 ounces cream cheese, softened - 1 cup granulated sugar - 3 large eggs - 1/4 cup fresh lemon juice - Zest of 2 lemons - 1 teaspoon vanilla extract - 1/4 teaspoon salt - Powdered sugar, for dusting - Fresh berries, for garnish (optional) Gather these ingredients before you start. This setup makes the cooking process smooth. Each item plays a key role. The graham cracker crumbs form a sweet base. The cream cheese gives the squares their rich and creamy texture. Zesty lemon juice adds a bright, fresh flavor. The eggs help bind everything together. Using fresh lemon juice and zest enhances the taste. It provides a vibrant zing you will love. The vanilla extract adds warmth and depth. Remember to soften your cream cheese. This step helps achieve a smooth filling. If you want a sweet finish, use powdered sugar for dusting. Fresh berries can add a lovely touch. They make the dish look more inviting. You can find the full recipe at the end. Enjoy the fun of making these tasty lemon cheesecake squares! First, preheat your oven to 325°F (160°C). This step ensures even baking. Next, prepare an 8x8-inch square baking pan. Grease it well and line it with parchment paper. Leave some paper hanging over the sides. This makes it easy to lift the cheesecake out later. In a medium bowl, combine 1 cup of graham cracker crumbs, 1/4 cup of melted unsalted butter, and 2 tablespoons of granulated sugar. Mix until every crumb is moist. Press this mixture firmly into the bottom of the pan. It should form a nice, even layer. Bake the crust for 10 minutes. Once done, take it out and let it cool slightly. Now, let's make the filling. In a large bowl, beat 16 ounces of softened cream cheese with an electric mixer. Mix until it’s smooth and creamy. This takes about 2-3 minutes. Gradually add 1 cup of granulated sugar. Keep beating until it is fluffy and well combined. Next, add 3 large eggs, one at a time. Mix on low speed after each egg. This helps keep the filling light. Now, mix in 1/4 cup of fresh lemon juice, zest from 2 lemons, 1 teaspoon of vanilla extract, and 1/4 teaspoon of salt. Make sure everything is well mixed. Pour the cream cheese mixture over your cooled crust. Spread it evenly to cover the crust. Bake in the preheated oven for 30-35 minutes. The edges should be set, but the center will still jiggle a bit. When it is done, take it out and let it cool in the pan for 1 hour at room temperature. After cooling, place the cheesecake in the refrigerator. Chill it for at least 4 hours or overnight. This helps it set perfectly. Once chilled, lift the cheesecake out of the pan with the parchment paper. Cut it into squares. Dust with powdered sugar before serving. You can add fresh berries on top for a nice touch. For the full recipe, check above. To get a creamy filling, start with room temperature cream cheese. Cold cream cheese can lead to lumps in your mix, which we want to avoid. Beat the cream cheese for about 2-3 minutes until it is smooth. This step is key for a silky texture in your cheesecake. Using room temperature eggs also helps. When eggs are cold, they do not blend well. Let them sit out for about 30 minutes. This way, they mix smoothly with the other ingredients. Once your lemon cheesecake squares are ready, dust them with powdered sugar. This adds a sweet touch and makes them look fancy. Use a fine sieve to sprinkle the sugar evenly. Add fresh berries as a garnish for color and flavor. Berries like strawberries, blueberries, or raspberries work great. They not only look pretty but also add a nice contrast to the creamy lemon filling. Store your cheesecake squares in the fridge. Keep them covered with plastic wrap to stay fresh. They will last about 3-5 days. If you want to keep them longer, freezing is an option. Wrap each square in plastic wrap, then place them in an airtight container. This helps keep them fresh for up to 2 months. Just thaw them in the fridge before serving. {{image_2}} You can add fun flavors to your lemon cheesecake squares. For a twist, try adding different citrus zest. Lime or orange zest brightens the flavor. Just mix in a teaspoon or two into the filling. This small change makes a big difference! Another great option is adding chocolate. You can swirl in melted chocolate for a rich taste. Dark chocolate pairs well with lemon. You can also use chocolate chips for a nice surprise in each bite. If you want a lighter version, use low-fat cream cheese. It still gives a creamy texture but cuts calories. You won’t lose the taste. It’s a simple swap that keeps your dessert delicious. You can also try sweetener substitutes. Instead of sugar, use honey or maple syrup. This makes it a bit healthier. Just remember, adjust the amount to taste. Each sweetener has a different power. Explore these variations to create your perfect lemon cheesecake squares! For the full recipe, check out the section above. Lemon cheesecake squares last about 5 to 7 days in the fridge. Keep them in an airtight container. This helps to keep them fresh and tasty. If you notice any signs of spoilage, it is best to discard them. Yes, you can freeze lemon cheesecake squares! Wrap each square in plastic wrap. Then place them in a freezer-safe bag or container. They can last up to 3 months in the freezer. To enjoy, thaw them in the fridge overnight before serving. This keeps their creamy texture. Lemon cheesecake squares pair well with many treats. You can serve them with fresh whipped cream for extra creaminess. A scoop of vanilla ice cream also works great. Add some fresh berries on the side for a colorful touch. You might even try a drizzle of chocolate sauce for a fun twist. These additions enhance the flavor and look of your dessert. Zesty Lemon Cheesecake Squares This recipe is simple and fun to make. You will enjoy the fresh lemon taste in every bite! - Prep time: 15 minutes - Cook time: 30-35 minutes - Chill time: at least 4 hours - Total time: 5 hours and 45 minutes - Servings: 16 squares You start by making a tasty crust with graham cracker crumbs. Then, you mix cream cheese with sugar and eggs. Fresh lemon juice and zest add a bright flavor. This blend makes the filling smooth and creamy. When you bake these squares, the edges set first. The center will jiggle a bit. Let them cool and chill for the best taste. Dust with powdered sugar to make them look pretty. For a fun touch, add fresh berries on the side. This will make your dessert pop! Check out the Full Recipe for exact steps and measurements. Enjoy making these delightful treats! You learned how to make zesty lemon cheesecake squares. We covered the ingredients, steps, tips, and variations. You can enjoy this treat while impressing friends and family. Remember to keep your ingredients at room temperature for the best texture. Store them right to keep them fresh. With these easy steps, you can create a lemony dessert that delights everyone. Enjoy your baking journey and have fun experimenting with flavors!
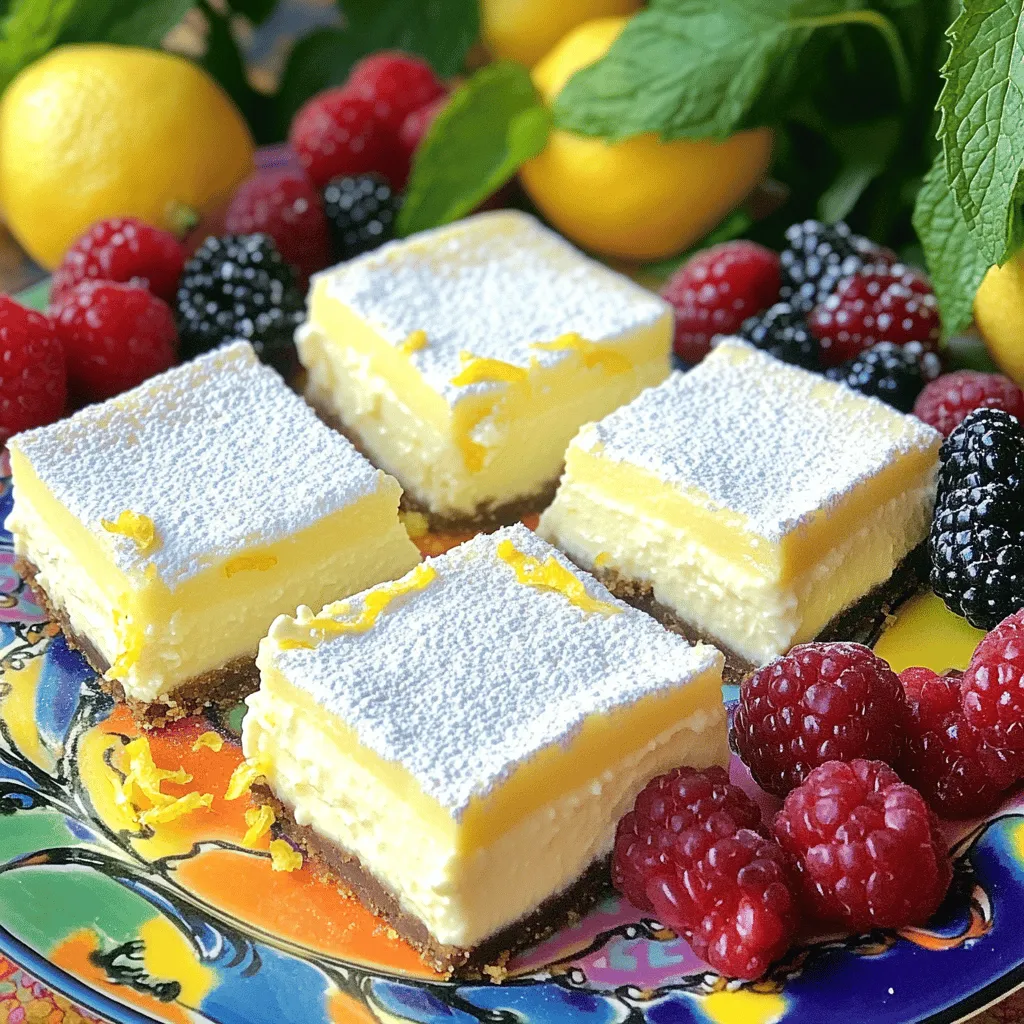
Lemon Cheesecake Squares Delightful and Creamy Treat
If you love desserts that are both tangy and sweet, you need to try these Lemon Cheesecake Squares! This delightful treat combines a creamy filling
To make Apple Cheesecake Tacos, you need fresh and tasty ingredients. Here’s what you will need: - Large apple varieties (Granny Smith or Honeycrisp) - Butter and spices (cinnamon, brown sugar) - Cream cheese and sweeteners (powdered sugar, vanilla extract) - Flour tortillas and optional toppings (walnuts, whipped cream, mint leaves) These ingredients create a perfect mix of flavors. The apples give a crisp bite, while the cream cheese adds a rich texture. The spices bring warmth and sweetness to the dish. You can easily find all these items at your local grocery store. When you choose your apples, pick ones that are firm and fresh. This will make your tacos taste amazing. You can see the full recipe for more details on how to prepare this fun dessert. First, grab your skillet and melt the butter over medium heat. Add the diced apples, cinnamon, and brown sugar. Sauté them for about 5 to 7 minutes. You want the apples to become tender and caramelized. Stir occasionally to avoid burning. Once cooked, set the apples aside to cool. In a mixing bowl, combine the softened cream cheese, powdered sugar, and vanilla extract. Use a hand mixer or a whisk to beat the mixture. You want to achieve a smooth and creamy consistency. Make sure there are no lumps. This creamy filling is the heart of your tacos. Now it's time to warm the flour tortillas. You can do this in a dry pan or microwave. Just a few seconds will make them pliable. Spread a generous portion of the cream cheese filling on each tortilla. Then, spoon the sautéed apples over the cream cheese. If you like, add chopped walnuts for a nice crunch. Fold the tortillas in half like a taco. Place them on serving plates. Top with a dollop of whipped cream. Garnish with fresh mint leaves if you want a pop of color. For the full recipe, check the details above. Enjoy your delicious Apple Cheesecake Tacos! Choosing the right apple is key. I love using Granny Smith or Honeycrisp apples. They offer a nice balance of sweet and tart. For cooking, slice them into small cubes. This helps them cook evenly. Sauté the apples in butter, cinnamon, and brown sugar. Cook them for about 5 to 7 minutes. You want them soft and caramelized. Keep stirring to avoid burning. For a twist, try flavored cream cheese. Pumpkin spice or chocolate cream cheese work well. Adjust the sweetness to your taste. You can add more powdered sugar if you like it sweeter. Or, reduce it for a less sweet filling. Both ways will add a fun kick to your tacos. Toppings can make a big difference. Consider adding chopped walnuts on top for crunch. You can also try chocolate syrup for a sweet drizzle. Ice cream pairs nicely with these tacos too. A scoop on the side makes it a real treat. Enjoy them warm with a dollop of whipped cream. Fresh mint leaves add a pop of color and flavor. These small touches make your Apple Cheesecake Tacos stand out! {{image_2}} You can switch apples for other fruits. Pears are sweet and soft. They add a great taste. Berries like strawberries or blueberries also work well. Mixing fruits gives a fun twist! Try using a blend of apples and berries for a unique flavor. The sweet and tart notes will surprise your taste buds. If you need gluten-free tacos, use corn tortillas. They hold up well and taste great. For a fresh twist, try lettuce wraps instead. They add a nice crunch and are light. If you're vegan, use dairy-free cream cheese. Brands like Tofutti or Kite Hill make good options. You can still enjoy a tasty filling while keeping it plant-based. Check out the Full Recipe for more details on these options! To keep your Apple Cheesecake Tacos fresh, store them properly. If you have assembled tacos, wrap each one in plastic wrap. Place them in an airtight container. This keeps the tacos from getting soggy. You can store them in the fridge for up to two days. If you have unassembled tacos, store the cream cheese filling and sautéed apples separately. Use containers with tight lids. The cream cheese filling lasts about five days, while the apples stay fresh for four days. When reheating, you want to keep the texture just right. For the assembled tacos, heat them in a skillet over low heat. This warms them gently. Avoid the microwave, as it can make them soggy. For the cream cheese filling, warm it in a bowl over hot water. This method keeps it creamy and smooth. Add a bit of milk if it thickens too much. Enjoy your yummy tacos again without losing their charm! The prep time for Apple Cheesecake Tacos is about 15 minutes. This includes chopping the apple and mixing the cream cheese filling. The cook time is around 15 minutes. You sauté the apples until they are soft and caramelized. So, the total time is 30 minutes. This quick recipe is perfect for busy days or a sweet treat! Yes, you can make the cream cheese filling ahead of time. Just mix the cream cheese, powdered sugar, and vanilla as the recipe says. Store it in an airtight container in the fridge. It will stay fresh for up to three days. This way, you can save time when you are ready to assemble your tacos! These tacos pair well with many treats. You can serve them with vanilla ice cream or whipped cream. Adding a drizzle of caramel sauce makes them even more special. For drinks, try hot apple cider or a simple cup of tea. You can also enjoy them with a fresh fruit salad for a balanced meal. In this article, we covered a fun recipe for Apple Cheesecake Tacos. We discussed the key ingredients and how to prepare them. I shared tips for making your apples sweet and your cream cheese smooth. You learned how to assemble the tacos and served them with tasty toppings. Remember, you can switch out fruits and try new flavors. The possibilities are endless. Enjoy making this delicious treat that everyone will love!
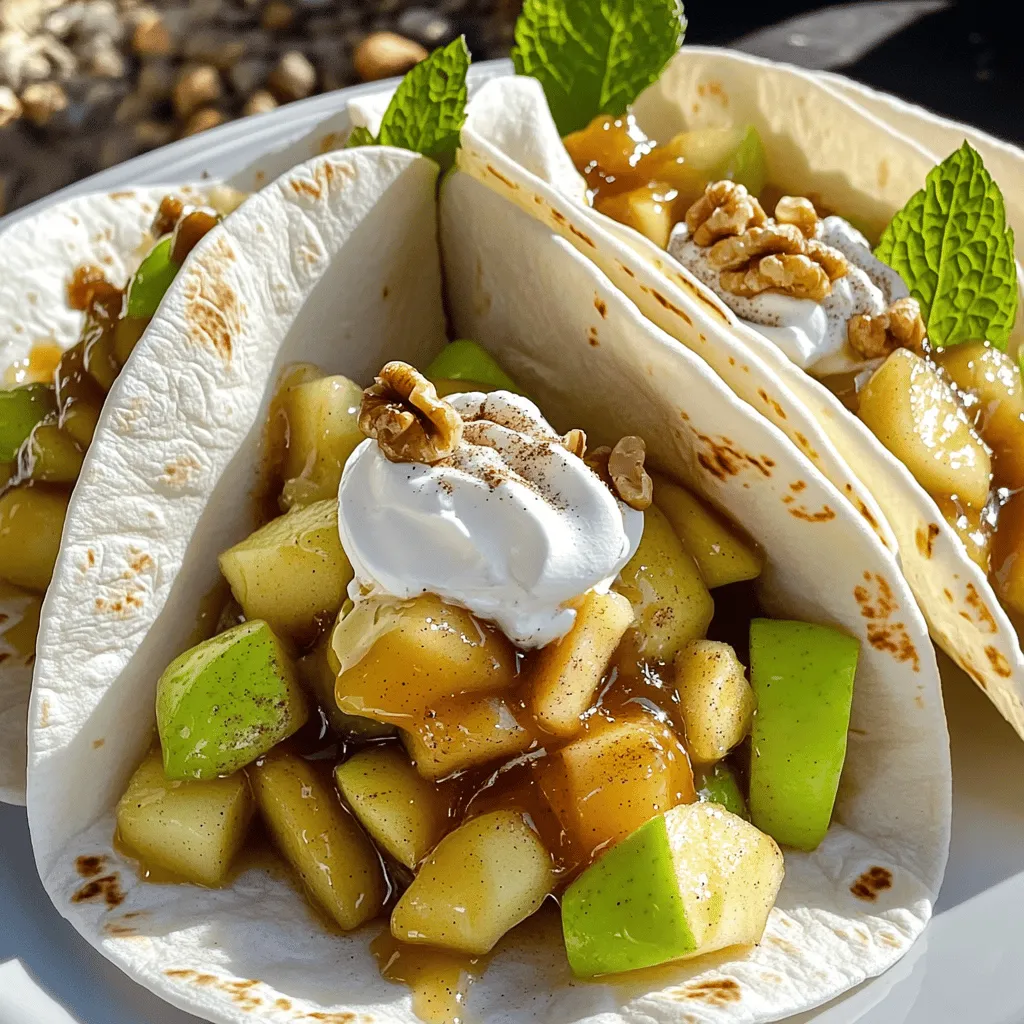
Apple Cheesecake Tacos Irresistible and Easy Recipe
Are you ready for a fun twist on dessert? Apple Cheesecake Tacos combine the comfort of warm apples and creamy cheesecake in a crispy tortilla.
To make these tasty cookies, you need some key items. Here’s what you will gather: - 1 cup all-purpose flour - 1/2 cup unsweetened cocoa powder - 1/2 teaspoon baking soda - 1/4 teaspoon salt - 1/2 cup unsalted butter, softened - 3/4 cup brown sugar, packed - 1/4 cup granulated sugar - 1 large egg - 1 teaspoon vanilla extract - 1 cup dark chocolate chips - 1/2 cup dried cherries, chopped These ingredients combine to create a rich and chewy cookie. The dark chocolate and cherries give a delightful mix of flavors. You will need a few tools to make the process smooth. Here’s a list: - Mixing bowls - Whisk - Baking sheet - Parchment paper - Measuring cups and spoons - Cookie scoop or tablespoon Using these tools helps you mix and bake your cookies with ease. Want to take your cookies to the next level? Consider these optional ingredients: - 1/4 teaspoon almond extract Adding almond extract gives a nice twist to the cookie's flavor. It pairs well with the chocolate and cherries. For the full details on making these cookies, check out the Full Recipe. To start, gather your ingredients for the chocolate cherry cookies. Here’s what you need: - 1 cup all-purpose flour - 1/2 cup unsweetened cocoa powder - 1/2 teaspoon baking soda - 1/4 teaspoon salt - 1/2 cup unsalted butter, softened - 3/4 cup brown sugar, packed - 1/4 cup granulated sugar - 1 large egg - 1 teaspoon vanilla extract - 1 cup dark chocolate chips - 1/2 cup dried cherries, chopped - 1/4 teaspoon almond extract (optional) Start by preheating your oven to 350°F (175°C). This gets your oven ready for baking. Next, line a baking sheet with parchment paper. This helps the cookies not to stick. In a medium bowl, whisk together the flour, cocoa powder, baking soda, and salt. Set this bowl aside for now. In a larger mixing bowl, cream the softened butter, brown sugar, and granulated sugar. Mix until it looks light and fluffy. This step adds air to the dough. Now, beat in the egg and vanilla extract. If you want to use almond extract, add it in at this point. Gradually add the dry mix to the wet mix. Stir until just combined. Be careful not to overmix. Finally, fold in the dark chocolate chips and chopped dried cherries. Make sure they are evenly spread throughout the dough. Using a tablespoon, scoop the dough and drop rounded balls onto the prepared baking sheet. Space them about 2 inches apart. This gives them room to spread while baking. Place the baking sheet in the preheated oven. Bake the cookies for 10 to 12 minutes. The edges should be set, but the centers will still be soft. This softness creates a chewy texture. After baking, let the cookies cool on the baking sheet for about 5 minutes. This allows them to firm up a bit. Then, transfer the cookies to a wire rack to cool completely. For a lovely presentation, arrange the cookies on a decorative plate. You can dust them with a light sprinkle of powdered sugar. Serve them with a side of fresh cherries for a fun touch. Enjoy your chocolate cherry cookies! Baking is a science. Small errors can change your cookies. Here are some common mistakes to watch for: - Overmixing the dough: This can make cookies tough. Mix just until combined. - Incorrect oven temperature: Use an oven thermometer. It helps ensure the right heat. - Skipping the chilling step: Let the dough rest. This helps the flavors meld. Want your cookies to be soft and chewy? Follow these tips: - Use brown sugar: It adds moisture. This keeps your cookies chewy. - Don’t overbake: Pull them out when they look slightly underdone. They will continue to firm up. - Add an extra egg yolk: This creates a rich texture. It enhances the chewiness. Balancing flavors is key. Here’s how to get it right: - Use high-quality chocolate: Dark chocolate pairs well with cherries. Its rich taste shines through. - Chop the cherries finely: This ensures even distribution. You want a cherry in every bite. - Add almond extract: It enhances the cherry flavor. Just a little makes a big difference. For a complete guide, check the Full Recipe for Chocolate Cherry Bliss Cookies. Enjoy your baking journey! {{image_2}} You can make these cookies vegan easily. Replace butter with coconut oil or vegan butter. For the egg, use a flaxseed egg. To make a flaxseed egg, mix one tablespoon of ground flaxseed with three tablespoons of water. Let it sit for five minutes to thicken. This simple swap keeps the cookies rich and tasty. Going gluten-free is simple with this recipe. Use gluten-free flour in place of all-purpose flour. Almond flour or oat flour works best. This change keeps the cookies soft and chewy. Make sure your chocolate chips are also gluten-free. You can still enjoy the same great flavor! Feel free to get creative with flavors! You can add nuts like walnuts or pecans for a crunchy bite. Different dried fruits can add a twist too. Try dried apricots or cranberries. They blend well with chocolate and cherries. You can even mix in some spices, like cinnamon or a pinch of sea salt, to enhance the taste. The options are endless! For the full recipe, follow the steps to create your perfect batch of chocolate cherry cookies. To keep your chocolate cherry cookies fresh, store them in an airtight container. This helps prevent moisture loss and keeps them chewy. Place a piece of parchment paper between layers of cookies to avoid sticking. If you want to enjoy them later, follow these tips to ensure they stay delicious. Freezing chocolate cherry cookies is simple. First, let them cool completely after baking. Then, place them in a single layer on a baking sheet. Once frozen, transfer them to a freezer-safe bag or container. Label the bag with the date. You can freeze them for up to three months. When you're ready to enjoy, thaw them at room temperature or reheat them in the oven for a few minutes. Chocolate cherry cookies last about one week at room temperature in an airtight container. If you freeze them, they can last for three months. To reheat, set your oven to 350°F (175°C). Place the cookies on a baking sheet for about 5 minutes. This warms them up and restores their soft texture. For the best experience, enjoy them warm with a glass of milk. You can find the full recipe to make these tasty treats again. To make chocolate cherry cookies from scratch, start with the ingredients listed in the Full Recipe. Preheat your oven to 350°F. Mix flour, cocoa powder, baking soda, and salt in one bowl. In another bowl, cream butter with brown and granulated sugar. Add an egg and vanilla extract, mixing well. Then, stir in the dry mix. Finally, fold in dark chocolate chips and chopped dried cherries. Scoop the dough onto a baking sheet and bake for 10-12 minutes. Yes, you can substitute ingredients in this recipe. You can use coconut oil instead of butter for a dairy-free option. If you want a nut-free version, skip the almond extract. You can also swap dried cherries for raisins or cranberries if you prefer. Try using milk chocolate chips if dark chocolate is not your favorite. Be creative, and you might find a new favorite blend. The best way to serve chocolate cherry cookies is warm, fresh from the oven. You can place them on a decorative plate to impress guests. Dust a little powdered sugar on top for a fancy touch. Serve them with a glass of cold milk or a scoop of vanilla ice cream. Fresh cherries as a side garnish add a nice touch too. You learned about the key ingredients, tools, and steps for making chocolate cherry cookies. I shared tips to avoid common mistakes and enhance flavors. You also discovered variations for vegan and gluten-free options. Proper storage practices can keep your cookies fresh longer. Baking these cookies can be fun and rewarding. With practice, you’ll enjoy perfect treats that everyone loves. Now, it’s your turn to bake and share!
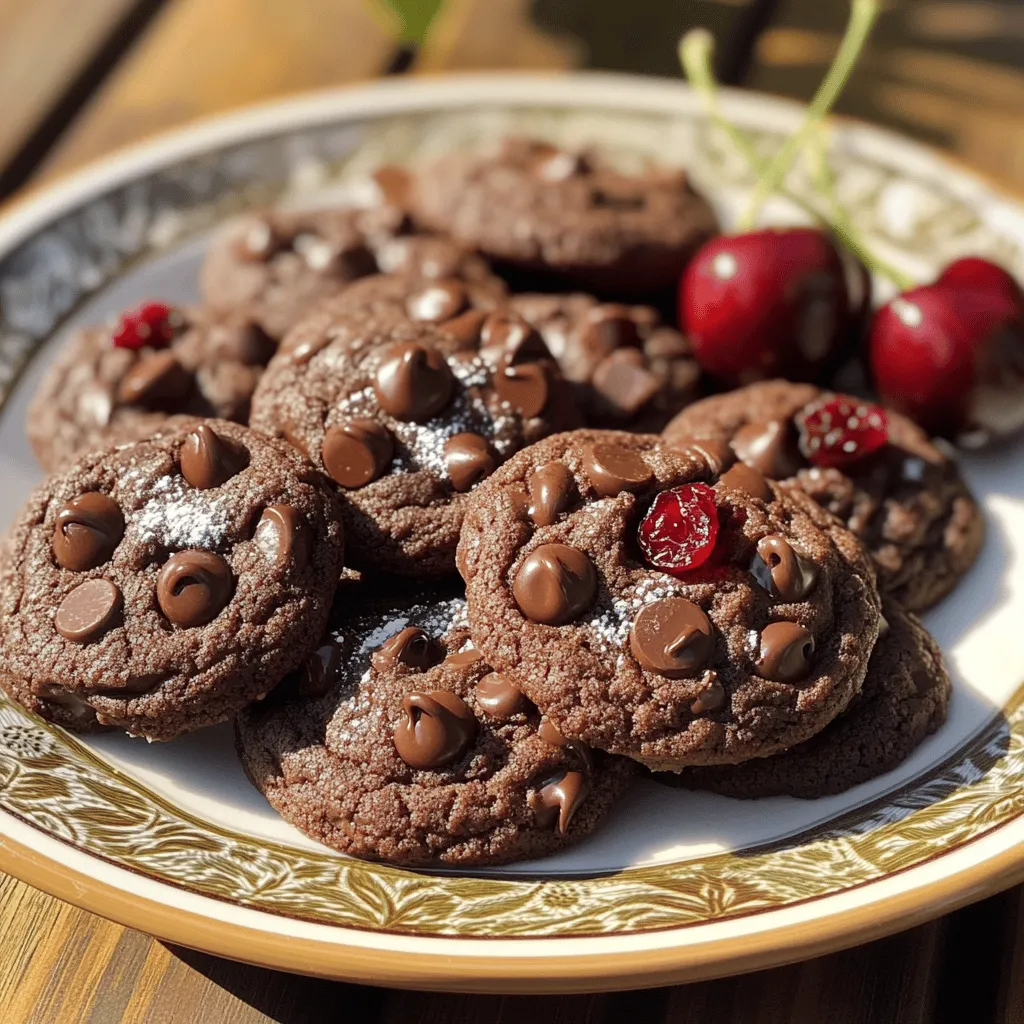
Chocolate Cherry Cookies Tempting and Simple Delight
Are you ready to bake something truly delicious? Chocolate cherry cookies are a simple delight that brings joy to any occasion. With rich chocolate and
- 1 cup all-purpose flour - 1/2 cup cocoa powder - 1 teaspoon baking powder - 1/4 teaspoon salt - 1/2 cup unsalted butter, softened - 1 cup granulated sugar - 1/2 cup brown sugar, packed - 2 large eggs - 2 tablespoons strong brewed coffee, cooled - 1 teaspoon vanilla extract - 1 cup mascarpone cheese - 1/4 cup powdered sugar - Cocoa powder for dusting When you make tiramisu cookies, each ingredient plays a big role. The flour gives the cookies their structure. Cocoa powder adds rich chocolate flavor. Baking powder helps them rise, while salt enhances all the flavors. Butter is key to a soft, chewy texture. The mix of granulated and brown sugar gives sweetness and depth. Eggs bind everything together. Coffee brings that signature tiramisu taste. Vanilla adds warmth, and mascarpone cheese creates a creamy filling. Powdered sugar sweetens the mascarpone, and cocoa powder finishes the treat perfectly. - Alternative sweeteners: You can use honey or maple syrup if you want a healthier option. Just adjust the liquid in your recipe. - Substitutes for mascarpone cheese: If you cannot find mascarpone, cream cheese or ricotta can work in a pinch. Mix in a bit of cream for a smoother texture. - Gluten-free flour options: Look for a 1:1 gluten-free flour blend. It can replace regular flour directly in this recipe. For the full recipe, check out the details above. Enjoy baking these delicious tiramisu cookies! 1. Preheat your oven to 350°F (175°C). This makes sure your cookies bake evenly. 2. Line a baking sheet with parchment paper. This prevents the cookies from sticking. 3. In a medium bowl, combine the dry ingredients. Whisk together the flour, cocoa powder, baking powder, and salt. Set this bowl aside for now. 1. In a large mixing bowl, mix the softened butter with both sugars. Beat them together until creamy and fluffy. This should take about 3-4 minutes. 2. Next, add the eggs one at a time. Mix well after each egg. This helps the dough become smooth. 3. Now, add the cooled coffee and vanilla extract. Mix until all ingredients are combined well. 1. Gradually mix the dry ingredients into the wet mixture. Be careful not to over-mix. You want to keep the dough light and airy. 2. Spoon tablespoon-sized balls of the cookie dough onto the prepared baking sheet. Leave space between them to allow for spreading. 3. Bake in the preheated oven for 10-12 minutes. The edges should be firm while the centers stay slightly soft. 4. Let the cookies cool on the baking sheet for 5 minutes. After that, transfer them to wire racks to cool completely. For the full recipe and more details, you can refer to the [Full Recipe]. To keep your tiramisu cookies from spreading too much, use cold butter. Softened butter can make cookies runny. Chilling the dough also helps. I recommend chilling it for at least 30 minutes. This step makes the cookies thicker and gives them a nice shape. Adding a pinch of salt can balance the sweetness of your cookies. Salt brings out the rich flavors in chocolate and coffee. You might also want to experiment with different coffee flavors. Try using espresso or flavored coffee for a unique twist. Each type of coffee can change the taste slightly and add depth. Serving tiramisu cookies can be fun! Arrange them on a decorative plate for a lovely display. You can sprinkle cocoa powder around the cookies for an elegant touch. For a cozy vibe, serve with a small cup of espresso or coffee. This pairing adds to the tiramisu theme and makes the treat feel special. {{image_2}} You can easily change the flavor of your tiramisu cookies. Adding chocolate chips or nuts gives them a nice crunch. I love using dark chocolate chips for a rich taste. You can also add chopped walnuts or hazelnuts for a fun texture. Another way to mix things up is by using different extracts. For example, almond extract adds a lovely nutty flavor. You could even try orange or coconut extracts. These can make your cookies feel fresh and exciting. If you're looking for vegan options, you can swap out the butter and eggs. Use coconut oil instead of butter and flax eggs in place of regular eggs. This keeps the flavor while making it vegan. Want a low-sugar version? You can use natural sweeteners like stevia or monk fruit. These options help cut sugar while keeping the taste great. Seasonal spices can really jazz up your cookies. For fall, add cinnamon or nutmeg for a warm feel. In winter, a hint of peppermint can make them festive. For special occasions, think about themed cookies. You could shape them like hearts for Valentine’s Day or use festive colors for holidays. These little touches make your treats even more fun and memorable. Feel free to explore these variations to find your favorite take on tiramisu cookies. For the full recipe, check out the section above! To keep your tiramisu cookies fresh, follow these steps: - Cool Completely: Always let your cookies cool fully before storing. This helps prevent moisture. - Use an Airtight Container: Store cookies in an airtight container. This keeps them soft and chewy. - Layer with Parchment Paper: If you stack cookies, use parchment paper between layers. This avoids sticking. - Room Temperature Storage: Keep cookies at room temperature for up to five days. They taste best fresh! You can freeze your tiramisu cookies to enjoy later. Here’s how: - Freeze Before Baking: Scoop cookie dough onto a tray and freeze until firm. Then, transfer to a freezer bag. You can bake them fresh later! - Freeze After Baking: Once baked and cooled, wrap cookies tightly in plastic wrap. Place them in a freezer bag to prevent freezer burn. - Thawing Tips: To thaw, leave cookies at room temperature for about 30 minutes. This keeps their texture nice and soft. Avoid microwaving, as it can make them tough. Storing and freezing tiramisu cookies will give you delicious treats anytime you want! For the Full Recipe, check out the earlier section. How long do tiramisu cookies last? Tiramisu cookies stay fresh for about five days at room temperature. Keep them in an airtight container. For longer storage, place them in the fridge for up to a week. This helps maintain the rich flavors and soft texture. Can I make tiramisu cookies in advance? Yes, you can make tiramisu cookies ahead of time. Bake them and store them in an airtight container. You can also prepare the cookie dough and refrigerate it for up to three days before baking. This gives you tasty cookies ready when you need them. Why did my cookies come out flat? Flat cookies often happen due to too much butter or not enough flour. Make sure to measure your ingredients correctly. Chilling the dough for about 30 minutes can also help them hold their shape better while baking. How to fix dry or crumbly cookies? If your cookies are dry, they might have too much flour. Adding a small amount of milk or melted butter can help. Mix carefully until the dough is soft but not sticky. This should give you a better texture. What to pair with tiramisu cookies? Tiramisu cookies pair wonderfully with coffee or espresso. Serve them alongside a rich cup of your favorite brew. You can also enjoy them with milk or a scoop of vanilla ice cream for extra delight. Can I use tiramisu cookies in other desserts? Absolutely! You can crumble tiramisu cookies and use them as a layer in parfaits. They also make a great topping for ice cream or a base for a no-bake cheesecake. The flavor adds a lovely twist to any dessert. This article covered delicious tiramisu cookie recipes and helpful tips. We explored key ingredients and effective substitutions. You learned essential steps to mix, bake, and present your cookies. Remember to chill your dough and experiment with flavors for the best results. Store your cookies well to keep them fresh and learn how to troubleshoot common baking issues. With these tips, you can make fantastic tiramisu cookies for any occasion. Enjoy the baking process and delight in your tasty creations!
Tiramisu Cookies Decadent Treat for Everyone
Craving a sweet treat that combines the classic flavors of tiramisu with the simplicity of cookies? You’re in the right place! These Tiramisu Cookies bring
To make a delightful tiramisu, gather these simple ingredients: - 1 cup strong brewed coffee, cooled - 2 tablespoons vanilla extract - 1 cup mascarpone cheese - 1 cup heavy cream - 2 tablespoons sugar - 1/2 cup mixed berries (strawberries, blueberries, raspberries) - 24 ladyfinger cookies - Cocoa powder, for dusting - Fresh mint leaves, for garnish Each ingredient plays a key role in creating the perfect tiramisu. - Strong brewed coffee gives that rich, bold flavor. - Vanilla extract adds warmth and sweetness. - Mascarpone cheese creates a creamy texture that is essential. - Heavy cream helps to achieve a light and airy filling. - Sugar sweetens the mixture just right. - Mixed berries add a tart freshness and a pop of color. - Ladyfinger cookies serve as the base, soaking up the coffee flavor. - Cocoa powder offers a bitter contrast to the sweet layers. - Fresh mint leaves act as a lovely garnish, adding a hint of freshness. If you can’t find an ingredient, don’t worry! Here are some easy swaps: - Use espresso instead of brewed coffee for a stronger taste. - Swap mascarpone cheese with cream cheese for a different texture. - Use coconut cream if you want a dairy-free option. - If you don’t have ladyfingers, pound cake works well too. - For a non-alcoholic version, skip the coffee and use milk with cocoa. These substitutes can help you create a delicious tiramisu tailored to your needs. For the full recipe, check out the recipe section provided! To start, you need to gather your ingredients. You will need strong brewed coffee, vanilla extract, mascarpone cheese, heavy cream, sugar, mixed berries, ladyfinger cookies, cocoa powder, and fresh mint leaves for garnish. 1. First, cool your brewed coffee. Pour it into a medium bowl and add the vanilla extract. Mix them well and set it aside. 2. Next, take a large mixing bowl. Whip the heavy cream with the sugar until you see soft peaks. This means the cream will hold its shape but is still soft. 3. Now, gently fold in the mascarpone cheese. Mix until it blends well and is smooth. 4. Quickly dip each ladyfinger in the coffee mixture for just 1-2 seconds. You want them soaked but not too soggy. 5. Layer half of the soaked ladyfingers in the bottom of a rectangular dish. This will be the first layer. 6. Spread half of the mascarpone mixture over the ladyfingers. Use a spatula to smooth it out evenly. 7. Scatter the mixed berries on top of the mascarpone layer. This adds color and flavor. 8. Repeat the layers. Add the remaining ladyfingers, mascarpone mixture, and another layer of mixed berries. 9. When done, dust the top with cocoa powder. This gives it a nice finish. 10. Cover the dish with plastic wrap. Chill it in the fridge for at least 4 hours, but overnight is best. This lets the flavors meld together. 11. Just before serving, garnish with fresh mint leaves. This adds an aromatic touch. - Coffee: Use strong coffee. This gives a bold flavor to your dessert. - Whipping Cream: Don’t overbeat the cream. It should be soft, not stiff. - Folding: Be gentle when folding in the mascarpone. This keeps the mixture light. - Ladyfingers: Don’t soak them too long. You want them firm enough to hold layers. - Chill Time: The longer you chill, the better the flavors blend. Aim for overnight if you can. To achieve a creamy and smooth texture, whip the cream until you see soft peaks. When folding in the mascarpone, do it gently. This keeps air in the mixture, making it light. Also, ensure your ladyfingers are not too soggy. They should be moist but still firm. The layers should look nice and hold well. Trust me, the texture makes all the difference in your tiramisu delight! For a full recipe, check out the details above. To make the best tiramisu, use strong coffee. The coffee gives a rich flavor. Let it cool before dipping the ladyfingers. This step is key. Use fresh mascarpone cheese. It makes a huge difference in taste. Don’t overmix the mascarpone with the cream. You want a light and airy texture. One mistake is soaking ladyfingers too long. Just a quick dip is enough. If they are soggy, the layers will fall apart. Another error is not chilling long enough. Tiramisu needs time to set. Aim for at least four hours in the fridge. To boost flavor, add a splash of coffee liqueur. It adds depth and warmth. You can also layer in different fruits. Try using sliced bananas or oranges for a twist. For presentation, dust cocoa powder right before serving. Garnish with fresh mint leaves for a pop of color. Explore the [Full Recipe] for detailed steps! {{image_2}} You can make a vegan tiramisu using plant-based ingredients. Replace mascarpone cheese with coconut cream. This gives a rich texture. Use almond milk or any plant milk instead of coffee. For sweetness, try maple syrup instead of sugar. Use vegan ladyfingers or make your own with flour and aquafaba. This option keeps the classic flavor while being dairy-free. For gluten-free tiramisu, substitute ladyfingers with gluten-free cookies. You can also use sponge cake made from almond flour. Make sure the coffee and mascarpone are gluten-free. This version still tastes amazing and keeps the delightful layers intact. Enjoy it without worry if you are gluten-sensitive. Get creative with flavors! Try adding orange zest to the coffee for a citrus twist. You can also infuse the mascarpone with matcha powder for a green tea flavor. Mixing in chocolate liqueur or flavored syrups can also add depth. Each variation gives a new taste experience. Check out the Full Recipe for more ideas and tips! To keep leftover tiramisu fresh, cover it tightly. Use plastic wrap or a lid. This keeps air out and prevents it from drying. Store it in the fridge. It stays cool and tasty. Avoid keeping it at room temperature. The cream can spoil quickly. Try to use it within three days for the best taste. You can freeze tiramisu for later. First, slice it into pieces. Wrap each piece well in plastic wrap. Then, place them in an airtight container. This helps keep them fresh. When you want to eat it, move it to the fridge. Let it thaw overnight. Don't refreeze once it’s thawed, as it can change the taste and texture. Tiramisu stays good in the fridge for about three to four days. If you freeze it, it lasts up to three months. Always check for any off smells or changes in appearance before eating. If you follow these tips, your tiramisu will taste delicious every time! For the full recipe, check out the ingredients and steps. Tiramisu is a popular Italian dessert. It layers coffee-soaked ladyfingers with creamy mascarpone cheese. This treat is rich and smooth, with a hint of cocoa on top. It’s perfect for coffee lovers and is often served chilled. Yes, you can make Tiramisu a day ahead. In fact, it tastes better when chilled overnight. Letting it sit allows the flavors to blend well. Just cover it tightly in the fridge to keep it fresh. The best Tiramisu is often found in authentic Italian restaurants. Look for places that make their desserts from scratch. Local bakeries might also have great options. Ask friends or check online reviews to find top spots near you. Absolutely! You can use various fruits in Tiramisu. Berries like strawberries, blueberries, and raspberries work well. You can also try bananas or peaches for a twist. Just remember to balance the flavors so they blend nicely with the coffee. Tiramisu comes from Italy, specifically the Veneto region. It became popular in the 1960s. The name means "pick me up," reflecting its coffee base. Since then, it has spread worldwide and is loved by many. For a delightful take on this classic, try the Full Recipe I shared! Tiramisu is a delightful dessert made from simple, key ingredients. In this post, you learned how each ingredient plays a vital role. I shared step-by-step instructions to guide you through the making process. You also discovered expert tips and common mistakes to avoid, ensuring delicious results. Experimenting with variations can enhance your experience, too. Remember to store your tiramisu properly to enjoy it longer. By following this guide, you can create a perfect tiramisu. Your friends and family will love it! Enjoy your new dessert-making skills.
Tiramisu Delight Simple and Irresistible Dessert
Tiramisu is an all-time favorite dessert that brings joy to any meal. In this blog post, I’ll guide you step-by-step to create a simple and
- 1 cup unsalted butter, softened - 1 cup granulated sugar - 1 cup packed brown sugar - 2 large eggs - 2 teaspoons vanilla extract - 3 cups all-purpose flour - 1 teaspoon baking soda - 1/2 teaspoon salt - 1 cup fresh blueberries (or frozen, thawed and drained) - 1 cup cream cheese, softened - 1/4 cup powdered sugar - 1 tablespoon lemon juice - 1 teaspoon lemon zest The right ingredients make all the difference in baking cookies. The base starts with unsalted butter. This gives the cookies a rich, creamy texture. The granulated and brown sugars add sweetness and moisture. Eggs bind everything together and add fluffiness. Flour is the backbone of the cookie dough. It gives cookies shape and structure. Baking soda acts as a leavening agent, helping them rise. Salt enhances flavors, balancing the sweetness. Using fresh blueberries adds a juicy burst of flavor. If you use frozen ones, thaw and drain them first. This keeps the dough from getting too wet. The cream cheese gives that cheesecake flavor. It pairs perfectly with the blueberries. The lemon juice and zest add a bright touch. They wake up the flavors in the cookies. Together, these ingredients make a delightful treat. - Choosing fresh versus frozen blueberries: Fresh blueberries are best for flavor and texture. However, frozen blueberries work well too. Just make sure they are thawed and drained to avoid sogginess. - Importance of room temperature cream cheese: Soft cream cheese mixes better. It helps create a smooth cheesecake swirl. Take it out of the fridge ahead of time. This simple step ensures a creamy mix and a delightful texture. For the full recipe, check the link above! First, you need to preheat your oven to 350°F (175°C). This step is key for even baking. While the oven heats, line your baking sheets with parchment paper. This helps prevent sticking and makes cleanup easy. In a large bowl, cream together the softened butter, granulated sugar, and brown sugar. Use a handheld mixer for best results. Mix until the mixture is light and fluffy. Next, add in the eggs one at a time. Make sure to mix well after each egg. Finally, stir in the vanilla extract for added flavor. In a separate bowl, whisk together the flour, baking soda, and salt. Gradually add this dry mix to your wet ingredients. Mix until just combined; do not overmix. Now, prepare the cheesecake mixture. In a small bowl, combine softened cream cheese, powdered sugar, lemon juice, and lemon zest. Whisk until smooth. Carefully fold in the fresh blueberries into the cookie dough. Be gentle; you don’t want to smash the berries. Using a tablespoon or cookie scoop, drop balls of cookie dough onto the lined baking sheets. Leave space between each ball. Take a teaspoon of the cheesecake mixture and place it on top of the dough. Use a toothpick or knife to gently swirl the cheesecake filling into the cookie dough. This creates a beautiful marble effect. Bake the cookies in the preheated oven for 12-15 minutes. Check if the edges are lightly golden. They may look soft in the middle, but they will firm up as they cool. After baking, let the cookies cool on the sheets for about 5 minutes. Then, transfer them to a wire rack to cool completely. Enjoy the delightful treat of Blueberry Cheesecake Swirl Cookies! For the complete recipe, please refer to the Full Recipe. To get the best swirl, start with a soft cheesecake mixture. Use a spoon or a small spatula to gently drop the cheesecake on top of the cookie dough. Avoid big blobs; smaller dollops swirl better. For tools, a toothpick or a small knife works well for swirling. Dip the tool into the cheesecake mixture, then swirl it into the cookie dough. Be gentle to keep the marbled look. One common mistake is overmixing the cookie dough. This makes the cookies tough instead of soft. Mix just until combined for the best texture. Another mistake is not cooling the cookies properly. Give them five minutes on the baking sheet before moving them. This helps keep their shape and flavor. For a great plate presentation, stack the cookies on a decorative platter. Dust them lightly with powdered sugar. This adds a nice touch. You can also place a few fresh blueberries around for color. Pair these cookies with milk or a nice cup of tea. The flavors blend well and make each bite delightful. {{image_2}} You can play with flavors in your cookies. Try using different berries like raspberries or blackberries. Each berry brings its unique taste. If you want to change the cheesecake flavor, consider chocolate or lemon. Chocolate adds richness, while lemon gives a bright twist. For gluten-free cookies, swap all-purpose flour with a gluten-free blend. Many blends work well, so choose one you like. If you need a dairy-free option, use a non-dairy cream cheese. Brands like Tofutti or Kite Hill make great substitutes. Just ensure they are soft enough to mix well. You can adjust flavors based on the season. In fall, add warm spices like cinnamon or nutmeg for cozy notes. For summer, mixing in citrus zest can brighten your cookies. Lemon or orange zest offers a fresh flavor that pairs well with blueberries. Experiment to find what you love! Store your blueberry cheesecake swirl cookies in an airtight container. This helps keep them soft and fresh. You can stack them with parchment paper between layers to prevent sticking. For best results, eat them within a week. They taste great fresh, but you can keep them for up to 10 days. After that, they might lose their yummy taste. You can freeze either the cookie dough or the baked cookies. To freeze the dough, scoop it into balls and place them on a baking sheet. Freeze until solid, then transfer them to a freezer bag. This way, you can bake fresh cookies whenever you want! For baked cookies, let them cool completely first. Then, place them in an airtight container or freezer bag. They can stay fresh in the freezer for about three months. When you’re ready to enjoy them, thaw the cookies in the fridge overnight. For the best texture, warm them in the oven for a few minutes before serving. Blueberry Cheesecake Swirl Cookies are soft, sweet cookies with a rich, creamy filling. They have the delightful taste of cheesecake mixed with fresh blueberries. Each bite gives you a burst of flavor that combines tartness from the berries and sweetness from the cream cheese. The cookie itself is soft and chewy, making it hard to stop at just one. Yes, you can use frozen blueberries. Just make sure to thaw and drain them first. Frozen berries can be juicier than fresh ones, which may change the texture a bit. If you use frozen berries, gently fold them into the dough to avoid breaking them apart. This helps keep your cookies from turning too mushy. These cookies stay fresh for about five days when stored in an airtight container. To keep them tasting great, avoid leaving them out in the open air. You can also freeze them for up to three months. Just make sure to let them cool completely before freezing. Yes, you can make the dough ahead. Prepare it and store it in the fridge for up to three days. If you want a longer storage time, freeze the dough. When you're ready to bake, let it thaw in the fridge overnight before using. This makes it easy to enjoy fresh cookies any day. If your cookies spread too much, it may be due to warm dough. Try chilling the dough for at least 30 minutes before baking. Also, make sure to measure your flour accurately. Too little flour can cause spreading. Using a cookie scoop can help keep them uniform in size. To make the cookies less sweet, reduce the granulated sugar by ¼ cup. You can also skip the powdered sugar on top for less sweetness. Adding a bit of lemon juice can balance the flavors and give a fresh taste without making the cookies overly sweet. For the complete recipe for Blueberry Cheesecake Swirl Cookies, check out the [Full Recipe](#). 🫐 In this article, we covered the key ingredients for Blueberry Cheesecake Swirl Cookies, the steps to make them, and tips for success. Fresh blueberries, soft cream cheese, and the perfect swirl are essential for the best flavor. Remember to avoid common mistakes like overmixing and not cooling the cookies properly. With some easy variations, these cookies can suit any occasion. Follow the storage tips for lasting freshness. Happy baking!
Blueberry Cheesecake Swirl Cookies Delightful Treat
Get ready to indulge in a treat that combines your favorite cheesecake and cookies! My Blueberry Cheesecake Swirl Cookies are rich, creamy, and bursting with
To make these Peanut Butter Brownie Swirl Cookies, you need basic ingredients. Here’s what to gather: - 1 cup creamy peanut butter - 1/2 cup granulated sugar - 1/2 cup brown sugar, packed - 1 large egg - 1 teaspoon vanilla extract - 1/2 teaspoon baking soda - 1/4 teaspoon salt - 1/2 cup all-purpose flour - 1/2 cup semi-sweet chocolate chips - 1/2 cup brownie mix (dry) These ingredients create a rich, tasty cookie. The peanut butter gives it a smooth texture, while the brownie mix adds a fudgy twist. You can make these cookies even more fun with extra mix-ins. Here are some ideas: - Chopped nuts (like walnuts or pecans) - Mini marshmallows - Swirls of caramel sauce - Other types of chocolate chips (like white or dark) These mix-ins add flavor and texture. Feel free to get creative! Not all ingredients work for everyone. Here are some easy swaps: - Use almond butter for a nut-free option. - Replace granulated sugar with coconut sugar for a healthier choice. - Use flax egg (1 tablespoon ground flaxseed with 2.5 tablespoons water) for a vegan twist. These substitutes let you enjoy the cookies no matter your diet. Check out the full recipe for more details on baking these treats! To start, gather your ingredients. You’ll need creamy peanut butter, sugar, an egg, and a few others. Next, preheat your oven to 350°F (175°C). This step is key for even baking. Line a baking sheet with parchment paper for easy cleanup. In a large bowl, mix the peanut butter, granulated sugar, and brown sugar. Stir until the mix is smooth and creamy. Add the egg and vanilla extract. Beat them in well. Now, sprinkle in the baking soda and salt. Mix until everything is combined. Gradually add the flour, stirring gently. Avoid overmixing to keep the cookies soft. Next, fold in the semi-sweet chocolate chips. This will give a rich taste. In a small bowl, combine the brownie mix with a splash of water. Stir until it forms a thick batter. This will create the swirl in your cookies. Using a tablespoon, scoop the peanut butter dough onto the lined sheet. Space each scoop about 2 inches apart. Now, drop small dollops of brownie batter on top of each scoop. Take a toothpick or small spatula and swirl the brownie mix into the cookie dough. Make sure not to mix them too much; you want that pretty marbled look. Place the baking sheet in your preheated oven. Bake for 10-12 minutes. Look for set edges and slightly cracked tops. This shows they are done. Once baked, remove the cookies from the oven. Let them cool on the sheet for a few minutes. This helps them firm up. Then, transfer the cookies to a wire rack. Allow them to cool completely. For serving, arrange the cookies on a nice plate. A light dusting of powdered sugar adds a lovely touch. You can also place a few whole chocolate chips on top for extra flair. Enjoy your Peanut Butter Brownie Swirl Cookies! For the full recipe, check back to the ingredients section. To get the best texture in your cookies, focus on your mixing. Start by blending your sugars and peanut butter until smooth. This step is key for a chewy cookie. When you add flour, mix just until you see no more dry bits. Overmixing can make cookies tough. One common mistake is not measuring your ingredients right. Use measuring cups for accuracy. Another mistake is using cold eggs. Always use eggs at room temperature. This helps them blend better into the dough. Don’t skip the chilling step. Chilling the dough for 15 minutes can help the cookies hold their shape. For added flavor, try mixing in a pinch of cinnamon or a splash of coffee. These can boost the taste of the cookies. If you like a crunch, add chopped nuts or toffee bits to the dough. You can also swap semi-sweet chips for dark chocolate for a richer flavor. For the full recipe, check the detailed steps above. {{image_2}} If you want to make these cookies nut-free, it's easy! Just swap the peanut butter for sun butter or soy nut butter. Both options have a similar texture. You can still enjoy the rich flavor without any nuts. Be sure to check labels for allergens. This keeps your cookies safe for kids or friends with nut allergies. You can mix things up by adding different flavors to the cookies. Try using almond extract instead of vanilla for a new twist. You can also add a dash of cinnamon for warmth. If you love coconut, mix in unsweetened shredded coconut. These small changes can make a big impact on taste. Making a vegan version of these cookies is simple. Replace the egg with one tablespoon of ground flaxseed mixed with three tablespoons of water. Let it sit for five minutes to thicken. Use a plant-based butter instead of regular peanut butter. You can find vegan brownie mix at the store too. This way, you keep all the delicious flavors while keeping it plant-based. For the full recipe, follow the steps outlined to create these tasty treats! Store your Peanut Butter Brownie Swirl Cookies in an airtight container. Keep them at room temperature for up to five days. This way, they stay soft and tasty. If you add powdered sugar on top, it may clump. But it still looks nice! You can freeze these cookies for later. Place them in a single layer on a baking sheet. Once frozen solid, transfer them to a freezer-safe bag. They will keep well for up to three months. Just remember to label the bag with the date. This way, you don’t forget when you made them! To enjoy warm cookies again, preheat your oven to 350°F (175°C). Place the cookies on a baking sheet. Heat them for about 5 minutes. This helps restore their soft texture. You can also use a microwave. Heat them for about 10-15 seconds. But be careful; you don’t want them too hot! Enjoy your cookies warm and gooey. For the full recipe, check out the details above. Peanut Butter Brownie Swirl Cookies stay fresh for about a week. Store them in an airtight container. If you want them to last longer, put them in the fridge. This helps keep them soft and tasty. Yes, you can use crunchy peanut butter! It will give your cookies a fun texture. The flavor will be the same, but you'll have little peanut pieces in every bite. Just remember, it might change how the dough mixes. If your dough feels too dry, add a splash of water or milk. Start with a teaspoon and mix well. If it still seems dry, add a bit more. You want the dough to be soft, but not sticky. This will help your cookies bake evenly and stay chewy. For the full recipe, check out the details above! In this article, we explored how to make delightful Peanut Butter Brownie Swirl Cookies. We discussed the core ingredients, optional mix-ins, and smart substitutions. You learned easy steps for preparation, baking, and serving. I shared tips to perfect your cookie texture and avoid common mistakes. We also looked at fun variations and smart storage tips. In closing, these cookies are simple and tasty. Enjoy experimenting with flavors and textures!
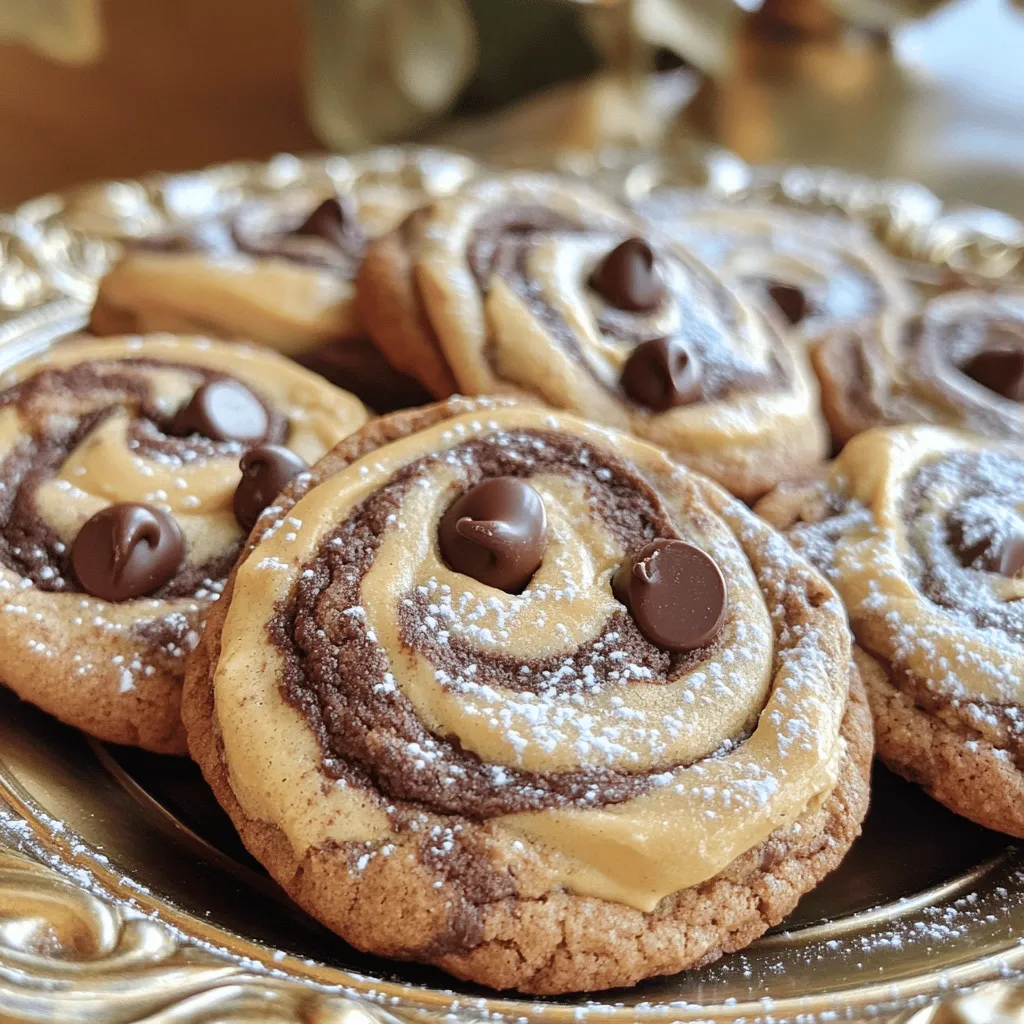
Peanut Butter Brownie Swirl Cookies Irresistible Treat
Get ready to meet your new favorite dessert: Peanut Butter Brownie Swirl Cookies! I’ll show you how to make these gooey, chewy treats that blend
To make tasty funnel cake bites, you need a few key items. Here’s what to gather: - 1 cup all-purpose flour - 1 tablespoon sugar - ½ teaspoon baking powder - ¼ teaspoon salt - 1 large egg - 1 cup milk - 1 teaspoon vanilla extract - ½ teaspoon cinnamon (optional) - Vegetable oil, for frying - Powdered sugar, for dusting These ingredients come together to create a sweet and crispy treat. The flour gives the structure, while the egg and milk add richness. Sugar brings sweetness, and a hint of vanilla adds flavor. You can easily take your funnel cake bites up a notch! Add these enhancements for extra flavor: - ½ teaspoon almond extract - 1 tablespoon cocoa powder for a chocolate twist - A pinch of nutmeg for a warm spice These options let you customize your bites. Experiment and find your favorite blend! Toppings make funnel cake bites even better. Here are some fun ideas: - Dust with powdered sugar for classic sweetness - Drizzle chocolate syrup for a rich treat - Add fresh fruit like strawberries or bananas - Serve with whipped cream for a delightful touch These toppings can change each bite. Try different combos to find what you love most! For the full recipe, refer to the earlier section. First, gather your ingredients. This includes flour, sugar, baking powder, salt, egg, milk, vanilla, and oil. You will also need powdered sugar for dusting. Start by mixing the dry ingredients in one bowl. In another bowl, whisk the egg, then add milk and vanilla. Combine both mixtures until smooth. To get the right batter, avoid over-mixing. You want it smooth but still thick. If you want extra flavor, add cinnamon. This spice adds warmth to each bite. You can also adjust the sugar to your taste. A little more sugar makes it sweeter! Heat your oil to 350°F (175°C). Use enough oil so the bites can float. Grab a piping bag or a squeeze bottle filled with the batter. Squeeze the batter into the hot oil in fun shapes. Cook for 2-3 minutes until golden brown. Use a slotted spoon to lift them out. Let them drain on paper towels. Finally, dust with powdered sugar for sweetness. Enjoy your delicious funnel cake bites! For the full recipe, check the earlier section. When making funnel cake bites, pay attention to the batter. A common mistake is over-mixing. This can make your bites tough instead of light. Mix until just smooth. Another mistake is frying at the wrong temperature. If the oil is too cool, the bites soak up oil. If it's too hot, they burn quickly. Aim for 350°F (175°C) for perfect frying. To cook funnel cake bites evenly, use a thermometer. This helps you know the oil is the right temperature. Squeeze out the batter in small circles, about 2-3 inches wide. This size cooks well and stays crisp. Make sure not to crowd the pan. Fry in batches to give each bite space. This ensures they cook evenly and become golden. You can enhance your funnel cake bites in many ways. Try adding cinnamon to the batter for a warm spice flavor. Vanilla extract adds a nice touch, too. You can also mix in some cocoa powder or lemon zest for a twist. For texture, consider frying in a mixture of oils. A blend of vegetable and coconut oil can add a unique flavor. Dipping sauces like chocolate or caramel can take your bites to the next level. Dust with powdered sugar right before serving for a sweet finish. For the Full Recipe, check out the earlier section. {{image_2}} You can change up the flavors in funnel cake bites. Try adding lemon zest for a zesty twist. A touch of cocoa powder gives a rich chocolate flavor. Mix in pumpkin spice for a warm fall treat. You can also add almond extract for a nutty note. Each variation brings its own charm to these treats. If you need gluten-free options, use a gluten-free flour blend. For a vegan version, replace the egg with a flax egg. To make a flax egg, mix one tablespoon of flaxseed meal with three tablespoons of water. Let it sit for five minutes to thicken. Use plant-based milk, like almond or soy, in place of regular milk. The toppings can really make your funnel cake bites shine. Use classic powdered sugar for a sweet touch. Drizzle chocolate or caramel sauce for extra richness. Fresh fruits like strawberries or blueberries add freshness. You can also try whipped cream or a scoop of ice cream. Don't forget to sprinkle chopped nuts for crunch. To keep your funnel cake bites fresh, store them in an airtight container. Line the bottom with paper towels to absorb moisture. Place a layer of bites in the container, then add more paper towels between layers. This helps keep them crisp. When you want to enjoy leftover funnel cake bites, the best way to reheat them is in an oven. Preheat your oven to 350°F (175°C). Place the bites on a baking sheet and heat for about 5-7 minutes. This restores their crispiness and taste. Funnel cake bites stay tasty for about 2-3 days when stored properly. If you want them to last longer, you can freeze them. They will keep well in the freezer for about one month. Just make sure to thaw them before reheating. Yes, you can freeze Funnel Cake Bites. Let them cool first. Place them in a single layer on a baking sheet. Once frozen, move them to an airtight bag. They should last for about two months in the freezer. When ready to eat, just reheat them in the oven. The best oil for frying Funnel Cake Bites is vegetable oil. It has a high smoke point, making it great for frying. You can also use canola oil or peanut oil. Both oils work well and add a neutral flavor. Serving Funnel Cake Bites at a party is easy. Use small paper trays or cones for fun presentation. Dust them with powdered sugar right before serving. Provide dipping sauces like chocolate, caramel, or fruit sauce. This adds variety and excitement for guests. You can find pre-made Funnel Cake Bites at some grocery stores and food trucks. Check local fairs and festivals as well. If you want to try them at home, I recommend making them from scratch. It’s fun and rewarding! The Full Recipe for Funnel Cake Bites includes simple ingredients like flour, sugar, and milk. You can find the complete recipe above, along with easy steps to make these tasty treats. Making delicious funnel cake bites at home is simple and fun. We covered the key ingredients, from essentials to tasty toppings. I shared step-by-step instructions to help you master the batter and cook them crispy. With tips to avoid common mistakes, you can elevate your bites easily. We explored unique flavor combos and options for everyone. Lastly, I shared how to store and reheat them for later enjoyment. Enjoy the sweetness and joy of funnel cake bites with your loved ones. They’ll be a hit every time!
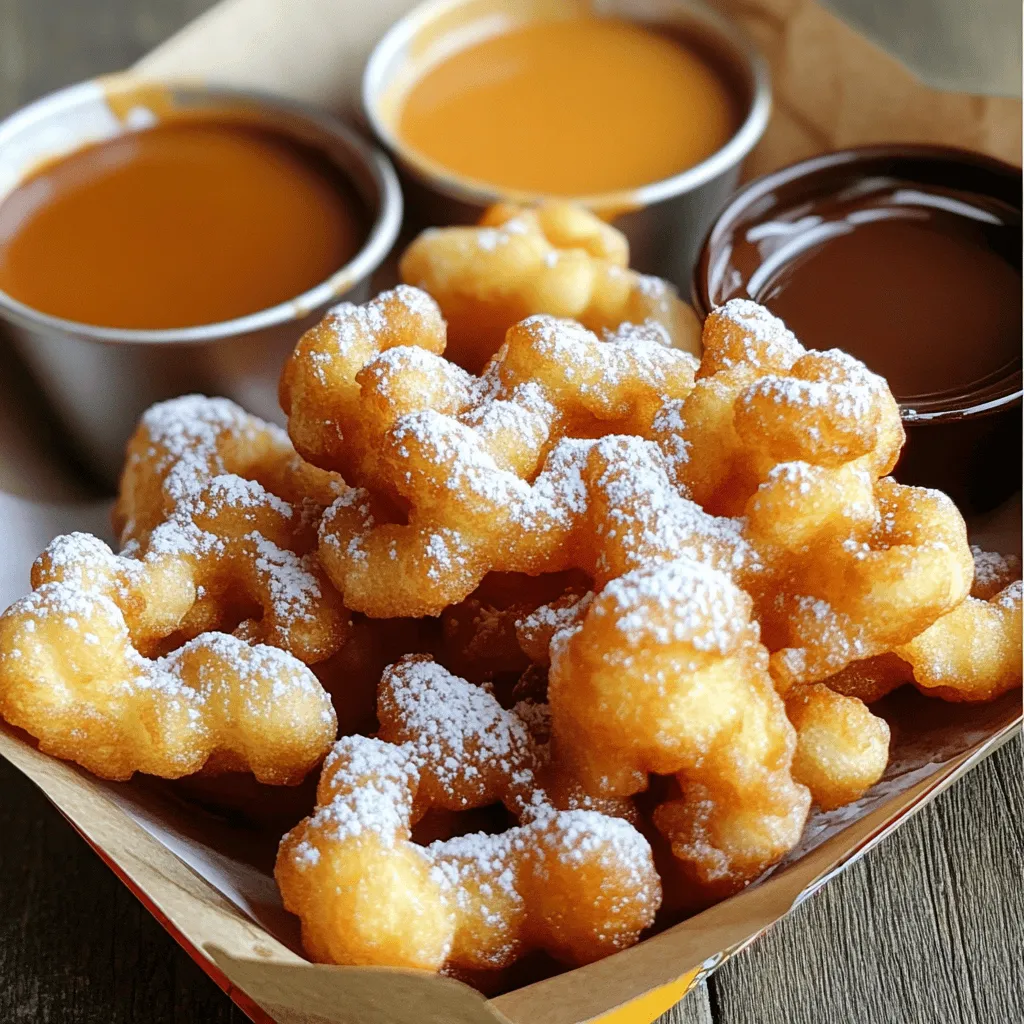
Funnel Cake Bites Delightful and Easy Recipe Guide
Are you ready to whip up a tasty treat? Funnel cake bites are easy to make and lots of fun! In this guide, I’ll walk
- 1 ¾ cups all-purpose flour - 1 ½ cups granulated sugar - ½ cup unsweetened cocoa powder - 2 teaspoons baking powder - 1 teaspoon baking soda - ½ teaspoon salt - 2 large eggs - 1 cup buttermilk - ½ cup vegetable oil - 2 teaspoons vanilla extract - 1 cup boiling water - 1 cup chocolate chips - 1 cup caramel sauce (store-bought or homemade) - 1 cup toffee bits (store-bought or homemade) - Whipped cream, for serving - Chocolate shavings or toffee bits, for garnish When choosing your ingredients, I suggest using high-quality chocolate chips for a richer taste. Brands like Ghirardelli or Guittard work wonders. For caramel sauce, don’t hesitate to pick a good store brand or try making it at home. Fresh buttermilk is key for moistness. If you can’t find buttermilk, mix regular milk with a splash of vinegar. This cake is all about layers of flavor, so every ingredient counts. Check the freshness of your baking powder and baking soda. Old ingredients may affect how your cake rises. Make sure your eggs are at room temperature for a smooth batter. This cake will serve 12, perfect for sharing. Enjoy making this delightful treat! For detailed steps, refer to the Full Recipe. Start by preheating your oven to 350°F (175°C). This step is key for baking. Next, grease and flour two 9-inch round cake pans. This will help the cake come out easily later. In a large mixing bowl, whisk together these dry ingredients: - 1 ¾ cups all-purpose flour - 1 ½ cups granulated sugar - ½ cup unsweetened cocoa powder - 2 teaspoons baking powder - 1 teaspoon baking soda - ½ teaspoon salt Make sure the mixture is well combined. This helps the cake rise evenly. Now it’s time to add the wet ingredients. Pour in: - 2 large eggs - 1 cup buttermilk - ½ cup vegetable oil - 2 teaspoons vanilla extract Beat this mixture on medium speed for about 2 minutes. The batter should be smooth and creamy. Next, gradually stir in 1 cup of boiling water. The batter will be thin, but that’s okay! It helps keep the cake moist. Finally, fold in 1 cup of chocolate chips, saving some for topping later. Divide the batter evenly between your prepared pans. Bake them for 30-35 minutes. Check for doneness by inserting a toothpick into the center. If it comes out clean, your cake is ready! Let the cakes cool in the pans for about 10 minutes. After that, move them to wire racks to cool completely. This cooling step is important before you assemble the cake. Once cooled, you can now layer and decorate your delicious creation! For the full recipe, please refer to the complete instructions. To make the best Chocolate Caramel Toffee Crunch Cake, focus on a few key steps. - Ensuring proper cake texture: Use room temperature eggs and buttermilk. This helps merge the ingredients smoothly, creating a light and fluffy cake. - Avoiding common baking mistakes: Don't skip preheating the oven. This ensures the cake rises well. Also, measure flour correctly. Too much flour makes the cake dry. Once your cake is baked and cooled, it’s time to make it look amazing! - Ideas for frosting and garnishing: I love using whipped cream for a soft touch. Feel free to mix in a bit of caramel sauce into the whipped cream for extra flavor. Top with chocolate shavings or extra toffee bits for a crunchy finish. - Presentation suggestions for serving: Slice the cake into pieces. Serve each piece on a plate with a dollop of whipped cream. A sprinkle of toffee bits adds a nice crunch and looks delightful! For an extra touch, drizzle more caramel sauce on the plate. For the complete details, check out the Full Recipe for step-by-step guidance! {{image_2}} You can easily change the flavor of this cake. For a twist, try vanilla instead of chocolate. Coffee adds a rich depth. Just use the same amounts in the recipe. You can also add fun mix-ins to the batter. Try nuts, dried fruit, or even different chocolate types. Customize each layer with your favorite flavors. If you need gluten-free options, use gluten-free flour instead of all-purpose flour. This change keeps the cake tasty. For a vegan cake, swap eggs for flax eggs and use plant-based milk. You can also use vegan butter. If you have nut allergies, skip the toffee bits. Use crispy rice or extra chocolate chips instead. These swaps help keep your cake safe and delicious! Check out the Full Recipe for all the details. To keep your Chocolate Caramel Toffee Crunch Cake fresh, store it in an airtight container. This will help keep moisture in and prevent the cake from drying out. Place the cake at room temperature if you plan to eat it within three days. For longer storage, wrap the cake tightly in plastic wrap and then in foil. This method prevents freezer burn. You can also freeze individual slices for easy treats later. Just remember to use a freezer-safe container or bag for best results. At room temperature, the cake lasts about three days. In the fridge, it can stay fresh for up to a week. If you freeze it, the cake can keep for about three months without losing taste or texture. Just make sure to thaw it in the fridge before serving. This way, you can enjoy a slice of this delicious cake anytime! How can I make this cake ahead of time? You can bake the cake a day or two before serving. Allow the cakes to cool completely. Wrap each layer in plastic wrap. Store them in the fridge. This keeps them fresh and moist. Can I use a different type of frosting? Yes, you can use other frostings. Cream cheese frosting adds a nice tang. A chocolate ganache gives a rich taste. Choose whatever you like best! What to do if the cake collapses? If your cake collapses, check the oven temperature. Too hot can cause it to rise too fast. Also, make sure you mixed the batter well. If it’s too thin, it may not hold its shape. How to fix a dry cake? If your cake is dry, you can add a simple syrup. Mix equal parts water and sugar. Heat until the sugar dissolves. Brush this syrup onto the cake layers for added moisture. For complete instructions and measurements, check out the Full Recipe. This will guide you through each step to create this delicious cake! This blog post covered all you need for a great cake. We discussed key ingredients and how to prepare them. You learned step-by-step instructions for baking and cooling. I also shared tips for baking success and decoration ideas. Variations allow you to explore new flavors and adjust for diets. Proper storage helps keep your cake fresh longer. Now, you have all the tools to create a delicious cake. Enjoy baking!
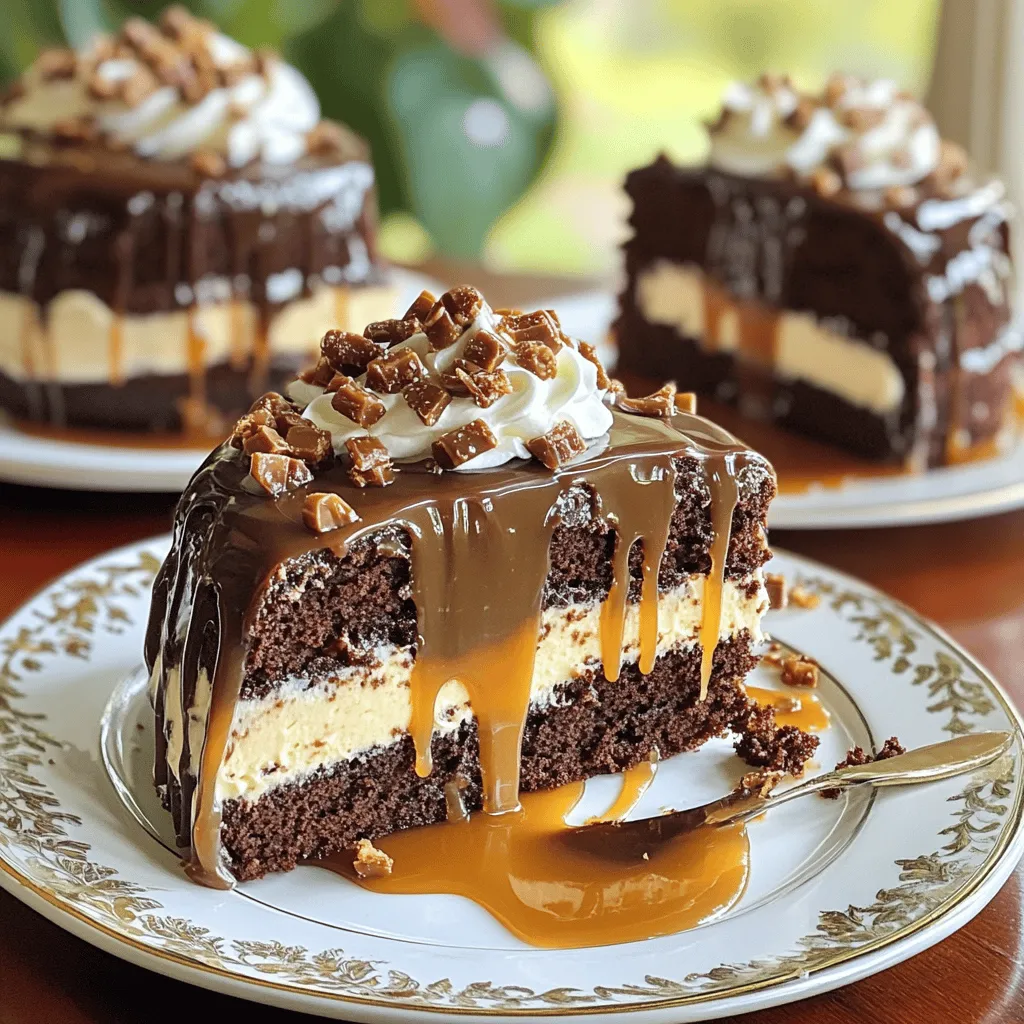
Chocolate Caramel Toffee Crunch Cake Delightful Recipe
Are you ready to indulge in a dessert that will satisfy your sweet tooth? The Chocolate Caramel Toffee Crunch Cake combines rich chocolate, gooey caramel,
To make a rich and moist brownie cake, gather these key ingredients: - 1 cup unsalted butter, melted - 2 cups granulated sugar - 4 large eggs - 1 teaspoon vanilla extract - 1 cup all-purpose flour - 1 cup unsweetened cocoa powder - 1 teaspoon baking powder - 1/2 teaspoon salt - 1 cup semi-sweet chocolate chips You can boost the flavor with a few optional add-ins: - 1/2 cup chopped walnuts - 1/2 cup of white chocolate chips - A pinch of espresso powder for deeper chocolate notes - A sprinkle of sea salt on top before baking These add-ins make your brownie cake even more special. They add texture and surprise bites of flavor. To bake your brownie cake, have these tools handy: - A 9x13 inch baking pan - Mixing bowls (one large, one medium) - Whisk and rubber spatula - Measuring cups and spoons - Parchment paper (for easy removal) With these ingredients and tools, you’re ready to create a delightful brownie cake. For the complete steps, check the Full Recipe. First, gather your ingredients. You will need melted butter, sugar, eggs, and vanilla. Mix the melted butter with sugar in a big bowl. Whisk until smooth. Then, add the eggs one by one. Stir well after each egg. Now, pour in the vanilla extract. In a separate bowl, mix the flour, cocoa powder, baking powder, and salt. Stir these dry ingredients well. Next, slowly add this mix to the wet batter. Be gentle. Over-mixing makes the cake dense. Once combined, fold in the chocolate chips and walnuts if you want. Now, pour the batter into a greased 9x13 inch baking pan. Spread it out evenly. Preheat your oven to 350°F (175°C). Bake the cake for 30 to 35 minutes. Check it with a toothpick. It should have a few moist crumbs, not wet batter. After baking, take the pan out of the oven. Let it cool for 20 minutes in the pan. Then, move the cake to a wire rack to cool fully. Once cool, slice it into squares or rectangles. You can dust it with powdered sugar or add vanilla ice cream for extra delight. Enjoy your Chocolate Delight Brownie Cake! For the complete recipe, check out the Full Recipe. To get that soft and chewy brownie cake, mix your wet and dry ingredients well, but don't overdo it. Over-mixing can make the cake tough. It’s best to mix until just combined. For a fudgy texture, use less flour and add more chocolate chips. Baking at the right temperature is key. Set your oven to 350°F (175°C) for the best results. One big mistake is not measuring your ingredients correctly. Too much flour can lead to a dry cake. Always use a kitchen scale or measuring cups. Another mistake is opening the oven door too soon. This can make your cake sink. Wait until the last few minutes to check for doneness with a toothpick. To make your brownie cake look fancy, dust it with powdered sugar after it cools. You can also add fresh berries or a scoop of vanilla ice cream on top. For a fun twist, drizzle melted chocolate over the cake or sprinkle chopped nuts for extra crunch. These details make your dessert stand out without much extra effort. For the full recipe, check out the Chocolate Delight Brownie Cake. {{image_2}} You can make a gluten-free brownie cake easily. Replace all-purpose flour with almond flour or a gluten-free blend. This keeps the cake rich and moist. Just make sure to check the labels on your flour. Some blends may have added ingredients that can change the taste. If you want a vegan brownie cake, swap eggs for flax eggs. Mix one tablespoon of ground flaxseed with three tablespoons of water. Let it sit for five minutes until it thickens. Instead of butter, use coconut oil or vegan butter. These changes keep the cake tasty and moist without any animal products. You can get creative with flavors and add-ins for your brownie cake. Here are some fun ideas: - Mint Extract: Add a teaspoon of mint extract for a fresh twist. - Peanut Butter: Swirl in half a cup of creamy peanut butter before baking. - Spices: A pinch of cinnamon or cayenne can add warmth and depth. - Fruits: Mix in fresh raspberries or chopped cherries for a fruity burst. - Nuts: Use hazelnuts or pecans instead of walnuts for a different crunch. These variations let you customize your brownie cake to your taste. Check out the Full Recipe for the base you can build on. Enjoy experimenting! To keep your brownie cake fresh, store it in an airtight container. This helps keep moisture in and prevents it from drying out. Place a piece of parchment paper between the cake and the lid to absorb excess moisture. If you use a cake stand, cover it with plastic wrap. This will keep it safe and delicious for a longer time. You can freeze brownie cake for up to three months. First, let it cool completely. Then, cut it into squares. Wrap each piece tightly in plastic wrap, then place them in a freezer bag. When you are ready to eat, just take a piece out and let it thaw at room temperature. If you want it warm, heat it in the microwave for about 20 seconds. This will bring back its soft, fudgy texture. Brownie cake usually lasts about 5 to 7 days at room temperature if stored correctly. If you see any mold or smell something off, it's best to throw it away. It’s also a good idea to check for dryness. If the cake feels hard or crumbly, it may not taste good anymore. Always trust your senses when it comes to food! A brownie cake is thicker and fluffier than regular brownies. It has a cake-like texture while keeping that rich, fudgy flavor. Regular brownies are denser and often chewier. The key difference lies in the ratio of flour and eggs. Brownie cake uses more flour and eggs, giving it a light, airy feel. This makes it great for birthday celebrations or special treats. Yes, you can use cocoa powder instead of chocolate. Cocoa powder will give your brownie cake a deep, rich chocolate taste. In the recipe, you will use 1 cup of unsweetened cocoa powder. This option is also more convenient and can save money. Just remember to balance it with enough fat, like butter, to keep it moist. To make your brownie cake extra fudgy, use more chocolate and less flour. You can add an extra half cup of chocolate chips. Also, avoid over-mixing the batter. This keeps the cake tender and moist. Baking for a shorter time can also help. Check the cake at 30 minutes. A toothpick should come out with a few moist crumbs for the best fudgy texture. Toppings can elevate your brownie cake. Here are some great options: - Whipped cream for a light touch - Vanilla ice cream for a cool contrast - Fresh berries for a fruity zing - Caramel sauce for added sweetness - Chopped nuts for a crunchy bite Feel free to mix and match these toppings. They can make your brownie cake even more special! For a full recipe, check the details above. We covered the essential steps to make a delicious brownie cake. You learned about the required ingredients, key tools, and how to prepare the batter. I shared tips for perfect texture and personalized variations, such as gluten-free and vegan options. Plus, you now know how to store and freeze your cake for later enjoyment. Making this treat can be easy and fun. Enjoy every bite and share it with friends and family. Happy baking!
Brownie Cake Delight Simple and Decadent Recipe
Welcome to my world of delightful desserts! Today, I’m sharing my simple and decadent Brownie Cake recipe. If you crave rich, fudgy goodness, this cake