Desserts
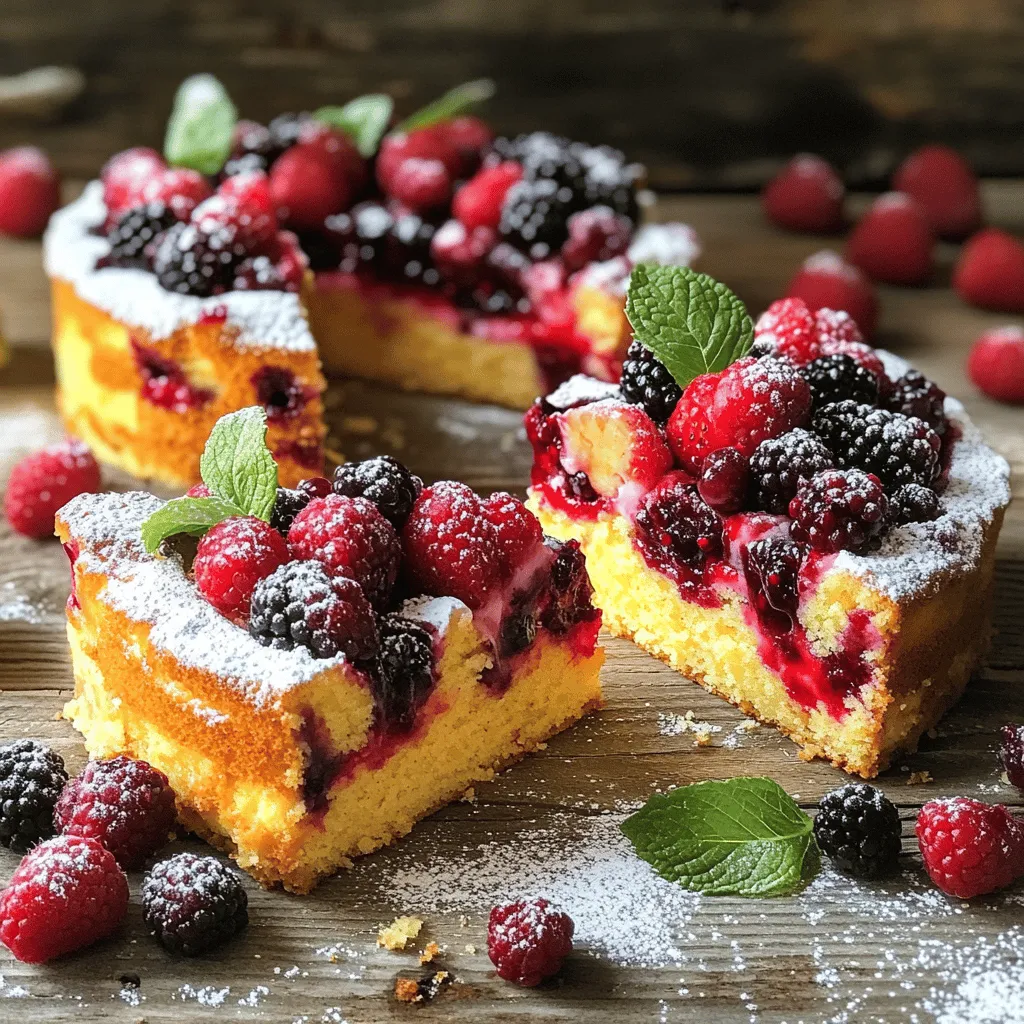
Easy Berry Cake Deliciously Simple Dessert Recipe
Are you ready to bake something simple yet delicious? This Easy Berry Cake combines fresh berries with a fluffy texture that will impress everyone. With
![- 2 cups all-purpose flour - 1 cup granulated sugar - 1/2 cup unsalted butter, softened - 2 large eggs - 1 cup sour cream - 1 teaspoon vanilla extract - 1 teaspoon baking powder - 1/2 teaspoon baking soda - 1/2 teaspoon salt - 1 1/2 cups fresh blueberries - 1/2 teaspoon cinnamon - 1/4 cup brown sugar - 1 tablespoon lemon zest When making blueberry coffee cake, gather the main ingredients first. You need flour, sugar, butter, eggs, and sour cream. These create a rich and moist base. I like to use fresh blueberries for the best flavor. Next, add flavor enhancers. Vanilla extract gives a sweet aroma. Baking powder and baking soda help the cake rise. Salt balances the sweetness. Mixing in lemon zest adds a bright twist, brightening the flavor. Finally, for the topping, you will want cinnamon and brown sugar. This adds a sweet crunch on top. Each bite will have a delightful blend of flavors. Use the [Full Recipe] for specific amounts and instructions. This coffee cake is a great treat for breakfast or dessert. Enjoy the burst of blueberries in every slice! 1. Preheat your oven to 350°F (175°C) and grease a 9x13 inch baking dish. This helps the cake not stick. 2. In a large mixing bowl, cream together the softened butter and granulated sugar. Mix until it feels light and fluffy. This step adds air for a soft cake. 1. Add the eggs, one at a time. Mix well after each egg. Then, stir in the sour cream and vanilla extract until everything combines. 2. In another bowl, whisk together the flour, baking powder, baking soda, and salt. Gently mix this dry mixture into the wet mixture. Stop mixing when it looks just combined; overmixing can make the cake tough. 3. Now, gently fold in the blueberries and lemon zest. Be careful to keep the berries whole; they add great flavor and color. 1. Spread the batter evenly in the prepared baking dish. 2. In a small bowl, mix the brown sugar and cinnamon. Sprinkle this topping evenly over the batter. 3. Bake in the preheated oven for 45-50 minutes. Check for doneness by inserting a toothpick in the center; it should come out clean. 4. Once baked, take it out of the oven. Let it cool for at least 15 minutes before slicing. This helps the cake set and makes it easier to cut. For the complete method, refer to the Full Recipe. Enjoy the delightful taste of blueberry coffee cake! How to check for doneness? To check if your blueberry coffee cake is done, insert a toothpick into the center. If it comes out clean, your cake is ready. If it has wet batter on it, bake for a few more minutes. Keep an eye on it to avoid over-baking. Best practices for folding in blueberries: When adding blueberries, do it gently. Use a spatula to fold them into the batter. This keeps the berries whole and prevents them from breaking. If you are using frozen blueberries, make sure to thaw and drain them first. This helps avoid extra moisture in your cake. Serving suggestions and garnishing ideas: Serve the cake warm or at room temperature. Each slice looks great with a dollop of whipped cream or a scoop of vanilla ice cream. You can also add fresh blueberries on top for a pop of color. Tips for dusting with powdered sugar: Before serving, dust the cake with powdered sugar for a sweet touch. Use a fine mesh sieve to sprinkle the sugar evenly. This creates a lovely, snowy effect that makes your cake look even more inviting. Incorporating lemon zest for freshness: Adding lemon zest lifts the flavor of the cake. It brings a bright, fresh taste that pairs well with blueberries. Just one tablespoon is enough to make a difference. Using different types of berries: You can switch out blueberries for other berries if you like. Raspberries, blackberries, or a mix of berries work well too. Each type offers a unique flavor, making your cake special every time. For the complete recipe, check out the [Full Recipe]. {{image_2}} You can change the fruit in this recipe for fun flavors. Try using raspberries or blackberries instead of blueberries. Raspberries give a nice tartness. Blackberries add a sweet touch. You can also mix different berries together for a mixed berry coffee cake. This adds more colors and flavors. If you need gluten-free options, use almond or coconut flour. These flours work well but change the texture a bit. For a vegan version, swap eggs with flaxseed meal. Use coconut oil in place of butter. Both choices keep the cake tasty and moist. Add spices to make your coffee cake fit the season. For fall, try cinnamon or nutmeg. In winter, consider ginger for warmth. You can also add festive toppings for holidays. Think of crushed candy canes or colorful sprinkles. This makes your cake fun and special for celebrations. To keep leftover blueberry coffee cake fresh, store it in an airtight container. This keeps moisture in and prevents it from drying out. You can also wrap it tightly in plastic wrap. Make sure to let the cake cool completely before sealing it. This helps maintain its texture and taste. If you plan to eat it within a few days, this method works great. To freeze blueberry coffee cake, slice it into portions. Wrap each slice in plastic wrap and then place them in a freezer bag. This helps prevent freezer burn. When you're ready to eat, take out a slice and let it thaw in the fridge overnight. For a quick reheat, you can pop it in the microwave for about 30 seconds. This will bring back its fluffy texture. Blueberry coffee cake lasts about 3 to 5 days at room temperature if stored well. If you refrigerate it, it can last up to a week. Watch for signs of spoilage. If you see mold or it smells off, it's best to toss it. A dry texture or hard edges also means it’s time to say goodbye. Keeping track of these factors helps you enjoy every slice safely. What can I substitute for sour cream? You can use plain yogurt. Greek yogurt also works well. Both options keep the cake moist. Applesauce is an option too but will change the taste a bit. Can I use frozen blueberries? Yes, frozen blueberries are fine. Just make sure to thaw and drain them first. This keeps the batter from getting too wet. Fresh blueberries are ideal, but frozen work well too. How do I adjust baking time for a smaller pan? If you use a smaller pan, reduce the baking time. Check for doneness about 10 minutes early. A toothpick should come out clean when the cake is done. Why did my coffee cake turn out dense? Too much mixing can cause density. Make sure to mix just until combined. Also, check your baking powder. If it’s old, it may not rise properly. What pairs well with blueberry coffee cake? Coffee is a classic match. You can also serve it with tea or milk. A scoop of vanilla ice cream adds a nice touch too. Is blueberry coffee cake good for breakfast or dessert? It’s perfect for both! Enjoy it with coffee in the morning or as a sweet treat later. The flavors work great any time of day. You now know how to make a tasty blueberry coffee cake. We explored the key ingredients, from flour and sugar to fresh blueberries. You learned the step-by-step process and some helpful tips for baking and serving. Plenty of variations let you customize your cake for any taste. Plus, I shared how to store and freeze leftovers for later enjoyment. Remember, baking is about having fun with your food. Enjoy every bite of your blueberry coffee cake!](https://tossedrecipes.com/wp-content/uploads/2025/05/5b2310f7-1b11-40e6-a07a-a0738c35e73a.webp)
Blueberry Coffee Cake Simple and Flavorful Recipe
Looking for a warm treat that bursts with flavor? This Blueberry Coffee Cake recipe is your answer! You’ll love how easy it is to bake
Lemon Glazed Blueberry Bait Irresistible Fishing Treat
Are you ready to catch more fish? This Lemon Glazed Blueberry Bait is a game-changer! Packed with fruity flavor and a sweet glaze, it’s crafted

Blueberry Crumble Cheesecake Delightful and Creamy
Are you ready to savor a dessert that blends creamy cheesecake with sweet blueberries and a crunchy topping? My Blueberry Crumble Cheesecake is a showstopper
![To make delicious blueberry lemon bars, gather these fresh ingredients: - 1 cup all-purpose flour - 1/4 cup powdered sugar - 1/2 cup unsalted butter, softened - 1/4 teaspoon salt - 2 large eggs - 1 cup granulated sugar - 2 tablespoons lemon zest (about 2 lemons) - 1/4 cup fresh lemon juice - 1 teaspoon baking powder - 1 cup fresh blueberries - Extra powdered sugar for dusting You can also add some optional ingredients to enhance flavor. Consider using a pinch of vanilla extract for warmth. Adding a few drops of almond extract can give a nice twist. If you like a bit of spice, a dash of cinnamon or nutmeg can add depth. Using fresh ingredients ensures the best taste. Fresh blueberries burst with flavor, and ripe lemons offer a bright zing. Each element plays a key role in the balance of sweet and tart. This full recipe brings together these ingredients for a treat that is both zesty and satisfying. First, set your oven to 350°F (175°C). This temperature helps the bars bake evenly. Grease an 8x8 inch baking pan with butter or cooking spray. If you prefer, line the pan with parchment paper. This makes it easy to lift the bars out later. To make the crust, mix these ingredients in a bowl: - 1 cup all-purpose flour - 1/4 cup powdered sugar - 1/2 cup unsalted butter, softened - 1/4 teaspoon salt Use a fork or your fingers to combine them until the mix looks like coarse crumbs. Next, press the crust firmly into the bottom of your pan. Make sure it is even all around. This helps the bars cook evenly. In a separate bowl, whisk together: - 2 large eggs - 1 cup granulated sugar - 2 tablespoons lemon zest - 1/4 cup fresh lemon juice - 1 teaspoon baking powder Mix these ingredients gently until they blend well. Be careful not to overmix. When ready, gently fold in 1 cup of fresh blueberries. Do this slowly to keep the blueberries whole and intact. Pour the blueberry filling over the crust. Spread it out evenly. Bake the pan in the oven for 20 to 25 minutes. The filling should be set and not jiggly when done. Once baked, take the pan out and let it cool on a wire rack. For the best results, refrigerate the bars for at least one hour before cutting them into squares. This step helps the bars set properly. Enjoy your fresh blueberry lemon bars! For more details, check the Full Recipe. 1. Overmixing the filling: When you make the filling, mix just until smooth. Overmixing can add air and make it puff up during baking. This can lead to a texture that is not creamy and smooth. 2. Not properly cooling the bars: Allow your bars to cool in the pan before cutting. If you cut them too soon, they may fall apart. Let them chill in the fridge for at least an hour. This will help them set nicely. - Best practices for a flaky crust: Cold butter is key for a flaky crust. Make sure your butter is softened but still cool. Mix it with the dry ingredients until it looks like coarse crumbs. This keeps the crust light. - How to achieve a perfectly set filling: Bake the bars until the filling looks firm and no longer jiggles. If you see a slight shine on top, that’s okay. It will set as it cools. - Choosing the right blueberries: Fresh blueberries are best. Look for ones that are plump and firm. They should be deep blue with a slight bloom. This shows they are ripe and fresh. - Tips for selecting ripe lemons: Choose lemons that are heavy for their size. They should have a bright yellow color. If they feel slightly soft, they are juicy. This will give more flavor to your bars. For more detailed steps, check the Full Recipe. {{image_2}} You can change the flavor of your blueberry lemon bars easily. For a twist, try adding different fruits. Raspberries or blackberries work great with lemon. They add a nice tangy taste. You can also mix berries for a colorful dessert. Another idea is to incorporate herbs. Fresh mint adds a cool flavor. Basil can give an unexpected yet delightful taste. Just use a small amount so it doesn't overpower the fruit. These simple changes can make your dessert unique and fun. If you need a gluten-free option, you have choices. You can use almond flour or coconut flour instead of all-purpose flour. Both options create a tasty crust. Just make sure to adjust the amount of butter. These flours absorb moisture differently. Ground almonds will give a nutty flavor. Coconut flour adds a subtle sweetness. Both will keep your bars light and delicious. Feel free to experiment with these alternatives to suit your needs. When it’s time to serve, think about pairing your bars. Ice cream or whipped cream adds a creamy touch. Vanilla ice cream complements the lemon well. Or, top with fresh whipped cream for a light finish. For gatherings, consider creative presentations. Cut the bars into fun shapes with cookie cutters. Serve on a colorful platter with mint leaves for garnish. These small touches can impress your guests. They will love how you present this simple yet elegant dessert. For the complete recipe, check the [Full Recipe] section! To keep your blueberry lemon bars fresh, use an airtight container. Glass or plastic containers work well. Store them in the fridge for the best taste. Make sure they are completely cool before packing them. If you want to freeze them, cut the bars first. Wrap each piece in plastic wrap. Then, place them in a freezer-safe bag. This way, you can enjoy them later! Blueberry lemon bars last about one week in the fridge. Look for signs of spoilage like a sour smell or a change in color. If they look dry or hard, it’s time to toss them. When reheating frozen bars, let them thaw in the fridge overnight. You can warm them in the oven at 350°F for about 10 minutes. This keeps the texture nice! For more details, check the Full Recipe. Yes, you can use frozen blueberries. Just make sure to let them thaw first. Drain any excess liquid to keep the filling from getting too watery. Gently fold them into the mixture. This helps maintain their shape. Frozen berries may not taste as fresh, but they work well. If you want a dairy-free option, use coconut oil or vegan butter. Applesauce is another choice for a healthier option. It gives moisture without the fat from butter. Just remember, these substitutes may change the flavor slightly. Look for the filling to be set and no longer jiggly. The edges should be slightly golden. You can also insert a toothpick in the center. If it comes out clean, your bars are ready! Yes, you can make the bars a day before serving. Just cool them completely and store in the fridge. Cover them with plastic wrap to keep them fresh. This helps the flavors blend nicely. Each bar has about 150 calories. They also contain 6 grams of fat and 20 grams of sugar. You'll get some vitamin C from the lemons. Blueberries add fiber and antioxidants. For the complete recipe, check out the Full Recipe. You learned how to make delicious blueberry lemon bars step by step. From mixing the crust to creating the filling, each part matters. I shared tips to avoid common mistakes and make your bars stand out. You can even try fun variations to keep things fresh. Whether you store them well or serve them creatively, these bars will impress. Baking should be fun, and with these easy tips, you’ll enjoy making and sharing your treats. Happy baking!](https://tossedrecipes.com/wp-content/uploads/2025/05/1ab25488-45eb-4b2a-92a7-74c684a2d1cc.webp)
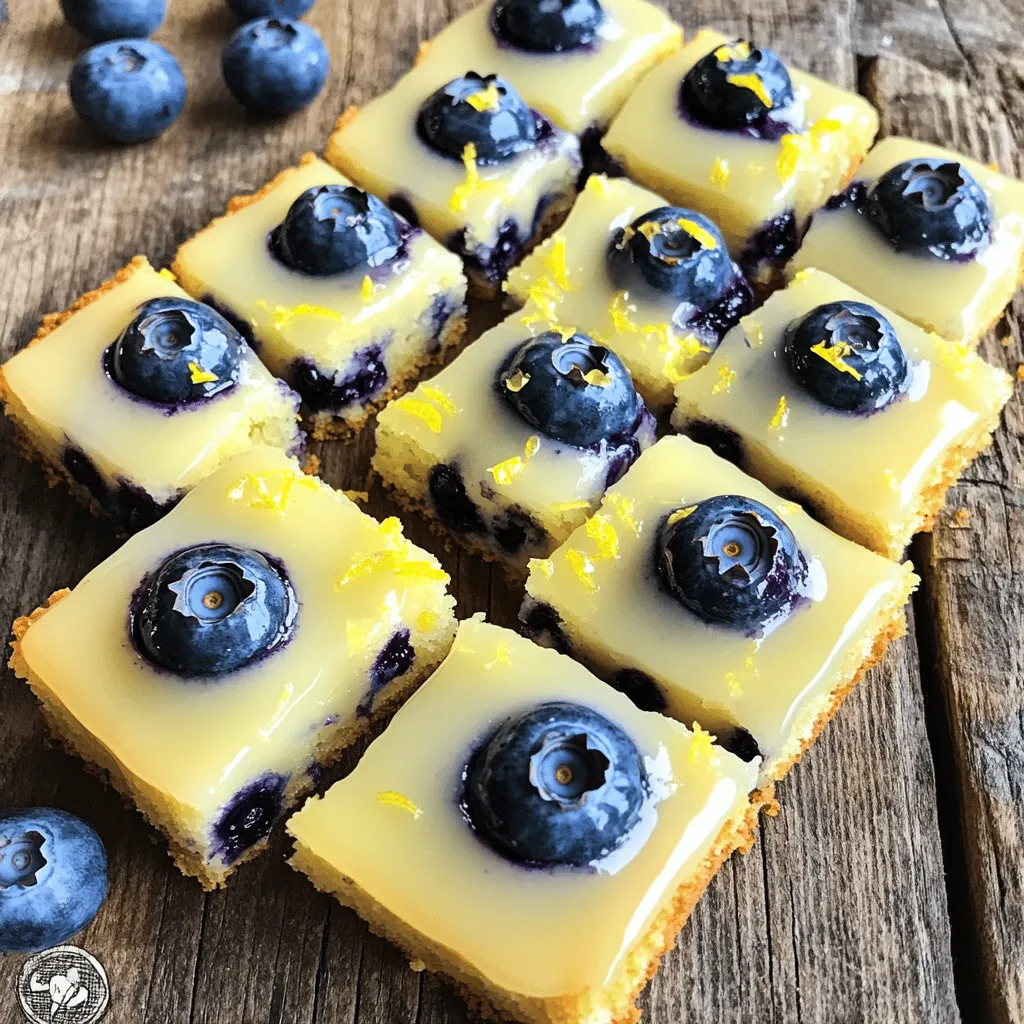
Blueberry Lemon Bars Tasty and Simple Dessert Recipe
If you’re craving a sweet treat that’s both easy to make and full of flavor, you’re in the right place! My Blueberry Lemon Bars combine
![The star of the show is fresh blueberries. You will need 2 cups for this recipe. Look for firm, plump berries. They should be deep blue with a light bloom. Rinse them gently before use to keep their shape. Sweetness comes from a mix of 1 cup granulated sugar and 3/4 cup brown sugar. Granulated sugar gives a clean sweetness, while brown sugar adds a slight caramel flavor. You will also need 2 tablespoons lemon juice and 1 teaspoon lemon zest to balance the sweetness. For the base, gather your baking essentials. You will require 2 cups all-purpose flour, 1 teaspoon baking powder, 1/2 teaspoon baking soda, and 1/2 teaspoon salt. These ingredients help the jamboree rise and create a fluffy texture. Do not forget 1/2 cup unsalted butter, which should be softened. This adds richness and flavor to your batter. You'll also need 2 large eggs and 1 teaspoon vanilla extract for extra flavor. Finally, use 1/2 cup milk to make the batter smooth and moist. Check the [Full Recipe] for all the details! Start by making the blueberry filling. In a medium saucepan, mix together 2 cups of fresh blueberries, 1 cup of granulated sugar, 2 tablespoons of lemon juice, 1 teaspoon of lemon zest, and 1 tablespoon of cornstarch. Cook this mixture over medium heat. Stir gently until it starts to bubble and thicken. This takes about 5 to 7 minutes. Once thickened, remove it from heat and let it cool a bit. Next, prepare the batter. In a separate bowl, whisk together 2 cups of all-purpose flour, 1 teaspoon of baking powder, 1/2 teaspoon of baking soda, and 1/2 teaspoon of salt. In a large mixing bowl, cream together 1/2 cup of softened unsalted butter and 3/4 cup of brown sugar until it is fluffy. Add 2 large eggs, one at a time, mixing well after each addition. Stir in 1 teaspoon of vanilla extract. Gradually mix in the dry ingredients until just combined. Then, pour in 1/2 cup of milk and mix until smooth. The batter will be thick. Now, it’s time to bake! Preheat your oven to 350°F (175°C). Grease a 9-inch square baking dish or line it with parchment paper. Spoon half of the batter into the prepared dish and spread it evenly. Carefully pour the blueberry mixture over the batter. Spread it gently. Top with the remaining batter, dolloping it over the blueberry mix. It’s okay if it looks rustic! Bake in the preheated oven for 35 to 40 minutes. Check for doneness by inserting a toothpick into the center. It should come out clean. Once done, let it cool for about 10 minutes before slicing into squares. Enjoy warm or at room temperature, and add whipped cream if you like! For the full recipe, refer to the detailed instructions above. To get the best texture for your Blueberry Jamboree, follow these steps. First, use fresh blueberries for juicy bursts of flavor. If you find fresh ones hard to get, frozen blueberries can work too. Just make sure to thaw and drain them first. This helps avoid excess liquid. Mix your batter well, but don’t overdo it. Stir just until the dry ingredients blend in. Over-mixing can make your jamboree tough. The batter should be thick, which helps hold the blueberry filling nicely. You can customize this recipe by swapping ingredients. For a healthier twist, use whole wheat flour instead of all-purpose flour. If you want less sugar, try using honey or maple syrup. These natural sweeteners add a unique taste. You can also add spices like cinnamon or nutmeg for warmth. Chopped nuts, like walnuts, can give a nice crunch. Want to make it richer? Add a tablespoon of sour cream to the batter for creaminess. Serve your Blueberry Jamboree warm or at room temperature. A dollop of whipped cream on top makes it feel fancy. You can also try ice cream for a fun twist. Pair it with a hot cup of coffee or tea for a delightful treat. This dessert is great for brunch, parties, or just a cozy night in. It’s a perfect way to impress your friends or family. Enjoy every bite! {{image_2}} You can swap blueberries for other fruits. Raspberries, strawberries, or peaches work well. Each fruit gives a new taste. For instance, raspberries add a tart kick. Strawberries are sweeter and lighter. Just make sure to adjust sugar levels based on the fruit you use. Want a vegan option? Simply replace the eggs with flax eggs. Mix 1 tablespoon of flaxseed meal with 2.5 tablespoons of water for each egg. For gluten-free needs, use a gluten-free flour blend. The texture may change slightly, but it will still taste great! You can change the recipe based on the season. In fall, add spices like cinnamon or nutmeg. In winter, try cranberries for a festive touch. Summer is perfect for tropical flavors like mango or pineapple. Each twist makes the Jamboree special and fun to enjoy! Check out the Full Recipe for more ideas. To keep your Blueberry Jamboree fresh, store it in an airtight container. This will prevent it from drying out. You can leave it at room temperature for up to two days. If you want to keep it longer, place it in the fridge. It will stay good for about a week. Always make sure to let it cool completely before sealing it up. Freezing is a great way to save any extra jamboree. First, let it cool down completely. Next, cut it into squares. Wrap each piece tightly in plastic wrap. Then, place them in a freezer-safe bag or container. This way, they won’t get freezer burn. The jamboree can last in the freezer for up to three months. When you’re ready to enjoy, just thaw it overnight in the fridge. Reheating is easy! If you want a warm treat, preheat your oven to 350°F (175°C). Place the jamboree squares on a baking sheet and cover them loosely with foil. Heat for about 10-15 minutes. This keeps them moist. You can also use a microwave for a quick fix. Heat each piece for 15-20 seconds. Just watch them closely so they don’t get too hot. Enjoy your delicious Blueberry Jamboree warm! You can tell your Blueberry Jamboree is done when it turns golden brown. Insert a toothpick into the center. If it comes out clean, it's ready. The edges should pull away slightly from the pan. This means it baked evenly. If the toothpick has batter on it, bake for a few more minutes. Keep an eye on it to avoid overbaking. Yes, you can make the filling ahead of time. Cook the blueberries and let them cool. Store it in the fridge for up to two days. This will save you time on baking day. Just remember to bring it back to room temperature before using. This helps the filling blend well with the batter. You can find Magnolia Bakery Blueberry Jamboree at their bakery locations. They also offer online ordering for delivery in some areas. If you can't visit, check local bakeries. Many offer similar treats. You can also make it at home using the Full Recipe. In this blog post, we explored how to make a delicious Blueberry Jamboree. We covered key ingredients like fresh blueberries, sweeteners, and baking essentials. You learned detailed steps for preparing the filling, making the batter, and baking to perfection. The tips and tricks shared will help you perfect the texture and try fun variations. Remember the storage tips for keeping leftovers fresh. Enjoy your baking adventure and impress friends with your sweet treats!](https://tossedrecipes.com/wp-content/uploads/2025/05/7be62542-944d-45d0-be47-08610382684a.webp)
Magnolia Bakery Blueberry Jamboree Tasty Treat Recipe
If you crave a sweet, fruity treat, the Magnolia Bakery Blueberry Jamboree is perfect for you! This delightful recipe packs fresh blueberries into a soft
![To make this 4 ingredient blueberry cobbler, you will need just a few simple items: - 2 cups fresh or frozen blueberries - 1 cup all-purpose flour - 1 cup granulated sugar - 1 cup milk These ingredients come together to create a dish that is both tasty and easy. The blueberries give it a sweet and fruity flavor that everyone loves. You can use either fresh or frozen blueberries. Fresh blueberries taste bright and juicy. They have a nice texture when baked. Frozen blueberries are also great. They can save time, and they work well in this recipe. Just remember to thaw them before use. If you're missing an ingredient, don't worry! You can make some swaps: - For flour, try almond flour or oat flour for a gluten-free option. - If you want less sugar, use a sugar substitute like stevia or monk fruit. - For milk, any non-dairy milk will work. Almond milk or oat milk are good choices. These options help you customize the recipe to fit your needs. You can still enjoy a delicious cobbler! For the complete recipe, check [Full Recipe]. Start by preheating your oven to 350°F (175°C). This step helps the cobbler bake evenly. Next, grease a 9x9-inch baking dish. This makes it easy to serve later. Now, take a medium bowl and mix the blueberries with 1/2 cup of sugar. Toss them gently to coat. Spread the blueberries evenly in the bottom of your baking dish. In a separate bowl, whisk together the flour, the remaining 1/2 cup of sugar, and milk. Mix until it’s smooth. The batter will be thick but that’s okay. Once mixed, pour the batter over the blueberry layer. Make sure to cover all the blueberries. Now, it’s time to bake! Place your dish in the preheated oven. Bake for 45 to 50 minutes. The batter will rise and form a nice golden top. To check if it is done, insert a toothpick into the center. If it comes out clean, your cobbler is ready! Also, look for a golden-brown top. The edges should be firm and slightly crisp. Let it cool for about 10 minutes before serving. This will help set the cobbler. For an extra treat, serve it warm with vanilla ice cream on top. For the full recipe, refer to the earlier section. To get the best texture, mix the batter gently. Overmixing can make it tough. You want a light and fluffy look. Pour the batter over the blueberries carefully. This helps keep the layers distinct. Bake until the top is golden brown. A golden top means a perfect texture. A soggy bottom can ruin your cobbler. To prevent this, use fresh blueberries if possible. Frozen blueberries can release extra water. Toss the blueberries with sugar before baking. This helps draw out some moisture. Also, bake it long enough to evaporate excess liquid. Keep an eye on the time. Serve your cobbler warm for the best taste. Add a scoop of vanilla ice cream on top. The ice cream melts and mixes with the warm cobbler. For a fresh touch, garnish with mint leaves. You can also pair it with whipped cream. Enjoy it with family and friends for a delightful treat! {{image_2}} You can make this blueberry cobbler gluten-free. Just swap all-purpose flour with a gluten-free blend. Look for a blend that mimics all-purpose flour closely. This way, you can enjoy a tasty dessert without the gluten. Adding flavors can make your cobbler shine. Try mixing in a bit of lemon zest. This adds a bright taste that pairs well with blueberries. You can also sprinkle some cinnamon into the batter. Just a pinch can give it a warm, cozy vibe. While blueberries are the star, you can mix in other fruits too. Raspberries, peaches, or blackberries work great. You can even create a fruit mix for added fun. Just keep the total fruit amount around two cups for the best results. For the full recipe, check out the Berry Bliss Blueberry Cobbler! To keep your cobbler fresh, let it cool completely first. Then, cover it tightly with plastic wrap or aluminum foil. You can also place it in an airtight container. This method stops moisture loss and keeps the flavor intact. If you prefer, you can slice it before storing. This makes it easier to grab a piece later. When you're ready to enjoy your cobbler again, preheat your oven to 350°F (175°C). Place the cobbler in a baking dish and cover it with foil. This helps it heat evenly and keeps it moist. Bake for about 15 to 20 minutes until it's warm. You can also use a microwave, but it may make the topping less crispy. Heat it on medium for about 30 seconds to a minute. If stored properly, your blueberry cobbler lasts for about 3 to 4 days in the fridge. For longer storage, consider freezing it. Wrap it well in plastic wrap and then in foil. It can last up to 3 months in the freezer. When you're ready to eat it, thaw it overnight in the fridge before reheating. Enjoy this delicious treat anytime! Yes, you can use other fruits! Peaches, cherries, or raspberries work well. Just keep the same amount of fruit. Mix and match for fun flavors. Each fruit adds a unique taste. Feel free to experiment! To make the cobbler in advance, prepare it as usual. After baking, let it cool completely. Then, cover it with plastic wrap or foil. Store it in the fridge for up to two days. When you're ready, just reheat it in the oven. This keeps it tasty and fresh. Serve blueberry cobbler warm for the best taste. A scoop of vanilla ice cream on top adds delight. You can also sprinkle some fresh mint leaves for a pop of color. This combination makes each bite special and delicious. For extra fun, try adding whipped cream too! You learned about the key ingredients for blueberry cobbler, including fresh or frozen options. I shared step-by-step baking instructions and tips to ensure the perfect texture. You can even explore variations like gluten-free and fruity twists. Proper storage techniques help keep your cobbler fresh, while FAQs address common questions. In conclusion, with these guidelines, you can make a great blueberry cobbler. Enjoy it warm and share it with friends or family. Happy baking!](https://tossedrecipes.com/wp-content/uploads/2025/05/a32b0aff-7096-41b2-863f-f613fe97734e.webp)
4 Ingredient Blueberry Cobbler Quick and Easy Recipe
If you crave a dessert that’s quick, easy, and delicious, then this 4 Ingredient Blueberry Cobbler is for you! With only four simple ingredients, you
![- 1 cup unsalted butter, melted - 1 1/2 cups granulated sugar - 3 large eggs - 1 tablespoon lemon zest - 1/4 cup fresh lemon juice - 1 teaspoon vanilla extract - 1 cup all-purpose flour - 1/2 teaspoon baking powder - 1/4 teaspoon salt - 1 cup fresh blueberries - 1/2 cup white chocolate chips (optional) In this recipe for blueberry lemon brownies, each ingredient plays a key role. The unsalted butter brings richness and moisture. Granulated sugar adds sweetness that balances the tartness of the lemon. Eggs help bind the brownies and give them a nice structure. Lemon zest and juice infuse the brownies with a bright, refreshing flavor. The vanilla extract enhances the overall taste, while flour gives the brownies their chewy texture. Baking powder helps them rise, and salt intensifies all the flavors. Fresh blueberries add bursts of sweetness and color. If you love white chocolate, the chips add a creamy touch. If you need to make swaps, there are great options. You can replace unsalted butter with coconut oil for a dairy-free version. For vegan brownies, consider using flax eggs or applesauce as an egg substitute. If gluten is a concern, you can use gluten-free flour blends. These substitutions keep the brownies tasty and enjoyable for everyone. For more tips and the full recipe, check out the complete guide on blueberry lemon brownies. 1. Preheat the oven and prepare the pan. Set your oven to 350°F (175°C). Grease and line a 9x9 inch baking pan with parchment paper. Leave some paper hanging over the edges for easy lifting later. 2. Mix the wet ingredients. In a large bowl, whisk together 1 cup of melted butter and 1 1/2 cups of granulated sugar. Make sure it's smooth. Add 3 large eggs one by one, mixing well after each. Stir in 1 tablespoon of lemon zest, 1/4 cup of fresh lemon juice, and 1 teaspoon of vanilla extract. 3. Combine the dry ingredients. In another bowl, whisk together 1 cup of all-purpose flour, 1/2 teaspoon of baking powder, and 1/4 teaspoon of salt. Slowly add this mix to the wet ingredients. Fold gently until just combined. Be careful not to overmix the batter. 1. Pour and spread the batter. Carefully fold in 1 cup of fresh blueberries and 1/2 cup of white chocolate chips if you want them. Pour the batter into your prepared pan. Spread it evenly with a spatula. 2. Bake the brownies. Place the pan in the oven and bake for 25-30 minutes. Check if they are ready by inserting a toothpick in the center. It should come out clean or with a few moist crumbs. 3. Test for doneness. Once done, allow the brownies to cool in the pan for about 10 minutes. Lift them out using the parchment paper. Let them cool completely on a wire rack before slicing into squares. To get the best texture in your blueberry lemon brownies, avoid overmixing. Overmixing makes brownies tough. Mix just until the ingredients blend. This keeps them soft and chewy. Using room temperature ingredients is key too. Cold butter or eggs can cause the batter to clump. Let your butter and eggs sit out for about 30 minutes before using. This helps create a smoother batter. Maximize the lemon flavor by using fresh ingredients. Use both lemon zest and juice for a bright taste. The zest adds oils that boost the lemon flavor. A good rule is to use the zest of one lemon per batch. You can also add depth with spices or extracts. A pinch of cinnamon or a splash of almond extract can work wonders. These small touches can change the flavor profile of your brownies. They add warmth and complexity to each bite. For the full recipe, check out the detailed steps to create these tasty treats! {{image_2}} You can play with flavors in your blueberry lemon brownies. Adding nuts like walnuts or pecans gives a nice crunch. You can also swap blueberries for raspberries for a fun twist. If you love chocolate, try adding cocoa powder to the batter. This change will give your brownies a rich, chocolatey taste. Making vegan blueberry lemon brownies is easy. Simply replace the eggs with flaxseed meal and water. Use coconut oil instead of butter for a smooth texture. For gluten-free brownies, swap regular flour with almond flour or a gluten-free blend. These options keep the brownies delicious and friendly for all diets. For the complete recipe, check out the [Full Recipe]. To keep your blueberry lemon brownies fresh, store them in an airtight container. This helps prevent them from drying out. You can also place a piece of bread inside the container. The bread will help keep the brownies moist. For longer storage, you can freeze them. Wrap each brownie in plastic wrap, then place them in a freezer bag. This keeps them safe from freezer burn. Blueberry lemon brownies can last for about 3 to 4 days at room temperature. Just make sure they are covered well. If you store them in the fridge, they can last up to a week. When you want to enjoy them again, you can reheat them. Place them in the microwave for about 10-15 seconds. This will warm them up and make them taste fresh again. Can I use frozen blueberries? Yes, you can use frozen blueberries. They add a nice burst of flavor. Just toss them in a bit of flour before mixing them in. This helps keep them from sinking to the bottom of your brownies. How do I prevent brownies from sticking to the pan? To prevent sticking, grease your pan well. Use butter or cooking spray. You can also line the pan with parchment paper. Leave some paper hanging over the edges. This makes it easy to lift the brownies out. What can I serve with blueberry lemon brownies? Serve these brownies with whipped cream or ice cream. A scoop of vanilla pairs well with their flavor. You can also add fresh berries on top for color and taste. Why is my brownie batter too thick? If your batter is too thick, you may have added too much flour. Always measure flour carefully. You can also add a splash of milk to loosen it up. This helps create a smooth, spreadable batter. How can I tell when my brownies are done baking? To check for doneness, insert a toothpick into the center. If it comes out clean or with a few moist crumbs, they are ready. Avoid overbaking, as this will make them dry. You learned how to make delicious blueberry lemon brownies using simple ingredients. I shared tips on substitutions, preparation, and baking techniques to help you succeed. Don’t forget to try variations for extra flavor and dietary needs. Proper storage ensures your brownies stay fresh longer. With practice, you’ll master this fun recipe. Enjoy your baking journey and share these yummy brownies with friends and family!](https://tossedrecipes.com/wp-content/uploads/2025/05/83858223-e602-465d-bade-40cd51db32ea.webp)
Blueberry Lemon Brownies Flavorful and Simple Recipe
Craving a sweet treat that bursts with flavor? Blueberry Lemon Brownies offer a delightful twist on classic desserts. This easy recipe combines juicy blueberries and
. To keep your lemon lavender sandwich cookies fresh, start by placing them in an airtight container. This helps prevent them from drying out. You can also add a slice of bread to keep them soft. Store the cookies at room temperature for up to a week. If you need to keep them longer, consider freezing them. To freeze your cookies, first, let them cool completely. Then, wrap each sandwich cookie in plastic wrap. Place the wrapped cookies in a freezer bag or container. Make sure to remove as much air as possible. You can freeze them for up to three months. When you’re ready to enjoy, take them out and let them sit at room temperature. You can also warm them in the oven at a low temperature for a few minutes. Before serving, you might want to refresh your cookies a bit. If they feel dry, try adding a little lemon zest on top. This can help bring back the fresh flavor. Another tip is to warm them slightly in the oven. This will make the frosting soft and the cookies tasty. Enjoy your delicious treat! For the full recipe, check out the section above. What is the best way to infuse lavender flavor in cookies? To infuse lavender flavor, crush the dried lavender lightly. This helps release its oils. Mix it directly into the dry ingredients. This way, the flavor spreads evenly while baking. Can I use dried lavender flowers from my garden? Yes, you can use dried lavender from your garden. Just make sure it is culinary grade. This means it’s safe to eat and free from chemicals. How do I know when the cookies are done baking? The cookies are done when the edges turn lightly golden. They may look soft in the center but will firm up as they cool. Can I substitute ingredients in this recipe? Yes, you can make some substitutions. For example, use coconut oil instead of butter. You can also swap lemon juice for orange juice for a different taste. What are some common mistakes to avoid when making these cookies? Some mistakes include overmixing the dough and not chilling it. Overmixing makes cookies tough. Chilling helps the cookies hold their shape while baking. Where can I find pre-made Lemon Lavender Sandwich Cookies? You can find these cookies at specialty bakeries or online. Check local shops that focus on gourmet treats. What to look for when buying quality cookies? Look for cookies that list real ingredients. Avoid those with artificial flavors or preservatives. Freshness is key, so check the expiration date before buying. You learned how to make delicious Lemon Lavender Sandwich Cookies. We covered essential ingredients, preparation steps, and baking techniques. I shared tips for enhancing flavor and texture, as well as variations to try. Remember, you can store your cookies for freshness and even freeze them for later. Baking can be fun and rewarding. Enjoy your tasty cookies with loved ones, and let your creativity shine!](https://tossedrecipes.com/wp-content/uploads/2025/05/a7747489-00fc-45a9-99a6-31ca2595d896.webp)
Lemon Lavender Sandwich Cookies Sweet and Simple Treat
Looking for a delightful treat to brighten your day? Lemon Lavender Sandwich Cookies are a sweet, zesty option that’s both easy to make and irresistible.
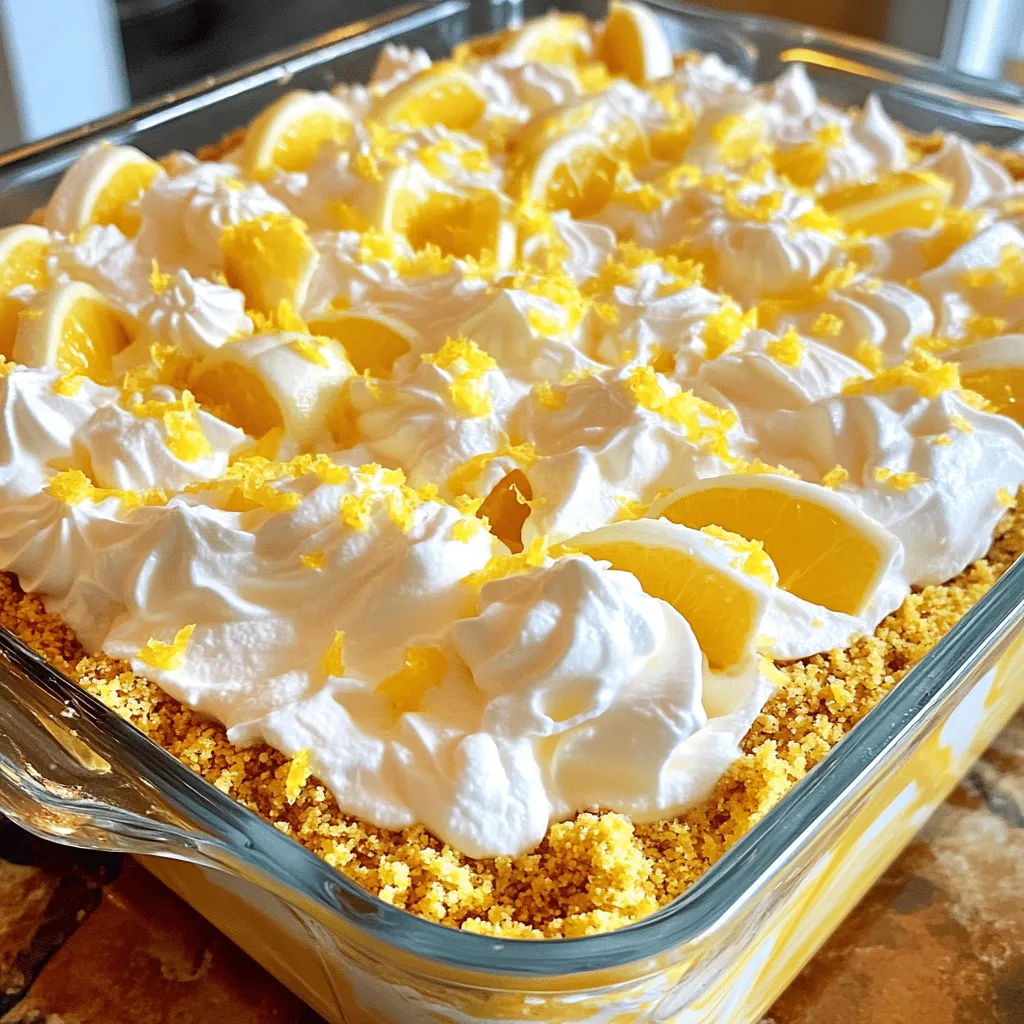
Heavenly Lemon Oreo Dessert Delightful and Simple Treat
Are you ready to treat yourself to a delicious dessert? The Heavenly Lemon Oreo Dessert is a fun and easy recipe that you will love.