Dinner
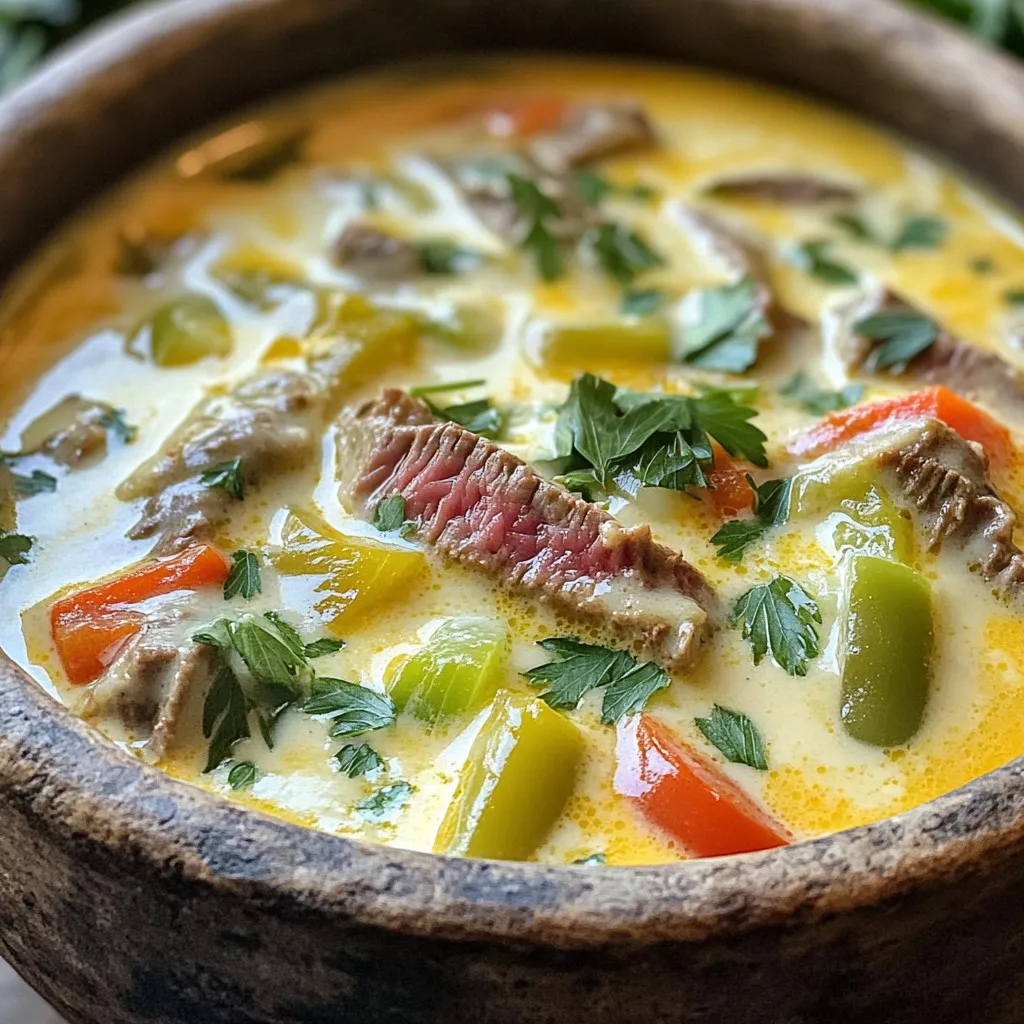
Philly Cheesesteak Soup Flavorful Comfort Bowl
Looking for a warm, satisfying meal? Let me introduce you to Philly Cheesesteak Soup. This tasty soup combines the bold flavors of a classic cheesesteak

Savory Japanese Chicken Katsu Bowls Easy Recipe
Are you ready to whip up a delicious and easy meal? My savory Japanese Chicken Katsu Bowls are a must-try! This dish features crispy chicken,
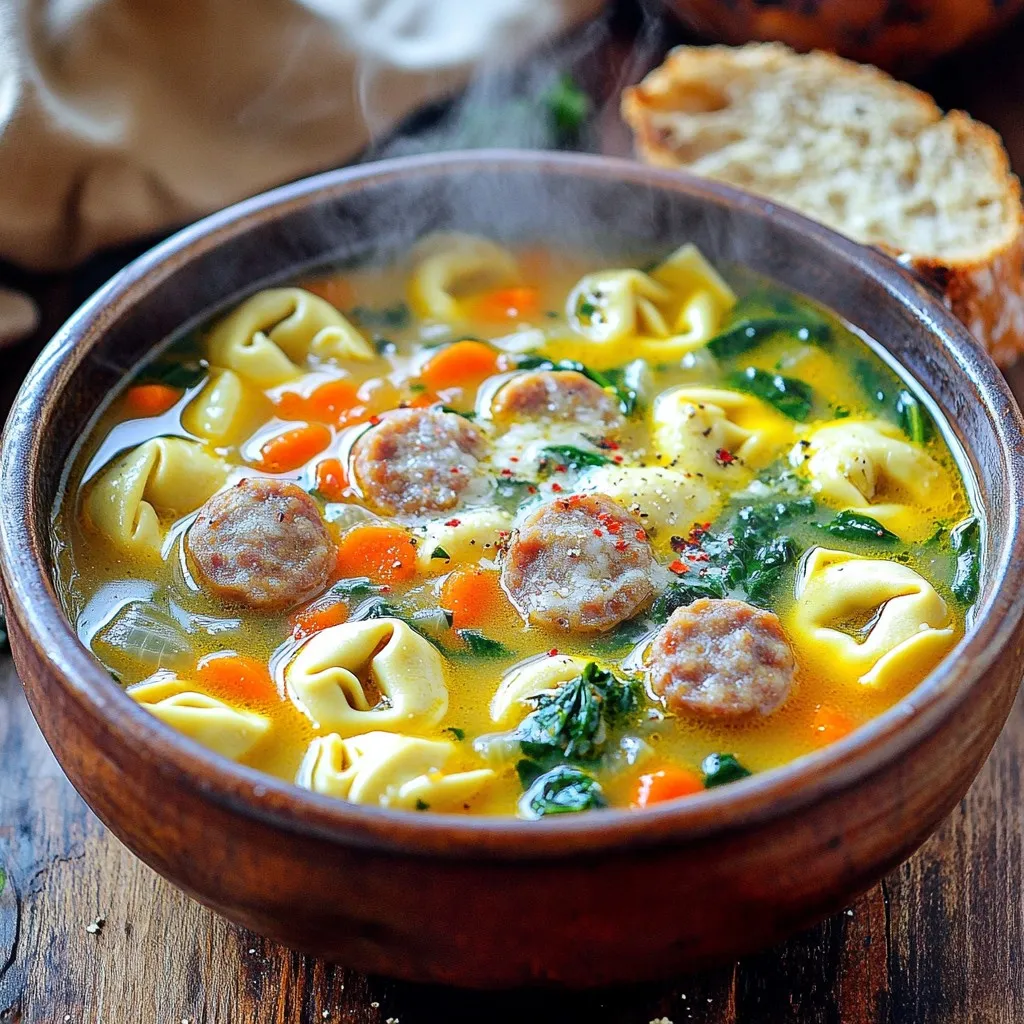
Autumn Sausage Tortellini Soup Cozy and Comforting Meal
As the leaves change color and the air becomes crisp, there’s nothing quite like a warm bowl of Autumn Sausage Tortellini Soup to bring comfort.
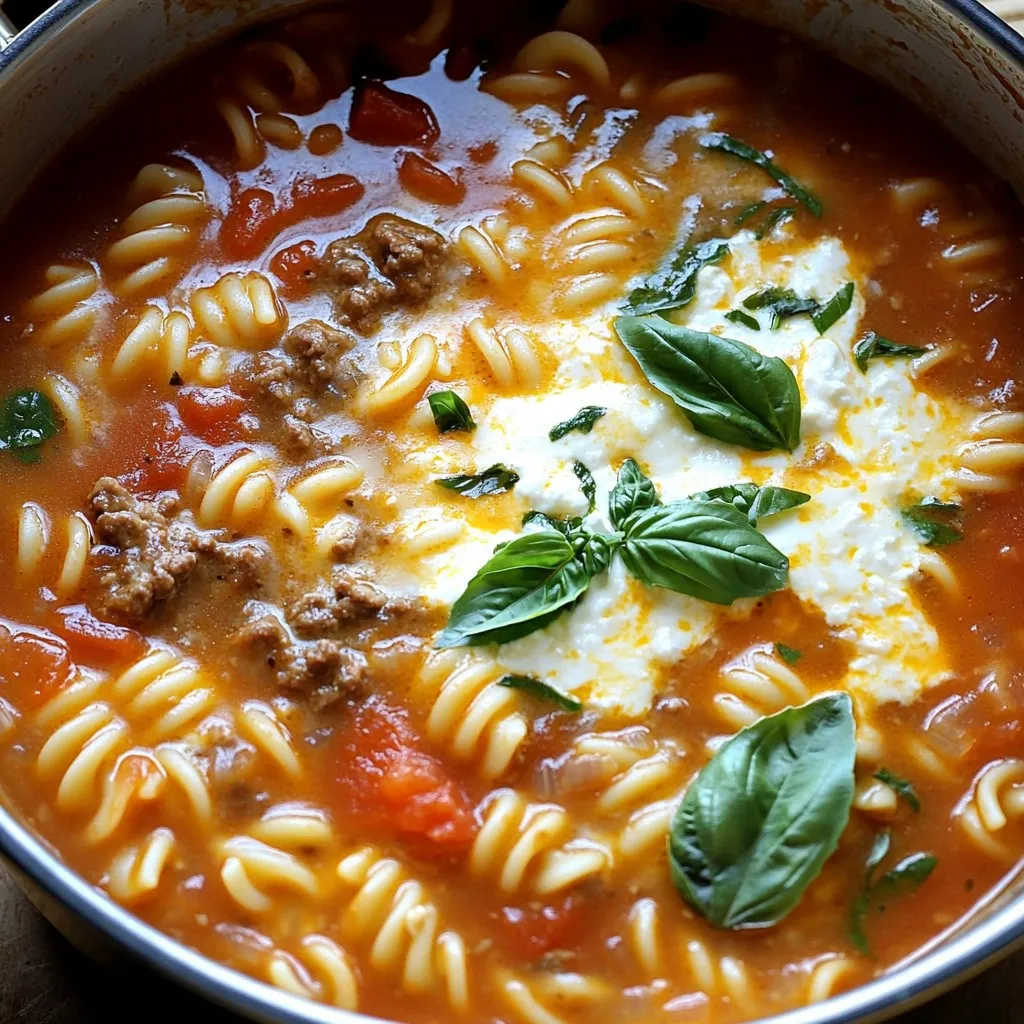
One-Pot Lasagna Soup Flavorful and Simple Recipe
Craving a comforting meal that’s both flavorful and easy? I’ve got just the thing for you: One-Pot Lasagna Soup! This tasty dish combines all the

Loaded Potato Soup Comforting and Hearty Recipe
Welcome to my loaded potato soup recipe! If you’re craving something warm and filling, you’ve found it. This hearty dish combines creamy potatoes, savory cheese,
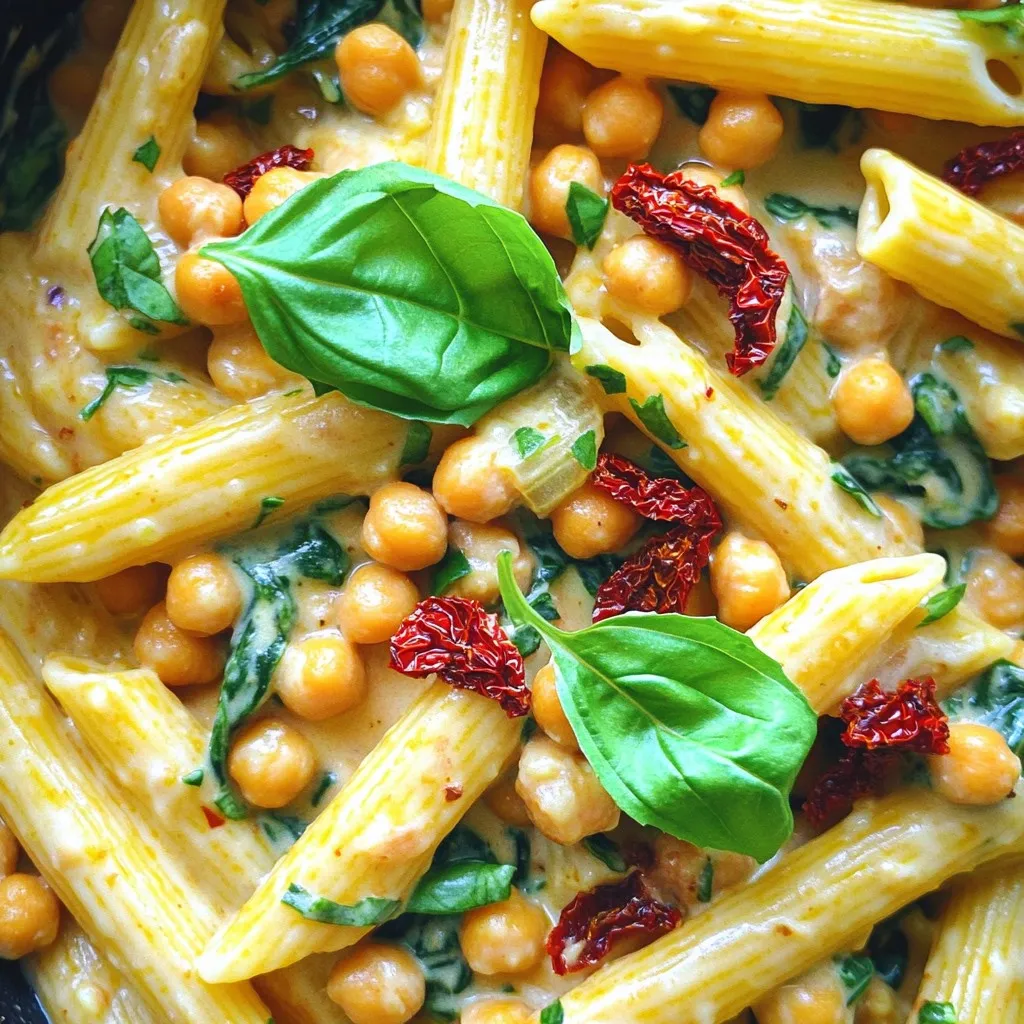
Sun-Dried Tomato Vegan Pasta Flavorful Comfort Dish
Craving a dish that is both flavorful and comforting? Look no further than my Sun-Dried Tomato Vegan Pasta! This easy recipe combines the rich taste
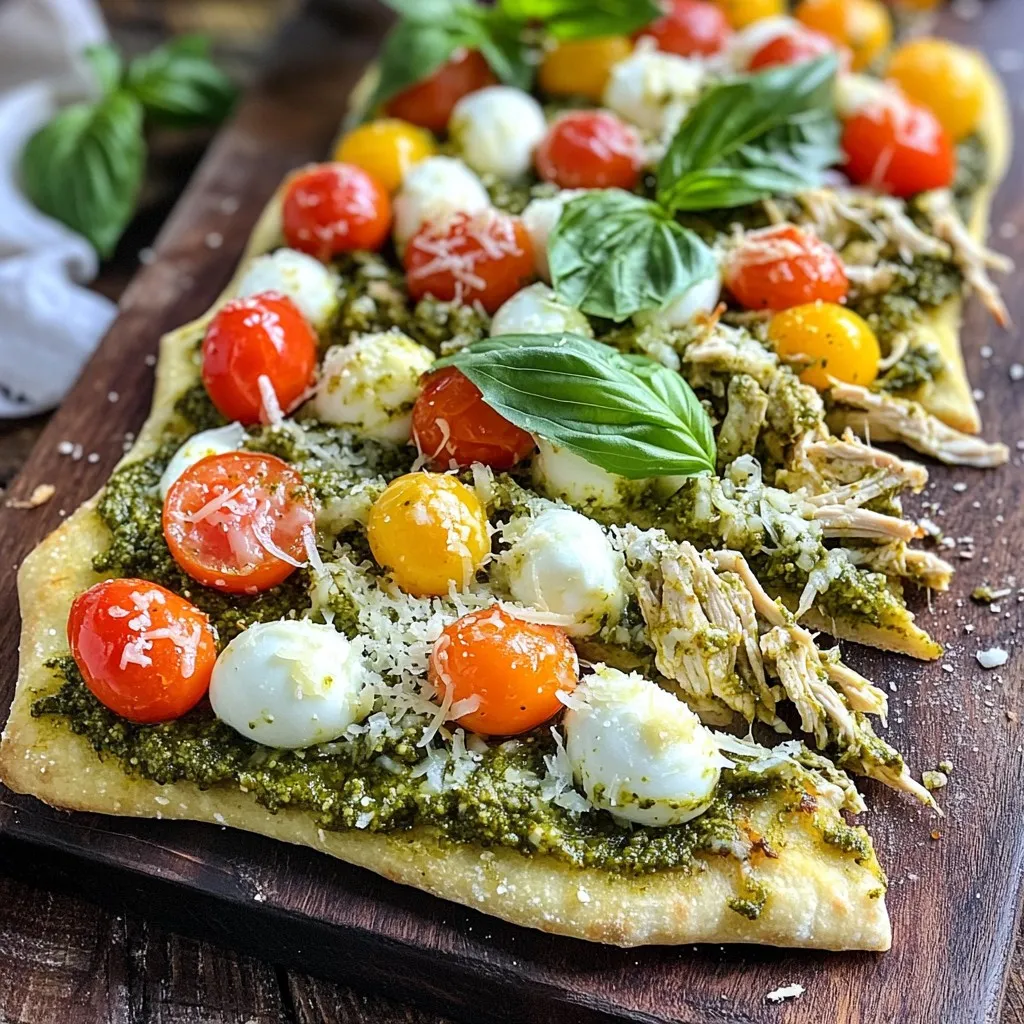
Pesto Chicken Flatbread Delightfully Simple Recipe
Are you ready for a dish that combines flavor and simplicity? This Pesto Chicken Flatbread recipe is just what you need for a quick meal.
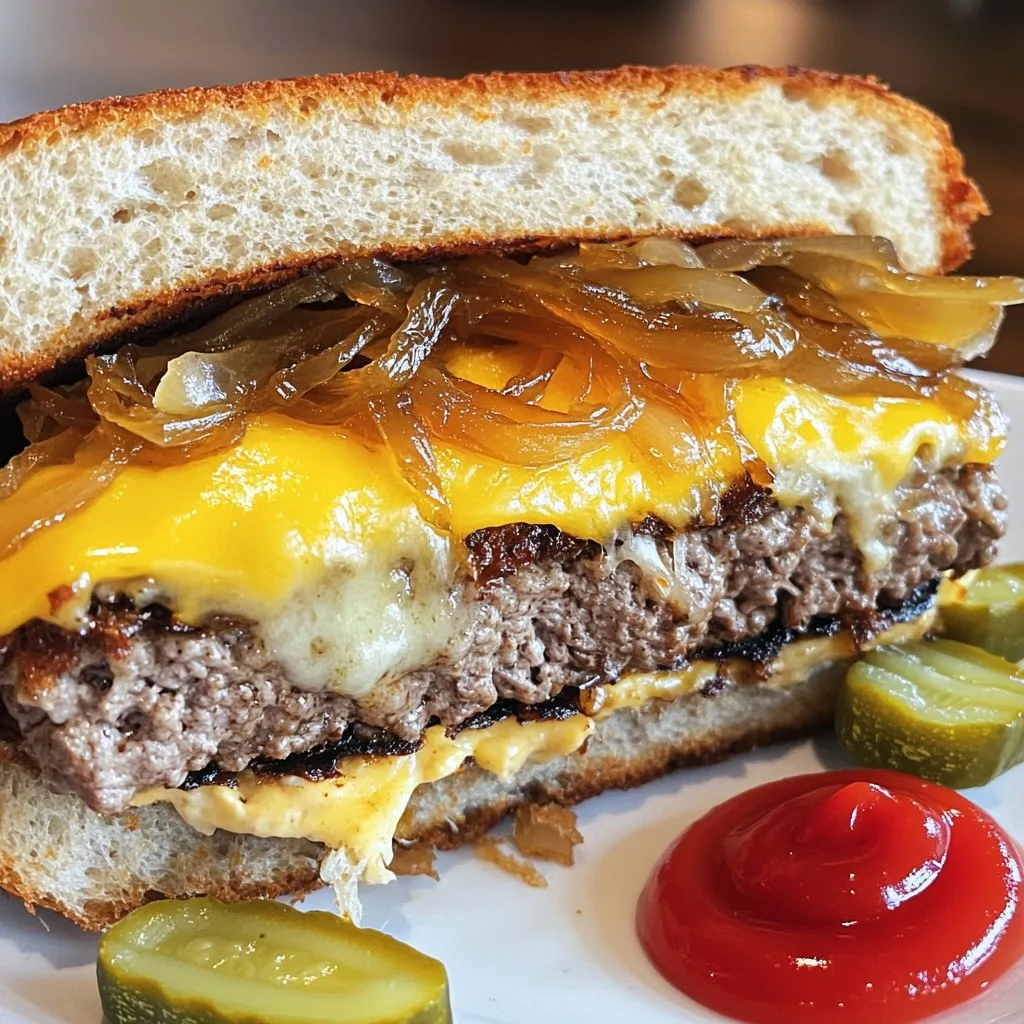
Classic Patty Melt Irresistible Comfort Food Treat
There’s something special about a Classic Patty Melt. It’s the ultimate comfort food that warms you up and satisfies your cravings. Imagine juicy beef patties

Sheet-Pan Garlic Herb Steak & Asparagus Delight
Looking for an easy and tasty meal? You’re in the right spot! This Sheet-Pan Garlic Herb Steak & Asparagus Delight brings bold flavors to your

Creamy Roasted Red Pepper Lasagna Skillet Delight
Looking for a hearty, delightful meal that bursts with flavor? Dive into my Creamy Roasted Red Pepper Lasagna Skillet Delight! This dish combines creamy cheeses,