Dinner

Quick and Flavorful Chicken Teriyaki Noodles Recipe
If you’re craving a quick meal that’s packed with flavor, this Chicken Teriyaki Noodles recipe is for you! In just a few simple steps, you
![- 2 boneless, skinless chicken breasts, cubed - 8 ounces linguine pasta - 1/2 cup unsalted butter - 4 cloves garlic, minced - 1 teaspoon smoked paprika - 1/2 teaspoon cayenne pepper (adjust to taste) For the main event, you need chicken breasts for protein, and linguine pasta as the base. The unsalted butter adds richness, while garlic gives the dish a wonderful aroma. Smoked paprika and cayenne pepper bring warmth and depth to the flavor. These ingredients work together to create a creamy and spicy delight. - 1 cup heavy cream - 1 cup chicken broth - Grated Parmesan cheese for serving Dairy is key to making this dish creamy. Heavy cream adds a smooth texture, while chicken broth enhances the flavor. Don’t forget the grated Parmesan! It adds a nice salty finish and makes every bite a joy. - 1 cup cherry tomatoes, halved - 1/2 cup fresh parsley, chopped - Salt and pepper to taste Fresh ingredients brighten up the dish. Cherry tomatoes add a sweet touch, while parsley brings color and freshness. Don’t forget to season with salt and pepper to enhance all the flavors! You can find the full recipe at the end of this section to guide you through all the steps. To start, fill a large pot with salted water. Bring the water to a rolling boil. Once boiling, add 8 ounces of linguine pasta. Cook the pasta as the package directs, usually around 8-10 minutes. Check for al dente texture, meaning it should be firm but not hard. When done, drain the pasta and set it aside. Don’t forget to save 1/2 cup of that pasta water; you'll need it later! Now, let’s cook the chicken. Take 2 boneless, skinless chicken breasts and cut them into cubes. In a large skillet, melt 1/4 cup of unsalted butter over medium heat. Add the chicken cubes to the skillet. Season them with salt, pepper, smoked paprika, and cayenne pepper. Cook the chicken for about 5-7 minutes until it turns golden and is cooked through. Once done, remove the chicken from the skillet and set it aside. In the same skillet, add the remaining 1/4 cup of butter. Once melted, add 4 cloves of minced garlic. Sauté this for about 1 minute until it smells amazing. Next, pour in 1 cup of chicken broth. Bring this mixture to a gentle simmer. Now, slowly whisk in 1 cup of heavy cream and let it simmer gently again. This is where the magic happens! Add in 1 cup of halved cherry tomatoes and cook for another 3-4 minutes until they soften. Now it’s time to bring everything together. Return the cooked chicken to the skillet. Stir well to mix everything. Add in the cooked linguine, tossing it all together. If the dish seems a bit dry, use that reserved pasta water to make it creamier. To finish, stir in 1/2 cup of chopped fresh parsley. Taste and adjust the seasoning if needed. Let everything cook for another minute to heat through. Your creamy cowboy butter chicken linguine is almost ready! To get that right creaminess in your sauce, start with the right cream. Heavy cream is key. It adds richness and helps the sauce cling to the pasta. When you add the cream, do it slowly. This helps mix it well with the broth. Watch the heat; keep it low. You want a gentle simmer, not a boil. If the sauce feels thick, add a bit of the pasta water. This helps it become silky smooth. For tender and flavorful chicken, use boneless, skinless breasts. Cut them into cubes for even cooking. Season them well with salt, pepper, smoked paprika, and cayenne. This adds great flavor. Sauté the chicken until golden brown, about 5-7 minutes. Make sure it is cooked through but not dry. It should be juicy and full of taste. If you have leftovers, they can be used in salads or sandwiches. To avoid overcooked linguine, start with boiling water. Add salt to the water for flavor. Cook it until it is al dente, usually about 8-10 minutes. Stir occasionally to prevent sticking. Remember to save some pasta water before draining. This starchy water helps with the sauce's texture. Drain the pasta well but don’t rinse it. Rinsing washes away the starch that helps the sauce stick. Check out the [Full Recipe] for a complete guide! {{image_2}} You can change the flavor of your creamy cowboy butter chicken linguine by adding different spices or herbs. For a smoky taste, try adding chipotle powder. If you like fresh, bright flavors, toss in some basil or thyme. You can also add a squeeze of lemon juice for a zesty kick. Experimenting with spices can make this dish your own. While linguine is a great choice, you can use other types of pasta too. Spaghetti or fettuccine work well. If you want a healthier option, try whole wheat or zucchini noodles. Each type of pasta brings a new texture to the dish. You may find a new favorite! If you want to switch up the protein, shrimp or turkey can be great options. Shrimp cooks quickly and adds a nice seafood flavor. Turkey is lean and will still be filling. Both can replace chicken in this recipe without losing any deliciousness. You can make this dish fit your taste and diet! To keep your creamy cowboy butter chicken linguine fresh, store it in an airtight container. Make sure it cools down first. You can refrigerate it for up to three days. If you want to save it longer, freeze it. Portion it into smaller containers for easy meals later. When it's time to enjoy your leftovers, reheating is key. Use the microwave for a quick option. Place the pasta in a bowl and cover it with a damp paper towel. Heat in short bursts, stirring often. You can also reheat it on the stove. Use a skillet over low heat. Add a splash of chicken broth to keep it creamy. This dish stays fresh in the fridge for about three days. If you freeze it, it can last for up to two months. After that, the quality may drop. Always check for signs of spoilage before eating. Enjoy your creamy cowboy butter chicken linguine knowing you can savor it later! Yes, you can make this recipe dairy-free. For the cream, use coconut cream or almond milk. These options will keep the dish rich and creamy. Instead of unsalted butter, try using olive oil or a dairy-free butter substitute. This will help you maintain the flavor without using dairy. Creamy Cowboy Butter Chicken Linguine pairs well with many sides. Here are a few ideas: - Garlic bread - Steamed broccoli - Mixed green salad - Roasted vegetables These sides add color and flavor to your meal. Each one complements the creamy dish nicely. To adjust spiciness, start with less cayenne pepper. You can always add more later. If you find it too spicy, try adding more cream or butter. This will help balance the heat. You can also add a squeeze of lemon juice to cut through the spice. This blog post covered how to cook Creamy Cowboy Butter Chicken Linguine. We explored the main ingredients, step-by-step cooking methods, and useful tips. I shared variations for different tastes and how to store leftovers properly. You can enjoy this dish in many ways, making it perfect for dinner any night. Remember, cooking is fun and you can make it your own. Embrace your creativity and enjoy the process!](https://tossedrecipes.com/wp-content/uploads/2025/06/369cbce7-d397-4cb3-9fc5-dc3e0d15d4aa.webp)
Creamy Cowboy Butter Chicken Linguine Delightful Dish
If you’re craving a rich and hearty meal, look no further. This Creamy Cowboy Butter Chicken Linguine is a true crowd-pleaser. With tender chicken, smooth
. To make your Cajun Chicken Sloppy Joes shine, adjust the seasoning. Taste your mix before serving. If you want more heat, add a pinch of cayenne or extra Cajun seasoning. For a milder dish, cut back on the spice. Cooking chicken evenly is key. Break the meat into small pieces as it cooks. This helps it brown well. Stir often to avoid sticking and ensure even cooking. Pair your Sloppy Joes with tasty sides. Creamy coleslaw adds crunch and balances the spice. Sweet potato fries offer a sweet contrast. For presentation, serve the Sloppy Joes on a nice platter. Sprinkle fresh parsley on top for a pop of color. Use colorful plates to make the meal more inviting. Want to spice things up? Add hot sauce or diced jalapeños to the mix. For a milder flavor, try adding more diced tomatoes. Leftovers are a treat! Use the chicken mix in tacos or on nachos. You can even stir it into pasta for a new meal. Check out the Full Recipe for more ideas. {{image_2}} You can switch the ground chicken for ground turkey or beef. Both options work well and taste great. Ground turkey gives a lighter bite, while beef adds richness. If you want a veggie option, try plant-based meat. These substitutes keep the flavors while being friendly to different diets. You can change the flavor profile by trying different cuisines. For example, BBQ Chicken Sloppy Joes offer a smoky twist. You can also add heat with hot sauces. Sriracha or jalapeño sauce can spice things up. Just adjust to your heat level for a tasty kick. Try serving the Sloppy Joes as a casserole for a fun twist. Layer the chicken mix in a baking dish, top with cheese, and bake until bubbly. Another option is to swap out hamburger buns for lettuce wraps. This makes a lighter meal and adds a fresh crunch. To store your Cajun Chicken Sloppy Joes, cool the mixture first. Place it in an airtight container. Keep it in the refrigerator. This will keep the dish fresh for about 3 to 4 days. Check for any strange smells or colors before you eat. If it looks or smells off, throw it away. You can freeze the chicken mixture too. Use a freezer-safe bag or container for this. Make sure to remove as much air as possible. Label it with the date. It will last about 2 to 3 months in the freezer. To thaw, move it to the fridge overnight. Reheat it in a skillet over medium heat. Stir often until it is hot. This keeps the flavor and texture nice. If you want to save time, prep the sauce ahead of time. You can make it a day or two before. Just store it in the fridge. For the buns, you can lightly toast them in advance. Keep them in a sealed bag. When you are ready to serve, just assemble. This makes dinner easy and quick! For the full recipe, check the recipe card! To spice up your Cajun Chicken Sloppy Joes, consider adding a few extra ingredients. You can use: - Extra Cajun seasoning for more heat - A dash of cayenne pepper for a fiery kick - Hot sauce for a tangy punch - Smoked paprika for a deeper flavor These spices can enhance the dish and make it even more exciting. Adjust the amounts based on your taste. If you like it spicy, don’t hold back! Yes, you can use other types of meat in this recipe. Ground turkey or beef works well. Each meat brings its own flavor and texture. - Ground turkey is leaner and has a mild taste. - Ground beef is richer and adds a hearty bite. These options can change the dish's feel. Try them to see which you prefer! Several sides complement Cajun Chicken Sloppy Joes nicely. Here are some popular choices: - Coleslaw adds crunch and freshness. - Sweet potato fries provide a sweet contrast. - Potato chips give a salty, crispy side. These sides balance the rich flavors of the Sloppy Joes. Mix and match to find your perfect pairing! For the full recipe, check out the complete details above. Cajun Chicken Sloppy Joes bring bold flavors and fun to any meal. We covered key ingredients like ground chicken, fresh veggies, and delicious seasonings. I shared step-by-step instructions for perfecting this dish, plus tips for making it your own. Experiment with protein alternatives or spices to suit your taste. Store leftovers properly for the best flavor. This dish is easy, tasty, and adaptable, making it a great choice for family dinners or gatherings. Enjoy making and sharing this meal that’s full of Cajun flair!](https://tossedrecipes.com/wp-content/uploads/2025/06/fc7806e7-107d-425c-b879-0c06a6eab6f1.webp)
Delicious Cajun Chicken Sloppy Joes Easy Dinner Recipe
Craving a fun and fiery dinner? You’re in the right place! My Cajun Chicken Sloppy Joes are not just tasty; they’re an easy win for
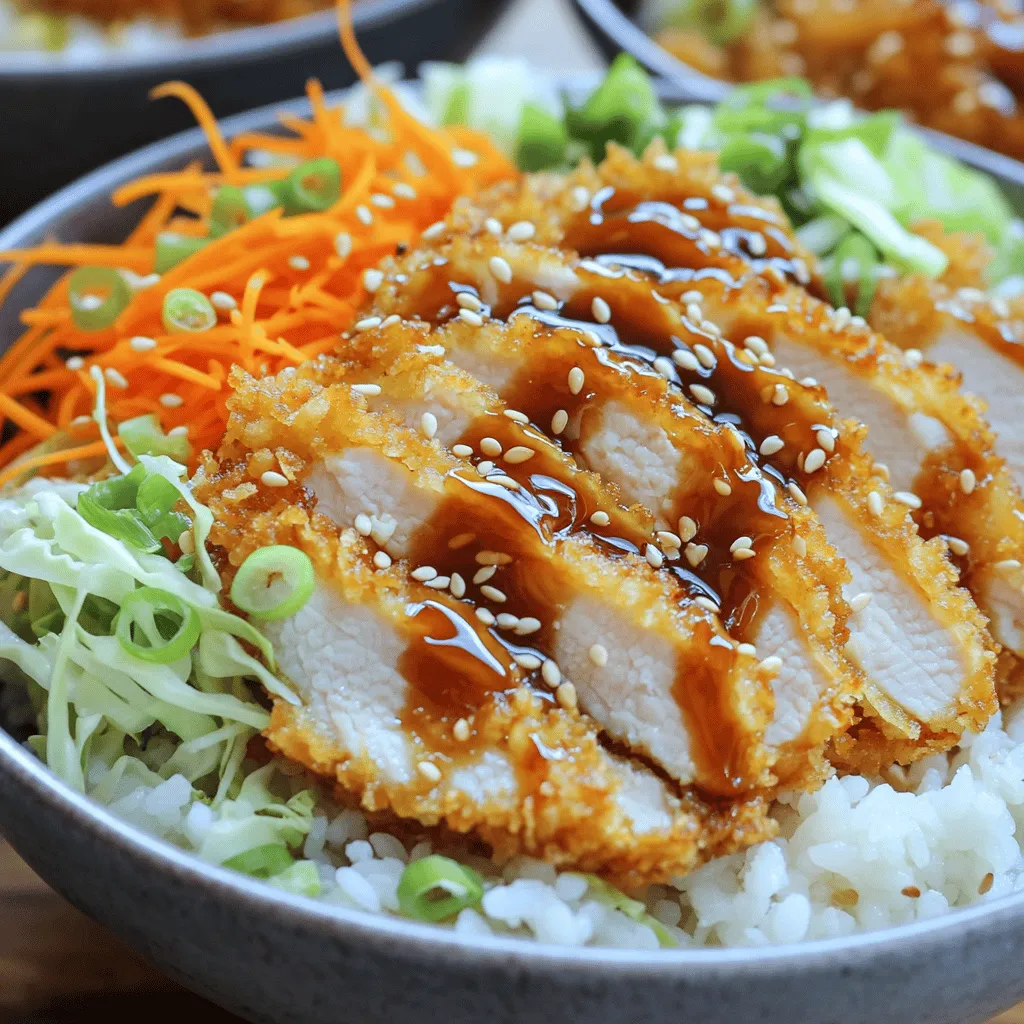
Japanese Katsu Bowls Tasty and Easy Dinner Recipe
Craving a quick and tasty dinner? Japanese katsu bowls offer crispy delights that you can whip up in no time. Whether you choose chicken, pork,
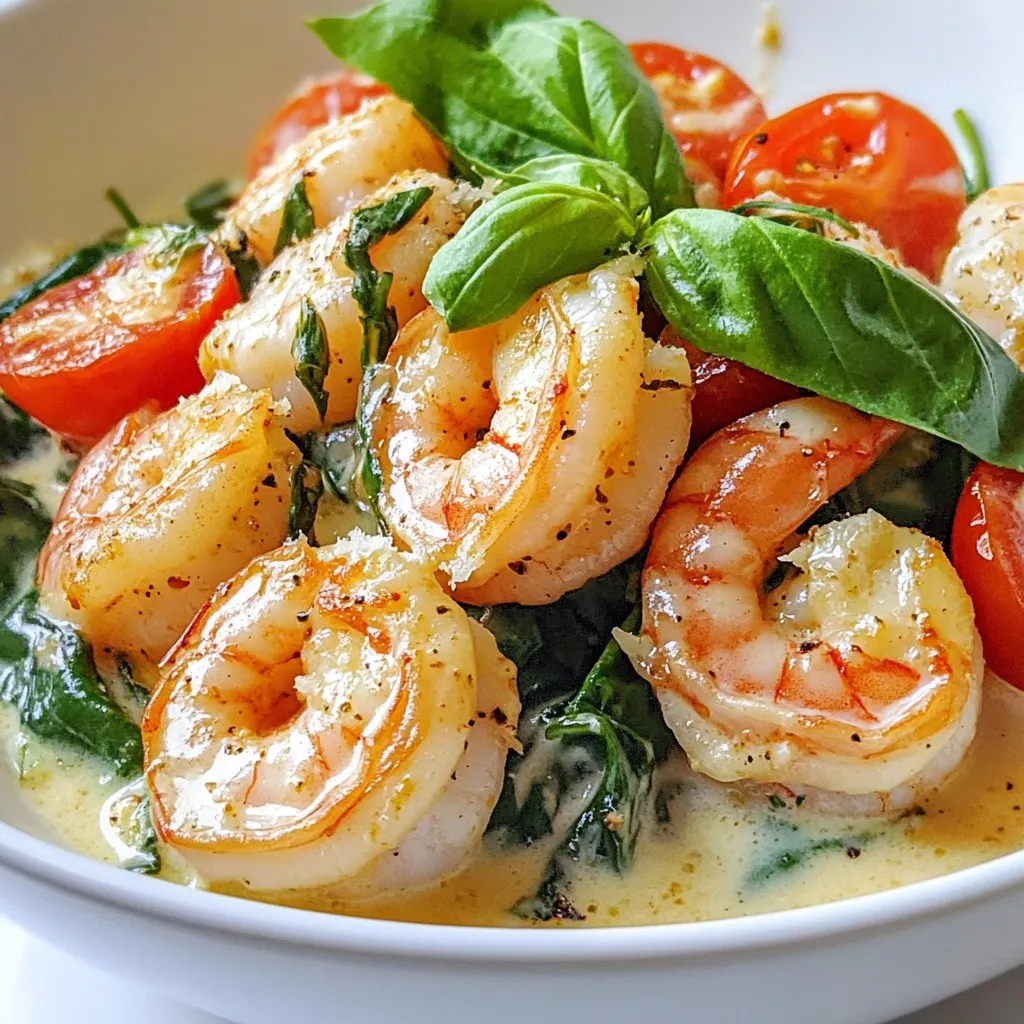
One Pot Creamy Tuscan Shrimp Easy Dinner Delight
If you’re looking for a simple yet delicious dinner, you’ve come to the right place! In this One Pot Creamy Tuscan Shrimp Easy Dinner Delight,
![- 2 boneless, skinless chicken breasts - 1 cup fresh corn kernels - 1 ripe avocado, diced - 1 red bell pepper, diced - 1 small red onion, finely chopped - 2 tablespoons olive oil - 1 teaspoon smoked paprika - 1 teaspoon cumin - Salt and pepper to taste - Juice of 1 lime - Fresh cilantro for garnish When you gather your ingredients, focus on freshness. I love using fresh corn because it adds a sweet crunch. You can use canned corn, but fresh tastes best. The ripe avocado brings creaminess. Make sure your avocado is soft but not mushy. For vegetables, the red bell pepper and onion add color and flavor. The olive oil helps everything cook nicely. Smoked paprika and cumin give your dish a warm, smoky taste. Salt and pepper are key to making flavors pop. Lime juice brightens everything up. Don't forget the cilantro! It adds a fresh touch at the end. This recipe combines all these ingredients into a meal you will love. For the full details on how to make it, see the Full Recipe section. - Preheat your oven to 400°F (200°C). - In a bowl, mix the corn, red bell pepper, red onion, lime juice, and half the olive oil. Season with salt, pepper, smoked paprika, and cumin. Stir well to combine. - Spread the corn mixture evenly on a baking sheet. - Roast for 15-20 minutes until lightly charred and tender. - Season the chicken breasts with salt, pepper, and the remaining olive oil. - In a skillet, heat over medium-high heat. Sear the chicken for about 5 minutes on each side until golden brown. - Once seared, transfer the chicken to the oven. You can place it on the same tray as the corn. - Bake for an additional 10-15 minutes until the chicken is cooked through. The internal temperature should reach 165°F (74°C). - Remove both the chicken and roasted corn from the oven. Let the chicken rest for a few minutes before slicing. - To serve, lay the sliced chicken on a plate. Top with the roasted corn mixture. Sprinkle diced avocado and fresh cilantro on top. For the full recipe, refer to the detailed instructions above. - Use a meat thermometer for accurate doneness. Aim for 165°F (74°C). - Let the chicken rest before slicing for juiciness. This keeps the meat moist. To achieve the best chicken, I recommend checking the internal temperature. A meat thermometer ensures the chicken is safe to eat. If you do not have one, look for clear juices when you cut into the chicken. If the juices run clear, your chicken is likely done. Resting the chicken is key. After cooking, place it on a cutting board and let it sit for about five minutes. This simple step allows the juices to redistribute, giving you tender, juicy bites. - Experiment with additional spices or herbs. Try garlic powder or fresh thyme. - Consider marinating the chicken for extra flavor. Use lime juice, olive oil, and spices. Flavor can elevate your dish. I love to mix spices like garlic powder, thyme, or even chili powder. These can add depth and warmth to the chicken. You could also add a pinch of cayenne for heat. Marinating the chicken makes it even better. A simple mix of lime juice, olive oil, and your favorite spices works wonders. Let it marinate for at least 30 minutes, or even overnight. This step will make your chicken taste amazing. For the full recipe, refer back to the main article. {{image_2}} You can switch up the protein in this dish. Try using turkey breasts instead of chicken. Turkey gives a similar texture and flavor. If you want a plant-based option, consider tofu. Tofu absorbs flavors well and can be a great choice. To make it more exciting, add black beans. They add protein and fiber. If you enjoy spice, throw in some jalapeños for a kick. It enhances the flavor and brings some heat. For toppings, you have options too! Sour cream adds creaminess, while cheese brings richness. These additions can make each bite even tastier. Explore these variations to create your perfect plate! For the full recipe, check out the [Full Recipe]. To keep your chicken breast with roasted corn and avocado fresh, store it in the fridge. Place leftovers in an airtight container. This helps keep moisture in and prevents odors. You can store it for up to three days. If you want to keep it longer, freezing is a great option. Wrap the chicken and corn mixture tightly in plastic wrap, then place it in a freezer-safe bag. This way, it stays good for up to three months. When you reheat your chicken, you want it to stay juicy. The best way is to use the oven. Preheat it to 350°F (175°C). Place the chicken and corn on a baking sheet. Cover them with foil to keep the moisture in. Heat for about 15-20 minutes. You can also use a microwave, but be careful. Heat it in short bursts, about 30 seconds, checking often. This keeps the chicken from drying out. Enjoy your delicious meal again! Yes, you can use frozen corn. Just thaw it first. Drain any excess water. This makes it easier to roast. The cooking time may be a bit shorter. Check for doneness after 10-15 minutes. To make this dish gluten-free, use gluten-free spices. Check labels on any packaged ingredients. Most fresh ingredients are naturally gluten-free. This means the corn, chicken, and veggies are safe. Enjoy a worry-free meal! This chicken dish pairs well with a green salad. You can also serve it with rice or quinoa. Grilled vegetables make a great side, too. These options balance the flavors nicely. Yes, this recipe is great for meal prep. Cook the chicken and corn ahead of time. Store in airtight containers in the fridge. Reheat for lunch or dinner all week! It stays tasty for about 3-4 days. For full details, check the Full Recipe. This blog post showed how to make a tasty chicken dish. You learned about the key ingredients, like chicken, corn, and avocado. I shared simple steps for cooking and tips for juicy results. You can also explore variations and storage options for leftovers. Remember, cooking is fun and you can adjust recipes to suit your taste. Enjoy experimenting and making this dish your own!](https://tossedrecipes.com/wp-content/uploads/2025/06/e9310303-88f2-4d11-aa8c-eb3235cd1ea7.webp)
Savory Chicken Breast with Roasted Corn and Avocado
Ready to enjoy a fresh and tasty meal? This Savory Chicken Breast with Roasted Corn and Avocado dish combines simple ingredients for a burst of
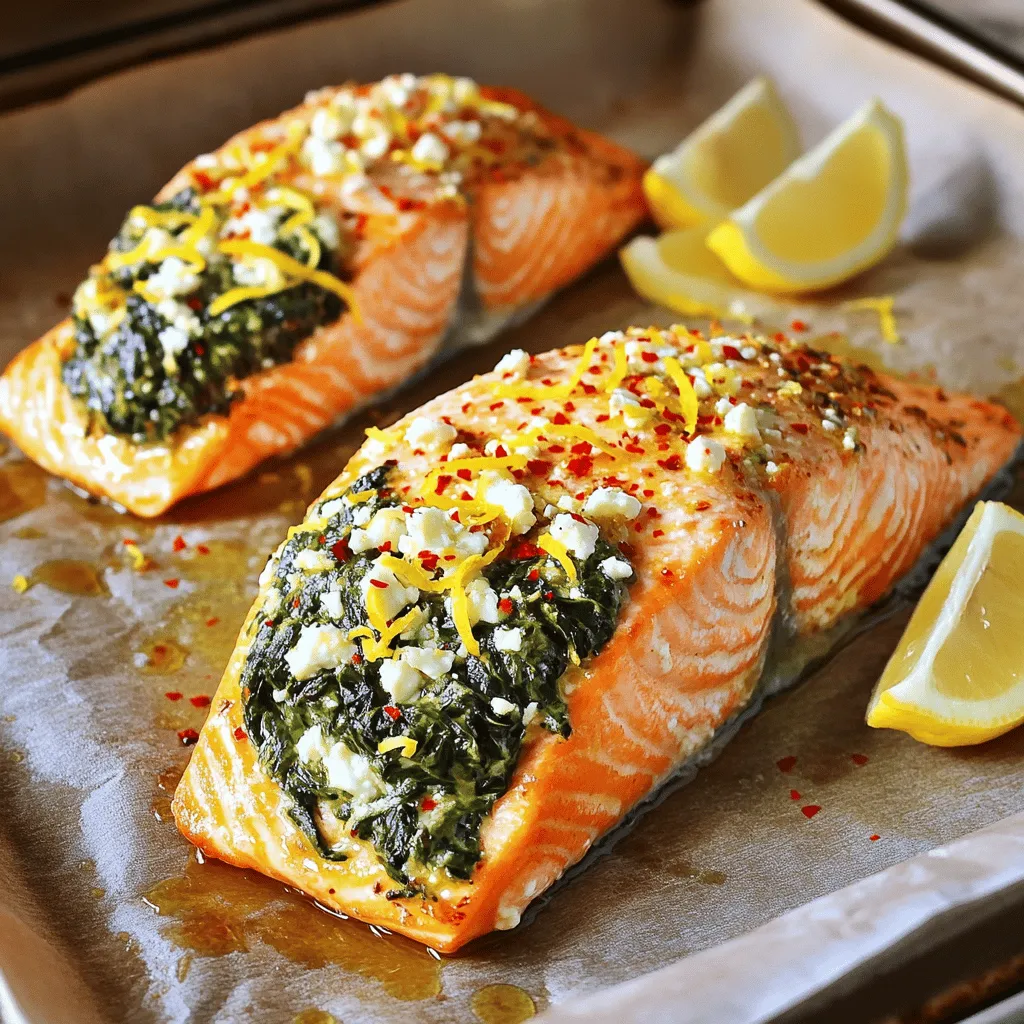
Baked Stuffed Salmon with Spinach & Feta Delight
If you crave a dish that’s both elegant and easy, Baked Stuffed Salmon with Spinach & Feta is your answer! This recipe combines tender salmon
![- 4 cod fillets (6 oz each) - 1 cup breadcrumbs (preferably panko) - 1 lemon, zested and sliced - Fresh herbs (parsley, dill) - Garlic powder - Onion powder - Paprika - Cayenne pepper (optional) - Olive oil - Salt and pepper to taste I love using fresh ingredients in my cooking. For this easy baked cod, I use four cod fillets, each weighing about six ounces. Cod is a mild fish that cooks well and has a nice texture. I recommend using panko breadcrumbs. They make the topping extra crispy. Zest a lemon to add a bright flavor. I also slice the lemon to place around the fish. Fresh herbs like parsley and dill give a nice finish to the dish. I like garlic and onion powder for depth. Paprika adds warmth, while cayenne gives a little kick, but it’s optional. For the oil, I use olive oil for its rich taste. It helps the breadcrumbs crisp up and keeps the fish moist. Don’t forget salt and pepper to enhance all the flavors. This combination makes the cod delicious and satisfying. You can find the full recipe above for all the details. 1. Preheat the oven to 400°F (200°C). This step is key for even cooking. 2. Prepare your baking dish by lightly greasing it with olive oil. This helps prevent sticking. 1. Combine 1 cup of breadcrumbs with fresh herbs like parsley and dill in a bowl. 2. Add garlic powder, onion powder, paprika, cayenne pepper, lemon zest, salt, and pepper. Mix well. 3. Pour in 2 tablespoons of olive oil and stir until the breadcrumbs are coated. Adjust seasoning levels to taste. 1. Place the 4 cod fillets in the greased baking dish. Drizzle them with olive oil. 2. Season both sides of the fillets with salt and pepper. 3. Add the breadcrumb mixture evenly on top of each fillet. Press it down gently to stick. 4. For added flavor, place lemon slices around the fillets in the dish. 1. Bake the cod in the preheated oven for 15-20 minutes. 2. To check for doneness, use a fork. The cod should flake easily and look opaque. Now you have a simple and tasty dish ready to impress your family or guests! For the complete recipe, check the Full Recipe. To get a crispy topping, I use panko breadcrumbs. They are light and crisp. Mix them with fresh herbs and spices. This adds flavor and crunch. Press the mixture onto the cod fillets. A firm press helps it stick well during baking. Keeping cod moist is also key. I drizzle olive oil over the fillets. This adds flavor and locks in moisture. Baking at 400°F (200°C) for 15-20 minutes works perfectly. The cod should flake easily when done. If you see a golden brown topping, you know it’s ready. For the best results, choose a good baking dish. A glass or ceramic dish works great. These materials heat evenly and show the fish well. I prefer a shallow dish. It allows the heat to circulate around the cod. You’ll need a few kitchen tools too. A mixing bowl helps combine the topping. A spatula makes serving easy. Use a fork to check if the cod flakes nicely. These tools keep the cooking process simple and fun. When it comes to sides, I love steamed veggies. Broccoli or asparagus pair well with cod. They add color and nutrients to the meal. A fresh salad is another good choice. It adds crunch and freshness. For presentation, serve the cod on a nice plate. Add a wedge of lemon and a sprinkle of parsley. This makes the dish look vibrant. It’s all about making it appealing and tasty. Don't forget to check the Full Recipe for more details! {{image_2}} You can change the flavor of your baked cod by using different herbs or spices. For example, try using basil or thyme for a fresh twist. You can also add some lemon zest for brightness. Using different types of fish can also work well. Instead of cod, try tilapia or haddock. These fish have a mild taste that pairs nicely with the same toppings. If you need gluten-free options, use gluten-free breadcrumbs. These can be found in most stores. You can also make your own by grinding gluten-free crackers or oats. For dairy-free needs, skip the butter or any dairy in your recipe. Olive oil works great as a substitute. You can also use dairy-free cheese if you want a cheesy crust. Broiling can give your cod a crispy texture. Place your dish under the broiler for the last few minutes of cooking. Keep an eye on it to avoid burning. Cooking in an air fryer is a quicker option. Set the air fryer to 375°F and cook for about 10-12 minutes. This method gives you a tasty, crispy fish without much fuss. For the full recipe, check out the [Full Recipe]. To keep your baked cod fresh, first cool it to room temperature. Then, place the cod in an airtight container. You can store it in the fridge for up to three days. When freezing, wrap each fillet tightly in plastic wrap, then place them in a freezer bag. This method helps prevent freezer burn. The cod can last up to three months in the freezer. When you want to enjoy your cod again, there are a few easy ways to reheat it. The oven is the best method. Preheat it to 350°F (175°C). Place the cod on a baking sheet, cover it with foil, and heat for about 10-15 minutes. This keeps the fish moist. You can also use the microwave, but be careful. Heat it in short bursts to avoid drying it out. Add a small splash of water to keep it juicy. For extra flavor, consider adding a squeeze of fresh lemon juice before serving. Enjoy your meal! If you want the full recipe, check out the complete instructions above. How long does baked cod last in the fridge? Baked cod lasts about 3 days in the fridge. Store it in an airtight container. This keeps it fresh and safe to eat. Always check for any off smells before eating leftovers. Can I use frozen cod for this recipe? Yes, you can use frozen cod. Just thaw it in the fridge before cooking. This helps the fish cook evenly. It’s best to avoid cooking from frozen, as it may not cook through properly. What wine pairs well with baked cod? A crisp white wine pairs well with baked cod. Options like Sauvignon Blanc or Pinot Grigio enhance the dish's flavors. The acidity balances the fish's richness, making each bite delightful. Is baked cod healthy? Yes, baked cod is very healthy. It is low in calories and high in protein. Cod also provides essential omega-3 fatty acids, which are great for heart health. Plus, using fresh herbs and lemon adds nutrients without extra calories. Can I substitute other fish for cod? Absolutely! You can use haddock, tilapia, or even salmon. Each fish has a unique taste and texture. Just adjust the cooking time based on the thickness of the fillets you choose. What’s the best way to tell if cod is cooked? The best way to check is by flaking it with a fork. Cooked cod should flake easily and be opaque all the way through. If it is still translucent or rubbery, it needs a bit more time in the oven. In this article, we explored how to bake cod to perfection. You learned about the main ingredients and how to mix them for a tasty topping. We outlined step-by-step instructions, plus helpful tips to achieve a crispy finish. You can also try fun variations to suit your taste or dietary needs. When storing leftovers, follow the best practices to keep them fresh. Overall, this method guarantees a delicious, healthy meal that’s easy to prepare. Now you're ready to cook and impress everyone at your table!](https://tossedrecipes.com/wp-content/uploads/2025/06/c6a0dd03-f41c-4ac2-9d22-85f88579a9ce.webp)
Easy Baked Cod Recipe Perfectly Crispy and Flavorful
Welcome to the world of easy and delicious cooking! If you’re looking for a quick, tasty meal, my Easy Baked Cod Recipe is just for
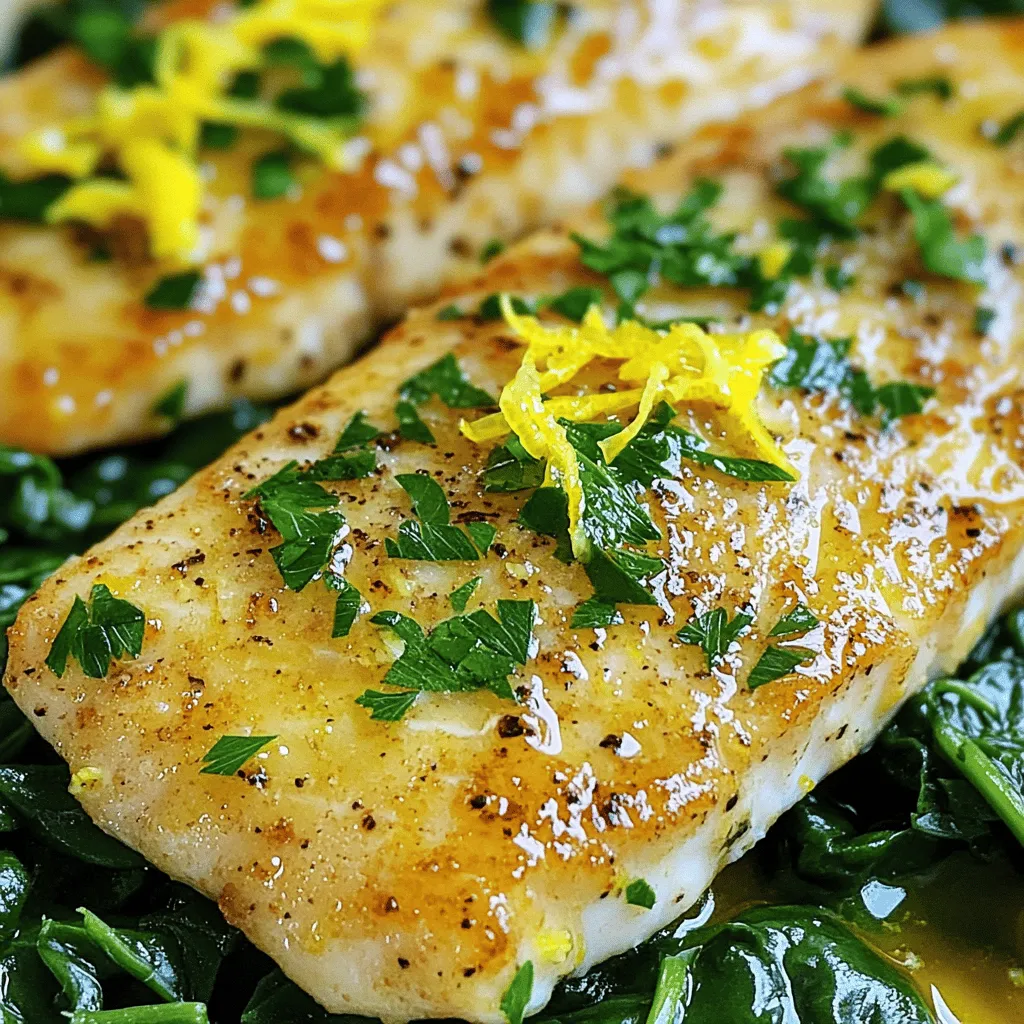
Easy Skillet Tilapia Quick and Flavorful Meal
Looking for a quick and tasty dinner? My Easy Skillet Tilapia is the answer! With just a few simple ingredients, you can whip up a
![Cooking is simple when you have the right ingredients. For this air fryer chicken and vegetables, you'll need: - 2 boneless, skinless chicken breasts, cut into bite-sized pieces - 1 cup bell peppers (red, yellow, green), sliced - 1 medium zucchini, sliced into half-moons - 1 cup broccoli florets - 1 tablespoon olive oil - Seasonings: garlic powder, paprika, oregano, salt, and pepper - Garnish: fresh parsley, chopped These fresh ingredients bring out the best flavors. The chicken gives you protein, while the veggies add color and nutrients. Using olive oil keeps this meal healthy. You can easily find these items at your local store. Each ingredient plays a role in making this dish tasty and nutritious. For the full recipe, check out the [Full Recipe]. First, grab a large bowl. In this bowl, combine the chicken pieces with one tablespoon of olive oil. Next, add the garlic powder, paprika, oregano, salt, and pepper. These spices bring a lot of flavor. Toss the chicken well to coat it evenly with the oil and spices. This step is crucial because it helps the chicken become tasty and juicy. Now it’s time to mix in the vegetables. Add one cup of sliced bell peppers, one medium zucchini cut into half-moons, and one cup of broccoli florets. Stir everything together until the veggies are coated with the seasoned oil. This mix not only adds color but also boosts your meal's nutrition and flavor. Before cooking, preheat your air fryer to 400°F (200°C). This step takes about five minutes. Once it’s ready, place the chicken and vegetable mixture into the air fryer basket. Make sure to spread it out in a single layer. If your air fryer is small, you might need to cook in batches. Cook the mixture for 12 to 15 minutes. Halfway through cooking, shake the basket gently. This helps the chicken and veggies cook evenly. The chicken should reach an internal temperature of 165°F (74°C) when done. The vegetables should be tender but still slightly crisp. For the full recipe, refer to the instructions above. To get that perfect crunch, use minimal oil. Just a little goes a long way. I like to spray the chicken and veggies lightly. This helps achieve that crispy finish we all want. Don't forget to shake the basket halfway through cooking. This simple step redistributes heat and ensures even cooking. Cooking time is key for juicy chicken. Always monitor the chicken's internal temperature. It should reach 165°F (74°C). If your air fryer is larger or smaller, adjust the time. You may need to cook a bit longer or shorter. Always trust your thermometer for best results. For serving, I recommend using a large platter. This makes the dish look appealing. After cooking, drizzle a touch of olive oil on top. Sprinkle some fresh parsley for a splash of color. This simple touch makes your meal look gourmet. If you want to impress, these small details matter! {{image_2}} You can change up the veggies in this meal. Seasonal vegetables work great. Try asparagus in spring or sweet carrots in fall. They add fresh flavors and colors. You can also use frozen vegetables. They are quick and easy. Just toss them in the bowl with the chicken. Add more taste by using different spices. Cayenne gives a nice heat. Italian seasoning brings a herby flavor. You can also use a marinade. Marinades soak into the chicken and veggies, adding depth. Let them sit for 30 minutes before cooking. This step boosts the flavor even more. If you want a change, swap chicken for turkey or shrimp. Both options cook well in the air fryer. For a meatless meal, try tofu. It soaks up flavors well. Press the tofu to remove excess water. Cut it into cubes and mix it with your spices. Each protein brings unique taste and texture. Check the Full Recipe for more ideas on how to make this dish your own. After enjoying your air fryer chicken and vegetables, store any leftovers in an airtight container. This keeps them fresh. I recommend eating them within three days for the best taste and texture. For reheating, use your air fryer. It helps keep everything crispy. Set it to 350°F (175°C) and reheat for about 5-7 minutes. If you need speed, the microwave works too. Just heat for one to two minutes. However, this may make your veggies soft. Yes, you can use frozen chicken and vegetables. Just remember a few tips. - Chicken: If using frozen chicken, cut it into smaller pieces. This helps it cook evenly. - Vegetables: Frozen veggies can go straight into the air fryer. They may need a few extra minutes to cook. Check that the chicken reaches 165°F (74°C). The veggies should be tender and warm. To check if the chicken is done, use a meat thermometer. Insert it into the thickest part. It should read 165°F (74°C). Look for these signs: - The chicken should be golden brown. - The juices should run clear, not pink. If you see these cues, your chicken is ready to enjoy! Many sides go well with air fryer chicken and vegetables. Here are some tasty options: - Rice: White, brown, or even cauliflower rice works well. - Quinoa: This is a great protein-packed choice. - Salad: A fresh green salad adds crunch and color. - Bread: Serve with crusty bread or rolls for a filling meal. Mix and match these sides to find your favorite pairings! This blog post covered a simple air fryer recipe with chicken and vegetables. You learned about the key ingredients, step-by-step instructions, and helpful tips for a perfect dish. Remember to watch cooking times and enjoy variations to keep it exciting. Whether you stick with chicken or try tofu, this recipe is flexible. Store leftovers properly and use the air fryer for reheating. Enjoy cooking and experimenting with this easy and tasty meal!](https://tossedrecipes.com/wp-content/uploads/2025/06/4d61b457-44a7-4524-8de3-1f0cff199e03.webp)
Air Fryer Chicken and Vegetables Healthy Meal Option
Looking to spice up your dinner routine with a quick and healthy option? Air Fryer Chicken and Vegetables are not just simple to prepare but