Dinner
![- 1 large head of green cabbage - 4 tablespoons olive oil - 4 cloves garlic, minced - 1 teaspoon smoked paprika - 1 teaspoon salt - 1/2 teaspoon black pepper - 1 teaspoon balsamic vinegar - Fresh parsley, chopped (for garnish) To make oven roasted garlic cabbage steaks, start by picking fresh ingredients. Look for a firm head of cabbage with bright green leaves. Avoid any that feel soft or show signs of browning. Fresh garlic should also be firm with no sprouts. You can adjust the recipe as needed. If you prefer more spice, add more smoked paprika. Want it creamier? Try sprinkling cheese on top before serving. If you need to skip an ingredient, use lemon juice instead of balsamic vinegar. These simple swaps allow you to customize flavors to your liking. Enjoy the process of making this dish your own! For the complete guide, check out the Full Recipe. How to clean and cut the cabbage Start by removing any wilted outer leaves from the cabbage. Rinse it under cold water to clean it well. Next, place the cabbage on a cutting board. Cut it into thick slices, about one inch wide. You will get around four to six cabbage steaks, depending on the size of your cabbage. Preparing the garlic-oil mixture In a mixing bowl, combine the olive oil, minced garlic, smoked paprika, salt, black pepper, and balsamic vinegar. Whisk these ingredients together until they blend well. This mixture gives the cabbage a rich flavor. Roasting in the oven: Timing and temperature Preheat your oven to 400°F (200°C). Place the cabbage steaks on a large baking sheet lined with parchment paper. Brush both sides of each steak generously with your garlic-oil mixture. Roast the cabbage in the hot oven for about 25 to 30 minutes. They should be golden brown on the outside and tender inside. Tips for flipping cabbage steaks while cooking Halfway through roasting, carefully flip each cabbage steak. Use a spatula to avoid breaking them. This helps both sides cook evenly and become crispy. Presentation ideas for serving To serve, place the roasted cabbage steaks on a rustic wooden board. Drizzle any leftover garlic oil over them. Garnish with freshly chopped parsley for a bright touch. This makes the dish look appetizing. Recommended side dishes Cabbage steaks pair well with many sides. Think about serving them with quinoa, grilled chicken, or a fresh salad. These options balance the rich flavors of the cabbage and make for a complete meal. For the full recipe, check out the details above. To get the best texture, cut your cabbage into thick slices. Aim for 1-inch steaks. This thickness allows the inside to cook well while the outside gets crispy. Brush the garlic-oil mixture on both sides. This adds flavor and keeps the steaks moist. You can experiment with seasonings. Try adding: - Crushed red pepper for heat - Lemon zest for brightness - Parmesan cheese for a savory touch These options can take your dish to the next level. If your cabbage steaks are soggy, check the oil amount. Too much oil can make them wet. Try using less next time. Also, ensure the oven is hot enough. A temperature below 400°F may not crisp them well. For burnt edges, flip your steaks halfway through cooking. If your oven runs hot, lower the temperature slightly. Keep an eye on them during the last few minutes. Different ovens may heat unevenly. Use an oven thermometer for accuracy. Adjust cooking time based on how your oven behaves. This will help you achieve the perfect roast every time. For the full recipe, refer back to the main article. {{image_2}} You can change the flavor of your cabbage steaks easily. Try using different spices or herbs. For a spicy kick, add cayenne pepper or chili flakes. If you prefer fresh herbs, consider rosemary or thyme. Both will bring a new taste to your dish. Cheese lovers can also enjoy these steaks. A sprinkle of Parmesan or feta cheese adds a creamy layer. For a twist, melt some cheese on top during the last few minutes of roasting. This creates a golden, bubbly topping that tastes amazing. While cabbage steaks are great, you can explore other vegetables too. Thick slices of cauliflower or eggplant roast well and can mimic the cabbage texture. These options provide different flavors while keeping your dish exciting. Using colored cabbages can also enhance your plate. Red or purple cabbages look stunning and taste just as good. Their vibrant colors make for a beautiful presentation. This adds visual appeal and new flavors to your meals. For more details on making these delicious dishes, check out the Full Recipe. To keep your cabbage steaks fresh, cool them completely. Place them in an airtight container. Store them in the fridge for easy access. If you want to keep them longer, freeze the steaks. Wrap them tightly in plastic wrap and then place them in a freezer bag. This helps prevent freezer burn. When you’re ready to eat, you can reheat them in the oven. Set the oven to 350°F (175°C) and heat for about 10-15 minutes. This method keeps them crispy and tasty. In the fridge, your leftover cabbage steaks should last about 3-5 days. Always check for any signs of spoilage before eating. If you have a lot left, consider using them in other dishes. Chop the leftover cabbage and mix it into a stir-fry. You can also add it to soups or salads for extra crunch. Another fun idea is to blend them into a veggie wrap. The possibilities are endless! For more details on making these delicious cabbage steaks, check the Full Recipe. How do you make cabbage steaks not fall apart? To keep cabbage steaks from falling apart, cut them thick. Aim for slices that are about 1-inch wide. This thickness helps them hold together. Make sure to handle them gently when flipping during cooking. Can I prepare cabbage steaks in advance? Yes, you can prepare cabbage steaks in advance. Cut the cabbage and coat it with the garlic-oil mix. Store them in the fridge for up to a day. Just remember to let them come to room temperature before roasting. What can I serve with roasted cabbage steaks? Roasted cabbage steaks pair well with many dishes. You can serve them with grilled meats, roasted potatoes, or a fresh salad. They also taste great with a drizzle of tahini or a squeeze of lemon. Health benefits of cabbage Cabbage is low in calories and high in fiber. It helps with digestion and keeps you full. It also has vitamins C and K, which are good for your skin and bones. Caloric content per serving Each serving of oven roasted garlic cabbage steaks has about 100 calories. This makes them a healthy side dish to add to any meal. Enjoy the flavor and health benefits at the same time. For the full recipe, click on [Full Recipe]. Oven roasted garlic cabbage steaks are easy, tasty, and full of nutrition. We covered what to buy, how to prepare, cook, and serve. You now have tips for perfecting your steaks and ideas for variations. Store your leftovers properly for later enjoyment. Now, you can confidently make this dish a regular part of your meals. Enjoy the rich flavors and health benefits as you explore your cooking skills. Happy roasting!](https://tossedrecipes.com/wp-content/uploads/2025/05/12b2a1f0-76b2-4769-aea0-abca7089a320.webp)
Oven Roasted Garlic Cabbage Steaks Flavorful Dish
Looking for a tasty and healthy dish? Oven Roasted Garlic Cabbage Steaks might be just what you need! This flavorful dish brings out the natural
![- 1 lb ground beef - 1 cup breadcrumbs - 1 egg - 2 cups cooked macaroni pasta - 2 cups shredded cheddar cheese - 1 cup milk - 1/2 cup sour cream - 1/2 cup grated Parmesan cheese - 1 teaspoon garlic powder - 1 teaspoon onion powder - 1 teaspoon smoked paprika - Salt and pepper to taste Gathering the right ingredients is key for a great Mac and Cheese Meatloaf Casserole. Start with the main ingredients. You need one pound of ground beef. This will be the heart of the dish. Add one cup of breadcrumbs to bind everything together. Crack in one egg. This helps the meatloaf hold its shape. Don't forget the two cups of cooked macaroni pasta. This makes it a true comfort meal. Next, let’s talk about the dairy. For that creamy mac and cheese flavor, you need two cups of shredded cheddar cheese. This is what makes it ooey-gooey. One cup of milk adds moisture. Half a cup of sour cream gives richness. Finally, include half a cup of grated Parmesan cheese for an extra cheesy kick. Now, let's spice things up. You want flavor in every bite. Add one teaspoon of garlic powder. This adds a nice depth. One teaspoon of onion powder gives sweetness. Then, add one teaspoon of smoked paprika for a subtle, smoky taste. Lastly, season with salt and pepper to taste. With these ingredients in hand, you are set to make a delicious dish. For the complete preparation steps, check the Full Recipe. - Preheat the oven to 350°F (175°C). - Prepare the 9x13 inch casserole dish with grease. - Combine ground beef, breadcrumbs, egg, garlic powder, onion powder, smoked paprika, salt, and pepper. - Mix until everything is well combined. - Form the meat mixture into a base layer in the casserole dish. - Mix the cooked macaroni, 1 cup of shredded cheddar cheese, milk, and sour cream. - Stir until the macaroni is well coated. - Layer the macaroni mixture on top of the meat mixture in the casserole dish. - Pour marinara sauce evenly over the macaroni layer. - Sprinkle the remaining shredded cheddar cheese and grated Parmesan cheese on top. - Bake for 30-35 minutes, until the cheese is melted and bubbly. - Remove from the oven and let it rest for 5 minutes before serving. For the full recipe, check out the ingredients listed above. - Ensure the meat is cooked thoroughly before serving. - Use a thermometer to check the internal temperature of 160°F. When you cook this dish, checking the meat is key. Undercooked meat can lead to foodborne illness. That’s why a thermometer is your best friend. It gives you a precise reading. - Pair with a fresh side salad or garlic bread. - Garnish with fresh parsley for presentation. For a tasty meal, I love serving this casserole with a crisp salad. A side of garlic bread adds a warm touch. Don’t forget to sprinkle fresh parsley on top. It adds color and a nice flavor boost. - Avoid overcooking the macaroni before mixing. - Ensure layers are even for consistent cooking. One big mistake is overcooking the macaroni. If you do this, it can get mushy in the oven. Also, make sure your layers are even. This helps the dish cook evenly and taste great. For the full recipe, check out the [Full Recipe]. {{image_2}} You can make this dish even tastier by adding different cheeses. Try using mozzarella for a stretchy texture or pepper jack for a kick. I love mixing in cream cheese; it gives the casserole a rich and creamy taste. This simple swap elevates the classic mac and cheese flavor. For a lighter version, switch the ground beef with ground turkey or chicken. This change keeps the dish healthy while still being delicious. If you want a smoky flavor, add bacon bits to the meat mixture. The crispy bits add a fun crunch and a savory twist. Adding vegetables is a great way to boost nutrition. I like to mix in spinach, zucchini, or bell peppers for color and flavor. Mushrooms also work well, giving your casserole an earthy taste. You can sneak in these veggies without losing the comfort of mac and cheese. After enjoying your Mac and Cheese Meatloaf Casserole, store leftovers in an airtight container. It will stay fresh in the fridge for 3-4 days. When you're ready to eat, reheat it in the oven or microwave. This keeps the flavors intact and the cheese melty. If you want to save some for later, freeze portions in airtight containers. They can last for up to 2 months in the freezer. When you want to enjoy it again, simply thaw it in the fridge overnight before reheating. This way, you can savor this comforting dish even on busy days. For the complete guide, check out the Full Recipe. You can boost the flavor of this dish easily. Try adding spices like cumin or chili powder. Fresh herbs, like basil or thyme, can also elevate it. A dash of hot sauce can bring some heat. Mix in some sautéed onions or peppers for added taste and texture. Yes, you can prepare this dish a day in advance. Assemble the layers and cover the casserole. Refrigerate it overnight. When you're ready to bake, take it out of the fridge and let it sit for a bit. This helps the dish to cook evenly. This casserole pairs well with a fresh side. Steamed vegetables like broccoli or green beans work great. A simple coleslaw adds crunch and a nice contrast. These sides balance the richness of the casserole. For more ideas, check the Full Recipe for extra tips! This blog post outlined how to make a tasty Mac and Cheese Meatloaf Casserole. We covered key ingredients, step-by-step instructions, and helpful tips. I’ve shared storage advice and some fun variations to try. This dish is simple to make and packed with flavor. You can customize it to fit your taste. Now, gather your ingredients and enjoy making this hearty meal with those you love. Happy cooking!](https://tossedrecipes.com/wp-content/uploads/2025/05/51dfc473-d1cc-4cf6-90c4-a6ff11a650c8.webp)
Savory Mac and Cheese Meatloaf Casserole Recipe
Are you ready for a dish that combines comfort and flavor into one? The Savory Mac and Cheese Meatloaf Casserole brings together juicy ground beef,

Chicken Potato Broccoli Casserole Comforting Dish
Looking for a warm and hearty dish to brighten your table? This Chicken Potato Broccoli Casserole combines tender chicken, comforting potatoes, and vibrant broccoli for
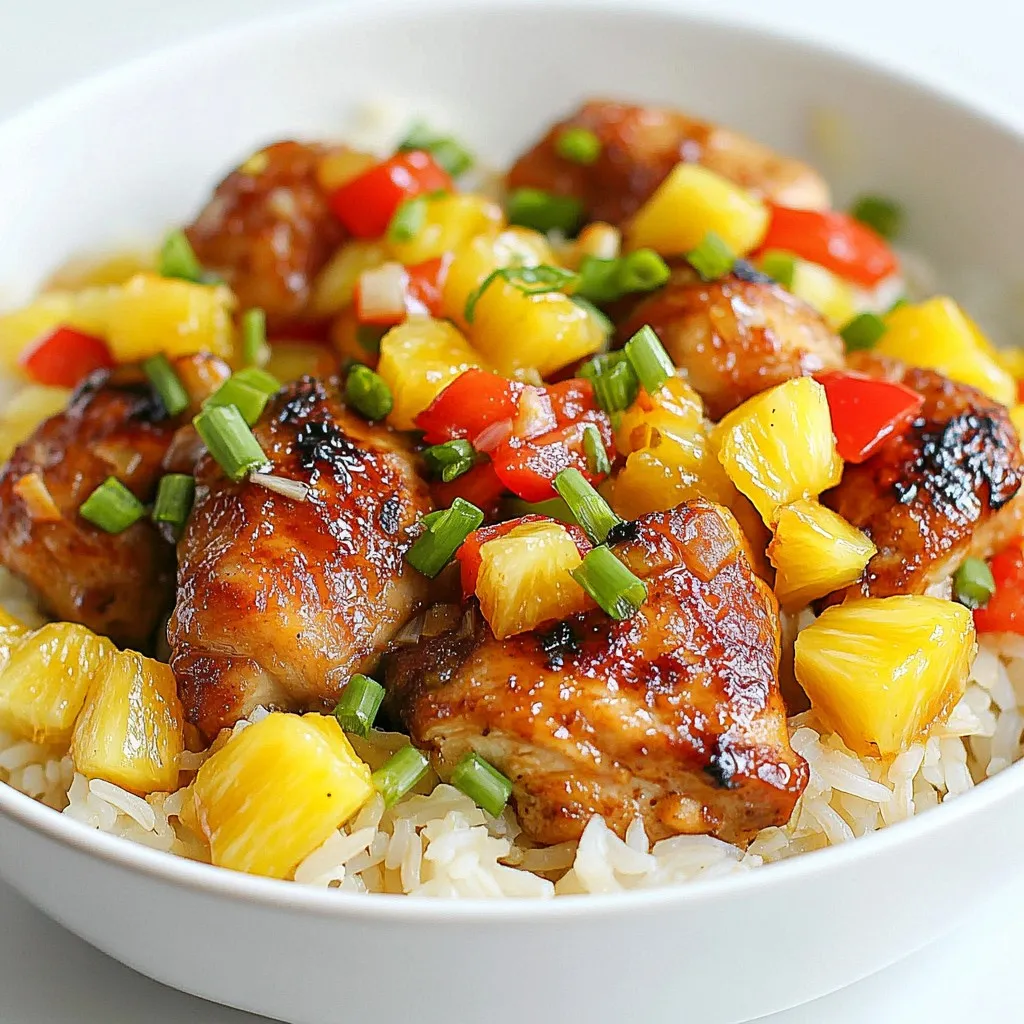
Pineapple Chicken & Rice Skillet Flavorful One-Pan Meal
Ready for a fun dinner that sings with flavor? My Pineapple Chicken & Rice Skillet is your ticket to a vibrant, one-pan meal that’s quick
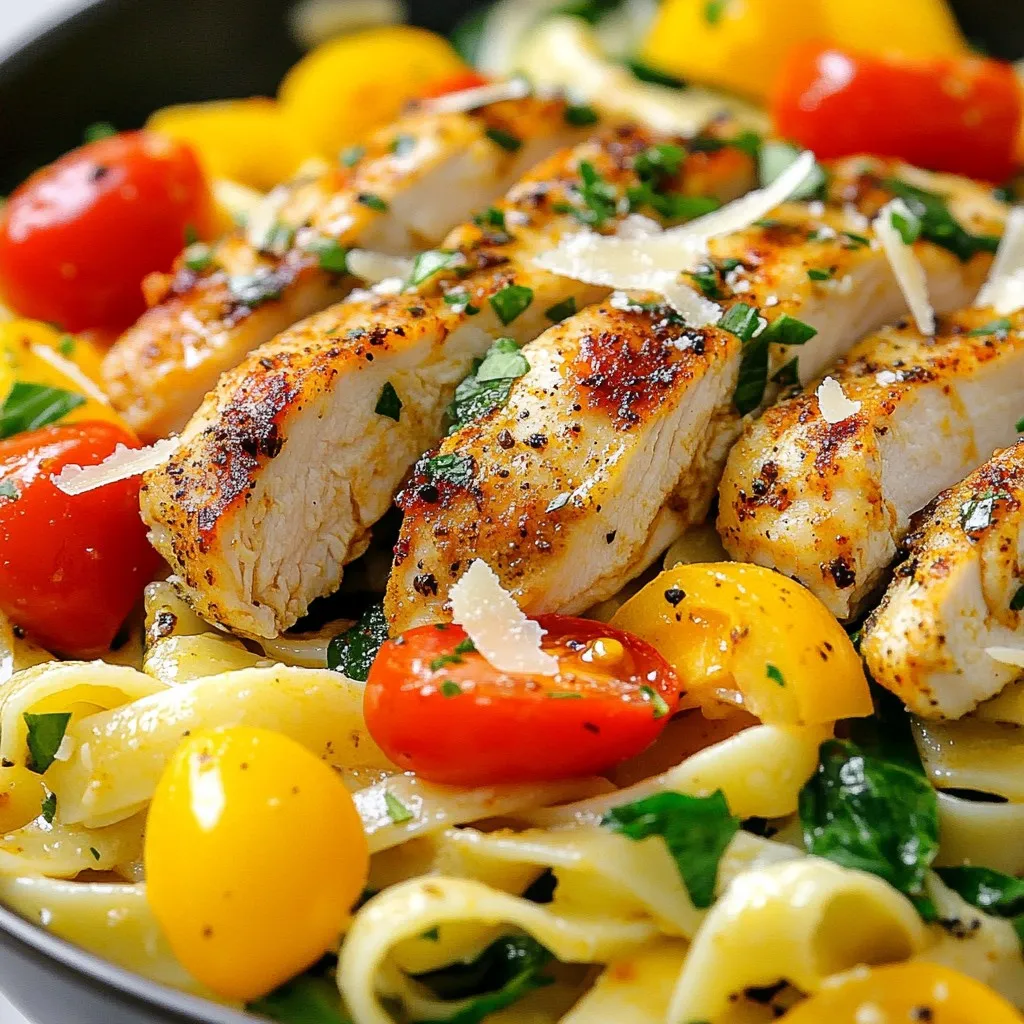
Ingredient Cajun Chicken Pasta Quick and Tasty Meal
Looking for a quick and tasty meal? Cajun Chicken Pasta might be your new go-to! With tender chicken, flavorful spices, and creamy sauce, this dish
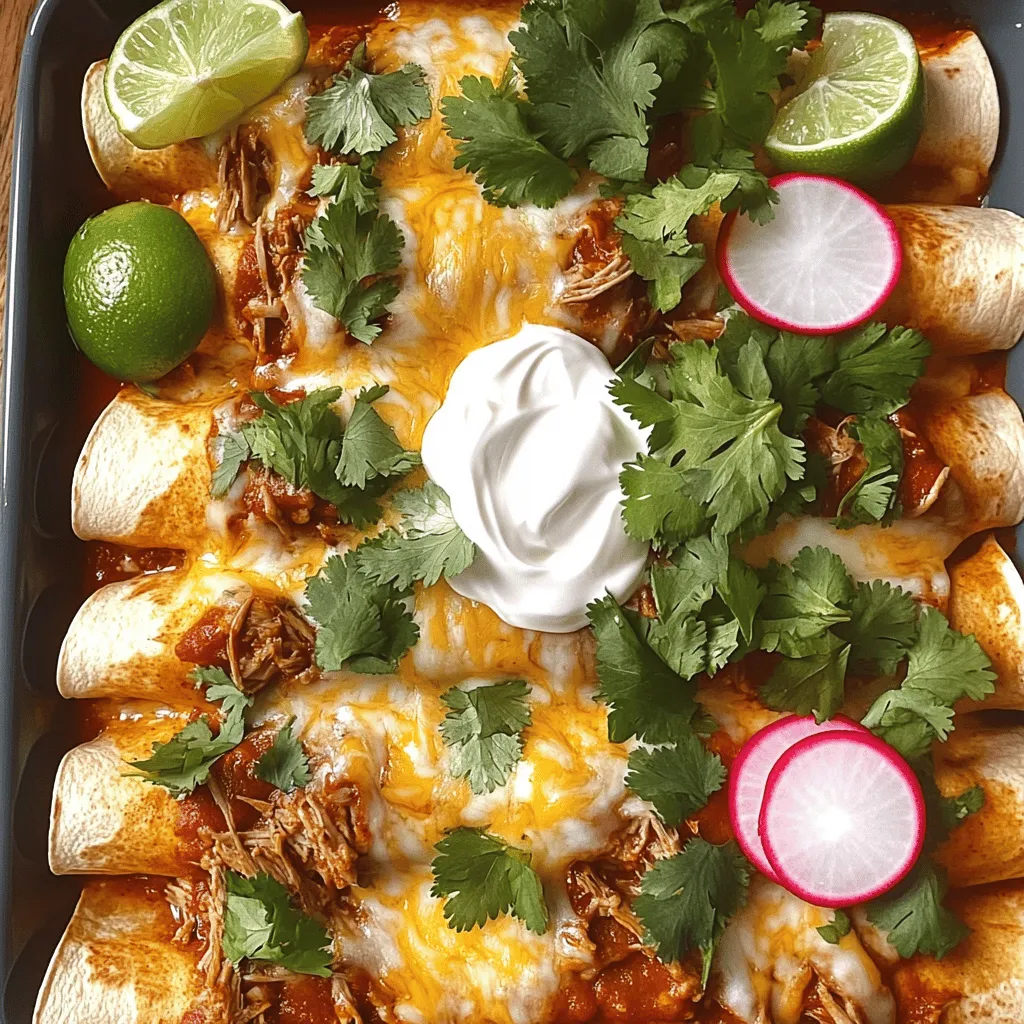
Birria Enchiladas Savory and Flavorful Delight
Are you ready to savor a dish that bursts with flavor? Birria enchiladas are the perfect blend of tender meat and zesty spices, wrapped in
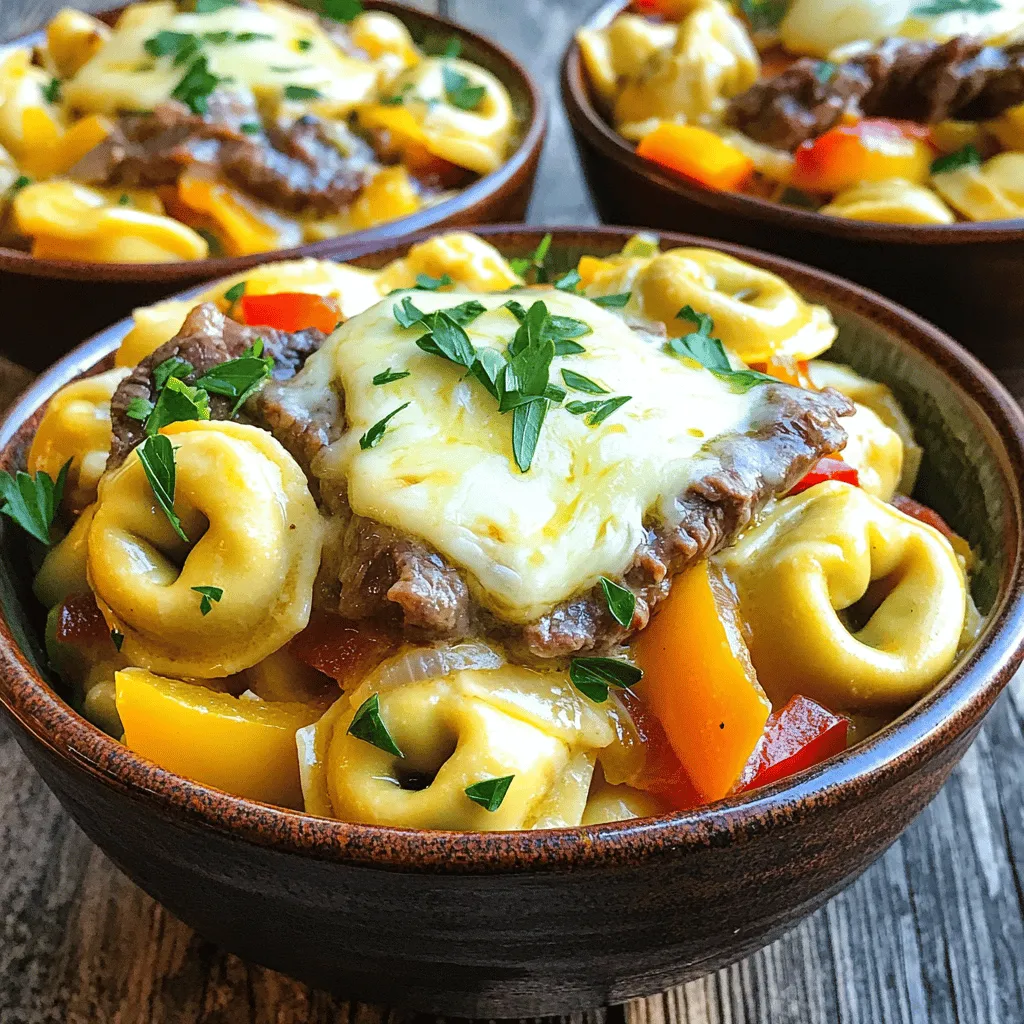
Cheesesteak Tortellini Flavorful and Easy Recipe
Are you ready to enjoy a dish that combines classic flavors in a fun way? Cheesesteak Tortellini takes all the savory goodness of a traditional
![- Chicken and Marinade Components - 4 boneless, skinless chicken breasts - 1 cup balsamic vinegar - 2 tablespoons honey - 2 tablespoons Dijon mustard - 4 cloves garlic, minced - 1 teaspoon dried oregano - 1 teaspoon salt - 1/2 teaspoon black pepper - Rice and Vegetables - 1 cup long-grain white rice - 2 cups chicken broth - 1 cup cherry tomatoes, halved - 1 cup fresh spinach - 2 tablespoons olive oil - Garnish - Fresh basil for garnish This recipe uses simple ingredients. You will need chicken for protein and flavor. The balsamic vinegar adds a sweet and tangy taste that makes the dish shine. Honey and Dijon mustard help balance the flavors. Garlic and oregano bring depth to the marinade. For the rice, I recommend long-grain white rice. It cooks up fluffy and pairs well with the chicken. Chicken broth adds rich flavor to the rice. Cherry tomatoes and spinach add color and nutrition to the dish. Finally, fresh basil gives a nice touch when serving. Check out the [Full Recipe] for detailed cooking steps. Enjoy making this tasty meal! To start, make the marinade. In a small bowl, whisk together: - 1 cup balsamic vinegar - 2 tablespoons honey - 2 tablespoons Dijon mustard - 4 cloves garlic, minced - 1 teaspoon dried oregano - 1 teaspoon salt - 1/2 teaspoon black pepper This mix adds a bold flavor to the chicken. Next, take 4 boneless, skinless chicken breasts and place them in a zip-top bag. Pour the marinade over the chicken, seal the bag, and refrigerate. Let it sit for at least 30 minutes. For best results, you can marinate it for up to 4 hours. Heat 2 tablespoons of olive oil in a large skillet over medium heat. Take the chicken out of the marinade. Reserve the marinade for later. Add the chicken to the skillet and sear it for about 5-7 minutes on each side. Look for a golden brown color. Use a meat thermometer to check that it reaches 165°F. Once done, set the chicken aside. While the chicken cooks, rinse 1 cup of long-grain white rice under cold water. This helps remove extra starch. After rinsing, add the rice to the same skillet you used for the chicken. Toast the rice for 1-2 minutes, stirring often. This step adds a nice nutty flavor. Next, pour in 2 cups of chicken broth and the reserved marinade. Bring this mix to a boil. Once boiling, reduce the heat to low, cover, and simmer for about 15 minutes. The rice should become tender and absorb all the liquid. After 15 minutes, stir in 1 cup of halved cherry tomatoes and 1 cup of fresh spinach. Cover again and cook for another 5 minutes. This will wilt the spinach and warm the tomatoes. Finally, slice the cooked chicken and place it over the rice. Drizzle any remaining balsamic marinade on top for added flavor. Transfer everything to a serving dish and garnish with fresh basil. Enjoy your delicious balsamic chicken and rice! For complete instructions, check the Full Recipe. To cook chicken that is juicy, start with the right cut. I recommend boneless, skinless breasts for this recipe. Marinate them well to infuse flavor. Use a zip-top bag to coat the chicken evenly. Let the chicken soak in the marinade for at least 30 minutes. For best results, aim for 4 hours. When cooking, heat the skillet until it's hot. This will help achieve a nice sear. Sear each side for 5-7 minutes. Make sure the internal temperature reaches 165°F for safe eating. Cooking rice can be tricky, but rinsing it helps! Rinse the long-grain white rice under cold water until the water runs clear. This removes extra starch and prevents it from being gummy. In your skillet, toast the rice for 1-2 minutes. This adds a nice nutty flavor. Then, pour in chicken broth and the reserved marinade. Bring it to a boil, then reduce heat and cover. Let it simmer for about 15 minutes. Check that the rice is tender and has absorbed all the liquid. The marinade is key to bold flavors. Mix balsamic vinegar, honey, and Dijon mustard together. Add minced garlic, oregano, salt, and black pepper for extra taste. This mix not only tenderizes the chicken but also gives it a rich flavor. Don’t forget to reserve some marinade after cooking the chicken. Drizzle it over the rice and chicken at the end. This will tie all the flavors together beautifully. If you want a little more zing, add fresh herbs like basil as a garnish. {{image_2}} If you want to mix things up, try different proteins. You can use turkey breasts instead of chicken. Turkey has a lean taste and pairs well with the balsamic flavor. Pork chops are another great choice. They will soak up the marinade nicely, too. For seafood lovers, shrimp works well. Cook them just until they turn pink for the best results. You can make this dish vegetarian with a few simple swaps. Instead of chicken, use firm tofu or tempeh. Both soak up flavors well and provide good protein. Cook them the same way as chicken. For the rice, you can add more veggies like bell peppers or zucchini. These will add color and taste without losing the essence of the dish. To boost the flavor, try adding more herbs or spices. Fresh thyme or rosemary can give a nice touch. You might also consider adding a splash of lemon juice. It adds brightness to the dish. For a little heat, sprinkle some red pepper flakes on top. This will give your meal a spicy kick. If you want to explore the full recipe, check out the Balsamic Bliss Chicken & Rice! After you enjoy this dish, store any leftovers in an airtight container. Let the chicken and rice cool down first. Then, place them in the fridge. They stay fresh for up to three days. This helps keep the flavor intact. When you’re ready to eat, you can reheat the leftovers. Use a microwave or stovetop for best results. If using a microwave, cover the dish to keep moisture in. Heat it for about 2-3 minutes, or until hot. Stir halfway through for even heating. On the stovetop, warm it over low heat. Add a splash of broth if it seems dry. You can also freeze this meal for later. Pack the cooled chicken and rice in a freezer-safe container. Make sure to leave some space for expansion. It will last up to three months in the freezer. When you're ready to eat, thaw it in the fridge overnight before reheating. This keeps the taste great, just like the Full Recipe! Yes, you can use other vinegars. Apple cider vinegar or red wine vinegar work well. They add unique flavors. Each type gives a different taste to the dish. Just remember to adjust the sweetness. If you need a honey substitute, try maple syrup or agave nectar. Both add sweetness. You can also use brown sugar. Just mix it with a bit of water to dissolve it. This keeps the sauce smooth. To make this dish gluten-free, use gluten-free rice. Check your chicken broth for gluten. Most brands are safe, but read labels. Avoid using soy sauce or any gluten-containing ingredients. Yes, you can prepare this dish ahead. Marinate the chicken up to 4 hours in advance. Cook the chicken and rice, then store separately. Reheat before serving. The flavors will blend even better. Balsamic chicken and rice pairs well with steamed vegetables. Try green beans, broccoli, or zucchini. A fresh salad adds crunch. Garlic bread complements the dish nicely too. Each side enhances the meal. For the full recipe, check the recipe section above. This blog post covered the key ingredients for a tasty balsamic chicken and rice dish. We walked through the steps to prepare the marinade, cook the chicken, and assemble your meal. Tips for perfect results and variations for dietary needs were shared. Remember, you can easily adapt the recipe to suit your taste and store leftovers properly. Cooking can be fun and simple, so don’t hesitate to experiment. Use these ideas to create a flavorful dish that you’ll love. Enjoy your cooking journey!](https://tossedrecipes.com/wp-content/uploads/2025/05/5fb890a5-f2ed-4741-977d-294a5a8c6ea0.webp)
Balsamic Chicken & Rice Tasty and Simple Meal Recipe
Looking for a quick and tasty meal? I’ve got just the recipe for you! My Balsamic Chicken & Rice brings together juicy chicken, savory rice,
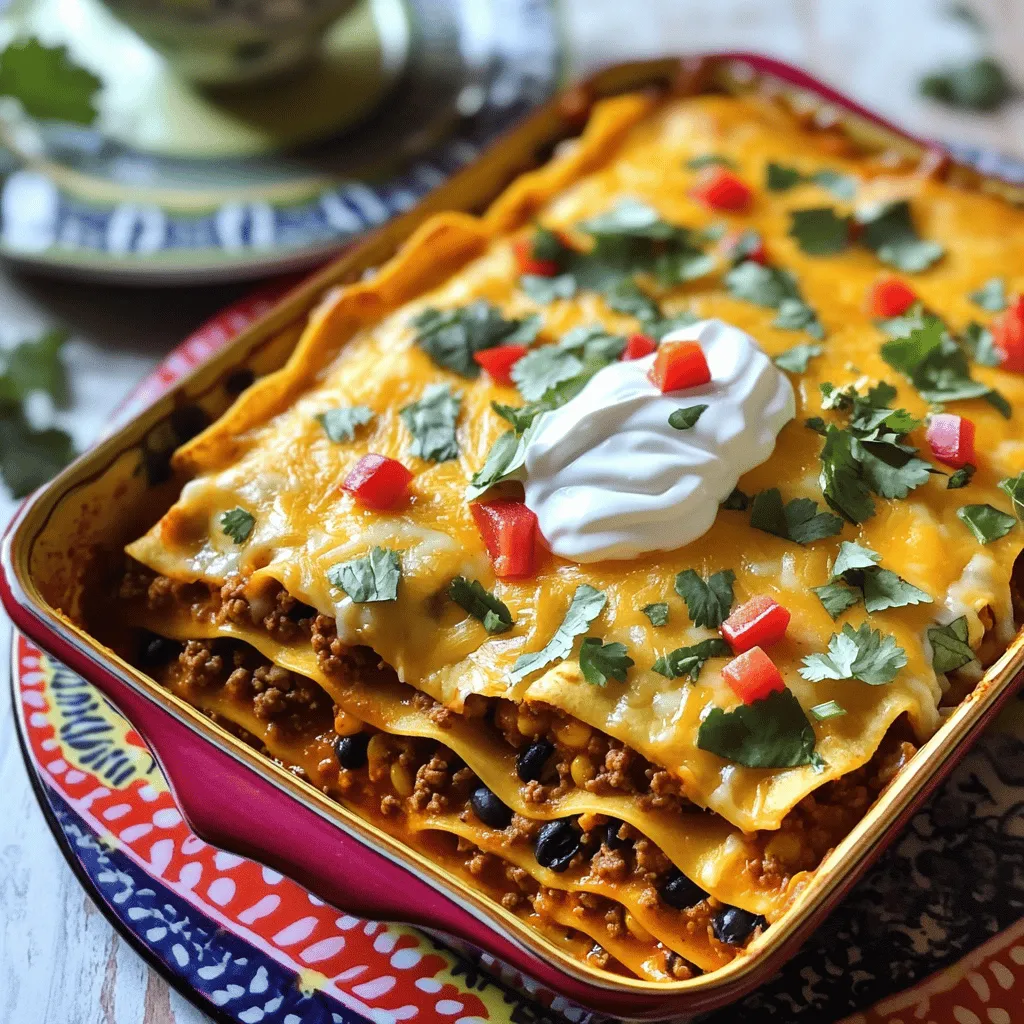
Taco Lasagna Delight Easy and Flavorful Recipe
Are you ready to spice up dinner with a fun twist? Taco Lasagna combines all the tasty goodness of tacos with the comfort of lasagna.
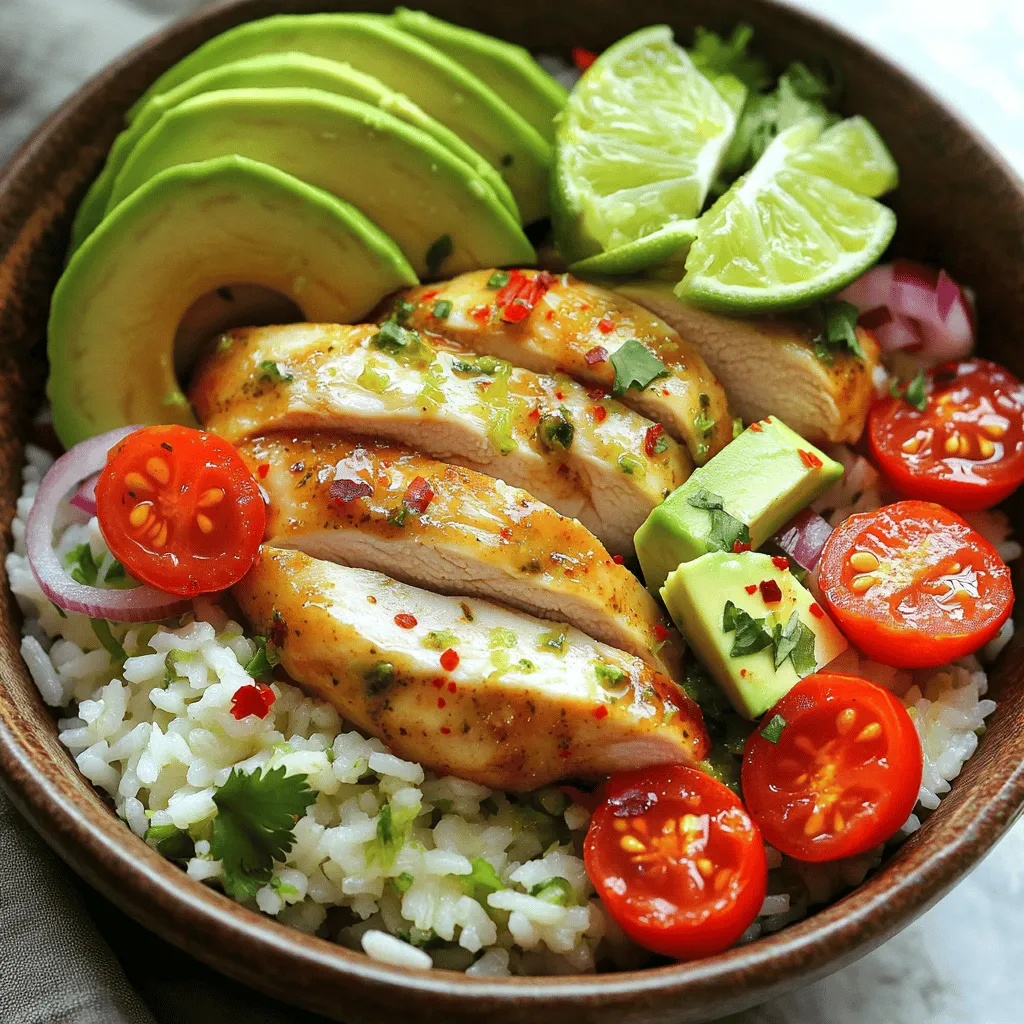
Cilantro Lime Chicken & Rice Bowl Flavorful Delight
Are you ready to savor a dish that’s bursting with flavor? This Cilantro Lime Chicken & Rice Bowl is simple yet delicious, perfect for any