Dinner
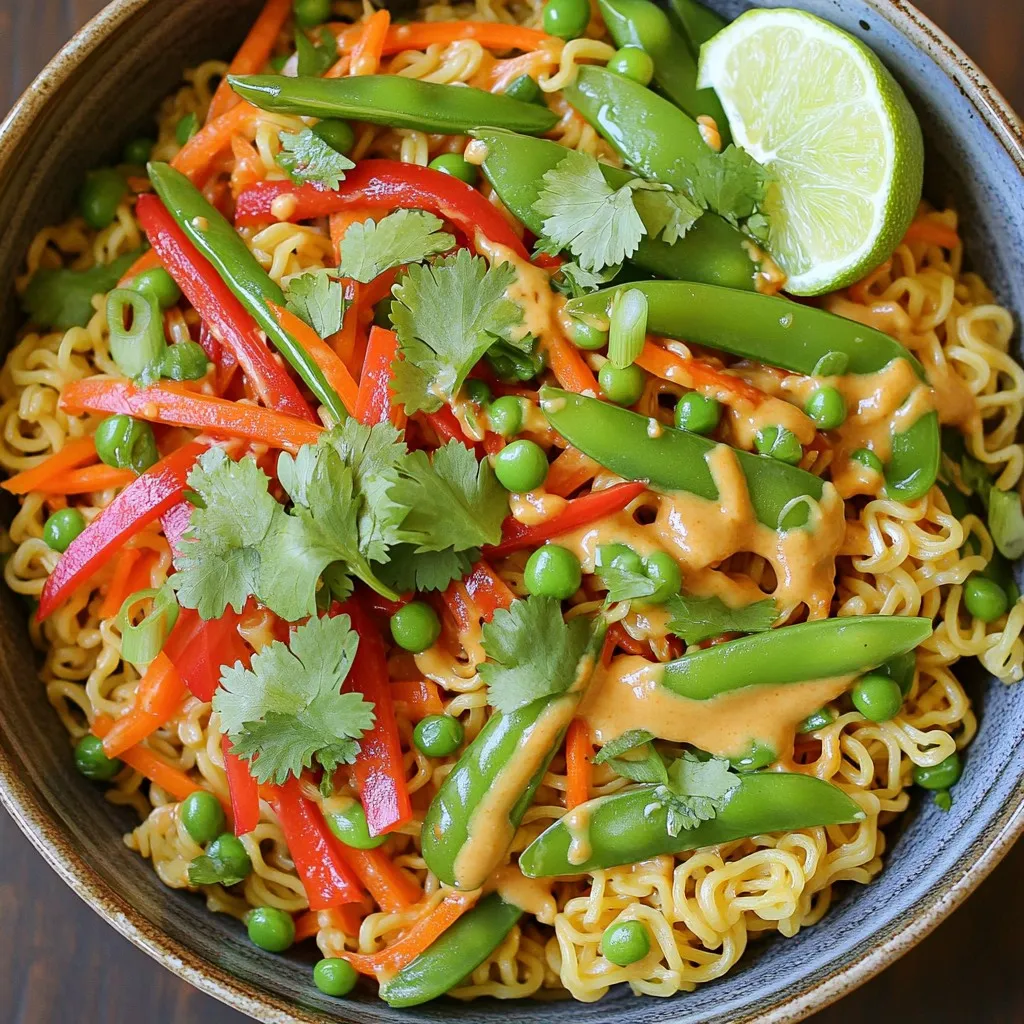
Minute Thai Peanut Ramen Stir-Fry Quick and Tasty Meal
Are you ready for a meal that’s quick, tasty, and packed with flavor? In just minutes, you can make Minute Thai Peanut Ramen Stir-Fry, a
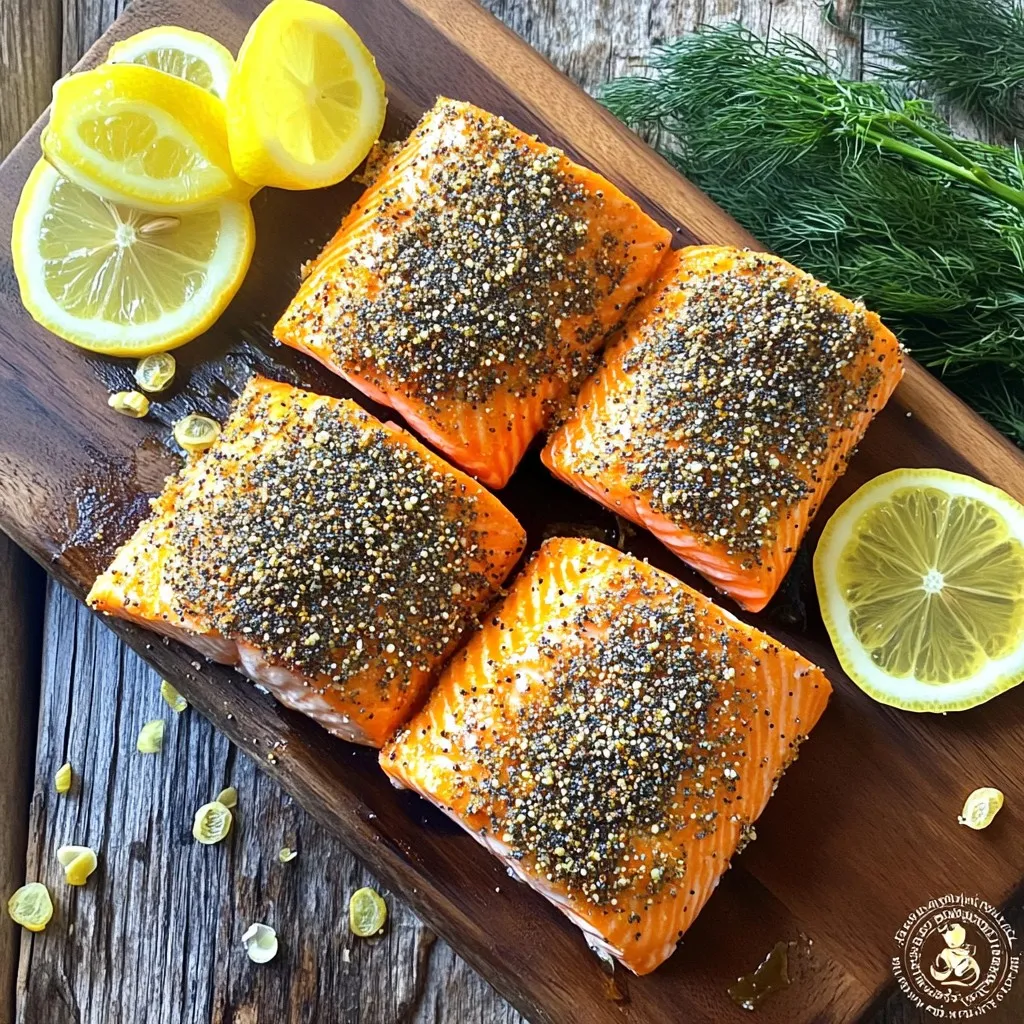
Air Fryer Everything Bagel Salmon Quick and Tasty Dish
Looking for a quick and tasty way to enjoy salmon? Try my Air Fryer Everything Bagel Salmon! This simple dish bursts with flavor and cooks
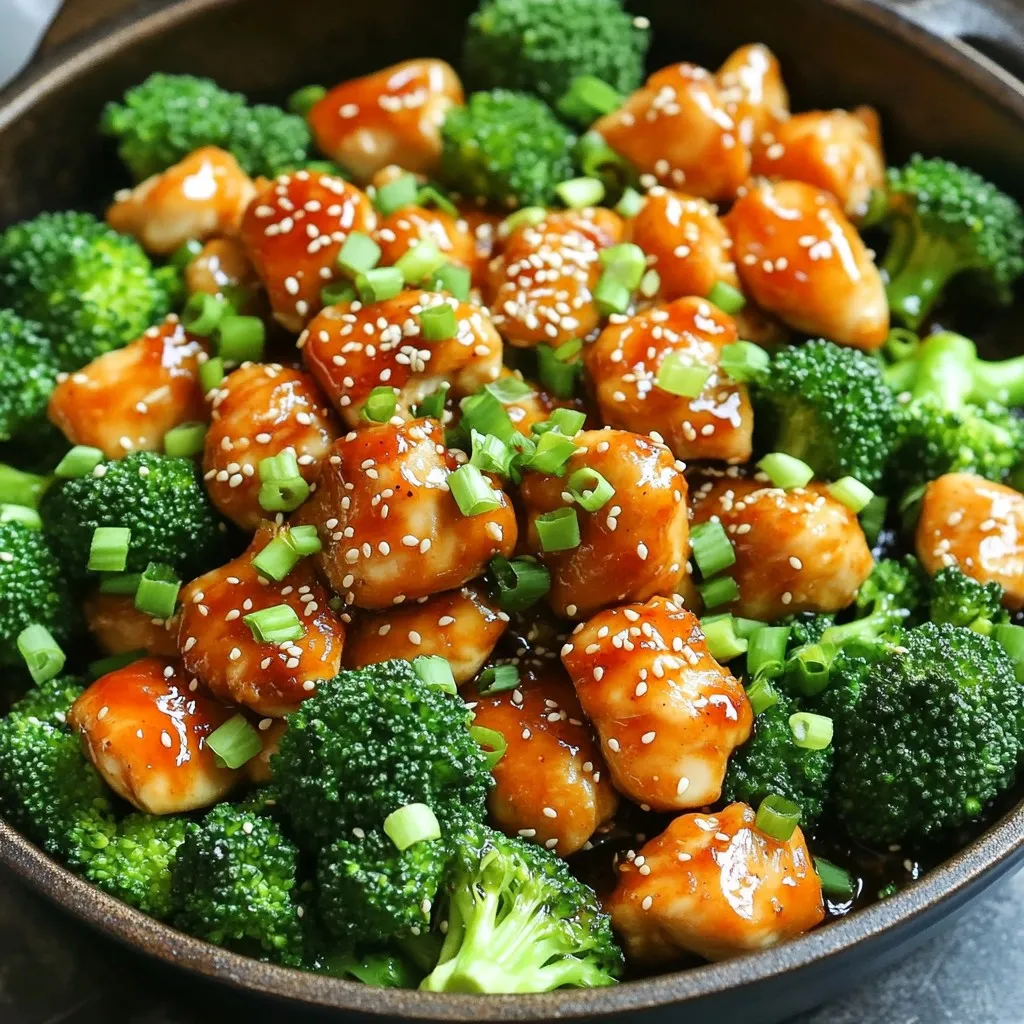
One-Pan Honey Sriracha Chicken & Broccoli Delight
Are you ready to spice up your dinner table? My One-Pan Honey Sriracha Chicken & Broccoli Delight is the perfect blend of sweet and spicy.
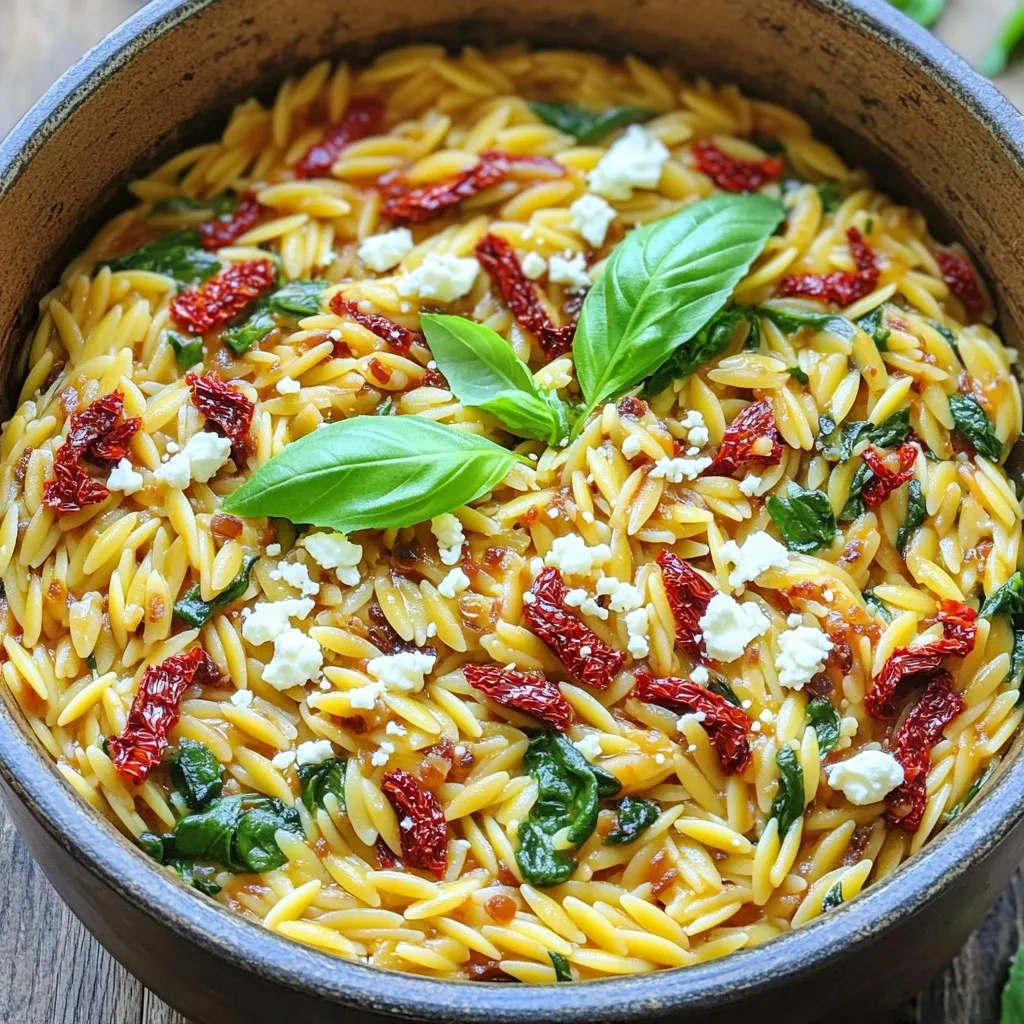
One-Pot Sun-Dried Tomato Orzo Flavorful Easy Meal
Are you ready to whip up a delicious meal with minimal fuss? This One-Pot Sun-Dried Tomato Orzo recipe is your answer! It’s packed with flavor

Slow Cooker Honey Garlic Beef Sliders Tasty Delight
Welcome to a tasty adventure! In this post, I’ll share my secret recipe for Slow Cooker Honey Garlic Beef Sliders. This dish combines tender beef
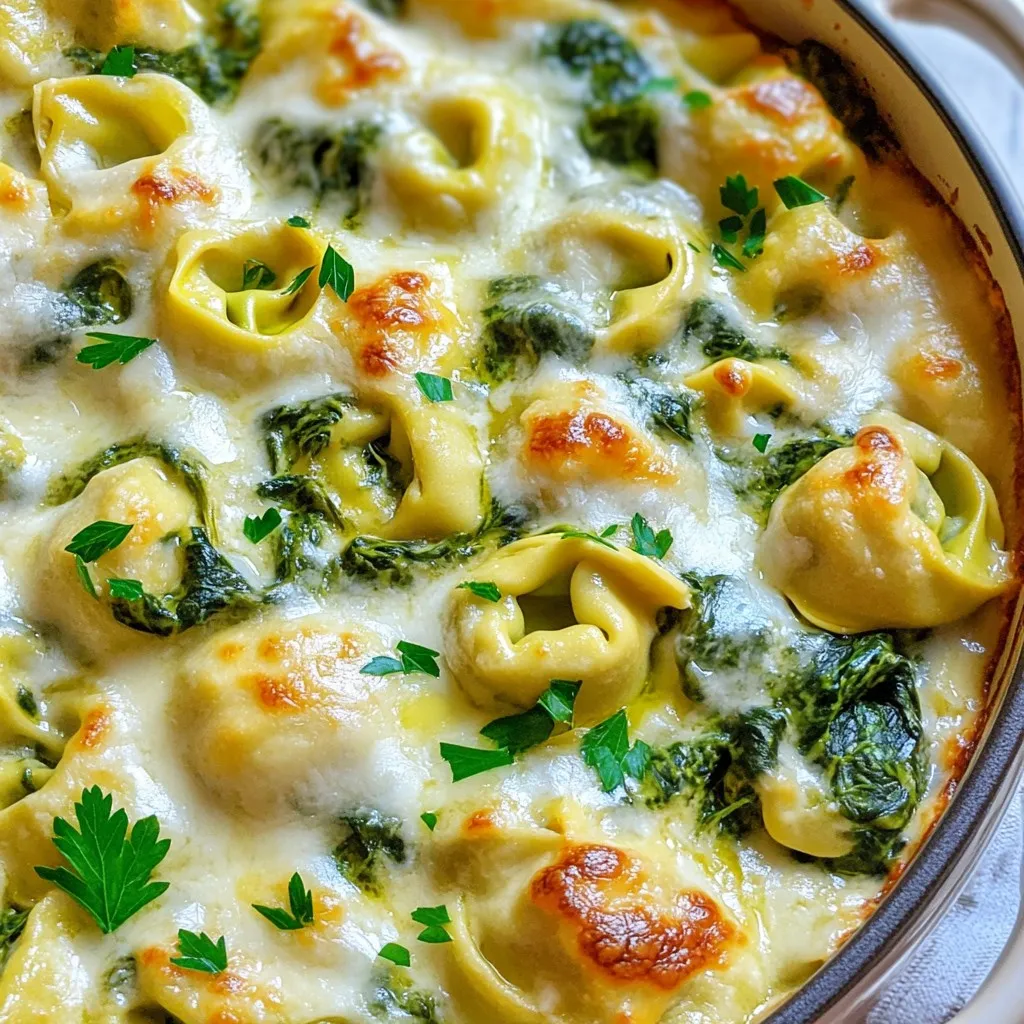
Creamy Spinach Artichoke Tortellini Bake Recipe
Are you ready to elevate your dinner game? This Creamy Spinach Artichoke Tortellini Bake is a cozy, flavorful dish that combines cheesy goodness with nutritious
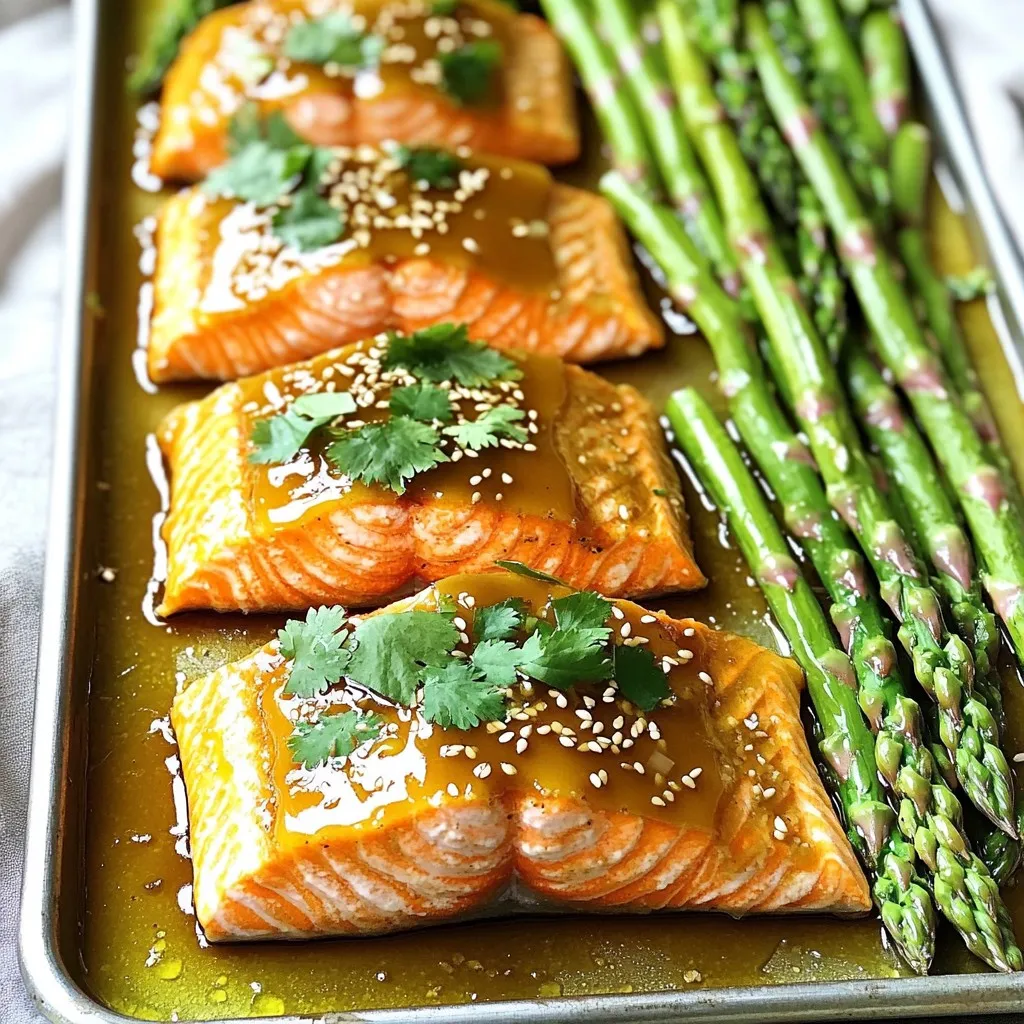
Sheet-Pan Honey Garlic Salmon Asparagus Delight
Are you ready for a quick and tasty dinner? In this post, I’ll show you how to make Sheet-Pan Honey Garlic Salmon with Asparagus. This

Sheet Pan Teriyaki Pineapple Chicken Tasty Dinner
Looking for a quick and tasty dinner? Try my Sheet Pan Teriyaki Pineapple Chicken! This dish bursts with flavor from juicy chicken thighs, fresh pineapple,
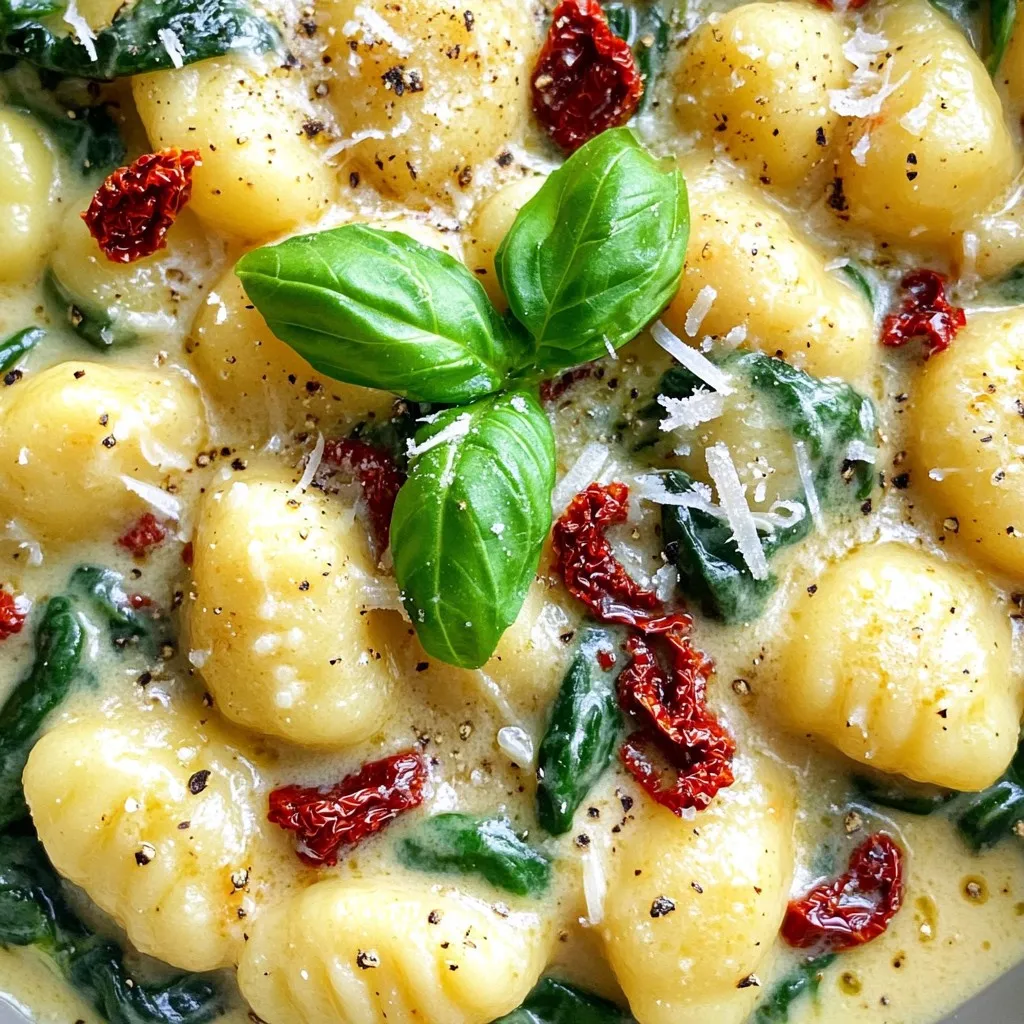
Minute Sun-Dried Tomato Gnocchi Flavorful Delight
Looking for a quick and tasty meal? You’ll love my Minute Sun-Dried Tomato Gnocchi! This easy dish combines soft gnocchi, flavorful sun-dried tomatoes, and fresh
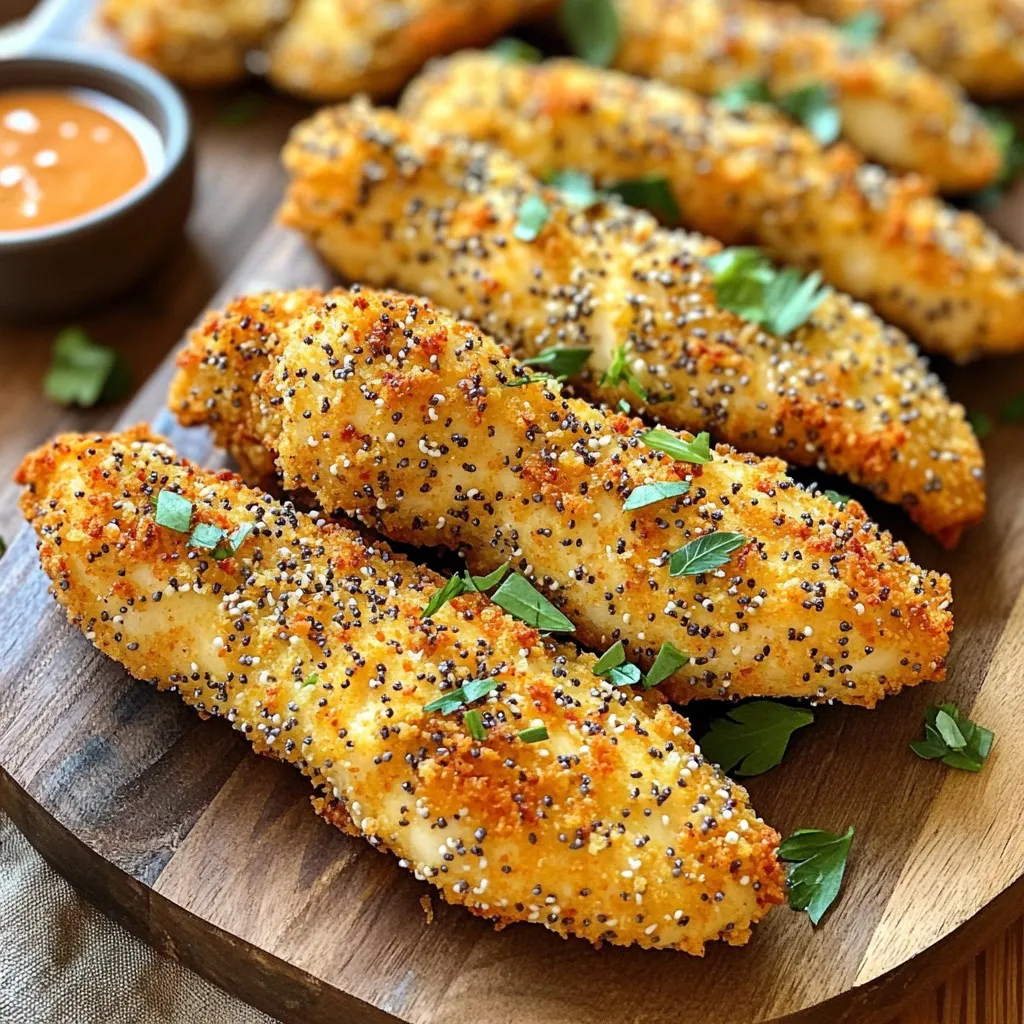
Air Fryer Everything Bagel Chicken Tenders Delight
Are you ready to transform your chicken night? In this post, I’ll show you how to make Air Fryer Everything Bagel Chicken Tenders that are