Salads
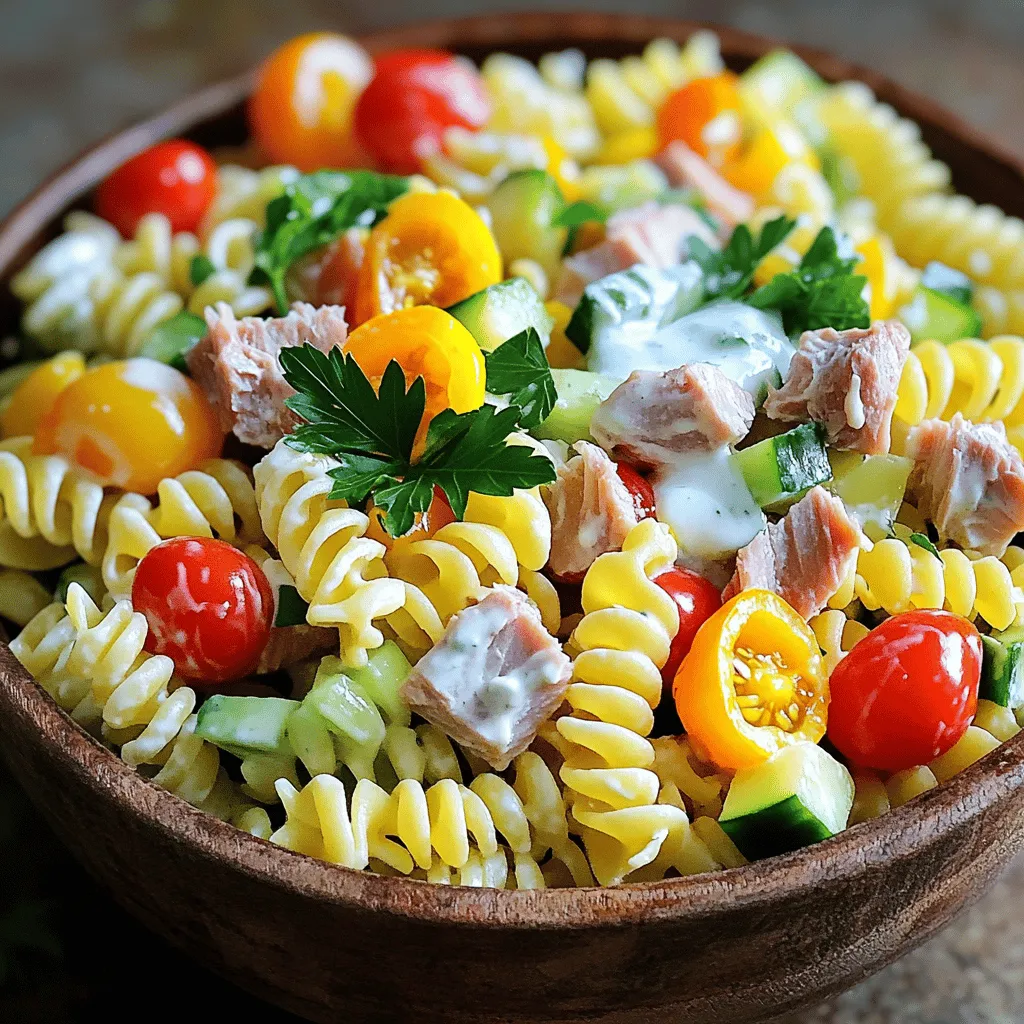
High Protein Tuna Pasta Salad Simple and Satisfying
If you’re seeking a meal that’s both easy to make and packed with protein, look no further! My High Protein Tuna Pasta Salad is simple,
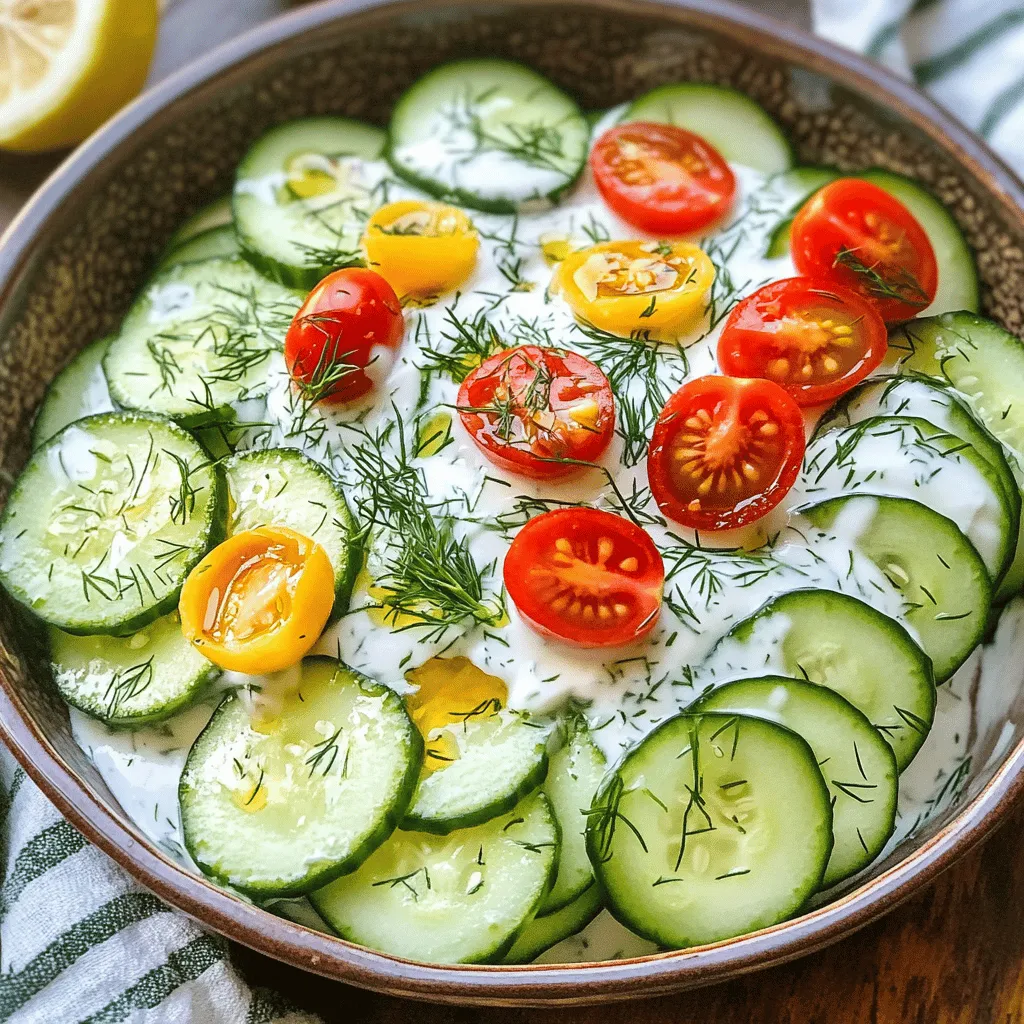
Creamy Cucumber Salad Fresh and Flavorful Dish
Looking for a cool and refreshing dish? This Creamy Cucumber Salad is the perfect blend of crisp cucumbers, tangy yogurt, and fragrant dill. It’s simple
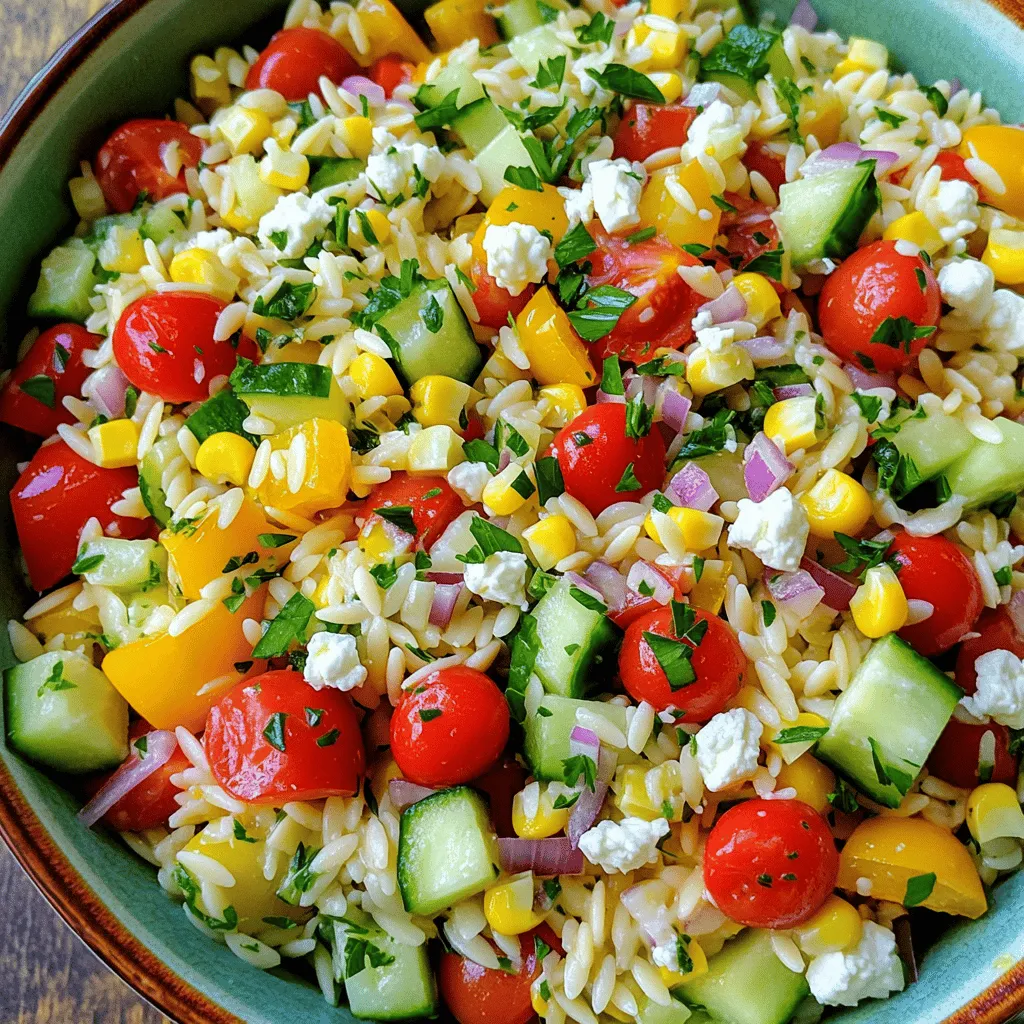
Rainbow Orzo Salad Vibrant and Flavorful Delight
Are you ready to brighten your table with a fun and tasty dish? This Rainbow Orzo Salad is not just a feast for the eyes,
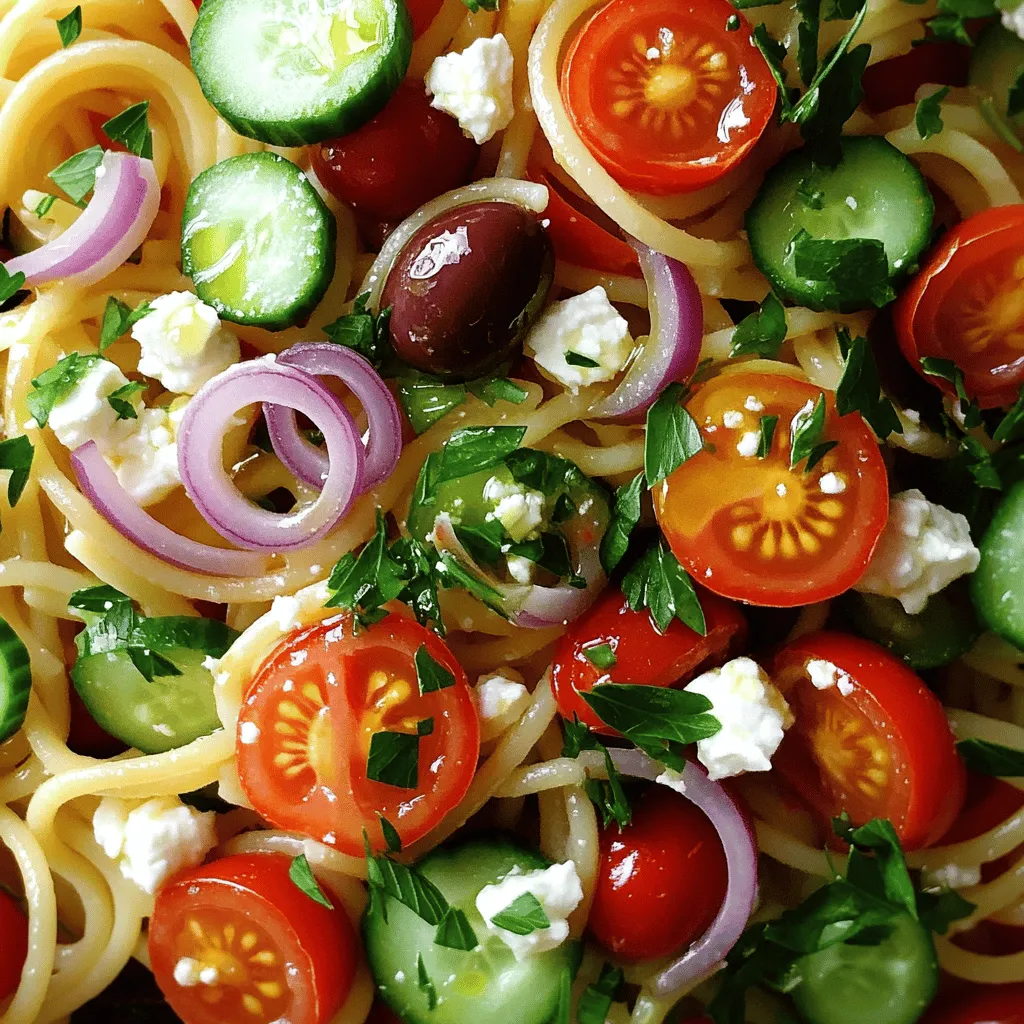
Spaghetti Salad Flavorful and Fresh Summer Delight
Looking for a bright and tasty dish for summer? My Spaghetti Salad brings all the fresh flavors you crave. With colorful veggies, rich dressings, and
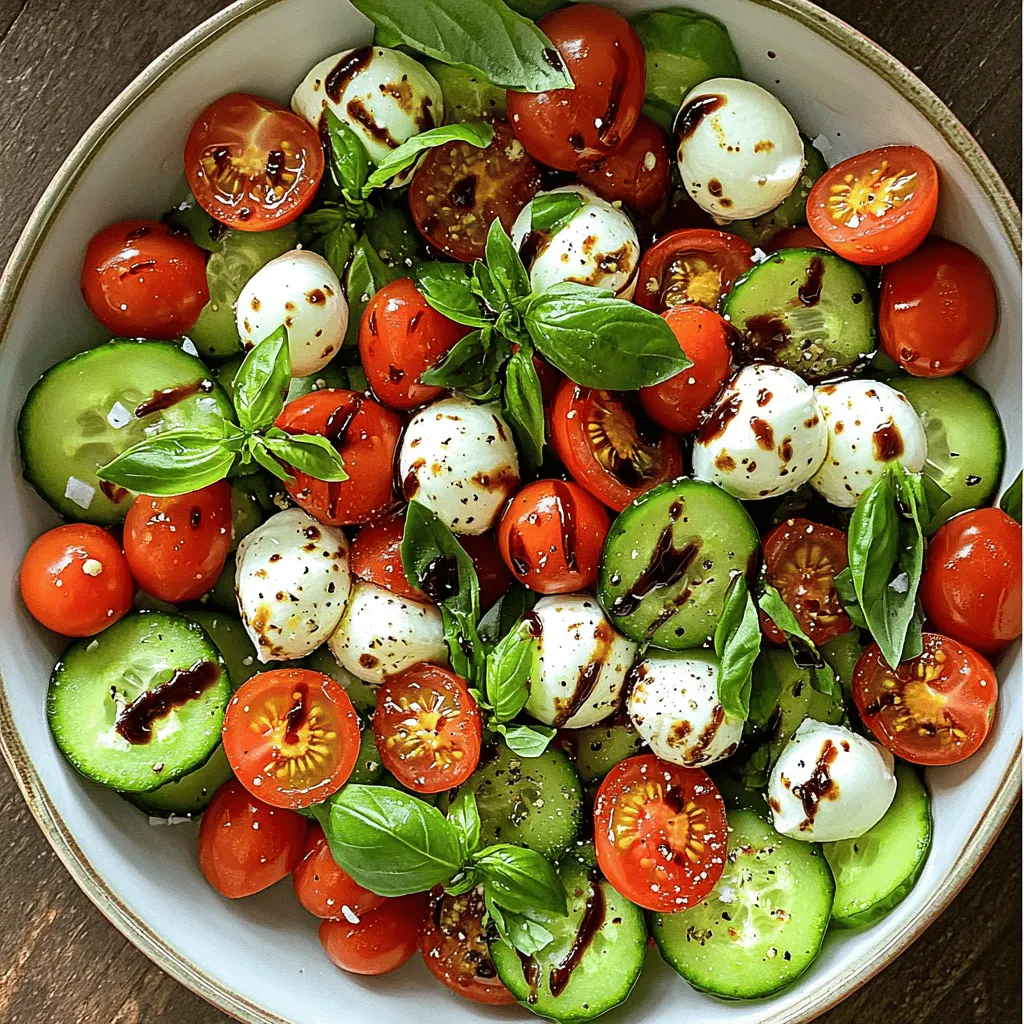
Easy Cucumber Caprese Salad Quick and Tasty Recipe
Looking for a fresh twist on a classic dish? My Easy Cucumber Caprese Salad is here to impress! This light and tasty recipe combines crisp

Asian Chicken Crunch Salad Fresh and Flavorful Dish
Looking for a bright, fresh meal that’s packed with flavor? The Asian Chicken Crunch Salad is your answer! This salad features juicy chicken, crisp veggies,
![To make a delicious Healthy Pesto Chicken Salad, gather these simple ingredients: - 2 cups cooked chicken breast, shredded - 1/2 cup basil pesto (store-bought or homemade) - 1 cup cherry tomatoes, halved - 1 cucumber, diced - 1/4 cup red onion, finely chopped - 1/4 cup feta cheese, crumbled - 2 cups mixed greens or spinach - 1 tablespoon lemon juice - Salt and pepper to taste This salad is more than tasty. It is packed with nutrition: - Cooked chicken breast: This is a great source of lean protein. It helps build and repair muscles. - Basil pesto: Made from fresh basil, it has healthy fats from olive oil and nuts. This helps with heart health. - Cherry tomatoes: These are rich in vitamins A and C. They also contain antioxidants that support skin health. - Cucumber: High in water, cucumber keeps you hydrated. It also adds crunch and fiber to the salad. - Red onion: This adds flavor and is rich in antioxidants. It can help lower blood pressure and improve heart health. - Feta cheese: This cheese adds a creamy texture. It is lower in fat than many cheeses, making it a good choice. - Mixed greens or spinach: These leafy greens are full of vitamins and minerals. They support overall health and digestion. If you have dietary restrictions or preferences, you can swap some ingredients: - Chicken: Try using turkey or tofu for a vegetarian option. - Pesto: Use a nut-free pesto if you have nut allergies. You can also make a spinach or arugula pesto. - Feta cheese: Substitute with goat cheese or leave it out for a dairy-free option. - Mixed greens: If you dislike mixed greens, use kale or arugula for a different taste. - Lemon juice: If you prefer, vinegar can replace lemon juice for a tangy kick. Feel free to mix and match these options to fit your needs! For the full recipe, check out the earlier section. To make the Healthy & Easy Pesto Chicken Salad, start with the chicken. Use 2 cups of cooked chicken breast. Shred it into bite-sized pieces. Then, grab a large mixing bowl. Add the shredded chicken and 1/2 cup of basil pesto. Mix them well. Make sure the chicken gets fully coated in pesto. Next, prepare the veggies. Cut 1 cup of cherry tomatoes in half. Dice 1 cucumber into small pieces. Chop 1/4 cup of red onion finely. Add these veggies to the bowl with chicken. Gently fold them in. Be careful not to mash the tomatoes. Finally, crumble 1/4 cup of feta cheese on top. Add 1 tablespoon of lemon juice for a fresh taste. Season with salt and pepper to your liking. Mix everything well, and your salad is almost ready! When mixing, use a spatula or a large spoon. These tools help prevent breaking the chicken or veggies. Start by mixing the chicken and pesto. Once they are combined, gently add the vegetables. This way, you keep the salad looking nice. If you find your salad too thick, add a splash of olive oil. This can help make it creamy. Be sure to taste as you go. Adjust the salt, pepper, and lemon juice to suit your taste buds. To serve, lay down a bed of mixed greens or spinach on each plate. Use about 2 cups of greens. Then, top each plate with the pesto chicken salad mixture. Make sure to pile it high for a nice look. If you want to impress, drizzle a little extra pesto or olive oil on top. A sprig of fresh basil can also add a pop of color. This makes it not just tasty but also beautiful. Enjoy your Healthy & Easy Pesto Chicken Salad! For the complete recipe, check out the Full Recipe. When cooking chicken for this salad, I recommend using boneless chicken breasts. They cook evenly and shred easily. Here’s how I do it: - Boil: Place the chicken in a pot of boiling water. Cook for about 15-20 minutes until it’s no longer pink. - Cool: Let the chicken cool for a few minutes before shredding. This helps keep it juicy. - Shred: Use two forks to pull apart the chicken. It should come apart easily. Leftover pesto chicken salad can last in the fridge for three days. Store it in an airtight container. Here’s how to keep it fresh: - Keep it cold: Place it in the fridge right after serving. - Avoid moisture: If you add extra ingredients, do so just before eating. This keeps everything crisp. - Check before eating: Always smell and look at the salad before serving leftovers. To make your pesto chicken salad even better, consider these tips: - Add nuts: Chopped walnuts or pine nuts give a nice crunch. - Try different cheeses: Swap feta for goat cheese for a creamier texture. - Mix in fruits: Sliced apples or grapes can add sweetness. - Use fresh herbs: Basil or parsley can brighten up the dish. Feel free to explore these options to make your pesto chicken salad unique! For the full recipe, check out the details above. {{image_2}} You can switch up the protein in this salad. Try using turkey instead of chicken. Turkey has a great flavor and is lean. If you want a plant-based option, use tofu. Press the tofu to remove water, then cube it. Sauté it with some olive oil and a little salt for more taste. Pesto is tasty, but you can mix it up. Use a yogurt-based dressing for a creamy twist. A balsamic vinaigrette adds a nice zing. You can also blend in some lemon juice or garlic for extra flavor. These options help keep things fun and fresh. Adding seasonal veggies can boost the salad's taste and color. In spring, toss in some asparagus or radishes. Summer is great for sweet corn and bell peppers. In fall, try roasted squash or beets. Lastly, winter greens like kale or Brussels sprouts add crunch. These fresh veggies make your salad even more delicious. For the full recipe, check out the Healthy & Easy Pesto Chicken Salad. To store leftover pesto chicken salad, place it in an airtight container. This keeps the salad fresh and prevents strong smells from other foods. You should eat the salad within three days for the best taste. If you notice any change in color or smell, throw it away. Freezing chicken salad is not the best option. The texture of the chicken and veggies may change when thawed. If you must freeze, use a freezer-safe container. Keep it for up to a month. When you’re ready to eat it, thaw it in the fridge overnight. Choose containers made of glass or BPA-free plastic. Glass containers are easy to clean and do not stain. Plastic containers are lightweight and portable. Make sure they have tight lids to keep air out. This helps your salad stay fresh longer. For the best results, store the salad in the fridge right after you make it. For full details on making the salad, check the Full Recipe. Healthy Pesto Chicken Salad can last up to three days in the fridge. Make sure to keep it in an airtight container. The flavors may deepen over time, but the salad is best enjoyed fresh. If you see any signs of spoilage, it’s best to toss it. Yes, you can make this salad ahead of time. I recommend preparing the chicken and pesto mixture, then storing it separately from the greens. This way, the greens stay crisp. When you’re ready to eat, combine them for a fresh taste. You can serve Pesto Chicken Salad in many ways. Here are a few ideas: - On a bed of greens: This keeps it light and fresh. - In a wrap: Use a tortilla for a tasty lunch option. - As a sandwich: Spread it between slices of bread for a hearty meal. - With crackers: Serve it as a dip for a fun snack. These ideas help make your meal exciting and enjoyable. For the complete recipe, check out the [Full Recipe]. You now know how to make a tasty and healthy pesto chicken salad. We’ve covered key ingredients, their benefits, and suggested swaps for diets. You have step-by-step instructions to make the process easy. I shared tips to cook and store your salad well. You can vary the recipe with different proteins and dressings. Use this knowledge to create a bright, fresh dish. Enjoy your meals and share them with friends!](https://tossedrecipes.com/wp-content/uploads/2025/06/532bba5e-e114-41c9-a13d-59a0267d3a0a.webp)
Healthy & Easy Pesto Chicken Salad Fresh and Tasty Dish
Looking for a fresh and tasty dish that’s both healthy and easy to make? You’ve found it! This Healthy & Easy Pesto Chicken Salad is
![- 1 bunch of fresh asparagus, trimmed - 4 medium-sized carrots, peeled and sliced into sticks - 3 tablespoons olive oil - 1 teaspoon garlic powder - 1 teaspoon dried thyme - 1 teaspoon paprika - Salt and pepper to taste - Zest of 1 lemon - 2 tablespoons balsamic vinegar - Baking sheet - Mixing bowl - Parchment paper - Measuring spoons Roasted asparagus and carrots are so simple and tasty. You only need a few fresh ingredients. Start with the asparagus and carrots. They bring bright colors and great flavors to your plate. For this dish, I use olive oil to help the veggies roast nicely. Olive oil also adds a lovely flavor. The garlic powder gives a nice kick, while thyme and paprika add depth. Make sure to have salt and pepper ready. They help balance the flavors. The zest of lemon adds a fresh touch at the end, and balsamic vinegar gives a tangy finish. Gather your tools, too. A baking sheet is key for roasting. A mixing bowl helps to combine everything well. Parchment paper makes cleanup easy and keeps the veggies from sticking. Measuring spoons ensure you add just the right amounts. This simple list of ingredients and tools makes it easy to create a tasty side dish. You can check the [Full Recipe] for more details on how to cook this delightful dish. - Preheat your oven to 425°F (220°C). - Prepare the vegetables by trimming asparagus and slicing carrots into sticks. Start by trimming the tough ends off the asparagus. This helps them cook evenly. Carrots need peeling and cutting into sticks. Aim for uniform sizes for even cooking. - In a large mixing bowl, combine the asparagus and carrot sticks. - Drizzle with olive oil and sprinkle seasoning. In the bowl, add the asparagus and carrot sticks together. Drizzle three tablespoons of olive oil over them. Then, add garlic powder, dried thyme, paprika, salt, and pepper. Toss everything well until the veggies are coated evenly. This step adds great flavor. - Spread vegetables on a baking sheet lined with parchment paper. - Roast for 20-25 minutes, tossing halfway through. Place the seasoned veggies on a baking sheet. Make sure they lie flat in one layer. Roast in the oven for 20-25 minutes. Halfway through, give them a gentle toss to ensure even cooking. You want them tender and slightly caramelized. Once done, zest a lemon over the roasted veggies and drizzle balsamic vinegar for extra flavor. Toss gently to combine. Enjoy this delicious dish! For the complete cooking guide, refer to the Full Recipe. To boost the taste of your roasted asparagus and carrots, try adding seasonings. Garlic powder, dried thyme, and paprika work very well. You can also use fresh herbs like rosemary or parsley for more flavor. When choosing olive oil, go for high-quality extra virgin olive oil. It gives a fruity taste and works great with veggies. Look for oils that smell fresh and have a rich color. For the best results, place your baking sheet in the middle of the oven. This helps the heat circulate evenly. It ensures your veggies cook well on all sides. To check if your asparagus and carrots are done, poke them with a fork. They should be tender but still firm. If they feel mushy, they may be overcooked. Serve your roasted veggies on a long platter for an appealing look. You can add lemon wedges around the edges for color. A sprinkle of fresh thyme adds a nice touch as well. Garnishing with lemon zest gives a bright finish. It adds freshness and a bit of tang. You can also drizzle a little extra balsamic vinegar for a pop of flavor. These small touches make your dish look and taste gourmet. For the full recipe, check out the complete details in the previous section. {{image_2}} You can change up this recipe based on what's fresh. Use seasonal vegetables to keep it exciting. For spring, add in some baby carrots or snap peas. In summer, include zucchini or bell peppers. When fall comes, think about using root vegetables like parsnips or sweet potatoes. Leafy greens like spinach or kale can also add a great touch. Spices are key to changing the flavor. Try using cumin or coriander for a warm touch. For a spicy kick, you can add chili powder. If you love cheese, sprinkle on some parmesan or feta just before serving. This will add a creamy texture and enhance the dish. While roasting is a favorite, you can also grill or sauté your veggies. Grilling gives them a smoky flavor, while sautéing allows you to add a bit of liquid for moisture. If you grill, keep an eye on the cooking time. It usually takes about 10-15 minutes. For sautéing, cook on medium heat for about 8-10 minutes, stirring often. Each method brings out different flavors and textures, so feel free to switch it up! To store leftovers, let them cool first. Place the roasted asparagus and carrots in an airtight container. This keeps moisture out and helps them stay fresh. They will last up to three days in the fridge. I recommend using glass containers for better quality. They help you see what's inside and don't stain. If you want to save them longer, you can freeze the leftovers. First, let them cool completely. Then, spread them out on a baking sheet. This prevents them from sticking together. Once frozen, move them to a freezer bag. They can last up to three months in the freezer. To thaw, put them in the fridge overnight for the best results. When you reheat, keep the texture nice and firm. The best method is to use the oven. Preheat it to 350°F (175°C). Place the veggies on a baking sheet. Heat for about 10-15 minutes. If you use a microwave, cover them with a damp paper towel. This keeps them from getting soggy. Mix them gently before serving to avoid mushy spots. For more tips, check the full recipe. Asparagus and carrots pack a lot of nutrients. Asparagus is low in calories and high in vitamins A, C, E, and K. It also has fiber, which helps digestion. Carrots are rich in beta-carotene, which our body turns into vitamin A. This vitamin supports good vision and skin health. Both veggies are great for heart health due to their antioxidants. Eating them can help reduce the risk of chronic diseases. Plus, they add color and flavor to your plate! Yes, you can swap in many other veggies! Try using broccoli, bell peppers, or zucchini for a different taste. You can also use root veggies like sweet potatoes or beets. Just remember to cut them into similar sizes for even cooking. Each vegetable brings its own flavor and health benefits, making your meal even more exciting! Leftovers can last up to four days in the fridge. Store them in airtight containers to keep them fresh. Make sure to cool the veggies down before sealing. If you want to keep them longer, you can freeze them. They can stay good in the freezer for up to three months. When you're ready to eat, just reheat them in the oven or microwave. Enjoying leftovers is a great way to save time and reduce waste! This recipe showcases the simple joy of roasting asparagus and carrots. You learned about fresh ingredients, the prepping steps, and the roasting process. I shared tips to enhance the flavors and make your dish stand out. You can also explore variations for every season and different cooking methods. Storing and reheating leftovers properly ensures your veggies stay fresh. Embrace these techniques for delicious meals ahead. Enjoy the satisfying crunch and flavors in every bite. Your journey in cooking is just beginning, and these tips will elevate your kitchen skills!](https://tossedrecipes.com/wp-content/uploads/2025/06/64590cc8-2b8d-4d38-90bd-df6189f7d999.webp)
Roasted Asparagus & Carrots Flavorful Vegetable Delight
Looking to add a burst of flavor to your meals? Roasted asparagus and carrots make the perfect dish! This easy recipe combines simple ingredients to
![- 2 cups Fritos corn chips - 1 can (15 oz) chili (no beans preferred) - 1 cup shredded cheddar cheese - 1 cup iceberg lettuce, shredded - 1 medium tomato, diced - 1/2 cup red onion, finely chopped - 1/4 cup jalapeño slices (optional) - 1/2 cup sour cream - 1 tablespoon taco seasoning (optional) - Salt and pepper to taste When I make Fritos Chili Cheese Salad, I love how all these ingredients come together. The Fritos corn chips provide a great crunch. The chili adds warmth and richness. I prefer using chili without beans for a smoother texture. The cheddar cheese melts just enough to add creaminess without losing its shape. I like to layer the iceberg lettuce first. It creates a nice bed for the chili and helps keep everything fresh. Fresh diced tomatoes and red onion bring color and crunch. If you like heat, jalapeño slices are a fun touch. They add a nice kick. Don’t forget the sour cream! It cools down the spice and adds a tangy flavor. Taco seasoning can enhance the taste even more. Finally, salt and pepper round out the dish. These simple ingredients make a tasty meal or snack. If you want the full details, check the [Full Recipe]. - Heat the chili over medium heat. - Stir occasionally until warmed through. Start by opening your can of chili. Pour it into a medium saucepan. Turn the heat to medium. Stir the chili gently. This helps it warm evenly. Keep an eye on it. You want it hot but not boiling. A few minutes should do the trick. - Layer shredded lettuce in a large serving bowl. - Pour warmed chili over the lettuce. Take a large serving bowl. Add the shredded lettuce at the bottom. Make sure it covers the bottom well. This lettuce will add freshness. Once the chili is warm, pour it over the lettuce. This creates a hearty base for your salad. - Sprinkle cheddar cheese over the chili. - Top with diced tomatoes and red onion. - Optional: Add jalapeño slices. Now, grab your shredded cheddar cheese. Sprinkle it over the warm chili. This will make it slightly melt and taste great. Next, add the diced tomatoes. They add color and freshness. Then, sprinkle the finely chopped red onion. It gives a nice crunch. If you like some heat, add jalapeño slices on top. - Dollop sour cream on top. - Sprinkle with taco seasoning, salt, and pepper. - Add Fritos just before serving for crunch. For the final touch, add a dollop of sour cream. This adds creaminess to the salad. Next, sprinkle taco seasoning, salt, and pepper. This boosts the flavor. Just before serving, add the Fritos. This keeps them crunchy and adds a nice texture. Enjoy your Fritos Chili Cheese Salad! For the complete recipe, check the Full Recipe. You can make this salad your own easily. Try different cheeses, like pepper jack or mozzarella. Each cheese brings a new taste. You can also add avocado for creaminess or black olives for a salty bite. Both options boost flavor and nutrition. Mixing in fresh herbs like cilantro can add a nice touch, too. If you want to prep this salad early, it’s simple. Store the salad parts separately. Keep the Fritos in a bag to stay crunchy. Layer the chili, cheese, and veggies in a container. This way, you can assemble it quickly before serving. Just remember to add the Fritos right before eating to keep them crunchy. You can make your salad look great with a few tricks. Use a clear bowl to show off the layers. This adds visual appeal. You can also serve it in individual cups for fun. Add a sprinkle of fresh herbs on top for color. A dollop of sour cream in the center adds flair. For a festive touch, use colorful plates to make the meal pop. {{image_2}} You can easily make a vegetarian Fritos Chili Cheese Salad. Just swap the chili for a meatless kind. Look for brands that offer hearty veggie chili. You can also add more vegetables, like black beans, corn, or bell peppers. These options add flavor and boost nutrition. If you love heat, here are some tips. Add diced jalapeños or serrano peppers to the salad. You could also mix in hot sauce for an extra kick. Brands like Sriracha or Frank’s RedHot work well. Just be careful not to overdo it; you want to enjoy the flavor. Want a lighter salad? Try baked Fritos instead of regular ones. They keep the crunch but cut down on fat. You can also use a lower-fat cheese or Greek yogurt instead of sour cream. These swaps make the salad tasty and a bit healthier without losing that great flavor. Feel free to explore your own variations! For the full recipe, check out the Fritos Chili Cheese Salad. To keep your Fritos Chili Cheese Salad fresh, store leftovers in an airtight container. This helps prevent moisture from making the chips soggy. You can use glass or plastic containers, but make sure they seal tightly. If you plan to save the salad, store the Fritos separately. This keeps their crunch intact. To reheat your chili, pour it into a saucepan over medium heat. Stir it often until it is warm. Avoid boiling, as this can change the flavor. When serving, layer your salad again. Add the fresh ingredients first, then the reheated chili, cheese, and toppings. Remember to add the Fritos last to keep them crispy. In the fridge, the salad lasts about three days. Always check for spoilage signs. Look for changes in color or texture. If it smells off, it’s best to throw it away. Fresh ingredients like lettuce and tomato can spoil faster, so use them wisely. Yes, you can use different types of chili. I recommend: - Turkey chili for a leaner option. - Vegetarian chili for a meatless meal. - Spicy chili for those who love heat. Choose a chili that matches your taste. The flavor of the chili is key to the salad's success. A thick, hearty chili works best. You can easily make this salad gluten-free. Here are some options for corn chips: - Look for gluten-free Fritos or other corn chips. - Check labels on brands to ensure they are gluten-free. - You can also use tortilla strips made from corn tortillas. Make sure to avoid any chips made with wheat. This way, everyone can enjoy the salad. This salad goes well with many sides. Here are some great pairings: - Cornbread for a sweet, soft contrast. - Fresh fruit salad to balance the flavors. - Grilled veggies for a healthy option. For drinks, consider: - Iced tea for a refreshing touch. - Lemonade for a citrusy kick. - A light beer for those who enjoy a cold drink. These choices enhance the meal and make it even more enjoyable. This Fritos Chili Cheese Salad combines easy steps and fresh flavors. You learned how to layer ingredients, customize options, and store leftovers. Whether you prefer mild or spicy, this dish offers something for everyone. Enjoy the crunch of Fritos alongside tasty chili and fresh veggies. Simplify your meal prep with these tips, and create a fun, colorful salad for your next gathering. Try it out and discover your favorite twist on this classic dish!](https://tossedrecipes.com/wp-content/uploads/2025/06/1cb75c05-9eec-4afd-91f7-28b88e199959.webp)
Fritos Chili Cheese Salad Crunchy and Flavorful Delight
Are you ready to enjoy a crunchy and flavorful delight? Fritos Chili Cheese Salad is simple to make and bursting with taste. With layers of
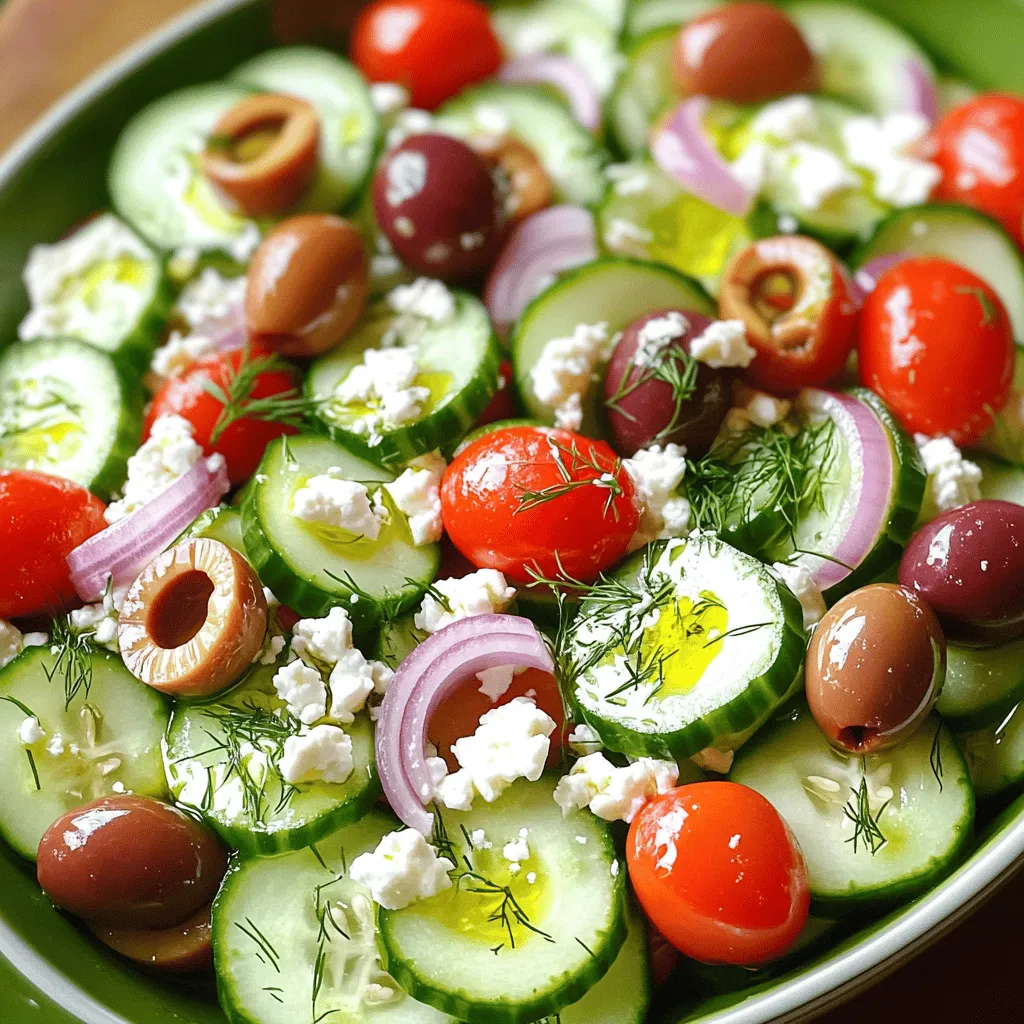
Cucumber Feta Salad Fresh and Flavorful Delight
Are you ready to dive into a refreshing dish that bursts with flavor? Cucumber Feta Salad is your go-to option for a light meal or