![- 2 cups cooked chicken, shredded or diced - 1 cup shredded cheddar cheese - ½ cup cream cheese, softened - 3 cloves garlic, minced - 2 tablespoons fresh parsley, chopped - ¼ teaspoon black pepper - ¼ teaspoon paprika - 4 large flour tortillas - 1 cup baby spinach leaves - Olive oil for frying When I make my Cheesy Garlic Chicken Wraps, I start with great ingredients. The cooked chicken is the hero, whether shredded or diced. I love using cheddar cheese for its rich flavor, paired with creamy cream cheese for a smooth texture. Next, I add garlic, fresh parsley, black pepper, and paprika. Garlic adds a punch of flavor. Parsley gives a fresh touch. The black pepper and paprika bring a hint of warmth. For the wrap, I choose large flour tortillas. They are soft and hold everything well. I love adding baby spinach leaves. They add crunch and color. Lastly, I use olive oil for frying. It helps to get a nice golden brown finish. These ingredients come together beautifully in the full recipe. Trust me; you’ll want to try them! First, grab a large mixing bowl. Add the cooked chicken, shredded cheddar cheese, and softened cream cheese. Next, toss in the minced garlic, chopped parsley, black pepper, and paprika. Mix everything until it blends well. This cheesy filling is where the magic starts! Now, lay a flour tortilla flat on your clean surface. Scoop a generous portion of the cheesy chicken mixture into the center of the tortilla. Then, add a handful of fresh baby spinach leaves on top. To wrap it up, fold the sides of the tortilla inward. Roll it tightly from the bottom to keep the filling secure. Repeat this with the other tortillas until you have all your wraps ready. Heat a skillet over medium heat and add a splash of olive oil. Once hot, place the wraps seam-side down in the skillet. Cook for 3 to 4 minutes until the bottom turns golden brown. Carefully flip each wrap and cook the other side for another 3 to 4 minutes. This will give you that crispy texture. After cooking, let them rest for a couple of minutes. Then, slice them in half and get ready to enjoy! For the complete recipe, check out the Full Recipe section. You can make Cheesy Garlic Chicken Wraps your own. First, add vegetables like bell peppers, onions, or mushrooms. These will boost the flavor and nutrition. You can also toss in spices like cumin or chili powder for a kick. If you want to switch proteins, use turkey or tofu. Both options work well and keep the dish tasty. You can choose how to cook your wraps. Pan-frying gives a nice, crispy outside. Heat olive oil in a skillet and cook each wrap until golden. It takes about 3-4 minutes on each side. Baking is another great option. Preheat your oven to 400°F (200°C). Place the wraps on a baking sheet and bake for about 10-15 minutes. This method is easier and requires less oil. To achieve that perfect crispiness, make sure the skillet is hot before adding the wraps. Avoid overcrowding the pan so they fry evenly. Serve your wraps warm for the best taste. Pair them with fresh salsa or guacamole for dipping. Both add a nice contrast to the cheesy filling. For a pretty presentation, sprinkle chopped parsley on top. It adds color and a fresh taste. You can also slice the wraps in half for easy eating. Enjoy your meal! {{image_2}} You can switch up the cheese in your cheesy garlic chicken wraps. If you want a different taste, try using mozzarella or pepper jack cheese. Mozzarella gives a nice stretch, while pepper jack adds a bit of heat. Both melt well and create a creamy texture. For those who prefer dairy-free options, many great alternatives exist. Brands now offer vegan cheese that melts nicely. Look for options made from nuts or soy. Just make sure they fit your taste and dietary needs. Tortillas are great, but you can explore other options too. Whole wheat tortillas are a healthy choice with more fiber. They add a nutty flavor that pairs well with the cheesy filling. Gluten-free tortillas are also available for those with gluten sensitivities. If you want to keep it light, try lettuce wraps. Crisp lettuce like romaine or butter lettuce works well. They add crunch and freshness, making your wraps feel bright and zesty. To spice things up, think about adding hot sauce. Just a few drops can really enhance the flavor. You can also mix in your favorite spices for a kick. Fresh herbs bring a whole new level to these wraps. Try adding basil, cilantro, or even dill. These herbs add a burst of freshness and make your wraps more colorful. They complement the garlic and cheese perfectly. For the full recipe, check out the [Full Recipe]. To store your cheesy garlic chicken wraps, let them cool first. Wrap each one in plastic wrap or foil. This keeps them fresh and tasty. You can also use a sealed container. They stay good in the fridge for about 3 days. After that, they may lose their flavor and texture. To freeze your wraps, follow these steps: 1. Let the wraps cool completely. 2. Wrap each one tightly in plastic wrap. 3. Place the wrapped wraps in a freezer bag. 4. Seal the bag, removing as much air as possible. This method helps keep them fresh for about 2 months. When ready to eat, take them out of the freezer. Let them defrost overnight in the fridge. For a quick thaw, you can use the microwave. To reheat your wraps and keep them crispy, use one of these methods: - Microwave: Heat on low for 30 seconds. Flip the wrap and heat for another 30 seconds. - Skillet: Heat a skillet over medium heat. Add a little olive oil. Cook each wrap for about 2-3 minutes on each side. This makes them crispy again. With these tips, you can enjoy your cheesy garlic chicken wraps anytime! For the full recipe, check the details above. Cheesy Garlic Chicken Wraps can last up to three days in the fridge. Store them in an airtight container. This keeps them fresh and tasty. If you want to keep them longer, consider freezing them instead. Yes, you can make these wraps ahead of time. Prepare the cheesy chicken filling and store it in the fridge. You can fill the tortillas just before cooking them. This keeps the wraps fresh and crispy. These wraps pair well with many sides. Consider serving them with: - Salsa for dipping - Guacamole for a creamy touch - A fresh salad for crunch - Sweet potato fries for a fun twist For the complete recipe details, check out the [Full Recipe]. This blog post covers a tasty recipe for Cheesy Garlic Chicken Wraps. We explored the key ingredients, including chicken, cheeses, and seasonings. I shared step-by-step instructions for preparing, assembling, and cooking the wraps. You can customize these wraps with various options and learn tips for perfecting your cooking method. In closing, these wraps are simple, versatile, and delicious. Try them out, and enjoy experimenting with flavors. Whether you reheat leftovers or serve them fresh, they are sure to please everyone.](https://tossedrecipes.com/wp-content/uploads/2025/06/a587355d-e627-4b4c-9fa3-7e1a7cd9ece5.webp)
Looking for a quick and tasty meal? Cheesy Garlic Chicken Wraps are your answer! With creamy chicken, melty cheese, and a hint of garlic, they’re simple to make and bursting with flavor. You’ll love how fast they come together. Join me as we explore the easy steps, great tips, and yummy variations that will take your wraps to the next level. Let’s dive in and get cooking!
Ingredients
Main Ingredients
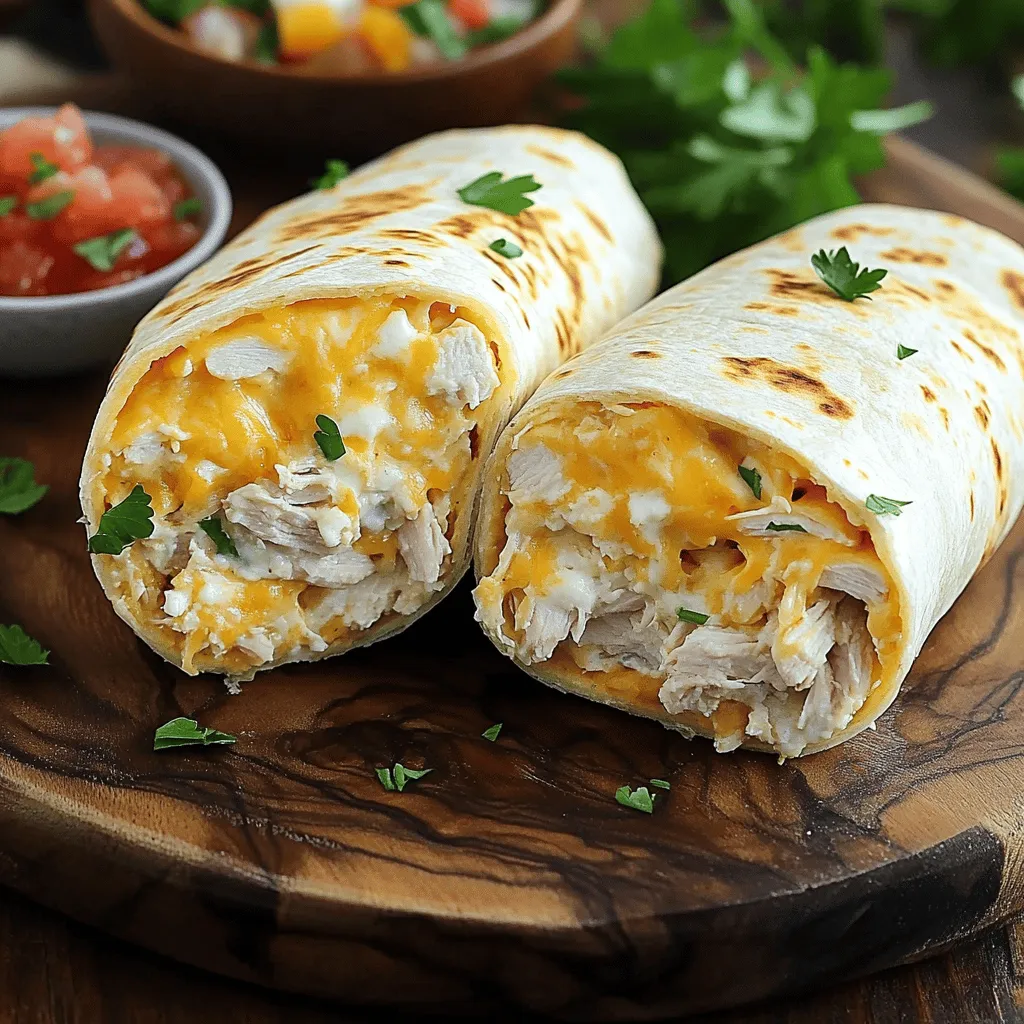
– 2 cups cooked chicken, shredded or diced
– 1 cup shredded cheddar cheese
– ½ cup cream cheese, softened
Seasonings and Add-Ins
– 3 cloves garlic, minced
– 2 tablespoons fresh parsley, chopped
– ¼ teaspoon black pepper
– ¼ teaspoon paprika
Tortilla and Greens
– 4 large flour tortillas
– 1 cup baby spinach leaves
– Olive oil for frying
When I make my Cheesy Garlic Chicken Wraps, I start with great ingredients. The cooked chicken is the hero, whether shredded or diced. I love using cheddar cheese for its rich flavor, paired with creamy cream cheese for a smooth texture.
Next, I add garlic, fresh parsley, black pepper, and paprika. Garlic adds a punch of flavor. Parsley gives a fresh touch. The black pepper and paprika bring a hint of warmth.
For the wrap, I choose large flour tortillas. They are soft and hold everything well. I love adding baby spinach leaves. They add crunch and color. Lastly, I use olive oil for frying. It helps to get a nice golden brown finish.
These ingredients come together beautifully in the full recipe. Trust me; you’ll want to try them!
Step-by-Step Instructions
Preparing the Filling
First, grab a large mixing bowl. Add the cooked chicken, shredded cheddar cheese, and softened cream cheese. Next, toss in the minced garlic, chopped parsley, black pepper, and paprika. Mix everything until it blends well. This cheesy filling is where the magic starts!
Assembling the Wraps
Now, lay a flour tortilla flat on your clean surface. Scoop a generous portion of the cheesy chicken mixture into the center of the tortilla. Then, add a handful of fresh baby spinach leaves on top. To wrap it up, fold the sides of the tortilla inward. Roll it tightly from the bottom to keep the filling secure. Repeat this with the other tortillas until you have all your wraps ready.
Cooking the Wraps
Heat a skillet over medium heat and add a splash of olive oil. Once hot, place the wraps seam-side down in the skillet. Cook for 3 to 4 minutes until the bottom turns golden brown. Carefully flip each wrap and cook the other side for another 3 to 4 minutes. This will give you that crispy texture. After cooking, let them rest for a couple of minutes. Then, slice them in half and get ready to enjoy!
For the complete recipe, check out the Full Recipe section.
Tips & Tricks
Customization Options
You can make Cheesy Garlic Chicken Wraps your own. First, add vegetables like bell peppers, onions, or mushrooms. These will boost the flavor and nutrition. You can also toss in spices like cumin or chili powder for a kick.
If you want to switch proteins, use turkey or tofu. Both options work well and keep the dish tasty.
Cooking Techniques
You can choose how to cook your wraps. Pan-frying gives a nice, crispy outside. Heat olive oil in a skillet and cook each wrap until golden. It takes about 3-4 minutes on each side.
Baking is another great option. Preheat your oven to 400°F (200°C). Place the wraps on a baking sheet and bake for about 10-15 minutes. This method is easier and requires less oil.
To achieve that perfect crispiness, make sure the skillet is hot before adding the wraps. Avoid overcrowding the pan so they fry evenly.
Serving Suggestions
Serve your wraps warm for the best taste. Pair them with fresh salsa or guacamole for dipping. Both add a nice contrast to the cheesy filling.
For a pretty presentation, sprinkle chopped parsley on top. It adds color and a fresh taste. You can also slice the wraps in half for easy eating. Enjoy your meal!
Variations
Different Cheeses
You can switch up the cheese in your cheesy garlic chicken wraps. If you want a different taste, try using mozzarella or pepper jack cheese. Mozzarella gives a nice stretch, while pepper jack adds a bit of heat. Both melt well and create a creamy texture.
For those who prefer dairy-free options, many great alternatives exist. Brands now offer vegan cheese that melts nicely. Look for options made from nuts or soy. Just make sure they fit your taste and dietary needs.
Wrap Alternatives
Tortillas are great, but you can explore other options too. Whole wheat tortillas are a healthy choice with more fiber. They add a nutty flavor that pairs well with the cheesy filling. Gluten-free tortillas are also available for those with gluten sensitivities.
If you want to keep it light, try lettuce wraps. Crisp lettuce like romaine or butter lettuce works well. They add crunch and freshness, making your wraps feel bright and zesty.
Flavor Profiles
To spice things up, think about adding hot sauce. Just a few drops can really enhance the flavor. You can also mix in your favorite spices for a kick.
Fresh herbs bring a whole new level to these wraps. Try adding basil, cilantro, or even dill. These herbs add a burst of freshness and make your wraps more colorful. They complement the garlic and cheese perfectly.
For the full recipe, check out the [Full Recipe].
Storage Info
Refrigerating Leftovers
To store your cheesy garlic chicken wraps, let them cool first. Wrap each one in plastic wrap or foil. This keeps them fresh and tasty. You can also use a sealed container. They stay good in the fridge for about 3 days. After that, they may lose their flavor and texture.
Freezing Instructions
To freeze your wraps, follow these steps:
1. Let the wraps cool completely.
2. Wrap each one tightly in plastic wrap.
3. Place the wrapped wraps in a freezer bag.
4. Seal the bag, removing as much air as possible.
This method helps keep them fresh for about 2 months. When ready to eat, take them out of the freezer. Let them defrost overnight in the fridge. For a quick thaw, you can use the microwave.
Reheating Tips
To reheat your wraps and keep them crispy, use one of these methods:
– Microwave: Heat on low for 30 seconds. Flip the wrap and heat for another 30 seconds.
– Skillet: Heat a skillet over medium heat. Add a little olive oil. Cook each wrap for about 2-3 minutes on each side. This makes them crispy again.
With these tips, you can enjoy your cheesy garlic chicken wraps anytime! For the full recipe, check the details above.
FAQs
How long do Cheesy Garlic Chicken Wraps last in the fridge?
Cheesy Garlic Chicken Wraps can last up to three days in the fridge. Store them in an airtight container. This keeps them fresh and tasty. If you want to keep them longer, consider freezing them instead.
Can I make Cheesy Garlic Chicken Wraps ahead of time?
Yes, you can make these wraps ahead of time. Prepare the cheesy chicken filling and store it in the fridge. You can fill the tortillas just before cooking them. This keeps the wraps fresh and crispy.
What can I serve with Cheesy Garlic Chicken Wraps?
These wraps pair well with many sides. Consider serving them with:
– Salsa for dipping
– Guacamole for a creamy touch
– A fresh salad for crunch
– Sweet potato fries for a fun twist
Full Recipe Reference
For the complete recipe details, check out the [Full Recipe].
This blog post covers a tasty recipe for Cheesy Garlic Chicken Wraps. We explored the key ingredients, including chicken, cheeses, and seasonings. I shared step-by-step instructions for preparing, assembling, and cooking the wraps. You can customize these wraps with various options and learn tips for perfecting your cooking method.
In closing, these wraps are simple, versatile, and delicious. Try them out, and enjoy experimenting with flavors. Whether you reheat leftovers or serve them fresh, they are sure to please everyone.
![- 2 cups cooked chicken, shredded or diced - 1 cup shredded cheddar cheese - ½ cup cream cheese, softened - 3 cloves garlic, minced - 2 tablespoons fresh parsley, chopped - ¼ teaspoon black pepper - ¼ teaspoon paprika - 4 large flour tortillas - 1 cup baby spinach leaves - Olive oil for frying When I make my Cheesy Garlic Chicken Wraps, I start with great ingredients. The cooked chicken is the hero, whether shredded or diced. I love using cheddar cheese for its rich flavor, paired with creamy cream cheese for a smooth texture. Next, I add garlic, fresh parsley, black pepper, and paprika. Garlic adds a punch of flavor. Parsley gives a fresh touch. The black pepper and paprika bring a hint of warmth. For the wrap, I choose large flour tortillas. They are soft and hold everything well. I love adding baby spinach leaves. They add crunch and color. Lastly, I use olive oil for frying. It helps to get a nice golden brown finish. These ingredients come together beautifully in the full recipe. Trust me; you’ll want to try them! First, grab a large mixing bowl. Add the cooked chicken, shredded cheddar cheese, and softened cream cheese. Next, toss in the minced garlic, chopped parsley, black pepper, and paprika. Mix everything until it blends well. This cheesy filling is where the magic starts! Now, lay a flour tortilla flat on your clean surface. Scoop a generous portion of the cheesy chicken mixture into the center of the tortilla. Then, add a handful of fresh baby spinach leaves on top. To wrap it up, fold the sides of the tortilla inward. Roll it tightly from the bottom to keep the filling secure. Repeat this with the other tortillas until you have all your wraps ready. Heat a skillet over medium heat and add a splash of olive oil. Once hot, place the wraps seam-side down in the skillet. Cook for 3 to 4 minutes until the bottom turns golden brown. Carefully flip each wrap and cook the other side for another 3 to 4 minutes. This will give you that crispy texture. After cooking, let them rest for a couple of minutes. Then, slice them in half and get ready to enjoy! For the complete recipe, check out the Full Recipe section. You can make Cheesy Garlic Chicken Wraps your own. First, add vegetables like bell peppers, onions, or mushrooms. These will boost the flavor and nutrition. You can also toss in spices like cumin or chili powder for a kick. If you want to switch proteins, use turkey or tofu. Both options work well and keep the dish tasty. You can choose how to cook your wraps. Pan-frying gives a nice, crispy outside. Heat olive oil in a skillet and cook each wrap until golden. It takes about 3-4 minutes on each side. Baking is another great option. Preheat your oven to 400°F (200°C). Place the wraps on a baking sheet and bake for about 10-15 minutes. This method is easier and requires less oil. To achieve that perfect crispiness, make sure the skillet is hot before adding the wraps. Avoid overcrowding the pan so they fry evenly. Serve your wraps warm for the best taste. Pair them with fresh salsa or guacamole for dipping. Both add a nice contrast to the cheesy filling. For a pretty presentation, sprinkle chopped parsley on top. It adds color and a fresh taste. You can also slice the wraps in half for easy eating. Enjoy your meal! {{image_2}} You can switch up the cheese in your cheesy garlic chicken wraps. If you want a different taste, try using mozzarella or pepper jack cheese. Mozzarella gives a nice stretch, while pepper jack adds a bit of heat. Both melt well and create a creamy texture. For those who prefer dairy-free options, many great alternatives exist. Brands now offer vegan cheese that melts nicely. Look for options made from nuts or soy. Just make sure they fit your taste and dietary needs. Tortillas are great, but you can explore other options too. Whole wheat tortillas are a healthy choice with more fiber. They add a nutty flavor that pairs well with the cheesy filling. Gluten-free tortillas are also available for those with gluten sensitivities. If you want to keep it light, try lettuce wraps. Crisp lettuce like romaine or butter lettuce works well. They add crunch and freshness, making your wraps feel bright and zesty. To spice things up, think about adding hot sauce. Just a few drops can really enhance the flavor. You can also mix in your favorite spices for a kick. Fresh herbs bring a whole new level to these wraps. Try adding basil, cilantro, or even dill. These herbs add a burst of freshness and make your wraps more colorful. They complement the garlic and cheese perfectly. For the full recipe, check out the [Full Recipe]. To store your cheesy garlic chicken wraps, let them cool first. Wrap each one in plastic wrap or foil. This keeps them fresh and tasty. You can also use a sealed container. They stay good in the fridge for about 3 days. After that, they may lose their flavor and texture. To freeze your wraps, follow these steps: 1. Let the wraps cool completely. 2. Wrap each one tightly in plastic wrap. 3. Place the wrapped wraps in a freezer bag. 4. Seal the bag, removing as much air as possible. This method helps keep them fresh for about 2 months. When ready to eat, take them out of the freezer. Let them defrost overnight in the fridge. For a quick thaw, you can use the microwave. To reheat your wraps and keep them crispy, use one of these methods: - Microwave: Heat on low for 30 seconds. Flip the wrap and heat for another 30 seconds. - Skillet: Heat a skillet over medium heat. Add a little olive oil. Cook each wrap for about 2-3 minutes on each side. This makes them crispy again. With these tips, you can enjoy your cheesy garlic chicken wraps anytime! For the full recipe, check the details above. Cheesy Garlic Chicken Wraps can last up to three days in the fridge. Store them in an airtight container. This keeps them fresh and tasty. If you want to keep them longer, consider freezing them instead. Yes, you can make these wraps ahead of time. Prepare the cheesy chicken filling and store it in the fridge. You can fill the tortillas just before cooking them. This keeps the wraps fresh and crispy. These wraps pair well with many sides. Consider serving them with: - Salsa for dipping - Guacamole for a creamy touch - A fresh salad for crunch - Sweet potato fries for a fun twist For the complete recipe details, check out the [Full Recipe]. This blog post covers a tasty recipe for Cheesy Garlic Chicken Wraps. We explored the key ingredients, including chicken, cheeses, and seasonings. I shared step-by-step instructions for preparing, assembling, and cooking the wraps. You can customize these wraps with various options and learn tips for perfecting your cooking method. In closing, these wraps are simple, versatile, and delicious. Try them out, and enjoy experimenting with flavors. Whether you reheat leftovers or serve them fresh, they are sure to please everyone.](https://tossedrecipes.com/wp-content/uploads/2025/06/a587355d-e627-4b4c-9fa3-7e1a7cd9ece5-300x300.webp)