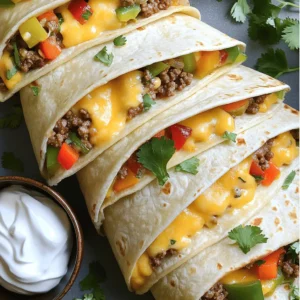
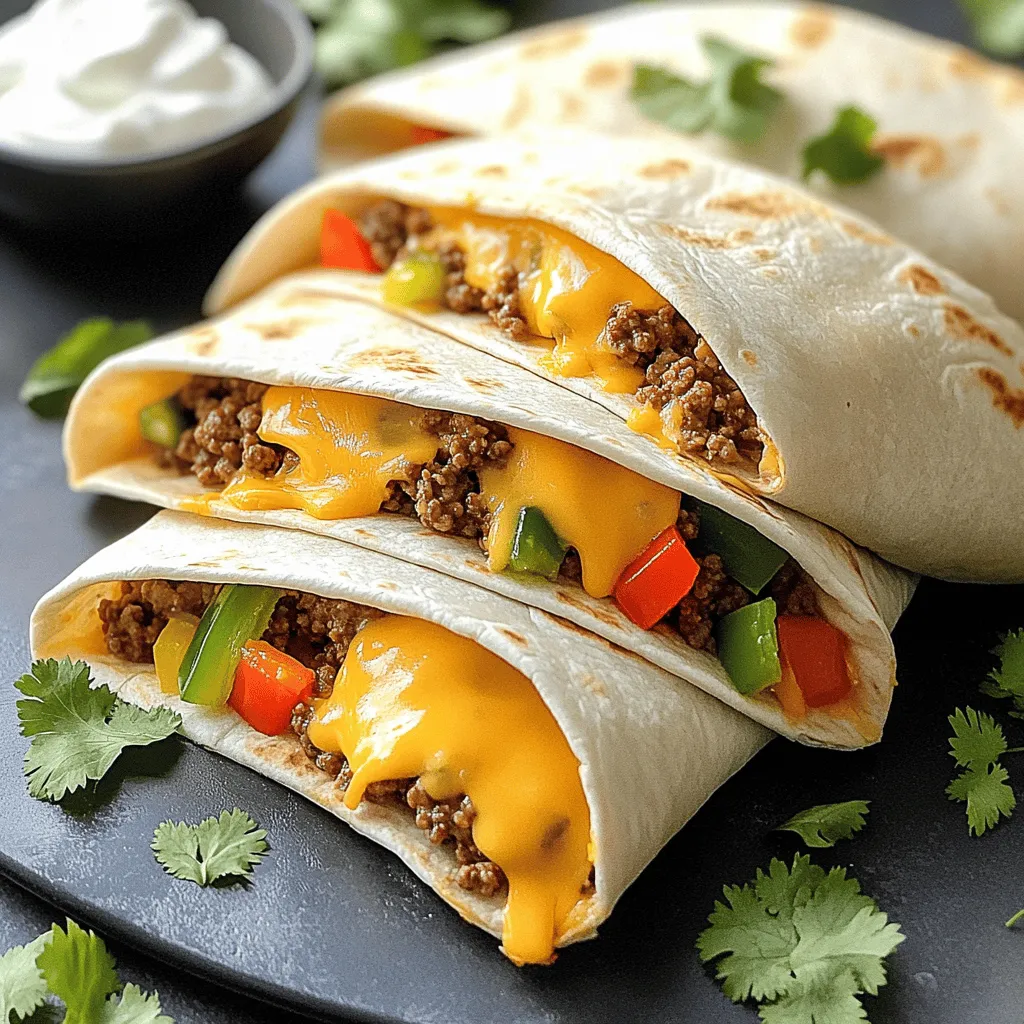
Looking for a tasty and simple meal? The Cheesy Ground Beef Delight Wrap is your answer! Packed with juicy beef, melted cheese, and colorful veggies, this wrap satisfies even the pickiest eaters. In just a few steps, you’ll create a delicious dish that’s perfect for busy weeknights. Let’s dive into the ingredients and get started on this mouthwatering meal that’s sure to impress!
Ingredients
List of Ingredients
– 1 lb ground beef
– 1 cup shredded cheddar cheese
– 1 cup diced bell peppers (mixed colors)
– 1/2 cup diced onion
– 2 cloves garlic, minced
– 1 teaspoon cumin
– 1 teaspoon paprika
– 1 teaspoon chili powder
– Salt and pepper to taste
– 4 large flour tortillas
– 1/4 cup sour cream
– 1/4 cup fresh cilantro, chopped (optional for garnish)
– Cooking oil
When you make Cheesy Ground Beef Delight Wrap, start with fresh ingredients. Quality beef makes a big difference. I like using 80/20 ground beef for a good balance of flavor and fat. The cheddar cheese is a must for that melty goodness. You can use different types of cheese, but cheddar adds great flavor.
Bell peppers add color and crunch. I recommend using a mix of red, yellow, and green for a vibrant look. Diced onions and minced garlic bring a sweet and savory taste to the beef.
Spices like cumin, paprika, and chili powder give it warmth and depth. You can adjust these to match your spice level. Salt and pepper enhance the flavors, so don’t skip these.
For serving, I love a dollop of sour cream. It cools the wrap perfectly. If you enjoy herbs, sprinkle fresh cilantro on top for a pop of freshness.
To wrap it all up, you’ll need large flour tortillas. They hold everything together well. Now that you have the ingredients, you’re ready to make this tasty meal!
Nutritional Information
– Calories per serving: 450
– Macronutrient breakdown:
– Protein: 25g
– Fat: 30g
– Carbohydrates: 30g
This meal packs a good amount of protein and fat, making it filling. The carbs come mainly from the tortillas and vegetables. If you want to make it lighter, you can adjust the amount of cheese or use a smaller tortilla.
Step-by-Step Instructions
How to Prepare the Cheesy Ground Beef Delight Wrap
1. Sautéing the onions and garlic
Start by heating a tablespoon of cooking oil in a large skillet over medium heat. Add the diced onion and minced garlic. Cook them for about 2-3 minutes until they smell great and turn soft. This step builds a nice flavor base for your wrap.
2. Cooking the ground beef
Next, increase the heat to medium-high. Add 1 pound of ground beef to the skillet. Break the beef apart with a spatula as it cooks. Brown the beef for about 5-7 minutes. You want it nice and brown, not pink.
3. Adding spices and bell peppers
Now stir in 1 cup of diced bell peppers along with 1 teaspoon each of cumin, paprika, chili powder, and salt and pepper to taste. Cook this mix for another 3-4 minutes. The peppers should soften and take on all those tasty spices.
4. Melting the cheese
Sprinkle 1 cup of shredded cheddar cheese over the beef mixture. Lower the heat to low and cover the skillet. Let it cook for about 2-3 minutes. The cheese will melt perfectly, creating a gooey filling.
5. Wrapping and serving instructions
While the cheese melts, warm 4 large flour tortillas in a dry skillet for about 30 seconds on each side. This makes them easier to fold. To wrap, place a generous spoonful of the cheesy beef mix in the center of a tortilla. Add a dollop of sour cream, and sprinkle with fresh cilantro if you like. Fold in the sides and roll it up tightly from the bottom to the top. Repeat with the rest of the tortillas and filling.
Now you have a delicious Cheesy Ground Beef Delight Wrap ready to enjoy! For the full recipe, check the details above.
Tips & Tricks
Cooking Tips for Perfect Wraps
– Choosing the right ground beef: Use 80/20 ground beef. This mix gives enough fat for flavor and keeps it juicy. Leaner beef can dry out.
– Best practices for melting cheese: Shred your cheese for quicker melting. Cover the skillet to trap heat. This helps the cheese melt evenly and gets gooey.
– How to warm tortillas properly: Warm tortillas in a dry skillet for about 30 seconds on each side. This makes them soft and easy to roll.
Presentation Tips
– Visual appeal suggestions: Cut the wraps in half diagonally. Place them on a bright plate for a pop of color. It makes the dish look more inviting.
– Serving suggestions with sides: Serve with a small bowl of sour cream for dipping. Fresh salsa or guacamole also pairs well. Add some crunchy chips for texture.
Variations
Ingredient Substitutions
You can swap out cheese for your favorite types. Try mozzarella or pepper jack for a kick. Both melt well and add unique flavors. You can also use cream cheese for a rich touch.
For veggies, feel free to mix it up. You can add diced zucchini or corn for sweetness. Spinach or kale can add a healthy crunch. Carrots provide a nice color and extra nutrients.
Dietary Modification Options
Need gluten-free? Use corn tortillas instead of flour ones. They hold the filling well and add a nice texture.
If you want vegetarian or vegan options, replace beef with lentils or black beans. Use dairy-free cheese and sour cream. You can enjoy the same great taste while being plant-based.
Storage Info
Refrigeration Guidelines
To store leftovers, let your wraps cool first. Wrap them in plastic wrap or foil. You can also place them in an airtight container. They will stay fresh in the fridge for about 3 to 4 days. When ready to eat, just take them out and reheat.
Freezing Instructions
Can you freeze the wraps?
Yes, you can freeze the wraps! They freeze well and make for an easy meal later. To do this, wrap each one tightly in plastic wrap. Then, place them in a freezer bag. They will last for up to 2 months in the freezer.
Best method for reheating from frozen
To reheat, you can bake or microwave them. If baking, preheat your oven to 350°F (175°C). Remove the plastic wrap and place the wraps on a baking sheet. Heat for about 20-25 minutes. For the microwave, unwrap the wrap and place it on a plate. Heat for about 2-3 minutes, checking to ensure it’s warm all the way through. Enjoy your cheesy ground beef delight! For the full recipe, check out the steps above.
FAQs
Common Questions About Cheesy Ground Beef Delight Wrap
How can I make this recipe ahead of time?
You can cook the ground beef mixture and store it in the fridge. Just cool it first. When you’re ready to eat, warm the filling and assemble the wraps. This saves time for busy days.
What sides pair well with cheesy ground beef wraps?
I love serving these wraps with simple sides like chips, salsa, or a fresh salad. You can also try guacamole or a corn salad for extra flavor.
Is it possible to make this recipe spicy?
Absolutely! You can add jalapeños or extra chili powder for heat. You can also use a spicy cheese to kick it up a notch. Adjust the spice according to your taste.
How long do these wraps last in the fridge?
These wraps stay good in the fridge for about three days. Store them in an airtight container to keep them fresh.
Troubleshooting and Common Issues
Why isn’t my cheese melting?
If your cheese isn’t melting, it might be too cold. Make sure to cook the filling hot enough. Covering the pan helps trap heat and melt the cheese faster.
How to avoid soggy wraps?
To keep your wraps crisp, don’t overfill them with the beef mixture. Also, warm the tortillas before wrapping, and serve them right away.
What can I do if the filling spills out when wrapping?
If the filling spills out, try using less filling. Fold the sides of the tortilla in first, then roll it tightly from the bottom. This helps keep everything inside.
For the full recipe, check the earlier sections to get all the details!
You learned how to make a Cheesy Ground Beef Delight Wrap. The ingredients are easy to find and tasty. Sautéed onions and garlic really boost the flavor. I shared tips for perfect wraps and tasty sides. You can also modify ingredients for special diets.
If you follow the steps, you’ll enjoy a great meal. Now, let’s get cooking! You can warm the wraps, serve them well, and savor every bite.