If you’re craving the sweet taste of homemade apple pie, you’re in the right place! In this guide, I’ll share a simple and satisfying recipe that anyone can master. From choosing the right apples to perfecting your crust, I’ll walk you through every step. Whether you’re a beginner or a seasoned baker, get ready to create a warm, delicious pie that will impress your family and friends. Let’s get baking!
Ingredients
Key Ingredients for Homemade Apple Pie
For a great apple pie, the apples you choose are key. I love using Granny Smith apples for their tartness. Honeycrisp apples add a nice sweetness. You can even mix them for more flavor.
Spices make the pie sing. You will need ground cinnamon and nutmeg. These warm spices create that cozy aroma. Lemon juice brings brightness and balances the sugar.
Storing your apples is simple. Keep them cool and dry. Prepare them by peeling and slicing them thin. This helps them cook evenly and creates a nice texture.
Pie Crust Options
You can choose between store-bought and homemade pie crust. Store-bought is quick and easy, but homemade tastes better. Making a flaky pie crust from scratch is fun and rewarding.
To make your own, mix flour, salt, and cold butter. Use your hands to work the butter into the flour until it looks like crumbs. Then add cold water to form a dough.
Common mistakes include overworking the dough and not chilling it. Overworking makes the crust tough. Chill it well for a flaky texture.
Tools You Will Need
The right tools make pie-making easy. A 9-inch pie pan is ideal for this recipe. You can use glass, metal, or ceramic. Each type gives a different crust finish.
Essential kitchen tools include a rolling pin, mixing bowls, and a sharp knife. A pastry cutter helps with making the crust.
For measuring, use dry cups for flour and sugar. Liquid measuring cups work for lemon juice. Accurate measurements ensure your pie turns out just right.
For the full recipe, check out the complete guide.
Step-by-Step Instructions
Preparing the Apple Filling
How to properly peel and slice apples
First, choose medium-sized apples like Granny Smith or Honeycrisp. Use a sharp peeler to remove the skin. Then, cut each apple in half and remove the core. Slice each half into thin wedges. Aim for pieces that are about 1/4 inch thick. This helps the apples cook evenly.
Combining ingredients for the filling
In a large bowl, mix your apple slices with sugar, lemon juice, cinnamon, nutmeg, and flour. Toss them gently until every slice is covered. The sugar helps sweeten the apples, and the flour thickens the mix.
Why resting the mixture is important
Let the apple mixture rest for about ten minutes. This step allows the apples to release their juices. You get a better filling when you bake the pie.
Assembling the Pie
Steps for rolling out pie dough
If you use store-bought crusts, simply unroll them. For homemade dough, roll it out on a floured surface. Aim for a circle about 12 inches wide. This gives you enough dough for a 9-inch pie pan.
Placement and sealing of the filling
Place the rolled-out crust into your pie pan. Pour the apple mixture in, spreading it evenly. Dot small pieces of butter on top of the apples. Roll out the second crust and cover the filling. Seal the edges by crimping with your fingers or a fork.
Creating decorative cuts on the top crust
Cut several slits in the top crust. This allows steam to escape while baking. You can make fun shapes or a simple grid for a classic look.
Baking the Pie
Preheating the oven and preparing for baking
Preheat your oven to 425°F (220°C). Place a baking sheet on the lower rack. This catches any drips from the pie.
Timing and temperature adjustments for baking
Bake the pie for 15 minutes at this high temperature. Then, lower the oven to 350°F (175°C). Bake for another 35 to 45 minutes.
Checking for doneness and visual cues
Look for a golden crust and bubbling filling. The crust should be firm and crispy. You can also insert a knife into the pie; it should slide easily through the apples.
Follow these steps, and you will have a delicious apple pie ready to enjoy! For the complete recipe, refer to the Full Recipe section.
Tips & Tricks
Choosing the Right Apples
The best apples for pie are Granny Smith and Honeycrisp. These apples balance sweetness and tartness. They hold their shape well when baked. Mixing these varieties adds depth to your pie’s flavor. Try using three parts Granny Smith to one part Honeycrisp for a great blend. You can also add a touch of Fuji for extra sweetness.
Perfecting Your Pie Crust
For a crisp and flaky bottom crust, keep your ingredients cold. Use cold butter and ice water. This prevents the crust from getting tough. Roll out your dough gently and don’t overwork it. An egg wash gives your pie a beautiful golden finish. Mix one egg with a tablespoon of milk. Brush this mixture over the top crust before baking.
Cooling and Serving
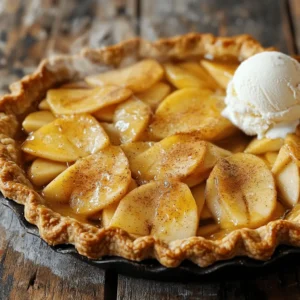
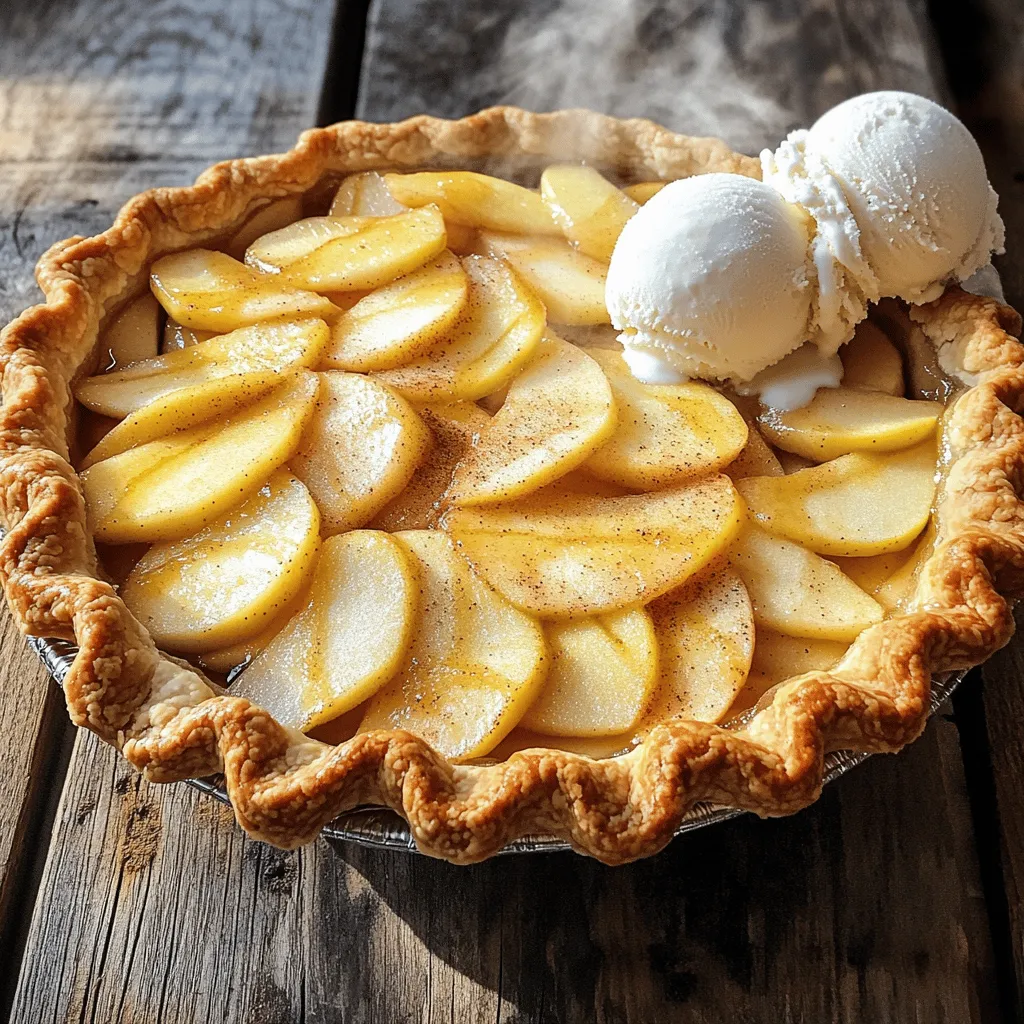
Cooling your pie is key. Let it sit for at least 2 hours before slicing. This helps the filling set, so it doesn’t ooze out. For serving, I love pairing a slice with vanilla ice cream. The warm pie and cold ice cream create a perfect contrast. Whipped cream is another great option for a creamy touch.
Variations
Different Toppings for Your Apple Pie
You can make your apple pie even better with different toppings. A lattice crust gives a lovely look and lets steam escape. It shows off the filling beautifully. A full crust is classic and keeps the pie warm and cozy.
You can also try a crumb topping for a crunchy twist. Mix flour, butter, and sugar until crumbly. This gives a nice texture and taste.
Flavor Enhancements
Want to spice things up? You can add caramel to your filling. It brings a sweet, buttery flavor. Nuts, like walnuts or pecans, add crunch. You can even toss in other fruits, like berries, for a fun mix.
Using spices makes a big difference. Besides cinnamon, try nutmeg or allspice. A splash of vanilla extract makes the flavor pop!
Dietary Modifications
If you need a gluten-free pie, use gluten-free flour for the crust. Many brands work well, and they taste great. You can also find ready-made gluten-free crusts at stores.
For a vegan option, use coconut oil or vegetable shortening in your crust. Replace the egg wash with plant milk or aquafaba. It gives a nice shine without animal products.
For the filling, use maple syrup instead of sugar. This makes it sweet and rich. Check the full recipe for more tips!
Storage Info
How to Store Apple Pie
To keep your apple pie fresh, store it in the fridge. Cover it with plastic wrap or aluminum foil. This helps keep it moist and prevents it from absorbing smells from other foods. If you want to save it for later, freezing is a great option. Wrap the pie tightly in plastic wrap, then in foil. This keeps the pie safe from freezer burns. You can slice it before freezing for easy servings.
Reheating Instructions
When you want to enjoy a slice again, you can reheat it in the oven. Preheat your oven to 350°F (175°C). Place the slice on a baking sheet. Heat for about 10-15 minutes. This warms it through without drying it out. To refresh the crust, you can cover the pie with foil for the first half of the reheating time. This keeps the crust crispy and prevents it from burning.
Shelf Life
Homemade apple pie can last for about two days at room temperature. Make sure to keep it in a cool spot, away from sunlight. If you store it in the fridge, it can last up to a week. Look for signs that your pie has gone bad. If it smells sour or has mold, it’s time to toss it. Always trust your nose and eyes!
FAQs
Can I make apple pie ahead of time?
Yes, you can make apple pie ahead of time. It is great for busy days. You can prepare the pie filling and store it in the fridge. This lets the flavors meld together. You can also make the pie crust and keep it wrapped in plastic. If you want to bake it later, you can freeze the pie. Just make sure to cover it well. When you are ready to bake, do not thaw the pie. Bake it straight from the freezer. This helps keep the crust crisp.
What is the secret to a perfect pie crust?
The secret to a great pie crust is cold ingredients and gentle handling. Use cold butter or shortening. This gives your crust a flaky texture. Mix the fat into the flour until it resembles coarse crumbs. Add cold water slowly. You want just enough to bring it together. Do not overwork the dough. Chill it for at least an hour before rolling it out. This makes it easier to handle and keeps it from shrinking while baking.
How do I know when my apple pie is done?
You can tell your apple pie is done by sight and smell. Look for a golden-brown crust. The filling should bubble through the slits in the top crust. You will also smell a sweet, warm aroma. If the crust is dark but the filling is not bubbling, your pie may need more time. Use a knife to gently poke the apples. They should feel tender when done.
Homemade apple pie brings comfort and joy. We covered key ingredients, pie crusts, and tools needed. You learned how to prepare the apple filling, shape the pie, and bake it to perfection. Tips helped you choose apples, achieve a flaky crust, and enhance flavor. Don’t forget to cool your pie before slicing! Store leftovers properly to enjoy later. With these steps, you can create a delightful treat for any occasion. Happy baking!