![- 2 cups cooked chicken, shredded - 1 cup shredded cheddar cheese - 1/2 cup cream cheese, softened - 2 cloves garlic, minced - 1/4 cup fresh parsley, chopped - 1 teaspoon paprika - 4 large flour tortillas - Salt and pepper to taste - Olive oil for grilling To make these Easy Cheesy Chicken Garlic Wraps, you need some key ingredients. First, we use two cups of cooked chicken, which gives great flavor. Shredded cheddar cheese adds a nice, cheesy touch. Cream cheese helps bind everything together. Don't forget the garlic; it really brings out the taste. Fresh parsley adds color and a bit of freshness. Paprika gives it just the right amount of warmth. While you can use any large flour tortillas, I find that they hold the filling well. Season with salt and pepper to your liking. Finally, a drizzle of olive oil is perfect for grilling. You will love how crispy the wraps get! - Alternatives for chicken: You can use turkey or tofu for a different protein. - Dairy-free cheese options: Try cashew cheese or nutritional yeast if you want a dairy-free alternative. - Garlic powder as a substitute: If you don’t have fresh garlic, garlic powder works well too. Substituting ingredients can make this recipe fit your needs. If chicken isn’t your thing, turkey or tofu can work. Dairy-free cheese options are great for those who avoid dairy. Garlic powder is a fine swap if you need it. - Mixing bowl - Skillet or frying pan - Measuring cups and spoons To prepare these wraps, you’ll need a few tools. A mixing bowl is essential for combining the ingredients. A skillet or frying pan is needed for grilling the wraps. Lastly, measuring cups and spoons help ensure you get the right amounts of each ingredient. For the full recipe, check out the link provided! To start, you need to mix the filling. In a large bowl, combine these ingredients: - 2 cups cooked chicken, shredded - 1 cup shredded cheddar cheese - 1/2 cup cream cheese, softened - 2 cloves garlic, minced - 1/4 cup fresh parsley, chopped - 1 teaspoon paprika - Salt and pepper to taste Mix everything together until it is well blended. This step is key for great flavor. If you want more taste, add extra garlic or paprika. Taste the mix before you fill the wraps. Adjust the salt and pepper if needed. Now, let’s fold the tortillas. Place a flour tortilla flat on a clean surface. Spoon about 1/4 of the chicken mix into the middle of the tortilla. To fold it, first bring the sides of the tortilla in. Then, roll it up tightly from the bottom. Make sure the filling stays inside! Repeat this for the rest of the tortillas and filling. A good fold helps keep the wraps intact. Next, it’s time to cook the wraps. Heat a skillet over medium heat and add a drizzle of olive oil. This oil helps to get a nice golden brown color. Once the skillet is ready, place each wrap seam-side down. Cook for about 3-4 minutes on one side. Then, flip and cook for another 3-4 minutes. You want them crispy and golden. After cooking, let them rest for a minute before slicing in half. This keeps the filling warm inside. These Easy Cheesy Chicken Garlic Wraps are simple and quick to make. For the full recipe, check it out [Full Recipe]. To keep your wraps crispy, use a hot skillet. A medium heat works best. Add a small drizzle of olive oil before cooking. This helps get a nice golden color. The best olive oil for grilling is extra virgin. It has a rich flavor and high smoke point. Garnish your wraps with fresh parsley for a pop of color. You can also add sliced tomatoes or avocados for extra taste. For dipping, ranch dressing pairs well. Garlic dip is another great choice. It adds a nice kick. Want more flavor? Try adding spices like cayenne or chili powder. These give a bold taste. You can also switch up ingredients. Use different cheeses or add vegetables like bell peppers. This keeps the wraps fun and fresh. {{image_2}} You can make these wraps vegetarian by using different proteins. Try black beans or lentils instead of chicken. These options add fiber and keep the meal hearty. You can also add more vegetables. Spinach, bell peppers, or mushrooms work great. Just sauté them lightly before mixing. Cheese makes these wraps creamy and delicious. You can explore other melting cheeses, too. Gouda or mozzarella can add unique flavors. Mixing in some herbs like basil or oregano will enhance the taste. This creates a fresh twist on the classic recipe. Wraps are not just for lunch; they work well for meal prep. You can make them ahead of time. Just store them in the fridge and grab one when needed. Another fun idea is to turn wraps into quesadillas. Simply add more cheese, then grill them until they are crispy and golden. To keep your wraps fresh, wrap them tightly in plastic wrap or foil. This helps prevent air from getting in. Store them in an airtight container in the fridge. They taste best when eaten within 3 days. When you want to eat them, reheat in a skillet. Heat them on medium for about 2-3 minutes on each side. This keeps them crispy and delicious. If you want to freeze unassembled wraps, first prepare the filling. Then, do not cook the wraps. Instead, wrap each one tightly in plastic wrap. Place them in a freezer bag or container. They can stay in the freezer for up to 3 months. To thaw, move them to the fridge overnight. Then, reheat in a skillet until hot. In the fridge, these wraps last about 3-4 days when stored properly. Look for signs of spoilage like a sour smell or mold. If they feel slimy or have changed color, it's best to throw them away. Keeping your wraps fresh ensures you enjoy every bite! Making these wraps is quick and easy. It takes about 15 minutes to prep. The cooking time is around 10 minutes. So, the total time is about 25 minutes. You can have a tasty meal ready in no time! I recommend using cooked chicken for safety. Raw chicken needs a longer cooking time to reach safe temperatures. If you want to use raw chicken, cook it fully first. Make sure it reaches 165°F (75°C) to ensure it’s safe to eat. This way, you keep your wraps delicious and safe. These wraps pair well with many sides. Here are some ideas: - Fresh salad with a light dressing - Crispy potato wedges or fries - Steamed veggies like broccoli or carrots - A bowl of ranch or garlic dip for extra flavor These sides will make your meal even better! For the full recipe, check out the details above. In this post, we explored the essential ingredients, step-by-step instructions, and tips for Easy Cheesy Chicken Garlic Wraps. You learned about substitutes, variations, and storage tips to keep your wraps fresh. Cooking can be fun and easy. With these wraps, you can enjoy a tasty meal or snack. Remember to be creative with your ingredients and serving styles. Enjoy your cooking and remember, great wraps can bring joy to any meal.](https://tossedrecipes.com/wp-content/uploads/2025/06/c29d3f69-b09c-436a-b22f-8219f625e86a.webp)
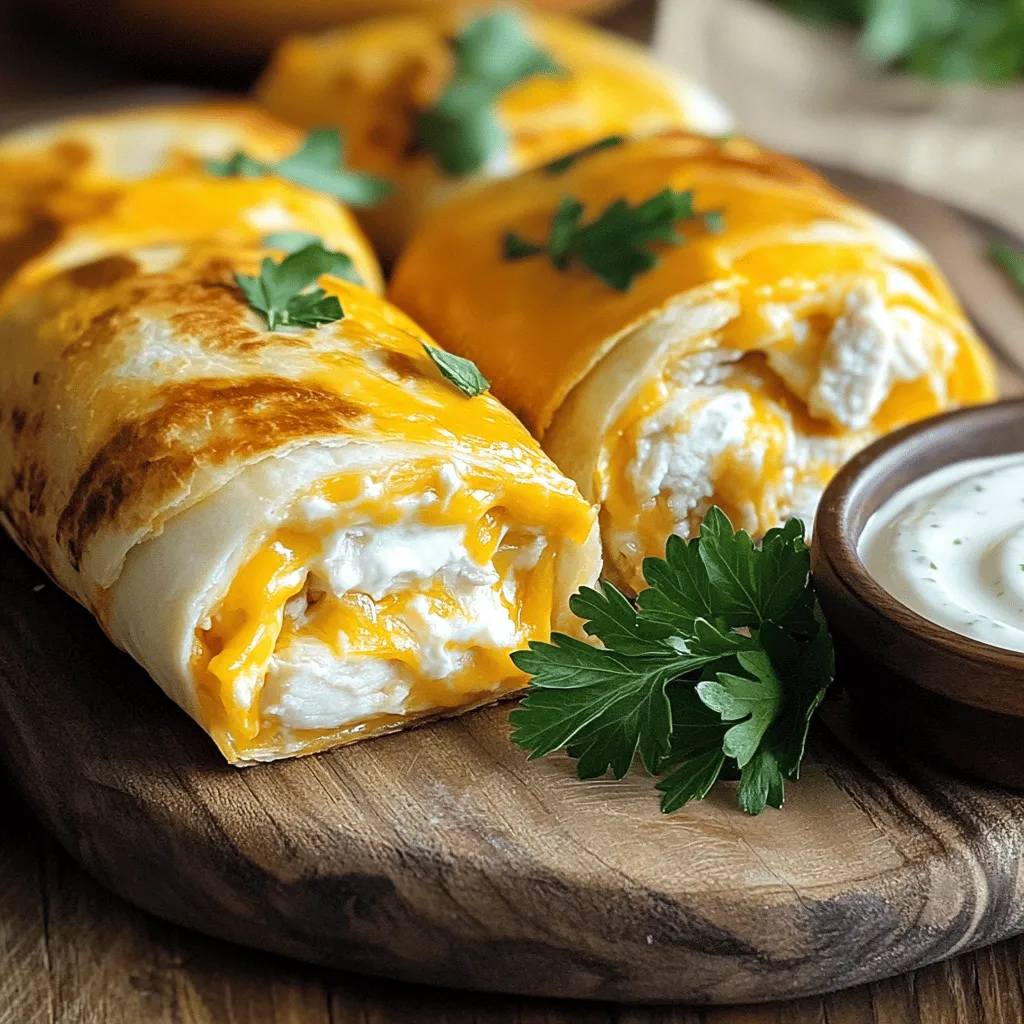
Looking for a quick and tasty meal? You’ll love these Easy Cheesy Chicken Garlic Wraps! With just a few simple ingredients, this recipe is perfect for busy weeknights. I’ll guide you on how to mix, assemble, and cook these wraps to perfection. Plus, I’ll share tips on variations and storage! Let’s get started on this delicious dinner that your whole family will enjoy.
Ingredients
Essential Ingredients
– 2 cups cooked chicken, shredded
– 1 cup shredded cheddar cheese
– 1/2 cup cream cheese, softened
– 2 cloves garlic, minced
– 1/4 cup fresh parsley, chopped
– 1 teaspoon paprika
– 4 large flour tortillas
– Salt and pepper to taste
– Olive oil for grilling
To make these Easy Cheesy Chicken Garlic Wraps, you need some key ingredients. First, we use two cups of cooked chicken, which gives great flavor. Shredded cheddar cheese adds a nice, cheesy touch. Cream cheese helps bind everything together. Don’t forget the garlic; it really brings out the taste. Fresh parsley adds color and a bit of freshness. Paprika gives it just the right amount of warmth.
While you can use any large flour tortillas, I find that they hold the filling well. Season with salt and pepper to your liking. Finally, a drizzle of olive oil is perfect for grilling. You will love how crispy the wraps get!
Possible Substitutes
– Alternatives for chicken: You can use turkey or tofu for a different protein.
– Dairy-free cheese options: Try cashew cheese or nutritional yeast if you want a dairy-free alternative.
– Garlic powder as a substitute: If you don’t have fresh garlic, garlic powder works well too.
Substituting ingredients can make this recipe fit your needs. If chicken isn’t your thing, turkey or tofu can work. Dairy-free cheese options are great for those who avoid dairy. Garlic powder is a fine swap if you need it.
Equipment Needed
– Mixing bowl
– Skillet or frying pan
– Measuring cups and spoons
To prepare these wraps, you’ll need a few tools. A mixing bowl is essential for combining the ingredients. A skillet or frying pan is needed for grilling the wraps. Lastly, measuring cups and spoons help ensure you get the right amounts of each ingredient.
For the full recipe, check out the link provided!
Step-by-Step Instructions
Preparing the Filling
To start, you need to mix the filling. In a large bowl, combine these ingredients:
– 2 cups cooked chicken, shredded
– 1 cup shredded cheddar cheese
– 1/2 cup cream cheese, softened
– 2 cloves garlic, minced
– 1/4 cup fresh parsley, chopped
– 1 teaspoon paprika
– Salt and pepper to taste
Mix everything together until it is well blended. This step is key for great flavor. If you want more taste, add extra garlic or paprika. Taste the mix before you fill the wraps. Adjust the salt and pepper if needed.
Assembling the Wraps
Now, let’s fold the tortillas. Place a flour tortilla flat on a clean surface. Spoon about 1/4 of the chicken mix into the middle of the tortilla.
To fold it, first bring the sides of the tortilla in. Then, roll it up tightly from the bottom. Make sure the filling stays inside! Repeat this for the rest of the tortillas and filling. A good fold helps keep the wraps intact.
Cooking the Wraps
Next, it’s time to cook the wraps. Heat a skillet over medium heat and add a drizzle of olive oil. This oil helps to get a nice golden brown color.
Once the skillet is ready, place each wrap seam-side down. Cook for about 3-4 minutes on one side. Then, flip and cook for another 3-4 minutes. You want them crispy and golden. After cooking, let them rest for a minute before slicing in half. This keeps the filling warm inside.
These Easy Cheesy Chicken Garlic Wraps are simple and quick to make. For the full recipe, check it out [Full Recipe].
Tips & Tricks
Cooking Tips
To keep your wraps crispy, use a hot skillet. A medium heat works best. Add a small drizzle of olive oil before cooking. This helps get a nice golden color. The best olive oil for grilling is extra virgin. It has a rich flavor and high smoke point.
Serving Suggestions
Garnish your wraps with fresh parsley for a pop of color. You can also add sliced tomatoes or avocados for extra taste. For dipping, ranch dressing pairs well. Garlic dip is another great choice. It adds a nice kick.
Flavor Enhancements
Want more flavor? Try adding spices like cayenne or chili powder. These give a bold taste. You can also switch up ingredients. Use different cheeses or add vegetables like bell peppers. This keeps the wraps fun and fresh.
Variations
Vegetarian Options
You can make these wraps vegetarian by using different proteins. Try black beans or lentils instead of chicken. These options add fiber and keep the meal hearty. You can also add more vegetables. Spinach, bell peppers, or mushrooms work great. Just sauté them lightly before mixing.
Different Cheese Choices
Cheese makes these wraps creamy and delicious. You can explore other melting cheeses, too. Gouda or mozzarella can add unique flavors. Mixing in some herbs like basil or oregano will enhance the taste. This creates a fresh twist on the classic recipe.
Creative Serving Styles
Wraps are not just for lunch; they work well for meal prep. You can make them ahead of time. Just store them in the fridge and grab one when needed. Another fun idea is to turn wraps into quesadillas. Simply add more cheese, then grill them until they are crispy and golden.
Storage Info
Storing Leftovers
To keep your wraps fresh, wrap them tightly in plastic wrap or foil. This helps prevent air from getting in. Store them in an airtight container in the fridge. They taste best when eaten within 3 days. When you want to eat them, reheat in a skillet. Heat them on medium for about 2-3 minutes on each side. This keeps them crispy and delicious.
Freezing Instructions
If you want to freeze unassembled wraps, first prepare the filling. Then, do not cook the wraps. Instead, wrap each one tightly in plastic wrap. Place them in a freezer bag or container. They can stay in the freezer for up to 3 months. To thaw, move them to the fridge overnight. Then, reheat in a skillet until hot.
Shelf Life
In the fridge, these wraps last about 3-4 days when stored properly. Look for signs of spoilage like a sour smell or mold. If they feel slimy or have changed color, it’s best to throw them away. Keeping your wraps fresh ensures you enjoy every bite!
FAQs
How long does it take to make Easy Cheesy Chicken Garlic Wraps?
Making these wraps is quick and easy. It takes about 15 minutes to prep. The cooking time is around 10 minutes. So, the total time is about 25 minutes. You can have a tasty meal ready in no time!
Can I use raw chicken in this recipe?
I recommend using cooked chicken for safety. Raw chicken needs a longer cooking time to reach safe temperatures. If you want to use raw chicken, cook it fully first. Make sure it reaches 165°F (75°C) to ensure it’s safe to eat. This way, you keep your wraps delicious and safe.
What can I serve with these wraps?
These wraps pair well with many sides. Here are some ideas:
– Fresh salad with a light dressing
– Crispy potato wedges or fries
– Steamed veggies like broccoli or carrots
– A bowl of ranch or garlic dip for extra flavor
These sides will make your meal even better! For the full recipe, check out the details above.
In this post, we explored the essential ingredients, step-by-step instructions, and tips for Easy Cheesy Chicken Garlic Wraps. You learned about substitutes, variations, and storage tips to keep your wraps fresh. Cooking can be fun and easy. With these wraps, you can enjoy a tasty meal or snack. Remember to be creative with your ingredients and serving styles. Enjoy your cooking and remember, great wraps can bring joy to any meal.
![- 2 cups cooked chicken, shredded - 1 cup shredded cheddar cheese - 1/2 cup cream cheese, softened - 2 cloves garlic, minced - 1/4 cup fresh parsley, chopped - 1 teaspoon paprika - 4 large flour tortillas - Salt and pepper to taste - Olive oil for grilling To make these Easy Cheesy Chicken Garlic Wraps, you need some key ingredients. First, we use two cups of cooked chicken, which gives great flavor. Shredded cheddar cheese adds a nice, cheesy touch. Cream cheese helps bind everything together. Don't forget the garlic; it really brings out the taste. Fresh parsley adds color and a bit of freshness. Paprika gives it just the right amount of warmth. While you can use any large flour tortillas, I find that they hold the filling well. Season with salt and pepper to your liking. Finally, a drizzle of olive oil is perfect for grilling. You will love how crispy the wraps get! - Alternatives for chicken: You can use turkey or tofu for a different protein. - Dairy-free cheese options: Try cashew cheese or nutritional yeast if you want a dairy-free alternative. - Garlic powder as a substitute: If you don’t have fresh garlic, garlic powder works well too. Substituting ingredients can make this recipe fit your needs. If chicken isn’t your thing, turkey or tofu can work. Dairy-free cheese options are great for those who avoid dairy. Garlic powder is a fine swap if you need it. - Mixing bowl - Skillet or frying pan - Measuring cups and spoons To prepare these wraps, you’ll need a few tools. A mixing bowl is essential for combining the ingredients. A skillet or frying pan is needed for grilling the wraps. Lastly, measuring cups and spoons help ensure you get the right amounts of each ingredient. For the full recipe, check out the link provided! To start, you need to mix the filling. In a large bowl, combine these ingredients: - 2 cups cooked chicken, shredded - 1 cup shredded cheddar cheese - 1/2 cup cream cheese, softened - 2 cloves garlic, minced - 1/4 cup fresh parsley, chopped - 1 teaspoon paprika - Salt and pepper to taste Mix everything together until it is well blended. This step is key for great flavor. If you want more taste, add extra garlic or paprika. Taste the mix before you fill the wraps. Adjust the salt and pepper if needed. Now, let’s fold the tortillas. Place a flour tortilla flat on a clean surface. Spoon about 1/4 of the chicken mix into the middle of the tortilla. To fold it, first bring the sides of the tortilla in. Then, roll it up tightly from the bottom. Make sure the filling stays inside! Repeat this for the rest of the tortillas and filling. A good fold helps keep the wraps intact. Next, it’s time to cook the wraps. Heat a skillet over medium heat and add a drizzle of olive oil. This oil helps to get a nice golden brown color. Once the skillet is ready, place each wrap seam-side down. Cook for about 3-4 minutes on one side. Then, flip and cook for another 3-4 minutes. You want them crispy and golden. After cooking, let them rest for a minute before slicing in half. This keeps the filling warm inside. These Easy Cheesy Chicken Garlic Wraps are simple and quick to make. For the full recipe, check it out [Full Recipe]. To keep your wraps crispy, use a hot skillet. A medium heat works best. Add a small drizzle of olive oil before cooking. This helps get a nice golden color. The best olive oil for grilling is extra virgin. It has a rich flavor and high smoke point. Garnish your wraps with fresh parsley for a pop of color. You can also add sliced tomatoes or avocados for extra taste. For dipping, ranch dressing pairs well. Garlic dip is another great choice. It adds a nice kick. Want more flavor? Try adding spices like cayenne or chili powder. These give a bold taste. You can also switch up ingredients. Use different cheeses or add vegetables like bell peppers. This keeps the wraps fun and fresh. {{image_2}} You can make these wraps vegetarian by using different proteins. Try black beans or lentils instead of chicken. These options add fiber and keep the meal hearty. You can also add more vegetables. Spinach, bell peppers, or mushrooms work great. Just sauté them lightly before mixing. Cheese makes these wraps creamy and delicious. You can explore other melting cheeses, too. Gouda or mozzarella can add unique flavors. Mixing in some herbs like basil or oregano will enhance the taste. This creates a fresh twist on the classic recipe. Wraps are not just for lunch; they work well for meal prep. You can make them ahead of time. Just store them in the fridge and grab one when needed. Another fun idea is to turn wraps into quesadillas. Simply add more cheese, then grill them until they are crispy and golden. To keep your wraps fresh, wrap them tightly in plastic wrap or foil. This helps prevent air from getting in. Store them in an airtight container in the fridge. They taste best when eaten within 3 days. When you want to eat them, reheat in a skillet. Heat them on medium for about 2-3 minutes on each side. This keeps them crispy and delicious. If you want to freeze unassembled wraps, first prepare the filling. Then, do not cook the wraps. Instead, wrap each one tightly in plastic wrap. Place them in a freezer bag or container. They can stay in the freezer for up to 3 months. To thaw, move them to the fridge overnight. Then, reheat in a skillet until hot. In the fridge, these wraps last about 3-4 days when stored properly. Look for signs of spoilage like a sour smell or mold. If they feel slimy or have changed color, it's best to throw them away. Keeping your wraps fresh ensures you enjoy every bite! Making these wraps is quick and easy. It takes about 15 minutes to prep. The cooking time is around 10 minutes. So, the total time is about 25 minutes. You can have a tasty meal ready in no time! I recommend using cooked chicken for safety. Raw chicken needs a longer cooking time to reach safe temperatures. If you want to use raw chicken, cook it fully first. Make sure it reaches 165°F (75°C) to ensure it’s safe to eat. This way, you keep your wraps delicious and safe. These wraps pair well with many sides. Here are some ideas: - Fresh salad with a light dressing - Crispy potato wedges or fries - Steamed veggies like broccoli or carrots - A bowl of ranch or garlic dip for extra flavor These sides will make your meal even better! For the full recipe, check out the details above. In this post, we explored the essential ingredients, step-by-step instructions, and tips for Easy Cheesy Chicken Garlic Wraps. You learned about substitutes, variations, and storage tips to keep your wraps fresh. Cooking can be fun and easy. With these wraps, you can enjoy a tasty meal or snack. Remember to be creative with your ingredients and serving styles. Enjoy your cooking and remember, great wraps can bring joy to any meal.](https://tossedrecipes.com/wp-content/uploads/2025/06/c29d3f69-b09c-436a-b22f-8219f625e86a-300x300.webp)