Harry Potter Butterbeer Cookies Delightful Treat Recipe

WANT TO SAVE THIS RECIPE?

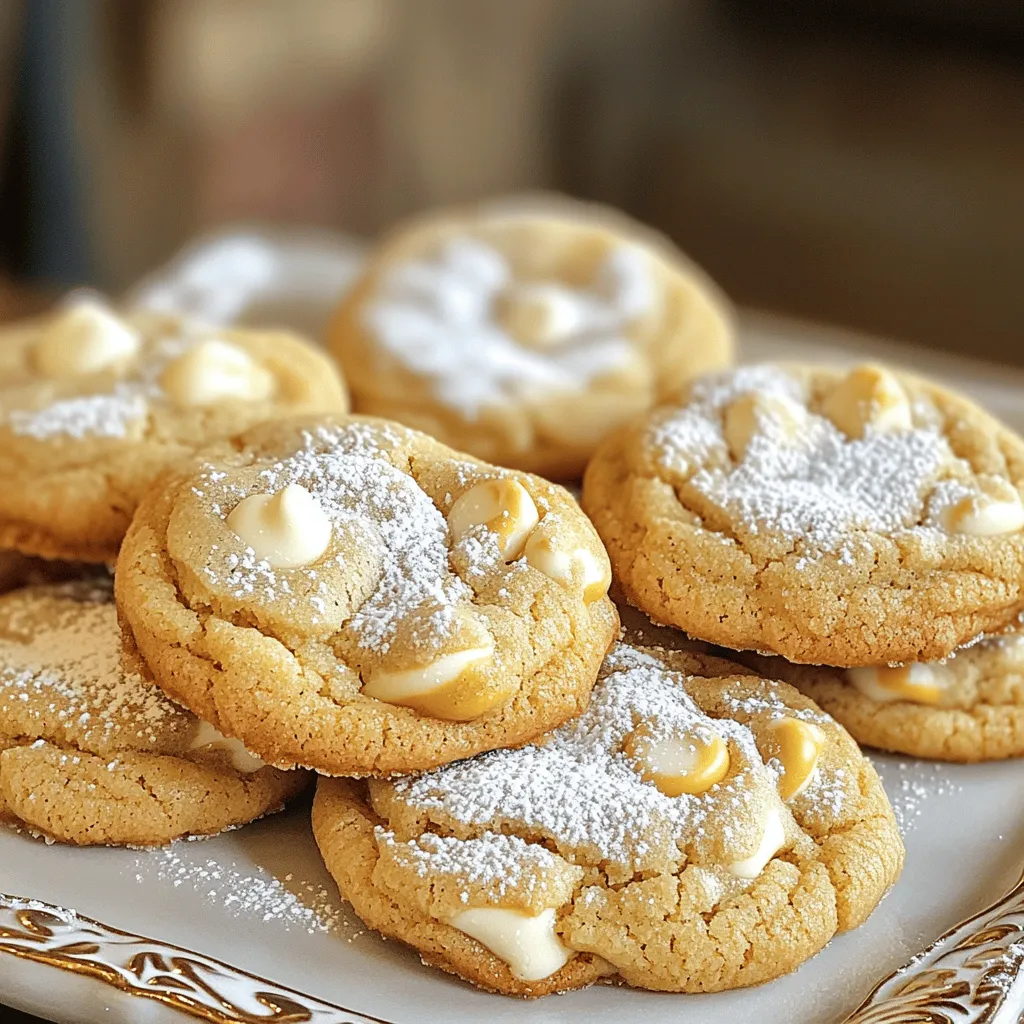
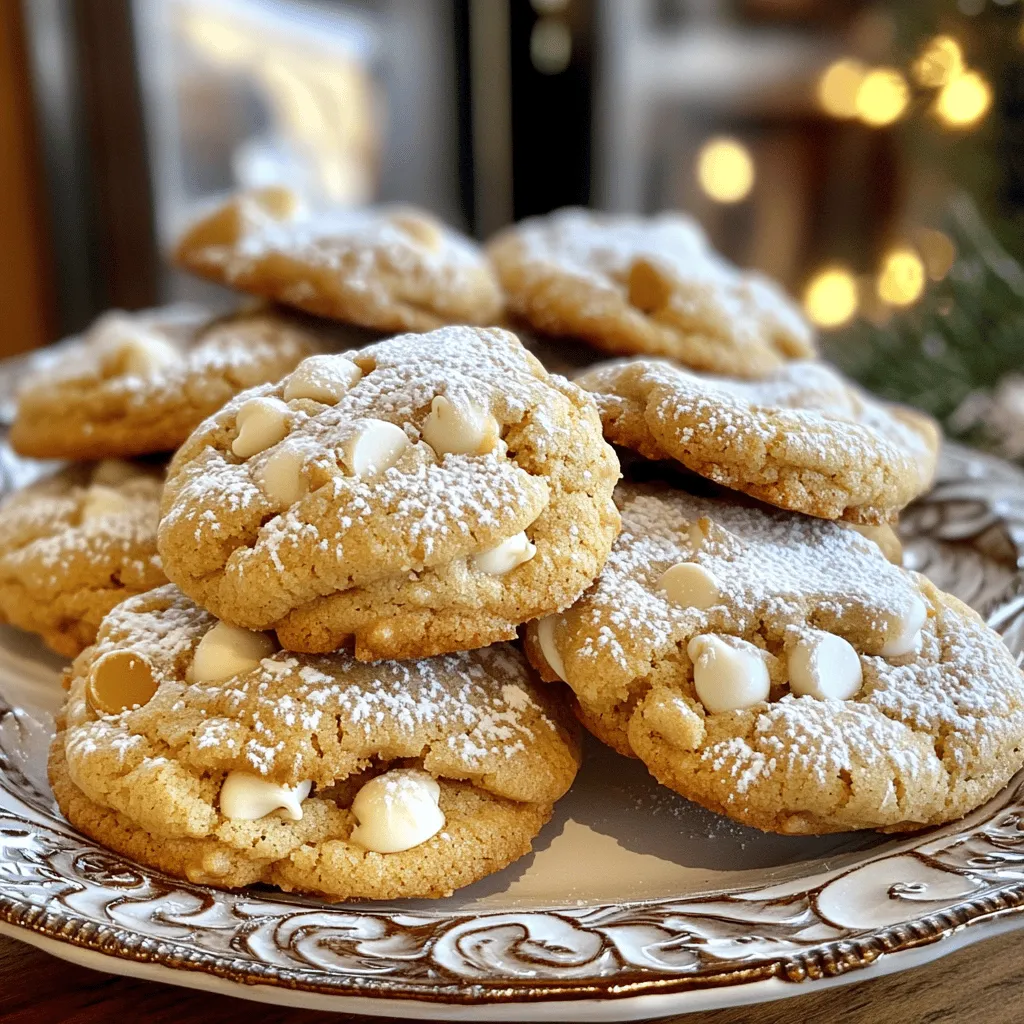
Are you ready to bring a taste of Hogwarts to your kitchen? These Harry Potter Butterbeer Cookies are a magical treat that combines the creamy flavors of butterscotch and white chocolate. With just a few simple ingredients, you can make cookies that are perfect for any wizarding fan. Get ready to impress your friends and treat yourself to this delightful recipe that brings the magic of the Harry Potter universe right to your plate!

Ingredients

List of Required Ingredients

– 2 ½ cups all-purpose flour

– 1 teaspoon baking soda

– ½ teaspoon salt

– 1 cup unsalted butter, softened

– 1 cup brown sugar, packed

– ½ cup granulated sugar

– 1 tablespoon vanilla extract

– 2 large eggs

– 1 tablespoon butterscotch syrup (or caramel syrup as a substitute)

– 1 cup butterscotch chips

– 1 cup white chocolate chips

– Pinch of nutmeg (optional)

These ingredients create a rich and tasty cookie. Each one adds to the overall flavor. The butterscotch and white chocolate chips give a delightful sweetness. You can also add a pinch of nutmeg for warmth.

Ingredient Substitutions

– If you need a different flavor, use caramel syrup instead of butterscotch.

– For a gluten-free option, try using gluten-free flour blends.

– If you want a dairy-free cookie, use coconut oil or a dairy-free butter.

Feel free to swap ingredients based on your needs. These simple changes let everyone enjoy these cookies. Whether you have dietary needs or just want to try something new, these swaps can work well.

Step-by-Step Instructions

Preparation Steps

1. Preheat your oven to 350°F (175°C). Line two baking sheets with parchment paper. This keeps the cookies from sticking.

2. In a medium bowl, whisk together 2 ½ cups of flour, 1 teaspoon of baking soda, and ½ teaspoon of salt. If you like, add a pinch of nutmeg for extra flavor.

3. In a large mixing bowl, cream 1 cup of softened butter, 1 cup of brown sugar, and ½ cup of granulated sugar. Mix until it’s light and fluffy, about 3 to 4 minutes.

Combining Ingredients

1. Add 1 tablespoon of vanilla extract and 1 tablespoon of butterscotch syrup to the butter mixture. Mix well to combine.

2. Beat in 2 large eggs, one at a time. Make sure each egg is fully mixed before adding the next.

3. Gradually add the dry mixture to the wet ingredients. Mix just until combined. This helps keep the dough soft.

4. Fold in 1 cup of butterscotch chips and 1 cup of white chocolate chips. Ensure they are evenly spread throughout the dough.

Baking Instructions

1. Scoop tablespoon-sized balls of dough and place them on the prepared baking sheets. Leave some space between each cookie.

2. Bake for 10 to 12 minutes. The edges should be lightly golden and the centers set. Keep an eye on them!

3. After baking, let the cookies cool on the sheets for 5 minutes. Then, transfer them to wire racks to cool completely. Enjoy your delicious treats!

For the full recipe, check the instructions above!

Tips & Tricks

Perfecting Your Cookies

To make the best Harry Potter Butterbeer cookies, start with your oven. Each oven is different. You may need to adjust your baking time. If your cookies look brown but feel soft, they are likely ready. Check them at the 10-minute mark.

Next, let’s talk about texture. You want your cookies soft and chewy, not hard. To help with this, chill the dough for at least 30 minutes. Chilling firms the dough, making it easier to scoop and shape. It also helps the flavors blend well.

Presentation Ideas

When serving your Butterbeer cookies, think about fun ways to present them. Use a whimsical jar to make them look magical. You can also stack them on a fun platter.

For a Harry Potter theme, consider using themed containers. Think about using a decorative box that looks like a Hogwarts letter. You can also sprinkle powdered sugar on top for a snowy effect.

Common Mistakes to Avoid

Many people make mistakes while baking cookies. One common mistake is overmixing the dough. This can make your cookies tough. Mix just until you combine the ingredients.

Another mistake is not measuring ingredients correctly. Always use dry measuring cups for flour and sugar. Too much flour can make cookies dry and crumbly.

Lastly, don’t forget to cool your cookies properly. If you move them too soon, they may break. Let them cool on the baking sheet for five minutes. Then, transfer them to wire racks to cool completely. Follow these tips, and you’ll have perfect Butterbeer cookies every time! For the complete recipe, check out the Full Recipe.

Variations

Flavor Add-Ins

You can make these Butterbeer cookies even better with some fun add-ins!

Spices: Try adding cinnamon or ginger for warmth. They add a cozy feel.

Mix-ins: You can include things like chopped nuts or different types of chocolate for extra flavor.

Vegan Options: If you want a vegan version, swap the butter for coconut oil and use flax eggs.

Seasonal Twists

Make these cookies special for any holiday!

Holidays: For Christmas, add a hint of peppermint extract for a festive twist.

Seasonal Ingredients: Use pumpkin spice in fall for a rich flavor. It fits the season perfectly.

Themed Events: For Harry Potter parties, use cookie cutters to shape them like stars or wands.

Different Cookie Styles

You can change how you bake these cookies for variety!

Bars: Instead of individual cookies, bake the dough as bars. Just adjust the baking time.

Thickness: If you want chewy cookies, make the dough balls thicker. For crispy, flatten them more.

Shapes: Get creative! You can cut them into different shapes or even make sandwiches with frosting.

These variations make the Butterbeer cookies fun and exciting. Check out the Full Recipe for more details!

Storage Info

Best Storage Practices

To keep your Harry Potter Butterbeer Cookies fresh, store them in an airtight container. This helps prevent them from drying out. I recommend using a plastic or glass container with a tight lid. You can also use a resealable plastic bag.

In the fridge: Cookies last about one week.

In the pantry: They stay fresh for up to ten days.

Freezing Cookies

You can freeze both the dough and baked cookies. For unbaked dough, scoop the dough onto a baking sheet. Freeze until solid, then store in a bag. When you want to bake, just thaw the dough in the fridge overnight.

To freeze baked cookies, place them in an airtight container with parchment paper between layers. They can last up to three months in the freezer.

Reheating Tips

To reheat cookies, use the oven for the best results. Preheat it to 300°F (150°C). Place the cookies on a baking sheet for about five minutes. This warms them without drying them out.

You can also use a microwave. Heat the cookies for about ten seconds. This warms them up but be careful not to overheat them. Enjoy your soft, warm Butterbeer Cookies!

FAQs

What makes the “Harry Potter Butterbeer Cookies” special?

These cookies connect to the magical world of Harry Potter. They bring the flavor of Butterbeer right to your kitchen. The sweet taste comes from butterscotch and white chocolate chips. A pinch of nutmeg adds a warm touch. This unique flavor profile makes them a delight for fans of all ages.

Can I make Butterbeer cookies ahead of time?

Yes, you can make these cookies in advance! Prepare the dough and chill it for a few hours. This helps the flavors blend better. You can also bake the cookies ahead and store them. Just make sure to follow proper storage tips for best results.

How should I store leftover cookies?

Store leftover cookies in an airtight container. This keeps them fresh for about a week. You can also freeze them for longer storage. To maintain texture, place parchment paper between layers. This way, they stay soft and tasty even after freezing.

In this post, we covered the essential ingredients for Butterbeer cookies and their substitutes. We explained step-by-step instructions to create them perfectly, plus tips for baking and serving. I shared fun variations and storage methods to keep your cookies fresh. Remember, these cookies bring a bit of magic to any occasion. Trust me, you’ll impress everyone with your baking skills. So, gather your ingredients, follow the steps, and enjoy the process!

- 2 ½ cups all-purpose flour - 1 teaspoon baking soda - ½ teaspoon salt - 1 cup unsalted butter, softened - 1 cup brown sugar, packed - ½ cup granulated sugar - 1 tablespoon vanilla extract - 2 large eggs - 1 tablespoon butterscotch syrup (or caramel syrup as a substitute) - 1 cup butterscotch chips - 1 cup white chocolate chips - Pinch of nutmeg (optional) These ingredients create a rich and tasty cookie. Each one adds to the overall flavor. The butterscotch and white chocolate chips give a delightful sweetness. You can also add a pinch of nutmeg for warmth. - If you need a different flavor, use caramel syrup instead of butterscotch. - For a gluten-free option, try using gluten-free flour blends. - If you want a dairy-free cookie, use coconut oil or a dairy-free butter. Feel free to swap ingredients based on your needs. These simple changes let everyone enjoy these cookies. Whether you have dietary needs or just want to try something new, these swaps can work well. 1. Preheat your oven to 350°F (175°C). Line two baking sheets with parchment paper. This keeps the cookies from sticking. 2. In a medium bowl, whisk together 2 ½ cups of flour, 1 teaspoon of baking soda, and ½ teaspoon of salt. If you like, add a pinch of nutmeg for extra flavor. 3. In a large mixing bowl, cream 1 cup of softened butter, 1 cup of brown sugar, and ½ cup of granulated sugar. Mix until it’s light and fluffy, about 3 to 4 minutes. 1. Add 1 tablespoon of vanilla extract and 1 tablespoon of butterscotch syrup to the butter mixture. Mix well to combine. 2. Beat in 2 large eggs, one at a time. Make sure each egg is fully mixed before adding the next. 3. Gradually add the dry mixture to the wet ingredients. Mix just until combined. This helps keep the dough soft. 4. Fold in 1 cup of butterscotch chips and 1 cup of white chocolate chips. Ensure they are evenly spread throughout the dough. 1. Scoop tablespoon-sized balls of dough and place them on the prepared baking sheets. Leave some space between each cookie. 2. Bake for 10 to 12 minutes. The edges should be lightly golden and the centers set. Keep an eye on them! 3. After baking, let the cookies cool on the sheets for 5 minutes. Then, transfer them to wire racks to cool completely. Enjoy your delicious treats! For the full recipe, check the instructions above! To make the best Harry Potter Butterbeer cookies, start with your oven. Each oven is different. You may need to adjust your baking time. If your cookies look brown but feel soft, they are likely ready. Check them at the 10-minute mark. Next, let's talk about texture. You want your cookies soft and chewy, not hard. To help with this, chill the dough for at least 30 minutes. Chilling firms the dough, making it easier to scoop and shape. It also helps the flavors blend well. When serving your Butterbeer cookies, think about fun ways to present them. Use a whimsical jar to make them look magical. You can also stack them on a fun platter. For a Harry Potter theme, consider using themed containers. Think about using a decorative box that looks like a Hogwarts letter. You can also sprinkle powdered sugar on top for a snowy effect. Many people make mistakes while baking cookies. One common mistake is overmixing the dough. This can make your cookies tough. Mix just until you combine the ingredients. Another mistake is not measuring ingredients correctly. Always use dry measuring cups for flour and sugar. Too much flour can make cookies dry and crumbly. Lastly, don’t forget to cool your cookies properly. If you move them too soon, they may break. Let them cool on the baking sheet for five minutes. Then, transfer them to wire racks to cool completely. Follow these tips, and you'll have perfect Butterbeer cookies every time! For the complete recipe, check out the Full Recipe. {{image_2}} You can make these Butterbeer cookies even better with some fun add-ins! - Spices: Try adding cinnamon or ginger for warmth. They add a cozy feel. - Mix-ins: You can include things like chopped nuts or different types of chocolate for extra flavor. - Vegan Options: If you want a vegan version, swap the butter for coconut oil and use flax eggs. Make these cookies special for any holiday! - Holidays: For Christmas, add a hint of peppermint extract for a festive twist. - Seasonal Ingredients: Use pumpkin spice in fall for a rich flavor. It fits the season perfectly. - Themed Events: For Harry Potter parties, use cookie cutters to shape them like stars or wands. You can change how you bake these cookies for variety! - Bars: Instead of individual cookies, bake the dough as bars. Just adjust the baking time. - Thickness: If you want chewy cookies, make the dough balls thicker. For crispy, flatten them more. - Shapes: Get creative! You can cut them into different shapes or even make sandwiches with frosting. These variations make the Butterbeer cookies fun and exciting. Check out the Full Recipe for more details! To keep your Harry Potter Butterbeer Cookies fresh, store them in an airtight container. This helps prevent them from drying out. I recommend using a plastic or glass container with a tight lid. You can also use a resealable plastic bag. - In the fridge: Cookies last about one week. - In the pantry: They stay fresh for up to ten days. You can freeze both the dough and baked cookies. For unbaked dough, scoop the dough onto a baking sheet. Freeze until solid, then store in a bag. When you want to bake, just thaw the dough in the fridge overnight. To freeze baked cookies, place them in an airtight container with parchment paper between layers. They can last up to three months in the freezer. To reheat cookies, use the oven for the best results. Preheat it to 300°F (150°C). Place the cookies on a baking sheet for about five minutes. This warms them without drying them out. You can also use a microwave. Heat the cookies for about ten seconds. This warms them up but be careful not to overheat them. Enjoy your soft, warm Butterbeer Cookies! These cookies connect to the magical world of Harry Potter. They bring the flavor of Butterbeer right to your kitchen. The sweet taste comes from butterscotch and white chocolate chips. A pinch of nutmeg adds a warm touch. This unique flavor profile makes them a delight for fans of all ages. Yes, you can make these cookies in advance! Prepare the dough and chill it for a few hours. This helps the flavors blend better. You can also bake the cookies ahead and store them. Just make sure to follow proper storage tips for best results. Store leftover cookies in an airtight container. This keeps them fresh for about a week. You can also freeze them for longer storage. To maintain texture, place parchment paper between layers. This way, they stay soft and tasty even after freezing. In this post, we covered the essential ingredients for Butterbeer cookies and their substitutes. We explained step-by-step instructions to create them perfectly, plus tips for baking and serving. I shared fun variations and storage methods to keep your cookies fresh. Remember, these cookies bring a bit of magic to any occasion. Trust me, you'll impress everyone with your baking skills. So, gather your ingredients, follow the steps, and enjoy the process!

Harry Potter Butterbeer Cookies

Experience the magic of the Wizarding World with these delightful Harry Potter Butterbeer Cookies! Soft, chewy, and bursting with butterscotch and white chocolate, these cookies are perfect for any Harry Potter fan or cookie lover. With just a few simple ingredients, you can create a delicious treat that transports you to your favorite magical moments. Click through to discover the full recipe and bake your own batch of enchantment!

Ingredients
  

2 ½ cups all-purpose flour

1 teaspoon baking soda

½ teaspoon salt

1 cup unsalted butter, softened

1 cup brown sugar, packed

½ cup granulated sugar

1 tablespoon vanilla extract

2 large eggs

1 tablespoon butterscotch syrup (or caramel syrup as a substitute)

1 cup butterscotch chips

1 cup white chocolate chips

Pinch of nutmeg (optional)

Instructions
 

Preheat your oven to 350°F (175°C) and line two baking sheets with parchment paper.

    In a medium bowl, whisk together the flour, baking soda, salt, and nutmeg (if using). Set aside.

      In a large mixing bowl, cream together the softened butter, brown sugar, and granulated sugar until light and fluffy, about 3-4 minutes.

        Add the vanilla extract and butterscotch syrup to the butter mixture, mixing well.

          Beat in the eggs, one at a time, ensuring they are fully incorporated after each addition.

            Gradually add the dry ingredient mixture to the wet ingredients, mixing until just combined.

              Fold in the butterscotch and white chocolate chips until evenly distributed.

                Drop tablespoon-sized balls of dough onto the prepared baking sheets, leaving enough space between each cookie.

                  Bake for 10-12 minutes or until the edges are lightly golden and the centers are set.

                    Remove from the oven and allow the cookies to cool on the baking sheets for 5 minutes before transferring them to wire racks to cool completely.

                      Prep Time: 15 minutes | Total Time: 30 minutes | Servings: About 24 cookies

                        - Presentation Tips: Dust the cooled cookies with a sprinkle of powdered sugar and serve in a whimsical jar or on a decorative platter for a magical touch!

                          WANT TO SAVE THIS RECIPE?