WANT TO SAVE THIS RECIPE?
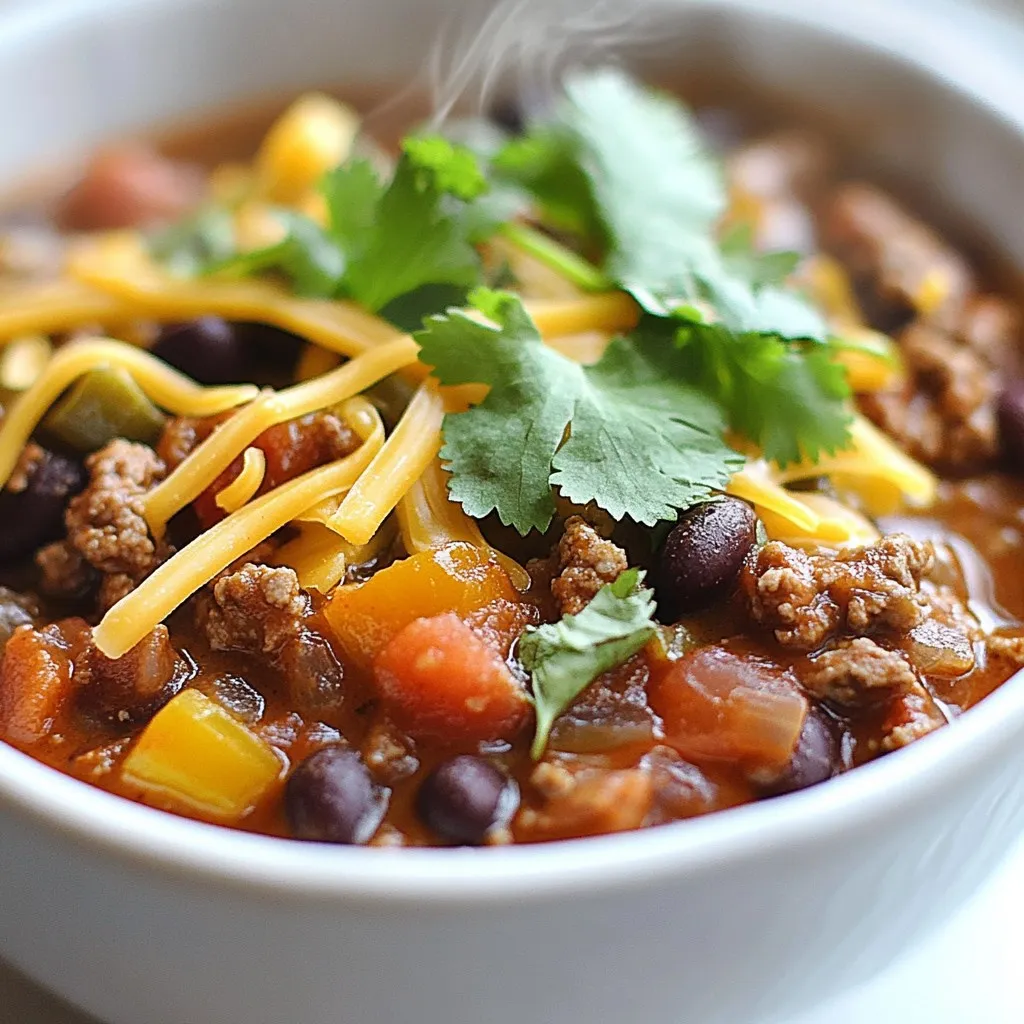
If you crave a warm, hearty dish that feels like a big hug, you’re in the right place! My Homestyle Classic Chili recipe combines ground meat, beans, and savory spices for a meal you’ll love. Whether you’re cooking for a crowd or just yourself, this chili is perfect for any occasion. Ready to dig into this flavor-packed journey? Let’s get cooking!
Why I Love This Recipe
- Comforting and Hearty: This classic chili recipe is the epitome of comfort food, providing warmth and satisfaction with every spoonful.
- Easy to Customize: With options to adjust the heat level and add your favorite toppings, you can make this chili your own!
- Perfect for Meal Prep: This recipe yields a generous amount, making it perfect for leftovers or freezing for busy weeknights.
- Family-Friendly: With its mild flavor and hearty ingredients, this chili appeals to both kids and adults alike.
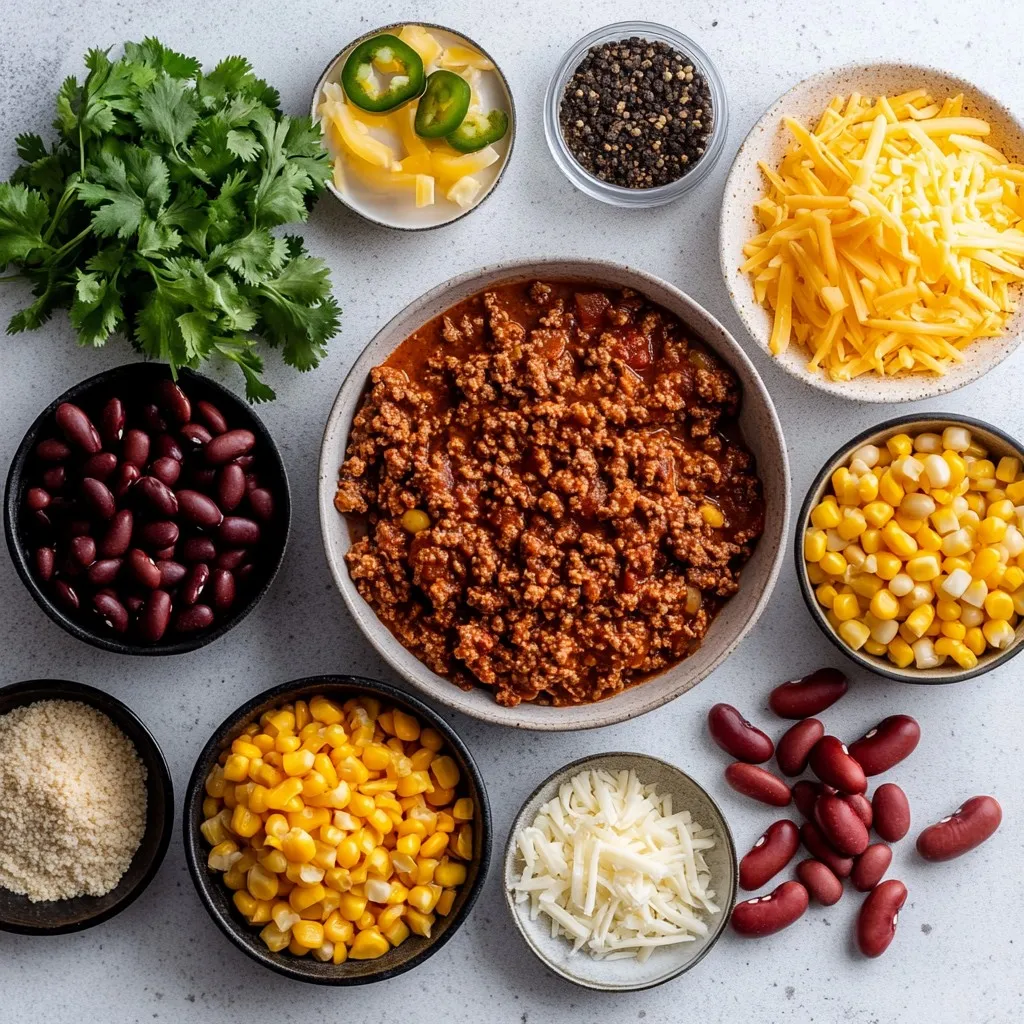
Ingredients
Main ingredients for Homestyle Classic Chili
– 1 pound ground beef or turkey
– 1 large onion, diced
– 3 cloves garlic, minced
– 2 cans (15 oz each) kidney beans, drained and rinsed
– 1 can (15 oz) black beans, drained and rinsed
– 1 can (28 oz) diced tomatoes with juices
For a hearty chili, I always start with ground beef or turkey. This gives the dish a rich flavor and a nice texture. Next, I add a large onion and three cloves of garlic. These aromatics add depth and warmth. Beans are a must for heartiness. I use kidney beans and black beans for variety. Diced tomatoes bring moisture and acidity, which balances the richness of the meat.
Spices and seasoning essentials
– 2 tablespoons chili powder
– 1 tablespoon ground cumin
– 1 teaspoon smoked paprika
– 1 teaspoon dried oregano
– 1 teaspoon salt
– ½ teaspoon black pepper
Spices make or break chili. I use two tablespoons of chili powder for a robust flavor. Ground cumin adds earthiness, while smoked paprika brings a subtle smokiness. Dried oregano adds an herbal note. Finally, I season with salt and black pepper to enhance all the flavors.
Optional ingredients for extra flavor
– 1-2 jalapeños, diced (optional, for heat)
– 2 cups beef or vegetable broth
– 1 cup corn (frozen or canned)
– Fresh cilantro and shredded cheese, for garnish
For those who like heat, I add jalapeños. They give a nice kick. If you prefer a milder chili, leave them out. I also add broth for a rich base and corn for sweetness. To finish, I like to garnish with fresh cilantro and shredded cheese. This adds color and freshness to each bowl.
Step-by-Step Instructions
Cooking the meat and aromatics
Browning the ground meat
Start by heating a large pot or Dutch oven over medium heat. Add 1 pound of ground beef or turkey. Cook it until it turns brown. Make sure to break it up with a spatula as it cooks. This helps it brown evenly. If there is extra fat, drain it away.
Sautéing onions and garlic
Next, add 1 large diced onion. Then, add 3 cloves of minced garlic. Stir the mix for about 3 to 4 minutes. You want the onion to turn soft and clear. This adds a nice flavor base to your chili.
Building the chili base
Adding spices and toasting
Now, it’s time to add flavor! Stir in 2 tablespoons of chili powder, 1 tablespoon of ground cumin, 1 teaspoon of smoked paprika, 1 teaspoon of dried oregano, 1 teaspoon of salt, and ½ teaspoon of black pepper. If you like heat, add 1 to 2 diced jalapeños. Cook this mix for 1 to 2 minutes. This toasts the spices and boosts their taste.
Incorporating tomatoes and beans
Next, pour in 1 can of diced tomatoes with their juices. Add 2 cans of drained kidney beans and 1 can of drained black beans. Don’t forget to add 1 cup of corn, either frozen or canned. Mix everything well to combine all the flavors.
Simmering for the best flavor
Bringing to a boil and simmering
Now, add 2 cups of beef or vegetable broth to the pot. Bring the mixture to a boil. Once it starts bubbling, reduce the heat to low. Let it simmer for at least 30 minutes. For even richer flavors, let it simmer for up to 1 hour. Stir it occasionally to avoid sticking.
Adjusting seasoning to taste
After simmering, taste your chili. You may need to adjust the salt or spices. Feel free to add more if you like. Serve your chili hot. Enjoy the hearty and rich flavors you created!
Tips & Tricks
Achieving the best flavors
To make your chili taste great, toasting spices is key. Toasting brings out the rich flavors. When you add the chili powder, cumin, and smoked paprika, cook them for a bit. This step wakes up the spices and makes the dish pop.
Simmering also plays a big role in flavor. The longer you let your chili simmer, the better it gets. Aim for at least 30 minutes. For even richer taste, try simmering for an hour or more. This time allows the flavors to blend and deepen.
Pressure cooking or slow cooking options
If you want to save time, use an Instant Pot. Brown your meat first, then add all the ingredients. Secure the lid and cook on high for about 15 minutes. This method locks in flavors quickly.
You can also use a slow cooker. Brown the meat and sauté the onions and garlic as usual. Then, add everything to the slow cooker. Set it on low for 6-8 hours. This method creates a deep, rich flavor.
Serving suggestions
For a hearty meal, serve your chili with crusty bread or rice. The bread is great for dipping, and the rice soaks up the chili’s sauce.
Garnishing adds a nice touch. Top your chili with fresh cilantro and shredded cheese. You could also add a dollop of sour cream for creaminess. Enjoy your delicious bowl of homestyle chili!
Pro Tips
- Use Fresh Ingredients: Fresh herbs and spices enhance the flavor of your chili. Always opt for fresh garlic and onion when possible.
- Adjust the Heat: For spicier chili, add more jalapeños or a dash of cayenne pepper. Taste as you go to find your perfect heat level.
- Simmer Longer for Depth: Allowing the chili to simmer for at least an hour will deepen the flavors. Don’t rush this step!
- Experiment with Toppings: Beyond cilantro and cheese, try adding avocado, sour cream, or crushed tortilla chips for extra texture and flavor.

Variations
Ingredient substitutions
You can switch up the proteins in your chili. Use ground turkey for a leaner option. For a vegetarian version, try lentils or crumbled tofu. Both will soak up flavors well.
You can also play with the beans. Black beans add a rich taste, while pinto beans lend creaminess. If you want a different twist, use chickpeas or navy beans. As for tomatoes, diced tomatoes with green chilies can add a nice kick.
Regional chili styles
Chili varies by region. Texas chili often skips beans and focuses on beef. It’s all about the meat and spices. Traditional chili, however, usually includes beans and tomatoes. You can add unique ingredients like beer or cocoa powder to give it a special touch.
In New Mexico, green chili peppers bring a fresh flavor. In Cincinnati, chili often contains cinnamon and chocolate. Explore these styles for a fun twist on your homestyle chili.
Heat level adjustments
To control the spice, start with one jalapeño. Taste as you go. If you want more heat, add another. You can also use chili powder for a milder spice.
To balance heat, add a touch of sweetness. A teaspoon of brown sugar or honey can help. You can also add a dollop of sour cream. This cools down the heat and makes each bite smooth.
Storage Info
How to properly store leftover chili
To keep your chili fresh, store it in a clean container. Let it cool to room temperature first.
– Refrigeration guidelines: Place the container in the fridge. Use it within three to four days. Make sure it is sealed well to stop any odors from mixing.
– Freezing for future meals: If you have more, freeze it! Use freezer-safe bags or containers. It can last for up to three months. Remember to label the container with the date.
Reheating tips
When you want to enjoy your leftover chili, here are the best ways to reheat it.
– Best methods for reheating chili: The stove works great. Pour the chili into a pot and heat it gently. Stir often to prevent sticking. You can also use the microwave. Heat in short bursts and stir in between.
– Keeping texture and flavor intact: Add a splash of broth or water if it looks too thick. This helps keep the chili moist. Taste and adjust seasonings if needed.
Shelf life of Homestyle Chili
It’s important to know how long your chili stays fresh.
– Understanding freshness and safety: When stored in the fridge, chili lasts about three to four days. If frozen, it can stay good for up to three months. Always check for any off smell or mold before eating. If in doubt, throw it out.
FAQs
What is the best way to thicken chili?
To thicken chili, you have a few good options. First, let it simmer longer. This lets water cook off. Another way is to mash some beans. This adds texture and body. You can also use flour or cornstarch. Mix one tablespoon of either with a bit of water. Stir this mixture into your chili and let it cook for a few more minutes. This will help it thicken nicely.
Can I make chili ahead of time?
Yes, you can make chili ahead of time. It often tastes better the next day. The flavors meld together as it sits. To store pre-made chili, let it cool first. Then, place it in an airtight container. You can keep it in the fridge for up to four days. For longer storage, you can freeze it. Just make sure to leave some space in the container, as it expands.
How do I make chili less spicy?
If your chili is too spicy, there are ways to fix it. You can add more beans or tomatoes. This will help dilute the heat. Another method is to add some creaminess. Stir in a bit of sour cream or cream cheese. You can also add sweetness, like sugar or honey. This balances the heat and makes the dish more enjoyable.
In this blog post, we explored the best ingredients for homestyle classic chili and how to cook it step-by-step. You learned about essential spices, optional ingredients, and tips for great flavor. I shared several variations and ways to store your chili. Remember, making chili can be fun and flexible. Feel free to adjust the heat and ingredients to fit your taste. Enjoy your cooking, and savor every bite of your delicious, homemade chil
Homestyle Classic Chili
A hearty and flavorful chili made with ground meat, beans, and spices, perfect for a comforting meal.
Course Main Course
Cuisine American
Servings 6
Calories 350 kcal
- 1 pound ground beef or turkey
- 1 large onion, diced
- 3 cloves garlic, minced
- 2 cans kidney beans, drained and rinsed (15 oz each)
- 1 can black beans, drained and rinsed (15 oz)
- 1 can diced tomatoes with juices (28 oz)
- 2 tablespoons chili powder
- 1 tablespoon ground cumin
- 1 teaspoon smoked paprika
- 1 teaspoon dried oregano
- 1 teaspoon salt
- 0.5 teaspoon black pepper
- 1-2 jalapeños, diced (optional, for heat)
- 2 cups beef or vegetable broth
- 1 cup corn (frozen or canned)
- Fresh cilantro and shredded cheese, for garnish
In a large pot or Dutch oven over medium heat, add the ground beef or turkey. Cook until browned, breaking it apart with a spatula. Drain excess fat if needed.
Add the diced onion and minced garlic to the pot, stirring for about 3-4 minutes until the onion is translucent.
Stir in the chili powder, cumin, smoked paprika, oregano, salt, black pepper, and jalapeños. Cook for another 1-2 minutes to toast the spices.
Pour in the diced tomatoes and their juices, along with the beans (kidney and black), and corn. Mix well to combine.
Add the broth to the pot and bring the mixture to a boil.
Reduce the heat to low and let it simmer for at least 30 minutes, stirring occasionally. For richer flavors, simmer up to 1 hour.
Adjust seasoning to taste and serve hot.
Ladle the chili into bowls, and top with fresh cilantro and shredded cheese. Serve with crusty bread or over rice for a hearty meal!
Keyword beans, chili, comfort food, spicy
WANT TO SAVE THIS RECIPE?