Craving a quick and tasty dinner? Japanese katsu bowls offer crispy delights that you can whip up in no time. Whether you choose chicken, pork, or tofu, this dish will please everyone at your table. With easy steps for cooking jasmine rice and tips for getting that perfect crunch, you’ll want to make this meal again and again. Let’s dive into this mouth-watering recipe!
Ingredients
Main Ingredients for Japanese Katsu Bowls
– 2 boneless chicken breasts
– Salt and pepper to taste
– 1 cup all-purpose flour
– 2 large eggs, beaten
– 2 cups panko breadcrumbs
– Vegetable oil for frying
– 2 cups jasmine rice
– 2 cups water
For a quick start, you can use pork or tofu instead of chicken. Each option brings its own flavor and texture. The secret to a great katsu bowl lies in the crispy coating. Panko breadcrumbs create a light, crunchy finish. You can also use crushed cornflakes or regular breadcrumbs if needed.
When cooking jasmine rice, I use a 1:1 ratio of rice to water. This helps the rice cook perfectly. Rinse the rice before cooking to remove excess starch. This step keeps it fluffy and light.
Garnishes and Sauces
– 1 cup shredded cabbage (for garnish)
– 1 small carrot, grated (for garnish)
– 2 green onions, sliced (for garnish)
– Tonkatsu sauce (for drizzling)
– Sesame seeds (optional, for garnish)
For garnishes, I love using shredded cabbage, grated carrot, and sliced green onions. These add color and crunch to the dish. The star is tonkatsu sauce, a sweet and savory sauce that pairs perfectly with katsu. Try making your own with ketchup, Worcestershire sauce, and sugar for a fun twist.
Optional sesame seeds add a nice touch. They give a nutty flavor and a bit of crunch. It’s all about balance and fun with flavors. You can find the Full Recipe to guide you through making these tasty katsu bowls.
Step-by-Step Instructions
Preparing the Chicken
To make chicken katsu, start by getting the right thickness. Take your chicken breasts and place them between two sheets of plastic wrap. Use a meat mallet to gently pound them until they are about half an inch thick. This helps them cook evenly. Next, season both sides with salt and pepper. This adds flavor to the chicken.
Set up your breading station. You will need three bowls. In the first bowl, add one cup of all-purpose flour. In the second bowl, crack two large eggs and beat them well. In the third bowl, place two cups of panko breadcrumbs. This setup makes breading easy and fun.
Cooking the Rice and Chicken
For perfect jasmine rice, measure two cups of rice and two cups of water. Combine them in a medium saucepan. Bring this mix to a boil over high heat. Once boiling, lower the heat, cover the pan, and let it simmer for about 15 minutes. After that, remove it from heat and let it sit for another five minutes. This will give you fluffy rice.
Now, it’s time to fry the chicken. Heat about half an inch of vegetable oil in a large skillet over medium heat. When the oil is hot, carefully add the breaded chicken to the pan. Fry each piece for about five to seven minutes on each side. You want them to be golden brown and fully cooked. Once done, place them on a paper towel-lined plate to drain any extra oil.
Assembling the Katsu Bowls
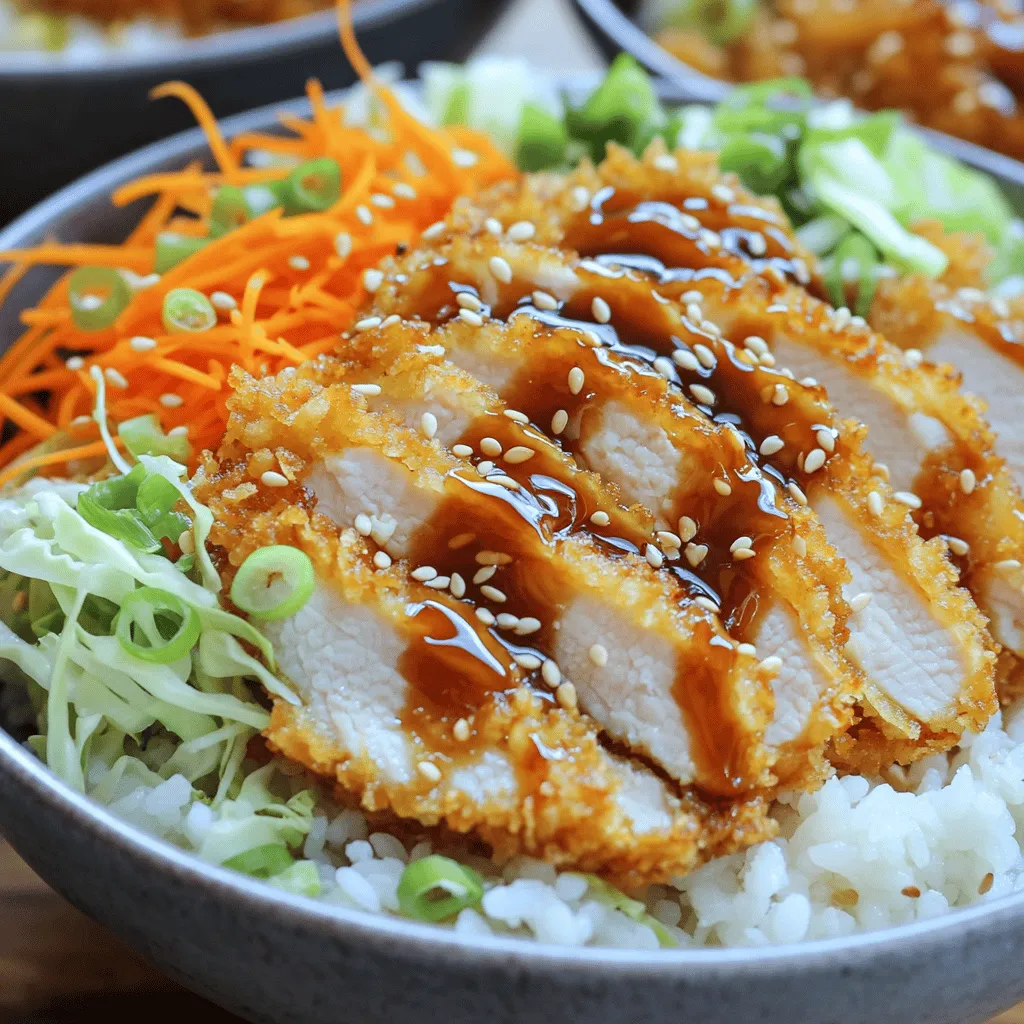
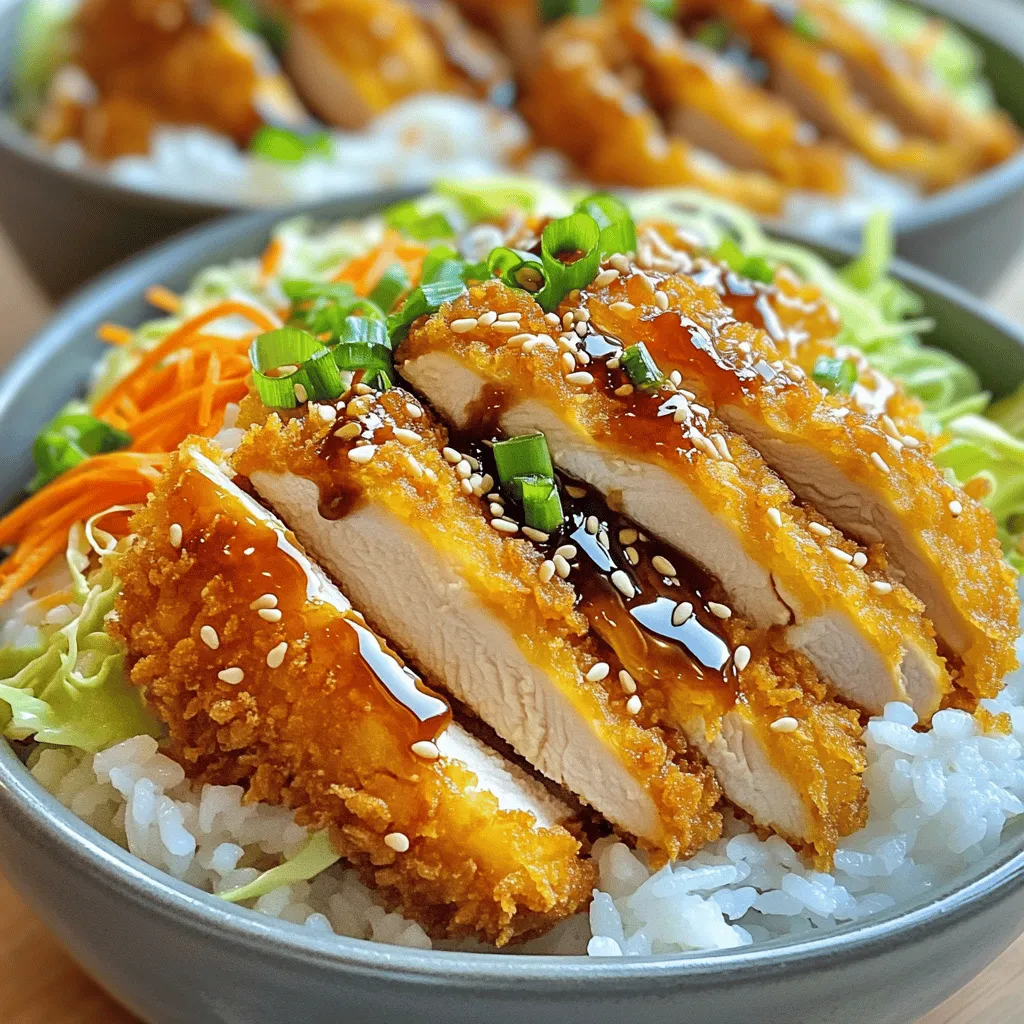
Now it’s time to put it all together. Take a deep bowl and add a generous scoop of your cooked jasmine rice. Next, place the sliced chicken katsu on top. This creates a nice base for your bowl. For a beautiful presentation, add shredded cabbage, grated carrot, and sliced green onions on top of the chicken.
For the final touch, drizzle some tonkatsu sauce over the chicken. If you like, sprinkle sesame seeds on top for extra flavor. Enjoy your delicious and easy chicken katsu bowl! For a full recipe, check out the Full Recipe section.
Tips & Tricks
Achieving the Perfect Crisp
To get that perfect crunch, start with the right breading. First, set up your three-bowl station. Use flour, beaten eggs, and panko breadcrumbs. Dredge the chicken in flour, coat it with egg, and press it into the panko. This layering locks in the crispiness.
Oil temperature matters. Heat your oil to about 350°F (175°C). If it’s too hot, the outside burns while the inside stays raw. Test the oil by dropping a small piece of bread into it. If it bubbles and sizzles, you are ready to fry.
Flavor Enhancements
Add more flavor with tasty toppings. Try avocado slices, pickled ginger, or even a slice of lemon. These add freshness and zing to your bowl. Drizzle extra tonkatsu sauce on top for a richer taste.
Marinating your chicken can also elevate the dish. Use soy sauce or a simple garlic and ginger mix. Let the chicken soak for at least 30 minutes. This makes the meat juicy and flavorful.
Common Mistakes to Avoid
Avoid overcooking your chicken. It should reach an internal temperature of 165°F (74°C). Use a meat thermometer for accuracy. Under-cooked chicken can lead to foodborne illness, so check carefully.
Soggy breading is a common issue. To prevent this, make sure your chicken is dry before breading. After frying, place the chicken on a paper towel-lined plate to absorb excess oil. This keeps the crust nice and crispy.
For the Full Recipe, visit the main section!
Variations
Different Types of Katsu Bowls
Katsu bowls can vary in meat and style. You can choose chicken katsu or pork katsu. Chicken katsu is lighter and has a mild flavor. Pork katsu, on the other hand, is richer and a bit juicier. Both types offer crispy bites that are hard to resist.
For those who follow a vegetarian or vegan diet, tofu is a great option. You can press firm tofu and slice it into thick pieces. Coat the tofu like you would chicken or pork. This gives you a crispy and savory katsu that everyone can enjoy.
Sauce Variations
Tonkatsu sauce is the classic choice for katsu bowls. You can make it at home using ketchup, Worcestershire sauce, soy sauce, and a touch of sugar. Mix these ingredients together for a sweet and tangy flavor that pairs well with the crispy katsu.
You could also try other sauces for a twist. Sweet chili sauce adds a nice kick. Teriyaki sauce gives a sweet glaze that makes the dish shine. Experiment with different sauces to find your favorite!
Side Dish Recommendations
Katsu bowls shine when paired with great sides. Popular side dishes include miso soup or a simple salad. A bowl of miso soup warms you up and adds a nice touch. A fresh salad with crisp veggies balances the meal.
Japanese pickles, called tsukemono, can also enhance your meal. They add a crunchy texture and a burst of flavor. Serve these alongside your katsu bowl for a complete, satisfying dinner.
Storage Info
How to Store Leftovers
After enjoying your katsu bowls, store leftovers in the fridge. Place the chicken, rice, and toppings in separate airtight containers. This keeps them fresh. Chicken lasts about 3 days. Rice stays good for 4 days. Toppings like cabbage and carrots should be used within 2 days for best taste.
Reheating Instructions
To reheat katsu without losing crispiness, use an oven or an air fryer. Preheat the oven to 350°F (175°C) and heat for about 10 minutes. If using an air fryer, set it to 350°F (175°C) for 5-7 minutes. This method revives the crispy texture. For rice, add a splash of water and cover to prevent dryness. Heat in the microwave for 1-2 minutes.
Freezing Tips
You can freeze cooked katsu components for later use. Wrap chicken tightly in plastic wrap and place in a freezer-safe bag. Rice can be frozen in a similar way. Both can stay good for up to 3 months. When ready to eat, thaw overnight in the fridge. Reheat them as outlined above to enjoy the same great taste.
FAQs
What is the difference between katsu and schnitzel?
Katsu and schnitzel are both breaded meat dishes. Katsu comes from Japan, while schnitzel is from Germany or Austria. The main difference is in the coating. Katsu uses panko breadcrumbs, which give it a light and crispy texture. Schnitzel typically uses regular breadcrumbs. The meats can also differ; katsu often uses chicken or pork, while schnitzel can use veal or chicken. Both dishes are delicious, but katsu has a unique Japanese twist with its sauces and garnishes.
Can I make katsu bowls gluten-free?
Yes, you can make katsu bowls gluten-free! For the breading, use gluten-free panko breadcrumbs instead of regular ones. You can also use almond flour or crushed cornflakes as alternatives. For rice, jasmine rice is naturally gluten-free, so you are safe there. Always check labels to ensure your ingredients are gluten-free. This way, everyone can enjoy a tasty katsu bowl!
How to make katsu sauce from scratch?
Making katsu sauce from scratch is easy! You will need ketchup, Worcestershire sauce, soy sauce, sugar, and a dash of garlic powder. Mix these ingredients in a bowl until smooth. This simple sauce adds a sweet and tangy flavor to your katsu bowl. For more details, check the Full Recipe.
In this blog post, we explored the key ingredients and steps for making delicious Japanese katsu bowls. We discussed chicken, panko, and perfect rice, along with essential garnishes and sauces. I shared tips for cooking techniques to ensure crispiness and flavor. You learned about variations, ideal pairings, and how to store leftovers effectively.
Remember, your katsu experience can be unique. Experiment with flavors, sauces, and proteins. Enjoy creating a dish that suits your taste!
