![Detailed Ingredients for Brownies - 1 cup unsalted butter - 2 cups granulated sugar - 4 large eggs - 1 tablespoon vanilla extract - 1 cup all-purpose flour - 1/2 cup unsweetened cocoa powder - 1/2 teaspoon salt - 2 cups semi-sweet chocolate chips Ingredients for Chocolate Mousse - 1 cup heavy cream - 2 tablespoons powdered sugar - 1 teaspoon vanilla extract (for mousse) Garnishing Ingredients - Dark chocolate shavings To make these layered chocolate mousse brownies, you need simple ingredients. Each one adds a unique flavor. The butter makes the brownies rich. The sugar gives them sweetness. Eggs help bind everything together. Vanilla adds a lovely touch. The flour and cocoa powder create the brownie base. For the mousse, heavy cream makes it light. Powdered sugar sweetens it up. The vanilla extract in the mousse gives it a nice flavor boost. Finally, dark chocolate shavings make a beautiful garnish. They add an extra chocolate kick. This combination makes every bite a delight. You can find the complete recipe [Full Recipe] here. First, set your oven to 350°F (175°C). This step ensures even baking. Grease a 9x13-inch baking pan with butter. You can also line it with parchment paper. Parchment helps the brownies come out easily. In a medium saucepan, melt the butter over low heat. After it melts, take it off the heat. Stir in the granulated sugar until it blends well. Next, add the eggs, one at a time. Mix well after each egg. Then, add in the vanilla extract. In another bowl, mix the flour, cocoa powder, and salt. Slowly fold the dry mix into the wet ingredients. Be gentle to keep the batter fluffy. Finally, fold in the chocolate chips for that gooey texture. Pour the batter into the prepared pan and spread it evenly. Now, bake your brownies for 20-25 minutes. Check if a toothpick comes out slightly moist but no wet batter remains. Once baked, let the brownies cool completely in the pan. This cooling step is key for a great mousse layer. While the brownies cool, prepare the mousse. In a medium bowl, beat the heavy cream with powdered sugar and vanilla extract. Beat until stiff peaks form. This step adds lightness to your mousse. Take half of the whipped cream and gently fold it into the melted chocolate. Make sure the chocolate is cool first. This helps mix the chocolate without losing air. Then, fold in the rest of the whipped cream. This creates a light, airy texture. Once your brownies are cooled, it's time to add the mousse. Spread a generous layer of chocolate mousse over the brownies. Use a spatula to smooth it out. Afterward, refrigerate the layered brownies for at least 2 hours. This allows the mousse to set and gives you that perfect slice. Refer to the Full Recipe for more details on the ingredients and steps. Ensuring Proper Mixing Mixing is key to great brownies. Start with melted butter and sugar. Stir well until smooth. Then, add eggs one at a time. This keeps the mix creamy. Fold in the dry ingredients gently. Over-mixing can make brownies tough. Aim for a smooth batter with some lumps of flour. Baking Time Adjustments Baking times can vary. Always check the brownies after 20 minutes. Insert a toothpick into the center. If it comes out with a few moist crumbs, they're done. If it has wet batter, they need more time. Let them cool in the pan for perfect texture. Tips for Light and Fluffy Mousse For a light mousse, start with cold cream. Beat it until stiff peaks form. Gently fold in melted chocolate. Don’t stir too hard; you want air in the mousse. This keeps it fluffy and light. Serving Temperature Recommendations Serve the mousse cold. After chilling, it firms up nicely. Cut the brownies into squares after they chill for two hours. The mousse layer will set well, making each bite a delight. Enjoy these treats chilled for the best taste! For the full recipe, check the details above. {{image_2}} Adding Flavored Extracts You can boost the taste of your brownies with flavored extracts. Try almond, mint, or orange. Add just a teaspoon for a nice twist. These flavors mix well with chocolate. They bring out a rich, bold taste. Incorporating Different Chocolate Types Switching chocolate types can change the whole dessert. Use milk chocolate for a sweeter brownie or dark chocolate for a richer flavor. You could even mix different types for depth. This adds a fun layer of taste in every bite. Gluten-Free Options Making gluten-free brownies is simple. Swap all-purpose flour with almond or coconut flour. The texture might change slightly, but the taste stays great. You can also use gluten-free baking mixes, which work well. Substituting Ingredients for Vegan Version To make these brownies vegan, replace eggs with flaxseed meal or applesauce. Use plant-based butter instead of regular butter. For the mousse, substitute heavy cream with coconut cream. This keeps the dessert creamy and delicious while being plant-friendly. For more details, check the Full Recipe to create your perfect layered chocolate mousse brownies! Refrigeration Guidelines Once your layered chocolate mousse brownies are made, store them in the fridge. Use an airtight container to keep them fresh. This helps maintain the rich texture of the mousse and the softness of the brownies. Make sure they are completely cooled before storing. They can stay fresh for up to a week in the fridge. Freezing Brownies and Mousse You can freeze these brownies for later enjoyment. First, cut them into squares. Wrap each piece in plastic wrap. Then, place them in a freezer-safe bag or container. This prevents freezer burn. They can last in the freezer for about three months. Thaw them in the fridge before serving. This keeps the mousse from becoming too soft. How Long Do Layered Chocolate Mousse Brownies Last? Layered chocolate mousse brownies last about 5 to 7 days in the fridge. If frozen, they last about three months. Always check for freshness before eating. Signs of Spoilage Look for changes in texture or smell. If the mousse looks watery or the brownies feel hard, it’s time to toss them. Foul odors or mold are also clear signs that they have gone bad. Enjoy them fresh for the best taste! Can I make these brownies ahead of time? Yes, you can make these brownies ahead of time. Bake them a day before. Once cooled, cover them tightly. This keeps them fresh. You can add mousse the next day. Just remember to refrigerate them until serving. What chocolate should I use for the mousse? Use semi-sweet chocolate for a balanced taste. It adds a rich flavor. Dark chocolate works too if you want it more intense. Make sure to melt the chocolate gently. This helps keep it smooth. How do I make the brownies fudgier? To make fudgier brownies, add an extra egg. You can also reduce the baking time. Check them a few minutes early. Less time means more moisture. Try using less flour as well for a denser texture. What if my brownies are too dry? If your brownies are dry, check your oven temperature. An oven that is too hot can dry them out. You can also add a bit of melted butter or cream. This will help bring back moisture. How to fix runny mousse? If your mousse is runny, make sure your cream is whipped stiff. You can beat it a bit longer. If it's still runny, chill it for a while. This gives it time to set. If needed, you can fold in more melted chocolate to thicken it. In this post, we covered how to make layered chocolate mousse brownies. We looked at the key ingredients, including those for garnishing. Then, I guided you step-by-step through baking the brownies and making the mousse. Tips helped you achieve the best texture and serving experiences. Lastly, I shared variations and storage tips. Enjoy making and sharing this dessert. It’s fun, delicious, and sure to impress!](https://tossedrecipes.com/wp-content/uploads/2025/07/9d5d1a04-9ce7-4e33-bacd-73e97e17c1f9.webp)
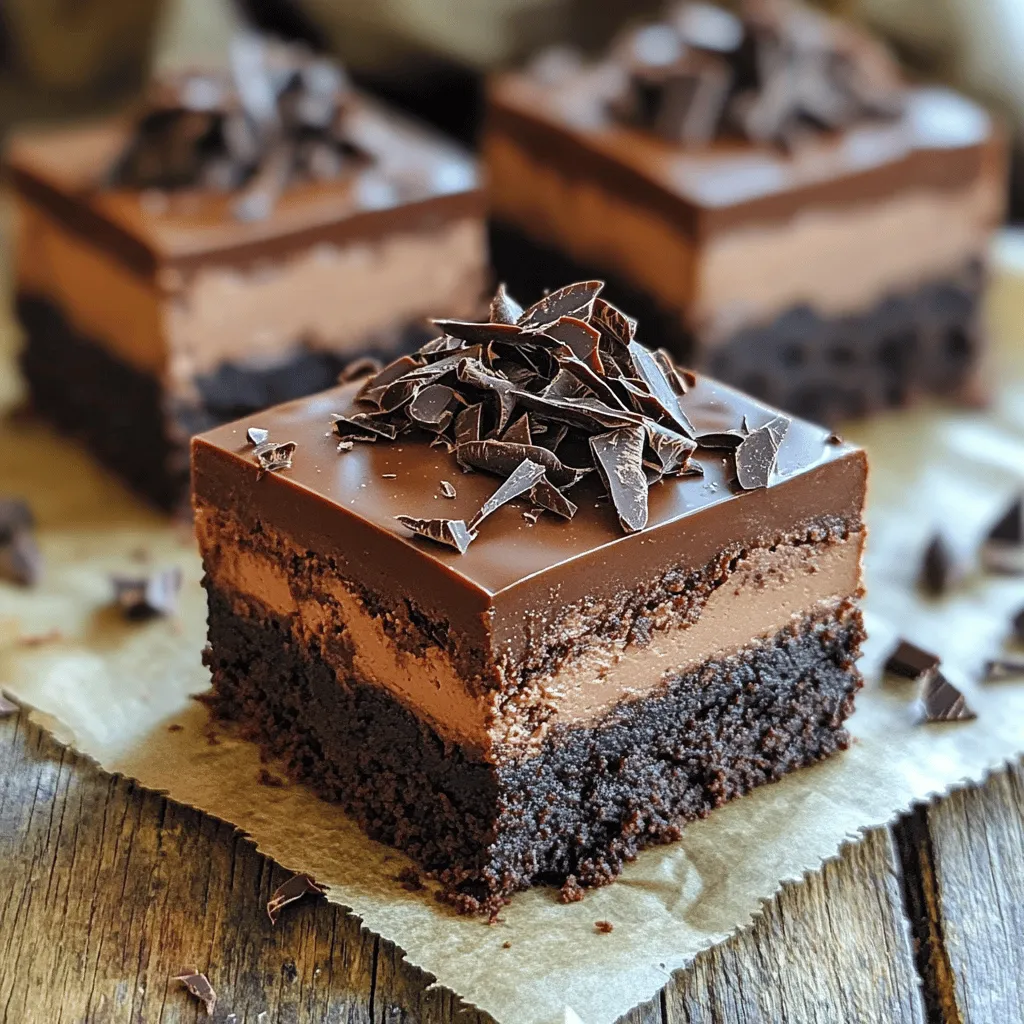
Indulging in dessert just got a whole lot sweeter with Layered Chocolate Mousse Brownies! These rich, fudgy brownies topped with smooth chocolate mousse are a treat for any chocolate lover. You will love how easy it is to create this elegant dessert in your kitchen. Dive into this article to discover the simple ingredients, step-by-step instructions, and expert tips you need to craft this delightful delight that will impress everyone!
Ingredients
List of Ingredients
Detailed Ingredients for Brownies
– 1 cup unsalted butter
– 2 cups granulated sugar
– 4 large eggs
– 1 tablespoon vanilla extract
– 1 cup all-purpose flour
– 1/2 cup unsweetened cocoa powder
– 1/2 teaspoon salt
– 2 cups semi-sweet chocolate chips
Ingredients for Chocolate Mousse
– 1 cup heavy cream
– 2 tablespoons powdered sugar
– 1 teaspoon vanilla extract (for mousse)
Garnishing Ingredients
– Dark chocolate shavings
To make these layered chocolate mousse brownies, you need simple ingredients. Each one adds a unique flavor. The butter makes the brownies rich. The sugar gives them sweetness. Eggs help bind everything together. Vanilla adds a lovely touch. The flour and cocoa powder create the brownie base.
For the mousse, heavy cream makes it light. Powdered sugar sweetens it up. The vanilla extract in the mousse gives it a nice flavor boost.
Finally, dark chocolate shavings make a beautiful garnish. They add an extra chocolate kick. This combination makes every bite a delight.
You can find the complete recipe [Full Recipe] here.
Step-by-Step Instructions
Brownie Preparation
Preheating the Oven and Preparing the Pan
First, set your oven to 350°F (175°C). This step ensures even baking. Grease a 9×13-inch baking pan with butter. You can also line it with parchment paper. Parchment helps the brownies come out easily.
Mixing the Ingredients for Brownies
In a medium saucepan, melt the butter over low heat. After it melts, take it off the heat. Stir in the granulated sugar until it blends well. Next, add the eggs, one at a time. Mix well after each egg. Then, add in the vanilla extract. In another bowl, mix the flour, cocoa powder, and salt. Slowly fold the dry mix into the wet ingredients. Be gentle to keep the batter fluffy. Finally, fold in the chocolate chips for that gooey texture. Pour the batter into the prepared pan and spread it evenly.
Baking Time and Cooling Process
Now, bake your brownies for 20-25 minutes. Check if a toothpick comes out slightly moist but no wet batter remains. Once baked, let the brownies cool completely in the pan. This cooling step is key for a great mousse layer.
Making the Chocolate Mousse
Beating the Heavy Cream
While the brownies cool, prepare the mousse. In a medium bowl, beat the heavy cream with powdered sugar and vanilla extract. Beat until stiff peaks form. This step adds lightness to your mousse.
Folding Techniques for Mousse
Take half of the whipped cream and gently fold it into the melted chocolate. Make sure the chocolate is cool first. This helps mix the chocolate without losing air. Then, fold in the rest of the whipped cream. This creates a light, airy texture.
Spreading Mousse Over Brownies
Once your brownies are cooled, it’s time to add the mousse. Spread a generous layer of chocolate mousse over the brownies. Use a spatula to smooth it out. Afterward, refrigerate the layered brownies for at least 2 hours. This allows the mousse to set and gives you that perfect slice.
Refer to the Full Recipe for more details on the ingredients and steps.
Tips & Tricks
Achieving the Perfect Brownie Texture
Ensuring Proper Mixing
Mixing is key to great brownies. Start with melted butter and sugar. Stir well until smooth. Then, add eggs one at a time. This keeps the mix creamy. Fold in the dry ingredients gently. Over-mixing can make brownies tough. Aim for a smooth batter with some lumps of flour.
Baking Time Adjustments
Baking times can vary. Always check the brownies after 20 minutes. Insert a toothpick into the center. If it comes out with a few moist crumbs, they’re done. If it has wet batter, they need more time. Let them cool in the pan for perfect texture.
Enhancing the Mousse Experience
Tips for Light and Fluffy Mousse
For a light mousse, start with cold cream. Beat it until stiff peaks form. Gently fold in melted chocolate. Don’t stir too hard; you want air in the mousse. This keeps it fluffy and light.
Serving Temperature Recommendations
Serve the mousse cold. After chilling, it firms up nicely. Cut the brownies into squares after they chill for two hours. The mousse layer will set well, making each bite a delight. Enjoy these treats chilled for the best taste!
For the full recipe, check the details above.
Variations
Flavor Enhancements
Adding Flavored Extracts
You can boost the taste of your brownies with flavored extracts. Try almond, mint, or orange. Add just a teaspoon for a nice twist. These flavors mix well with chocolate. They bring out a rich, bold taste.
Incorporating Different Chocolate Types
Switching chocolate types can change the whole dessert. Use milk chocolate for a sweeter brownie or dark chocolate for a richer flavor. You could even mix different types for depth. This adds a fun layer of taste in every bite.
Dietary Modifications
Gluten-Free Options
Making gluten-free brownies is simple. Swap all-purpose flour with almond or coconut flour. The texture might change slightly, but the taste stays great. You can also use gluten-free baking mixes, which work well.
Substituting Ingredients for Vegan Version
To make these brownies vegan, replace eggs with flaxseed meal or applesauce. Use plant-based butter instead of regular butter. For the mousse, substitute heavy cream with coconut cream. This keeps the dessert creamy and delicious while being plant-friendly.
For more details, check the Full Recipe to create your perfect layered chocolate mousse brownies!
Storage Info
Best Practices for Storage
Refrigeration Guidelines
Once your layered chocolate mousse brownies are made, store them in the fridge. Use an airtight container to keep them fresh. This helps maintain the rich texture of the mousse and the softness of the brownies. Make sure they are completely cooled before storing. They can stay fresh for up to a week in the fridge.
Freezing Brownies and Mousse
You can freeze these brownies for later enjoyment. First, cut them into squares. Wrap each piece in plastic wrap. Then, place them in a freezer-safe bag or container. This prevents freezer burn. They can last in the freezer for about three months. Thaw them in the fridge before serving. This keeps the mousse from becoming too soft.
Shelf Life
How Long Do Layered Chocolate Mousse Brownies Last?
Layered chocolate mousse brownies last about 5 to 7 days in the fridge. If frozen, they last about three months. Always check for freshness before eating.
Signs of Spoilage
Look for changes in texture or smell. If the mousse looks watery or the brownies feel hard, it’s time to toss them. Foul odors or mold are also clear signs that they have gone bad. Enjoy them fresh for the best taste!
FAQs
Common Questions
Can I make these brownies ahead of time?
Yes, you can make these brownies ahead of time. Bake them a day before. Once cooled, cover them tightly. This keeps them fresh. You can add mousse the next day. Just remember to refrigerate them until serving.
What chocolate should I use for the mousse?
Use semi-sweet chocolate for a balanced taste. It adds a rich flavor. Dark chocolate works too if you want it more intense. Make sure to melt the chocolate gently. This helps keep it smooth.
How do I make the brownies fudgier?
To make fudgier brownies, add an extra egg. You can also reduce the baking time. Check them a few minutes early. Less time means more moisture. Try using less flour as well for a denser texture.
Troubleshooting Issues
What if my brownies are too dry?
If your brownies are dry, check your oven temperature. An oven that is too hot can dry them out. You can also add a bit of melted butter or cream. This will help bring back moisture.
How to fix runny mousse?
If your mousse is runny, make sure your cream is whipped stiff. You can beat it a bit longer. If it’s still runny, chill it for a while. This gives it time to set. If needed, you can fold in more melted chocolate to thicken it.
In this post, we covered how to make layered chocolate mousse brownies. We looked at the key ingredients, including those for garnishing. Then, I guided you step-by-step through baking the brownies and making the mousse. Tips helped you achieve the best texture and serving experiences. Lastly, I shared variations and storage tips.
Enjoy making and sharing this dessert. It’s fun, delicious, and sure to impress!
![Detailed Ingredients for Brownies - 1 cup unsalted butter - 2 cups granulated sugar - 4 large eggs - 1 tablespoon vanilla extract - 1 cup all-purpose flour - 1/2 cup unsweetened cocoa powder - 1/2 teaspoon salt - 2 cups semi-sweet chocolate chips Ingredients for Chocolate Mousse - 1 cup heavy cream - 2 tablespoons powdered sugar - 1 teaspoon vanilla extract (for mousse) Garnishing Ingredients - Dark chocolate shavings To make these layered chocolate mousse brownies, you need simple ingredients. Each one adds a unique flavor. The butter makes the brownies rich. The sugar gives them sweetness. Eggs help bind everything together. Vanilla adds a lovely touch. The flour and cocoa powder create the brownie base. For the mousse, heavy cream makes it light. Powdered sugar sweetens it up. The vanilla extract in the mousse gives it a nice flavor boost. Finally, dark chocolate shavings make a beautiful garnish. They add an extra chocolate kick. This combination makes every bite a delight. You can find the complete recipe [Full Recipe] here. First, set your oven to 350°F (175°C). This step ensures even baking. Grease a 9x13-inch baking pan with butter. You can also line it with parchment paper. Parchment helps the brownies come out easily. In a medium saucepan, melt the butter over low heat. After it melts, take it off the heat. Stir in the granulated sugar until it blends well. Next, add the eggs, one at a time. Mix well after each egg. Then, add in the vanilla extract. In another bowl, mix the flour, cocoa powder, and salt. Slowly fold the dry mix into the wet ingredients. Be gentle to keep the batter fluffy. Finally, fold in the chocolate chips for that gooey texture. Pour the batter into the prepared pan and spread it evenly. Now, bake your brownies for 20-25 minutes. Check if a toothpick comes out slightly moist but no wet batter remains. Once baked, let the brownies cool completely in the pan. This cooling step is key for a great mousse layer. While the brownies cool, prepare the mousse. In a medium bowl, beat the heavy cream with powdered sugar and vanilla extract. Beat until stiff peaks form. This step adds lightness to your mousse. Take half of the whipped cream and gently fold it into the melted chocolate. Make sure the chocolate is cool first. This helps mix the chocolate without losing air. Then, fold in the rest of the whipped cream. This creates a light, airy texture. Once your brownies are cooled, it's time to add the mousse. Spread a generous layer of chocolate mousse over the brownies. Use a spatula to smooth it out. Afterward, refrigerate the layered brownies for at least 2 hours. This allows the mousse to set and gives you that perfect slice. Refer to the Full Recipe for more details on the ingredients and steps. Ensuring Proper Mixing Mixing is key to great brownies. Start with melted butter and sugar. Stir well until smooth. Then, add eggs one at a time. This keeps the mix creamy. Fold in the dry ingredients gently. Over-mixing can make brownies tough. Aim for a smooth batter with some lumps of flour. Baking Time Adjustments Baking times can vary. Always check the brownies after 20 minutes. Insert a toothpick into the center. If it comes out with a few moist crumbs, they're done. If it has wet batter, they need more time. Let them cool in the pan for perfect texture. Tips for Light and Fluffy Mousse For a light mousse, start with cold cream. Beat it until stiff peaks form. Gently fold in melted chocolate. Don’t stir too hard; you want air in the mousse. This keeps it fluffy and light. Serving Temperature Recommendations Serve the mousse cold. After chilling, it firms up nicely. Cut the brownies into squares after they chill for two hours. The mousse layer will set well, making each bite a delight. Enjoy these treats chilled for the best taste! For the full recipe, check the details above. {{image_2}} Adding Flavored Extracts You can boost the taste of your brownies with flavored extracts. Try almond, mint, or orange. Add just a teaspoon for a nice twist. These flavors mix well with chocolate. They bring out a rich, bold taste. Incorporating Different Chocolate Types Switching chocolate types can change the whole dessert. Use milk chocolate for a sweeter brownie or dark chocolate for a richer flavor. You could even mix different types for depth. This adds a fun layer of taste in every bite. Gluten-Free Options Making gluten-free brownies is simple. Swap all-purpose flour with almond or coconut flour. The texture might change slightly, but the taste stays great. You can also use gluten-free baking mixes, which work well. Substituting Ingredients for Vegan Version To make these brownies vegan, replace eggs with flaxseed meal or applesauce. Use plant-based butter instead of regular butter. For the mousse, substitute heavy cream with coconut cream. This keeps the dessert creamy and delicious while being plant-friendly. For more details, check the Full Recipe to create your perfect layered chocolate mousse brownies! Refrigeration Guidelines Once your layered chocolate mousse brownies are made, store them in the fridge. Use an airtight container to keep them fresh. This helps maintain the rich texture of the mousse and the softness of the brownies. Make sure they are completely cooled before storing. They can stay fresh for up to a week in the fridge. Freezing Brownies and Mousse You can freeze these brownies for later enjoyment. First, cut them into squares. Wrap each piece in plastic wrap. Then, place them in a freezer-safe bag or container. This prevents freezer burn. They can last in the freezer for about three months. Thaw them in the fridge before serving. This keeps the mousse from becoming too soft. How Long Do Layered Chocolate Mousse Brownies Last? Layered chocolate mousse brownies last about 5 to 7 days in the fridge. If frozen, they last about three months. Always check for freshness before eating. Signs of Spoilage Look for changes in texture or smell. If the mousse looks watery or the brownies feel hard, it’s time to toss them. Foul odors or mold are also clear signs that they have gone bad. Enjoy them fresh for the best taste! Can I make these brownies ahead of time? Yes, you can make these brownies ahead of time. Bake them a day before. Once cooled, cover them tightly. This keeps them fresh. You can add mousse the next day. Just remember to refrigerate them until serving. What chocolate should I use for the mousse? Use semi-sweet chocolate for a balanced taste. It adds a rich flavor. Dark chocolate works too if you want it more intense. Make sure to melt the chocolate gently. This helps keep it smooth. How do I make the brownies fudgier? To make fudgier brownies, add an extra egg. You can also reduce the baking time. Check them a few minutes early. Less time means more moisture. Try using less flour as well for a denser texture. What if my brownies are too dry? If your brownies are dry, check your oven temperature. An oven that is too hot can dry them out. You can also add a bit of melted butter or cream. This will help bring back moisture. How to fix runny mousse? If your mousse is runny, make sure your cream is whipped stiff. You can beat it a bit longer. If it's still runny, chill it for a while. This gives it time to set. If needed, you can fold in more melted chocolate to thicken it. In this post, we covered how to make layered chocolate mousse brownies. We looked at the key ingredients, including those for garnishing. Then, I guided you step-by-step through baking the brownies and making the mousse. Tips helped you achieve the best texture and serving experiences. Lastly, I shared variations and storage tips. Enjoy making and sharing this dessert. It’s fun, delicious, and sure to impress!](https://tossedrecipes.com/wp-content/uploads/2025/07/9d5d1a04-9ce7-4e33-bacd-73e97e17c1f9-300x300.webp)