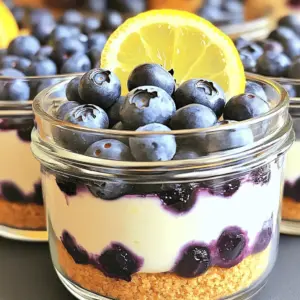
If you love sweet treats but want to skip the oven, you’re in for a treat! My No-Bake Lemon Blueberry Cheesecake Jars are simple, creamy, and bursting with fresh flavors. With just a few key ingredients, you can create a show-stopping dessert that’s perfect for any occasion. Ready to impress? Let’s dive into the easy steps that will make your taste buds sing!
Ingredients
Main Ingredients
– 1 cup graham cracker crumbs
– 4 tablespoons unsalted butter, melted
– 16 oz cream cheese, softened
– 1 cup fresh blueberries
Additional Ingredients
– 1 cup powdered sugar
– 1 cup heavy whipping cream
Flavor Enhancers
– 1/4 cup fresh lemon juice
– Zest of 1 lemon
– 1 teaspoon vanilla extract
For this No-Bake Lemon Blueberry Cheesecake Jars delight, you need a few key ingredients. First, the graham cracker crumbs create a tasty crust. Mix them with melted butter for a rich base. Then, you’ll need cream cheese, which gives the cheesecake its creamy texture. Fresh blueberries add a burst of flavor and color.
Next, add powdered sugar for sweetness. Heavy whipping cream makes your cheesecake light and fluffy. For that zesty kick, fresh lemon juice and lemon zest are essential. Lastly, a touch of vanilla extract rounds out the flavor. These ingredients work together to create a refreshing and delicious dessert.
Step-by-Step Instructions
Preparing the Crust
To start, you need to make the crust. In a medium bowl, mix 1 cup of graham cracker crumbs with 4 tablespoons of melted unsalted butter. Stir until it looks like wet sand. This mixture will give your jars a nice base.
Next, you will divide the crust mixture among your jars. Press it down firmly to form a solid layer. This step is key to hold everything together later.
Making the Cheesecake Filling
Now it’s time for the cheesecake filling. In a large bowl, beat 16 oz of softened cream cheese and 1 cup of powdered sugar together. Mix until it’s smooth and creamy. This step ensures your filling is sweet and rich.
Add 1/4 cup of fresh lemon juice, the zest of 1 lemon, and 1 teaspoon of vanilla extract. Stir again until everything is well combined. The lemon gives a bright flavor that pairs perfectly with the blueberries.
Whipping the Cream and Assembling
In another bowl, whip 1 cup of heavy whipping cream until it forms stiff peaks. This means it should hold its shape when you lift the beaters.
Gently fold the whipped cream into the cheesecake mixture. Be careful not to deflate the cream. This keeps your filling light and fluffy.
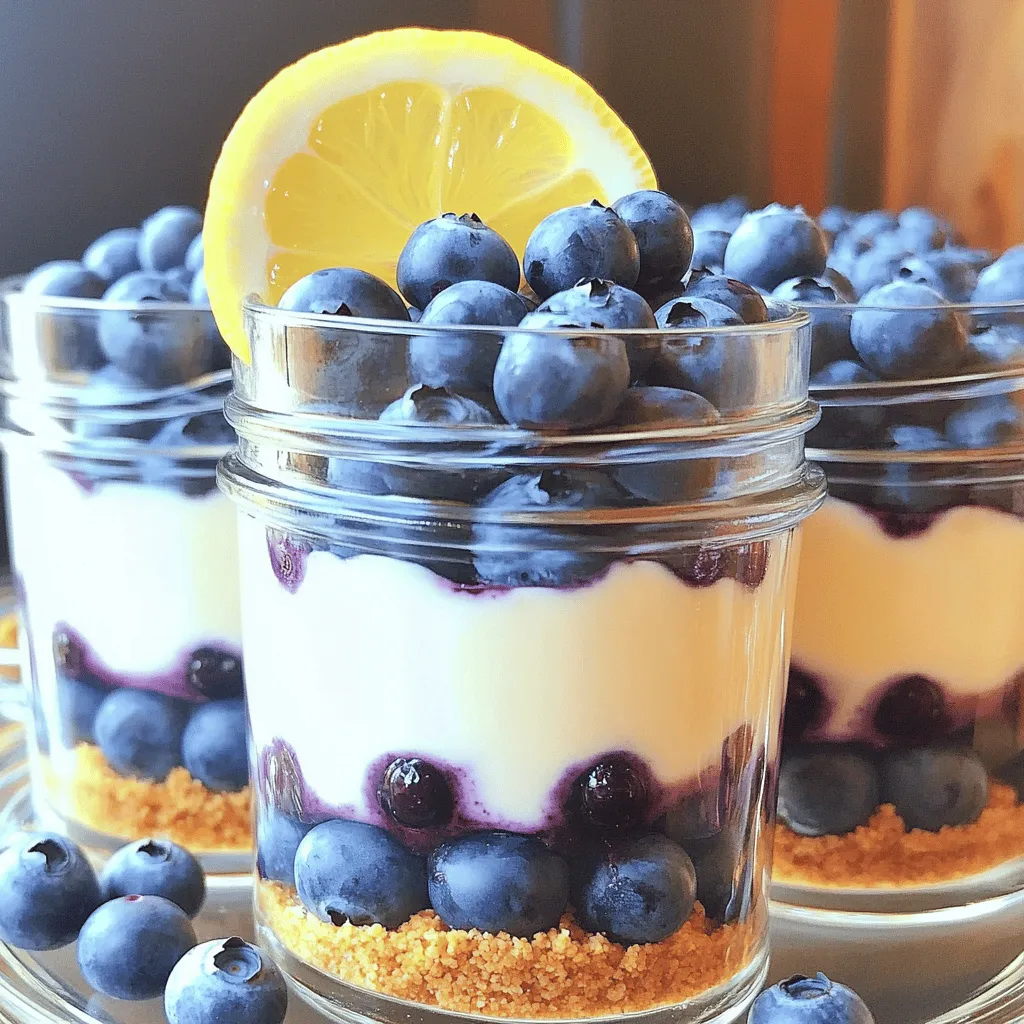
Now, it’s time to layer your jars. Spoon or pipe the cheesecake filling over the crust until it’s about half full. Add a layer of 1 cup of fresh blueberries on top. Repeat this with another layer of filling and blueberries. Fill the jars to the top for a beautiful presentation.
Finally, cover the jars and refrigerate them for at least 4 hours. This helps the cheesecake set. When you’re ready to serve, garnish with extra blueberries and a lemon slice for a lovely touch.
Tips & Tricks
Achieving the Perfect Texture
To make your cheesecake smooth, start with softened cream cheese. Cold cream cheese can lead to lumps. Leave it out for about 30 minutes before mixing. This small step makes a big difference!
When whipping cream, use a cold bowl and beaters. Cold tools help the cream whip up faster and better. Beat until stiff peaks form. This means the cream holds its shape well. Gently fold this whipped cream into your cheese mixture. Be careful not to mix too hard. You want to keep that light, airy texture.
Presentation Tips
For garnishing, fresh blueberries and lemon slices work best. They add color and a burst of flavor. You can also use mint leaves for a green touch. This makes your jars look even more inviting.
Using jars instead of a traditional cheesecake dish has perks. Jars make serving easy and fun. Each person gets their own portion. Plus, jars look cute on a table. They also keep the layers visible, showing off your hard work.
Common Mistakes to Avoid
One common mistake is overmixing the whipped cream. This can make it grainy and lose its fluffy texture. Mix just until combined.
Another mistake is not chilling the jars long enough. They need at least four hours in the fridge. This helps the cheesecake set properly. If you skip this step, your cheesecake may be too soft. Be patient and let them chill!
Variations
Flavor Customizations
You can easily change the flavor of your no-bake lemon blueberry cheesecake jars. Adding different fruits can create new tastes. Try using strawberries or raspberries for a twist. These fruits pair well with the lemon, giving you a fresh flavor.
You can also experiment with flavored extracts. Try almond or coconut extract for a unique taste. A few drops will change the whole dessert. Just mix them in with the cream cheese for a fun surprise.
Gluten-Free Options
Want to make this dessert gluten-free? It’s simple! Just swap out the regular graham crackers for gluten-free ones. Many brands offer delicious options that taste great.
If you want a different crust, consider using crushed nuts or oats. Blend them with melted butter to create a tasty base. This change can add more texture and flavor to your jars.
Vegan Alternatives
You can make this cheesecake dairy-free too! Substitute dairy-free cream cheese for the regular kind. Brands now offer great options that taste just as good.
For the whipped cream, use a plant-based whipping cream. Look for options made from coconut or almond. This way, everyone can enjoy your yummy dessert, no matter their diet.
Storage Info
Storing the Cheesecake Jars
To keep your no-bake lemon blueberry cheesecake jars fresh, store them in the fridge. Cover each jar with a lid or plastic wrap. This keeps the air out and prevents drying. If you want to freeze them, make sure to leave space at the top of each jar. This space allows the filling to expand as it freezes.
Shelf Life
In the fridge, these jars last for about 3 to 5 days. Always check for signs of spoilage before eating. If you see any mold or the filling smells off, it’s best to toss it.
Reheating and Serving Suggestions
If you froze the jars, let them thaw in the fridge overnight for best results. Once thawed, the cheesecake may need a gentle stir to refresh the texture. Serve with extra blueberries or a slice of lemon on top. This adds a bright touch and makes each jar look even tastier!
FAQs
How long do these cheesecake jars last?
These cheesecake jars last about 3 to 5 days in the fridge. Keep them sealed to maintain freshness. After this time, the flavors may fade. If you see any mold or off smells, it’s best to toss them.
Can I use powdered sugar substitutes?
Yes, you can! If you want less sugar, try using a sugar substitute like stevia or erythritol. Just adjust the amount to taste since some are much sweeter than sugar. You might also use coconut sugar, but it can change the color and taste a bit.
What’s the best way to clean the jars after use?
Cleaning the jars is simple! Soak them in warm, soapy water for a few minutes. Use a soft sponge to remove any residue. Avoid using harsh scrubbers to keep the jars scratch-free. If needed, a little baking soda can help with tough stains.
This blog post covered how to make delicious cheesecake jars. We explored the main ingredients, the steps to create the crust and filling, and tips to avoid mistakes. You can customize flavors, use gluten-free options, or try vegan alternatives. Proper storage and shelf life ensure you enjoy these treats longer.
Now you have all the tools to make your own cheesecake jars. Get creative and enjoy every bite!