Looking for a quick, tasty snack that packs a protein punch? No-Bake Oreo Protein Balls are your answer! With just a few simple ingredients, you can whip up these delightful bites in no time. Perfect for post-workout recovery or a sweet treat, these energy-packed balls will keep you satisfied and boost your day. Ready to make something delicious? Let’s dive into the easy steps!
Ingredients
List of Required Ingredients
– 1 cup crushed Oreo cookies
– 1 cup rolled oats
– 1/2 cup protein powder (vanilla or chocolate)
– 1/2 cup peanut butter (or almond butter)
– 1/4 cup honey or maple syrup
– 1/4 cup mini chocolate chips
– A pinch of sea salt
– Optional: Additional crushed Oreos for rolling
When I make No-Bake Oreo Protein Balls, I love the mix of flavors and textures. The crushed Oreo cookies give a rich taste. Rolled oats add a nice chew. Protein powder boosts the nutrition. Peanut butter or almond butter makes it creamy and filling. Honey or maple syrup adds just the right sweetness. Mini chocolate chips are a delightful surprise. A pinch of sea salt helps balance all the flavors.
Suggested Tools and Equipment
– Mixing bowl
– Spoon or spatula
– Parchment paper
– Baking sheet or plate
Having the right tools makes cooking easier. I use a large mixing bowl to combine all the ingredients. A spoon or spatula helps me mix everything well. Parchment paper keeps my baking sheet clean. It also makes it easy to remove the protein balls later. With these tools, I can whip up a tasty snack in no time!
Step-by-Step Instructions
Combining Dry Ingredients
Start by crushing 1 cup of Oreo cookies into small pieces. I love using a zip-top bag and a rolling pin for this. Next, in a large bowl, mix the crushed Oreos with 1 cup of rolled oats and 1/2 cup of protein powder. Stir them well until everything is combined. This step adds texture and flavor to your protein balls.
Mixing Wet Ingredients
Now it’s time to add the wet ingredients. Scoop in 1/2 cup of peanut butter (or almond butter, if you prefer). Then, add 1/4 cup of honey or maple syrup. Stir the mixture until it forms a thick, sticky dough. If your mix feels too crumbly, add more peanut butter or honey, one tablespoon at a time. This will help it hold together nicely.
Shaping and Chilling
Next, grab small amounts of the mixture and roll them into balls. Aim for about 1 inch in diameter. If you want, you can roll these balls in extra crushed Oreos for a fun twist. Place your protein balls on a parchment-lined baking sheet. Put them in the fridge for at least 30 minutes. This chilling time helps them firm up, making them perfect for snacking!
Tips & Tricks
Mixing and Consistency
To achieve the right texture, you want a thick, sticky dough. Start by mixing your dry ingredients well. If your mix feels dry, add more peanut butter or honey. Do this one tablespoon at a time. If it feels too sticky, add a bit more oats or protein powder. This will help balance it out.
Rolling Techniques
When rolling your protein balls, consider coating them in crushed Oreos. It adds flavor and a fun look. You can also use crushed nuts, coconut flakes, or even cocoa powder. Each option gives a unique touch.
Serving Suggestions
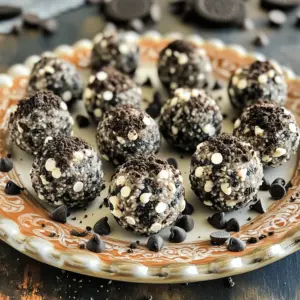
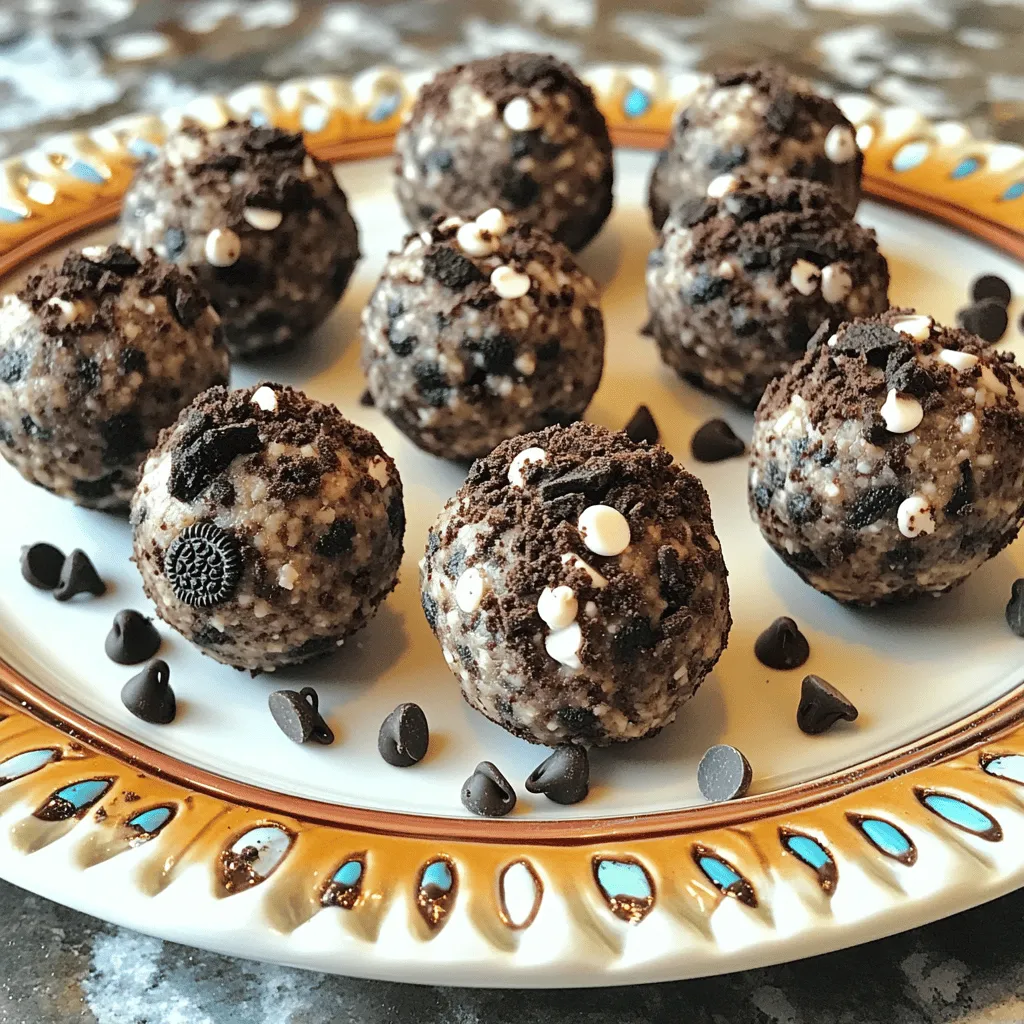
To enjoy your protein balls, you can eat them as is. They make a great snack after a workout. You can also pair them with a smoothie or a glass of milk. This adds a nice balance to your snack. Another idea is to serve them on a decorative plate. Sprinkle some crushed Oreos around them for a fun display.
Variations
Flavor Variations
You can change the flavor of your No-Bake Oreo Protein Balls. Try using different nut butters, like almond or cashew. Each nut butter brings a unique taste. You can also switch sweeteners. Use agave syrup or coconut sugar for a new twist.
Adding mix-ins is another fun way to modify the recipe. Try adding chopped nuts, like walnuts or almonds, for crunch. You can also add dried fruit, such as raisins or cranberries, for a sweet touch. These additions make your protein balls even more enjoyable.
Dietary Adjustments
If you follow a vegan diet, you can still enjoy these treats. Use a plant-based protein powder. Substitute honey with maple syrup, making it fully vegan. Choose almond butter or sunflower seed butter instead of peanut butter.
For gluten-free options, ensure your oats are certified gluten-free. Most protein powders are gluten-free, but check the label. With these small changes, you can make these protein balls fit your dietary needs.
Different Serving Sizes
You can easily adjust the recipe for more or fewer servings. If you want a larger batch, simply double the ingredients. This works great for parties or meal prep.
If you need a smaller batch, cut the ingredients in half. This is perfect if you want to try the recipe first. Just remember to keep the same mixing steps. Enjoy making these protein balls in a size that suits you!
Storage Info
How to Store
I recommend storing your No-Bake Oreo Protein Balls in the fridge. This keeps them fresh and tasty. Use an airtight container to avoid moisture. If you want to enjoy them later, you can freeze them too. Just place them in a freezer-safe bag. They will stay good for a long time in the freezer.
Shelf Life
In the fridge, these protein balls last about a week. If you freeze them, they can last up to three months. Just remember to label the bag with the date. This way, you know when to use them for the best taste.
Preparing Ahead
Making these protein balls in bulk is a great idea. You can double the recipe and store extras. This saves time on busy days. Just prepare the balls, chill them, and store them as I mentioned. When you need a quick snack, they will be ready to go!
FAQs
Can I use other types of cookies?
Yes, you can use other cookies. Try chocolate sandwich cookies or graham crackers. For a fun twist, use peanut butter cookies. The key is to have a similar texture for easy mixing. Just crush the cookies finely before mixing them in. You can even mix different types for more flavor!
What can I substitute for protein powder?
You can replace protein powder with ground nuts or seeds. Another option is using powdered peanut butter. If you want a dairy-free choice, try using soy protein or pea protein. Just keep in mind that the texture may change a bit. Adjust the wet ingredients if needed to keep the dough sticky.
Are No-Bake Oreo Protein Balls healthy?
Yes, they can be a healthy snack! Each ball has protein, fiber, and healthy fats. The oats give you energy, while peanut butter adds protein. The honey or maple syrup provides natural sweetness. They are great for a post-workout snack or a quick energy boost. Enjoy in moderation as part of a balanced diet.
In this blog post, we explored how to make No-Bake Oreo Protein Balls using simple ingredients and steps. You learned about required tools, tips for perfect texture, and creative variations. Remember, these protein balls are not just tasty but also versatile. They can suit different diets and storage needs. Try making them ahead for snacks or meals. I hope you enjoy making and sharing these easy, delicious treats. Happy snacking!