Are you ready to make a sweet treat that’s easy and fun? These No-Bake Salted Caramel Pretzel Bars mix salty and sweet in every bite. Perfect for any occasion, they require no baking and come together quickly. Whether you’re a kitchen novice or an expert, this recipe will guide you step-by-step. So, grab your ingredients, and let’s create something delightful together!
Ingredients
List of Ingredients
– 2 cups crushed pretzels
– 1 cup graham cracker crumbs
– 1/2 cup unsalted butter, melted
– 1/2 cup brown sugar
– 1 cup sweetened condensed milk
– 1 teaspoon vanilla extract
– 1 cup caramel sauce (store-bought or homemade)
– Sea salt for sprinkling
– 1/2 cup mini chocolate chips (optional)
Alternative Ingredient Options
You can swap the pretzels for crushed cookies if you prefer. Use gluten-free graham crackers for a gluten-free option. Coconut oil works well instead of butter for a dairy-free choice. For a richer taste, try dark brown sugar instead of light. You can also use homemade caramel sauce for a fresh flavor boost.
Tips for Quality Ingredients
Always use fresh ingredients to ensure the best taste. When choosing pretzels, look for those without added flavors. For graham crackers, select ones that are made with whole grains. If buying caramel sauce, check the label for natural ingredients. This helps avoid preservatives and artificial flavors. Using high-quality chocolate chips can also enhance the overall flavor of your bars.
Step-by-Step Instructions
Preparation Process Overview
Making no-bake salted caramel pretzel bars is simple. You only need to follow a few steps. This recipe takes about 20 minutes to prepare. The bars will chill for around 2 hours before serving.
Detailed Instructions for Each Step
1. Mix the Base: Start by combining 2 cups of crushed pretzels, 1 cup of graham cracker crumbs, 1/2 cup of melted unsalted butter, and 1/2 cup of brown sugar in a large bowl. Mix well until it looks like wet sand.
2. Form the Crust: Press this mixture into a 9×9-inch baking pan. Make sure to pack it tightly. A solid crust will hold the bars together nicely.
3. Make the Caramel: In a saucepan, mix 1 cup of sweetened condensed milk with 1 cup of caramel sauce over medium heat. Stir it constantly until it warms up and thickens a bit.
4. Add Vanilla: Take the caramel off the heat and stir in 1 teaspoon of vanilla extract. This adds a lovely flavor.
5. Pour Caramel: Pour the warm caramel over the pretzel crust. Use a spatula to spread it evenly. Let it cool for about 15-20 minutes.
6. Add Chocolate Chips (Optional): If you want, sprinkle 1/2 cup of mini chocolate chips on top. Press them down slightly so they stick to the caramel.
7. Chill the Bars: Put the pan in the fridge and chill for at least 2 hours. This helps the bars set well.
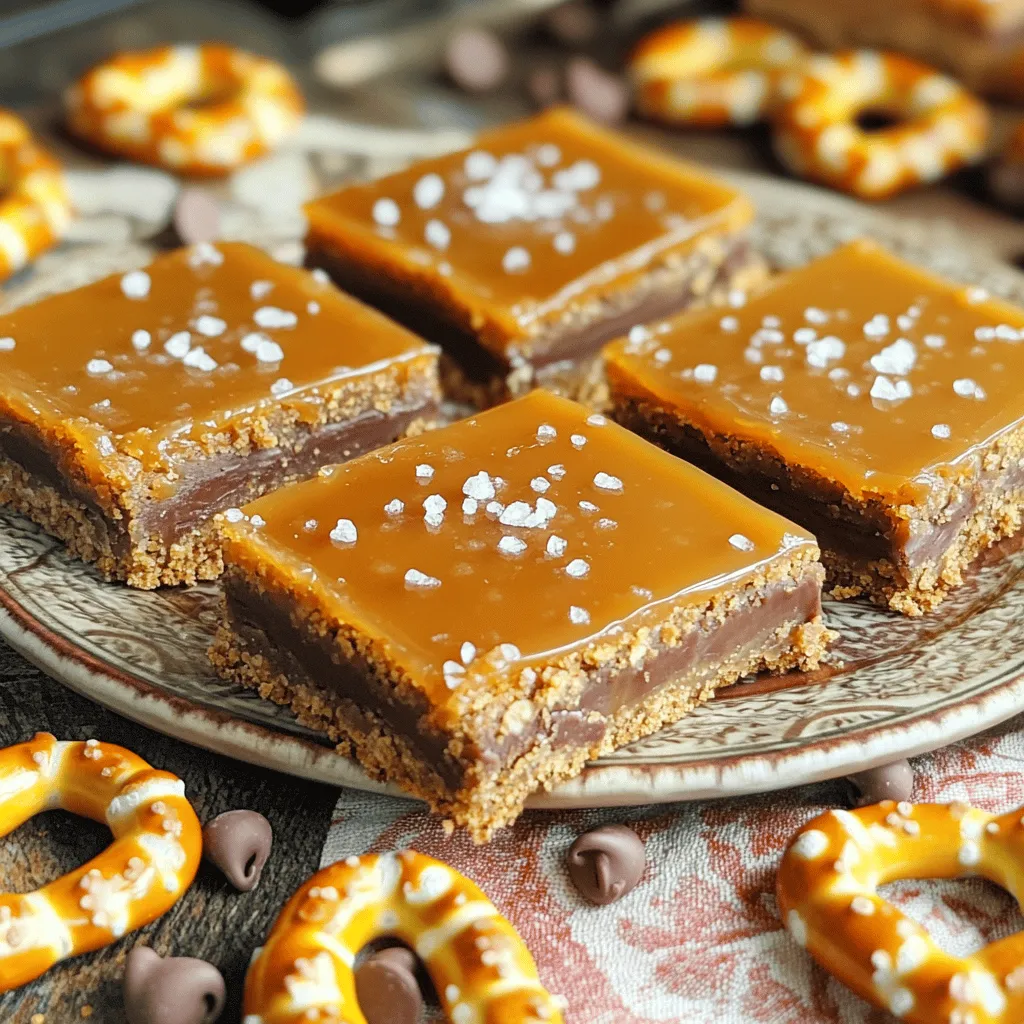
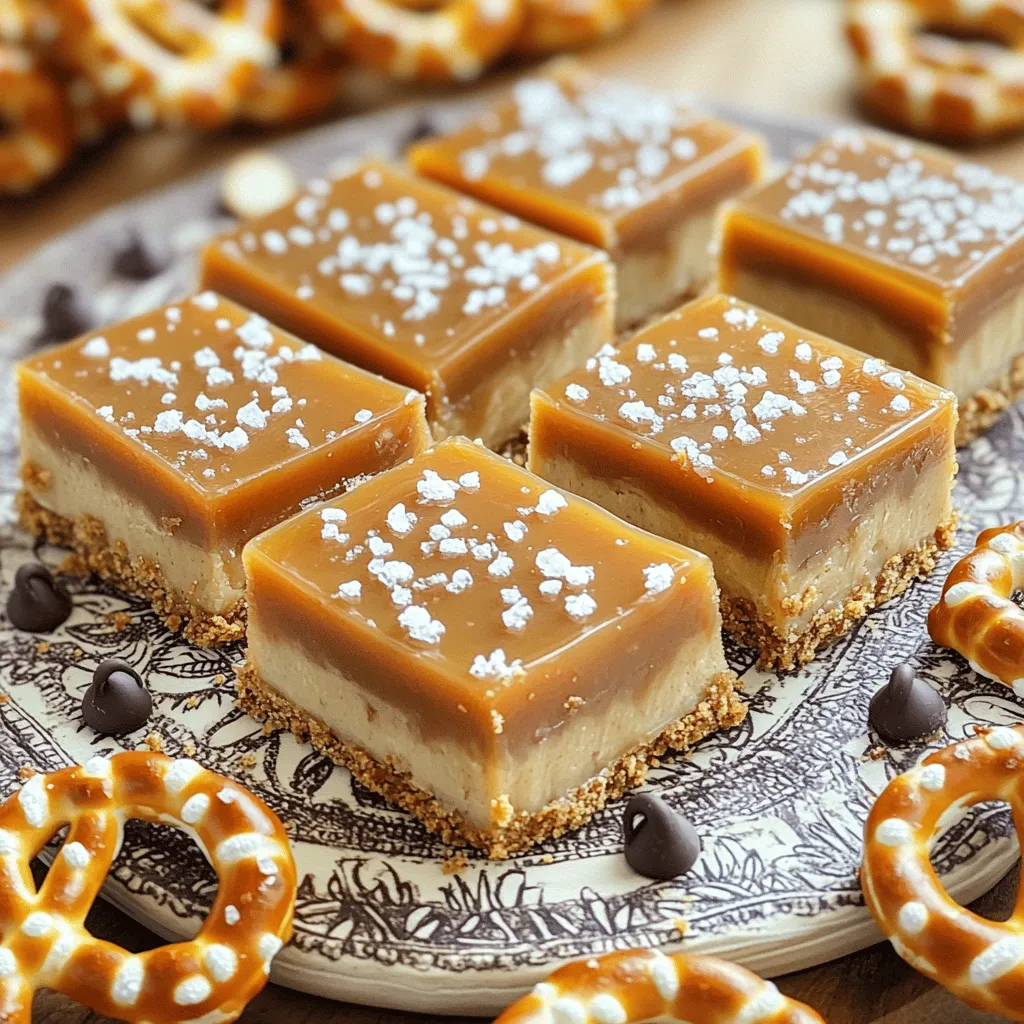
8. Cut and Serve: Once set, lift the bars out of the pan. Cut them into squares. Before serving, sprinkle a bit of sea salt on top for that perfect finish.
Time-Saving Tips During Preparation
– Use Store-bought Caramel: If you’re short on time, grab store-bought caramel sauce instead of making your own.
– Crush Pretzels Quickly: Place pretzels in a zip-top bag and crush them with a rolling pin. This saves time and keeps mess to a minimum.
– Chill Faster: If you’re in a hurry, place the pan in the freezer for the first 30 minutes. Then move it to the fridge to finish setting.
These steps will help you create delicious no-bake salted caramel pretzel bars with ease!
Tips & Tricks
Common Mistakes to Avoid
Making No-Bake Salted Caramel Pretzel Bars is fun, but some errors can ruin your treat. Here are some mistakes to dodge:
– Not packing the crust tightly: If you don’t press the crust firmly, it will crumble. Make sure to pack it down well.
– Using cold caramel: Warm caramel spreads better. If it’s cold, it can be hard to pour.
– Skipping the chill time: Don’t rush the chilling step. These bars need time to set well.
Best Practices for Serving
When it comes to serving these bars, a few tricks can make them shine. Here are my best tips:
– Use a sharp knife: A sharp knife cuts cleanly and prevents the bars from breaking.
– Serve chilled: These bars taste best when cold. Keep them in the fridge until it’s time to serve.
– Add a drizzle of caramel: A little extra caramel on top makes them look even better.
Enhancing Flavor and Texture
You can take these bars to the next level with a few simple tweaks. Here are some ideas:
– Try different toppings: You can use crushed nuts or sprinkles for a fun twist.
– Add a pinch of sea salt: This brings out the sweetness. Just a little sprinkle does wonders.
– Mix in mini chocolate chips: Chocolate adds richness. If you’re a fan of chocolate, don’t skip this step!
These tips will help you create delicious No-Bake Salted Caramel Pretzel Bars every time. Enjoy making your treat!
Variations
Alternative Toppings Ideas
You can change the toppings to make these bars even better. Try adding chopped nuts like pecans or almonds for a nice crunch. Crushed pretzels on top enhance the salty flavor. If you love coconut, sprinkle some sweetened coconut flakes for a tropical twist. You could even drizzle more caramel sauce on top for extra sweetness.
Flavor Combinations to Try
Mix up the flavors to suit your taste! Use chocolate caramel sauce for a richer taste. Add peanut butter to the caramel for a nutty flavor. You can swap the vanilla extract for almond extract to give a new twist. Want to add some fruit? Try layering sliced bananas before the caramel, or top with fresh strawberries for a refreshing bite.
Dietary Adjustments
If you need gluten-free bars, use gluten-free pretzels and graham crackers. For a vegan version, swap the butter with coconut oil and use a plant-based sweetened condensed milk. Choose a vegan caramel sauce to keep it dairy-free. These small changes keep the delicious taste while meeting your needs.
Storage Info
How to Properly Store Bars
Store your no-bake salted caramel pretzel bars in an airtight container. This keeps them fresh. Place parchment paper between layers if needed. It helps to prevent sticking. Keep them in the fridge for best results.
Shelf Life and Freezing Tips
These bars last about a week in the fridge. If you want to keep them longer, freeze them. Wrap each bar in plastic wrap and place them in a freezer bag. They can last up to three months in the freezer.
Reheating and Serving Suggestions
You don’t need to heat these bars before serving. Just take them out of the fridge. For extra flavor, drizzle some caramel sauce on top. A sprinkle of sea salt adds a nice touch too. Enjoy them cold for a perfect treat!
FAQs
Can I use homemade caramel sauce?
Yes, you can use homemade caramel sauce. It adds a personal touch. Just make sure it is thick enough to hold its shape. Homemade sauce often tastes richer than store-bought. I love using my own sauce for this recipe. It makes the bars even more special.
How long do these bars last in the fridge?
These bars last about one week in the fridge. Keep them in an airtight container. This helps them stay fresh and tasty. If you want to enjoy them longer, you can freeze them. Just make sure to wrap them well.
Can I add nuts or other mix-ins?
Absolutely! Nuts can add a nice crunch. Try using chopped pecans or walnuts for extra flavor. You can also add dried fruit, like raisins or cranberries. Just remember to adjust the sweetness if you add more ingredients.
What is the best way to cut the bars neatly?
To cut the bars neatly, use a sharp knife. First, chill the bars for a few hours. This helps them set up. Then, warm the knife under hot water. Wipe it dry before cutting. This method helps create clean edges.
In this blog post, we explored key ingredients, detailed steps, and helpful tips for making delicious bars. You learned about alternative options and techniques to enhance flavor. Remember to avoid common mistakes and try new variations. Proper storage will keep your bars fresh longer. Use this knowledge to create tasty treats that suit your needs. Enjoy your baking journey and have fun with it!
