![Here are the ingredients you need for the spooky Halloween marble cake: - 2 cups all-purpose flour - 1 ½ cups granulated sugar - ½ cup unsalted butter, softened - 1 cup whole milk - 3 large eggs - 2 teaspoons baking powder - 1 teaspoon vanilla extract - ¼ teaspoon salt - ½ cup unsweetened cocoa powder - 1 cup black and orange sprinkles (for decoration) - 1 cup Halloween-themed candy (optional for layering) These ingredients help create a deliciously moist and flavorful cake. The blend of vanilla and chocolate batters gives it a fun, spooky vibe. The sprinkles add a festive touch, making the cake perfect for Halloween gatherings. You can also layer candy inside for a sweet surprise! This cake is easy to make and will impress your friends and family. For detailed steps, check the full recipe. - Preheat your oven to 350°F (175°C). - Grease and flour a 9x5-inch loaf pan. - In a large bowl, cream together the softened butter and sugar until fluffy. - Beat in the eggs one at a time, mixing well after each addition. Add the vanilla extract. - In a separate bowl, whisk together the dry ingredients: flour, baking powder, and salt. - Gradually combine the wet and dry mixtures, alternating with the milk. Stir until just mixed. - Divide the batter into two bowls: one for vanilla and one for chocolate. Stir cocoa powder into the chocolate batter. - Spoon the vanilla and chocolate batters alternately into the prepared pan. - Use a knife to swirl the batters together for a marbled design. - If you want, layer some Halloween-themed candy in the center for a fun surprise. Bake the cake for 45-55 minutes. Check with a toothpick to see if it is done. For more details, check the Full Recipe. To create an even swirl, start by alternating spoonfuls of vanilla and chocolate batter. Use a knife to gently swirl the batters together. Aim for a figure-eight motion to blend without losing the distinct layers. This method gives a great look and taste. If you want more intricate designs, use a skewer. Dip it into the batter and make small circles or zig-zags. This adds a fun twist to your marble cake. Experiment with different patterns to find what you like best! Sprinkles add a festive touch. Use black and orange sprinkles to match the Halloween theme. Scatter them on top right before baking for a fun look. You can also add them after the cake cools for a brighter pop. For creative ghost and pumpkin icing, use white and orange frosting. Pipe little ghost shapes or pumpkin faces on top. This not only makes the cake fun but also adds a sweet layer of flavor. Get creative, and let your Halloween spirit shine through! To ensure the cake is cooked through, keep an eye on the time. Start checking at 45 minutes. The edges should pull away from the pan slightly, and the top should be firm. Use a toothpick to check if the cake is done. Insert it into the center; it should come out clean or with a few crumbs. If it’s wet with batter, bake a bit longer. This simple tip guarantees a perfectly baked cake every time. {{image_2}} You can change the flavor of your spooky Halloween marble cake. Adding extracts like almond or orange gives it a new twist. These flavors bring a unique taste to your cake. You can also mix in spices like cinnamon or nutmeg. These spices add warmth and depth, perfect for the fall season. Get creative with your cake toppings! Chocolate ganache can add a rich layer. Simply melt chocolate and mix it with cream for a smooth finish. You can also use fruit-based decorations. Fresh berries or spooky fruit shapes can brighten the cake. These options can make your cake stand out at any Halloween party. If you need a gluten-free cake, there are great flour substitutes. Almond flour or coconut flour works well. Just remember to adjust your wet ingredients. You may need to add a bit more liquid to keep the batter moist. This way, everyone can enjoy a slice of your spooky Halloween marble cake. For the full recipe, check out the [Full Recipe]. To keep your spooky Halloween marble cake fresh, wrap it tightly in plastic wrap. This helps keep the moisture in. You can also store it in an airtight container. Place it in the fridge if you plan to eat it within a week. For longer storage, freeze the cake. Slice it first for easy thawing. Wrap each slice in plastic wrap, then put them in a freezer bag. When you want to enjoy a slice, take it out and let it sit at room temperature for about an hour. Your spooky Halloween marble cake stays fresh for about five days in the fridge. In the freezer, it can last up to three months. Check for signs that the cake has spoiled. If you see mold or a strange smell, it's best to toss it. A dry or hard texture also means it’s time to say goodbye. Enjoy this festive treat while it’s fresh! For the full recipe, check out the recipe section. To make your spooky Halloween marble cake extra festive, think of fun mix-ins and toppings. Here are some ideas: - Mini chocolate chips for a sweet surprise - Crushed Halloween-themed cookies for crunch - Chopped nuts for added texture - Edible glitter for a magical touch - Whipped cream ghosts or pumpkin icing for decoration - Extra black and orange sprinkles on top for more flair These additions can make your cake not only tastier but also more visually fun. Kids and adults alike will love the spooky surprise! Yes, you can make this cake ahead of time! Here are some tips for prepping: - Bake the cake a day or two before your event. - Let it cool completely before wrapping it in plastic wrap. - Store the wrapped cake in the fridge to keep it fresh. - You can also freeze the cake for up to three months. - Thaw it in the fridge overnight before serving. Making it in advance can save you time, so you can focus on other fun Halloween tasks! To ensure your cake rises well, follow these tips: - Make sure your baking powder is fresh. - Room temperature ingredients help the cake mix better. - Don’t overmix the batter; mix until just combined. - Check your oven temperature with an oven thermometer. - Place the cake in the center of the oven for even baking. Avoiding these common pitfalls will give you a fluffy and delicious cake! For the full recipe, refer to the Spooky Halloween Marble Cake. This blog post covered a delicious marble cake recipe just in time for Halloween. We explored the key ingredients, easy preparation steps, and tips for a perfect marble effect. You learned how to add festive touches and alternative options. As you bake and decorate, remember to have fun and get creative. This cake can be a delightful treat for any gathering, year-round. With practice, you’ll master each layer and impress everyone with your skills. Enjoy your baking journey!](https://tossedrecipes.com/wp-content/uploads/2025/07/54e9d01a-ef26-4c46-bc8f-9ab2d5c20ae2.webp)
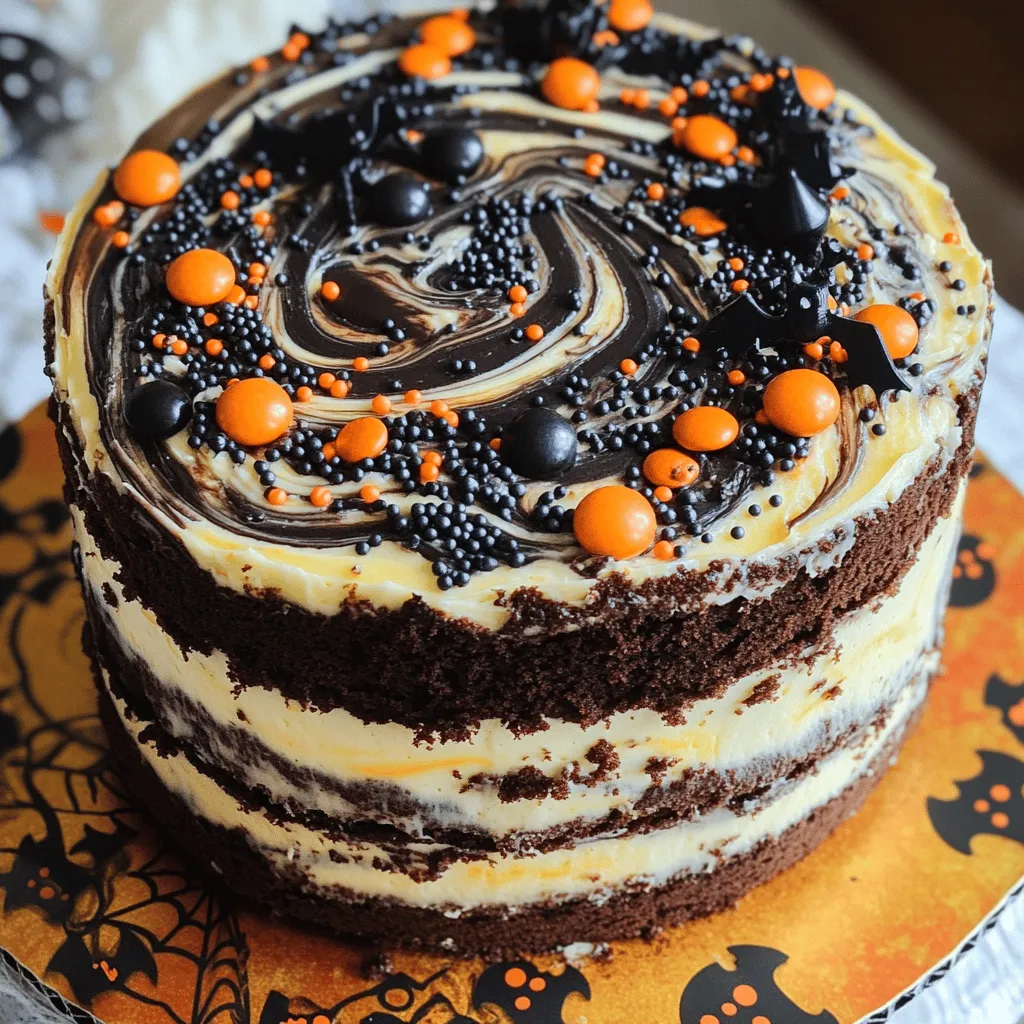
Get ready for a Halloween treat that will delight both kids and adults! My Spooky Halloween Marble Cake is easy to make and perfect for parties. With a blend of rich chocolate and vanilla, this cake offers a fun marble effect that looks festive on any table. Plus, I’ll share tips, tricks, and creative decorating ideas to take your baking to the next level. Let’s bake this cake and bring Halloween fun to life!
Ingredients
Here are the ingredients you need for the spooky Halloween marble cake:
– 2 cups all-purpose flour
– 1 ½ cups granulated sugar
– ½ cup unsalted butter, softened
– 1 cup whole milk
– 3 large eggs
– 2 teaspoons baking powder
– 1 teaspoon vanilla extract
– ¼ teaspoon salt
– ½ cup unsweetened cocoa powder
– 1 cup black and orange sprinkles (for decoration)
– 1 cup Halloween-themed candy (optional for layering)
These ingredients help create a deliciously moist and flavorful cake. The blend of vanilla and chocolate batters gives it a fun, spooky vibe. The sprinkles add a festive touch, making the cake perfect for Halloween gatherings. You can also layer candy inside for a sweet surprise! This cake is easy to make and will impress your friends and family. For detailed steps, check the full recipe.
Step-by-Step Instructions
Preparation Steps
– Preheat your oven to 350°F (175°C).
– Grease and flour a 9×5-inch loaf pan.
– In a large bowl, cream together the softened butter and sugar until fluffy.
– Beat in the eggs one at a time, mixing well after each addition. Add the vanilla extract.
Mixing the Batter
– In a separate bowl, whisk together the dry ingredients: flour, baking powder, and salt.
– Gradually combine the wet and dry mixtures, alternating with the milk. Stir until just mixed.
– Divide the batter into two bowls: one for vanilla and one for chocolate. Stir cocoa powder into the chocolate batter.
Achieving the Marble Effect
– Spoon the vanilla and chocolate batters alternately into the prepared pan.
– Use a knife to swirl the batters together for a marbled design.
– If you want, layer some Halloween-themed candy in the center for a fun surprise.
Bake the cake for 45-55 minutes. Check with a toothpick to see if it is done. For more details, check the Full Recipe.
Tips & Tricks
Perfecting the Marble Effect
To create an even swirl, start by alternating spoonfuls of vanilla and chocolate batter. Use a knife to gently swirl the batters together. Aim for a figure-eight motion to blend without losing the distinct layers. This method gives a great look and taste.
If you want more intricate designs, use a skewer. Dip it into the batter and make small circles or zig-zags. This adds a fun twist to your marble cake. Experiment with different patterns to find what you like best!
Decorating Ideas
Sprinkles add a festive touch. Use black and orange sprinkles to match the Halloween theme. Scatter them on top right before baking for a fun look. You can also add them after the cake cools for a brighter pop.
For creative ghost and pumpkin icing, use white and orange frosting. Pipe little ghost shapes or pumpkin faces on top. This not only makes the cake fun but also adds a sweet layer of flavor. Get creative, and let your Halloween spirit shine through!
Baking Tips
To ensure the cake is cooked through, keep an eye on the time. Start checking at 45 minutes. The edges should pull away from the pan slightly, and the top should be firm.
Use a toothpick to check if the cake is done. Insert it into the center; it should come out clean or with a few crumbs. If it’s wet with batter, bake a bit longer. This simple tip guarantees a perfectly baked cake every time.
Variations
Flavor Variations
You can change the flavor of your spooky Halloween marble cake. Adding extracts like almond or orange gives it a new twist. These flavors bring a unique taste to your cake. You can also mix in spices like cinnamon or nutmeg. These spices add warmth and depth, perfect for the fall season.
Alternative Toppings
Get creative with your cake toppings! Chocolate ganache can add a rich layer. Simply melt chocolate and mix it with cream for a smooth finish. You can also use fruit-based decorations. Fresh berries or spooky fruit shapes can brighten the cake. These options can make your cake stand out at any Halloween party.
Gluten-Free Option
If you need a gluten-free cake, there are great flour substitutes. Almond flour or coconut flour works well. Just remember to adjust your wet ingredients. You may need to add a bit more liquid to keep the batter moist. This way, everyone can enjoy a slice of your spooky Halloween marble cake.
For the full recipe, check out the [Full Recipe].
Storage Info
How to Store Leftover Cake
To keep your spooky Halloween marble cake fresh, wrap it tightly in plastic wrap. This helps keep the moisture in. You can also store it in an airtight container. Place it in the fridge if you plan to eat it within a week. For longer storage, freeze the cake. Slice it first for easy thawing. Wrap each slice in plastic wrap, then put them in a freezer bag. When you want to enjoy a slice, take it out and let it sit at room temperature for about an hour.
Shelf Life
Your spooky Halloween marble cake stays fresh for about five days in the fridge. In the freezer, it can last up to three months. Check for signs that the cake has spoiled. If you see mold or a strange smell, it’s best to toss it. A dry or hard texture also means it’s time to say goodbye. Enjoy this festive treat while it’s fresh! For the full recipe, check out the recipe section.
FAQs
What can I add to the marble cake to make it even more festive?
To make your spooky Halloween marble cake extra festive, think of fun mix-ins and toppings. Here are some ideas:
– Mini chocolate chips for a sweet surprise
– Crushed Halloween-themed cookies for crunch
– Chopped nuts for added texture
– Edible glitter for a magical touch
– Whipped cream ghosts or pumpkin icing for decoration
– Extra black and orange sprinkles on top for more flair
These additions can make your cake not only tastier but also more visually fun. Kids and adults alike will love the spooky surprise!
Can I make this cake in advance?
Yes, you can make this cake ahead of time! Here are some tips for prepping:
– Bake the cake a day or two before your event.
– Let it cool completely before wrapping it in plastic wrap.
– Store the wrapped cake in the fridge to keep it fresh.
– You can also freeze the cake for up to three months.
– Thaw it in the fridge overnight before serving.
Making it in advance can save you time, so you can focus on other fun Halloween tasks!
How do I ensure my cake rises properly?
To ensure your cake rises well, follow these tips:
– Make sure your baking powder is fresh.
– Room temperature ingredients help the cake mix better.
– Don’t overmix the batter; mix until just combined.
– Check your oven temperature with an oven thermometer.
– Place the cake in the center of the oven for even baking.
Avoiding these common pitfalls will give you a fluffy and delicious cake! For the full recipe, refer to the Spooky Halloween Marble Cake.
This blog post covered a delicious marble cake recipe just in time for Halloween. We explored the key ingredients, easy preparation steps, and tips for a perfect marble effect. You learned how to add festive touches and alternative options. As you bake and decorate, remember to have fun and get creative. This cake can be a delightful treat for any gathering, year-round. With practice, you’ll master each layer and impress everyone with your skills. Enjoy your baking journey!
![Here are the ingredients you need for the spooky Halloween marble cake: - 2 cups all-purpose flour - 1 ½ cups granulated sugar - ½ cup unsalted butter, softened - 1 cup whole milk - 3 large eggs - 2 teaspoons baking powder - 1 teaspoon vanilla extract - ¼ teaspoon salt - ½ cup unsweetened cocoa powder - 1 cup black and orange sprinkles (for decoration) - 1 cup Halloween-themed candy (optional for layering) These ingredients help create a deliciously moist and flavorful cake. The blend of vanilla and chocolate batters gives it a fun, spooky vibe. The sprinkles add a festive touch, making the cake perfect for Halloween gatherings. You can also layer candy inside for a sweet surprise! This cake is easy to make and will impress your friends and family. For detailed steps, check the full recipe. - Preheat your oven to 350°F (175°C). - Grease and flour a 9x5-inch loaf pan. - In a large bowl, cream together the softened butter and sugar until fluffy. - Beat in the eggs one at a time, mixing well after each addition. Add the vanilla extract. - In a separate bowl, whisk together the dry ingredients: flour, baking powder, and salt. - Gradually combine the wet and dry mixtures, alternating with the milk. Stir until just mixed. - Divide the batter into two bowls: one for vanilla and one for chocolate. Stir cocoa powder into the chocolate batter. - Spoon the vanilla and chocolate batters alternately into the prepared pan. - Use a knife to swirl the batters together for a marbled design. - If you want, layer some Halloween-themed candy in the center for a fun surprise. Bake the cake for 45-55 minutes. Check with a toothpick to see if it is done. For more details, check the Full Recipe. To create an even swirl, start by alternating spoonfuls of vanilla and chocolate batter. Use a knife to gently swirl the batters together. Aim for a figure-eight motion to blend without losing the distinct layers. This method gives a great look and taste. If you want more intricate designs, use a skewer. Dip it into the batter and make small circles or zig-zags. This adds a fun twist to your marble cake. Experiment with different patterns to find what you like best! Sprinkles add a festive touch. Use black and orange sprinkles to match the Halloween theme. Scatter them on top right before baking for a fun look. You can also add them after the cake cools for a brighter pop. For creative ghost and pumpkin icing, use white and orange frosting. Pipe little ghost shapes or pumpkin faces on top. This not only makes the cake fun but also adds a sweet layer of flavor. Get creative, and let your Halloween spirit shine through! To ensure the cake is cooked through, keep an eye on the time. Start checking at 45 minutes. The edges should pull away from the pan slightly, and the top should be firm. Use a toothpick to check if the cake is done. Insert it into the center; it should come out clean or with a few crumbs. If it’s wet with batter, bake a bit longer. This simple tip guarantees a perfectly baked cake every time. {{image_2}} You can change the flavor of your spooky Halloween marble cake. Adding extracts like almond or orange gives it a new twist. These flavors bring a unique taste to your cake. You can also mix in spices like cinnamon or nutmeg. These spices add warmth and depth, perfect for the fall season. Get creative with your cake toppings! Chocolate ganache can add a rich layer. Simply melt chocolate and mix it with cream for a smooth finish. You can also use fruit-based decorations. Fresh berries or spooky fruit shapes can brighten the cake. These options can make your cake stand out at any Halloween party. If you need a gluten-free cake, there are great flour substitutes. Almond flour or coconut flour works well. Just remember to adjust your wet ingredients. You may need to add a bit more liquid to keep the batter moist. This way, everyone can enjoy a slice of your spooky Halloween marble cake. For the full recipe, check out the [Full Recipe]. To keep your spooky Halloween marble cake fresh, wrap it tightly in plastic wrap. This helps keep the moisture in. You can also store it in an airtight container. Place it in the fridge if you plan to eat it within a week. For longer storage, freeze the cake. Slice it first for easy thawing. Wrap each slice in plastic wrap, then put them in a freezer bag. When you want to enjoy a slice, take it out and let it sit at room temperature for about an hour. Your spooky Halloween marble cake stays fresh for about five days in the fridge. In the freezer, it can last up to three months. Check for signs that the cake has spoiled. If you see mold or a strange smell, it's best to toss it. A dry or hard texture also means it’s time to say goodbye. Enjoy this festive treat while it’s fresh! For the full recipe, check out the recipe section. To make your spooky Halloween marble cake extra festive, think of fun mix-ins and toppings. Here are some ideas: - Mini chocolate chips for a sweet surprise - Crushed Halloween-themed cookies for crunch - Chopped nuts for added texture - Edible glitter for a magical touch - Whipped cream ghosts or pumpkin icing for decoration - Extra black and orange sprinkles on top for more flair These additions can make your cake not only tastier but also more visually fun. Kids and adults alike will love the spooky surprise! Yes, you can make this cake ahead of time! Here are some tips for prepping: - Bake the cake a day or two before your event. - Let it cool completely before wrapping it in plastic wrap. - Store the wrapped cake in the fridge to keep it fresh. - You can also freeze the cake for up to three months. - Thaw it in the fridge overnight before serving. Making it in advance can save you time, so you can focus on other fun Halloween tasks! To ensure your cake rises well, follow these tips: - Make sure your baking powder is fresh. - Room temperature ingredients help the cake mix better. - Don’t overmix the batter; mix until just combined. - Check your oven temperature with an oven thermometer. - Place the cake in the center of the oven for even baking. Avoiding these common pitfalls will give you a fluffy and delicious cake! For the full recipe, refer to the Spooky Halloween Marble Cake. This blog post covered a delicious marble cake recipe just in time for Halloween. We explored the key ingredients, easy preparation steps, and tips for a perfect marble effect. You learned how to add festive touches and alternative options. As you bake and decorate, remember to have fun and get creative. This cake can be a delightful treat for any gathering, year-round. With practice, you’ll master each layer and impress everyone with your skills. Enjoy your baking journey!](https://tossedrecipes.com/wp-content/uploads/2025/07/54e9d01a-ef26-4c46-bc8f-9ab2d5c20ae2-300x300.webp)