No-Bake Oreo Cheesecake Bars Easy Dessert Recipe

WANT TO SAVE THIS RECIPE?

Craving a sweet treat but don’t want to turn on the oven? Let me introduce you to my No-Bake Oreo Cheesecake Bars! This easy dessert recipe combines creamy cheesecake with crunchy Oreo goodness. It’s a simple yet delicious way to satisfy your sweet tooth. In this post, I’ll guide you through the ingredients, step-by-step instructions, and cool tips to make your cheesecake bars a hit. Let’s get started on this tasty journey!

Ingredients

List of Ingredients

– 24 Oreo cookies (plus extra for garnish)

– 4 tablespoons unsalted butter, melted

– 16 oz cream cheese, softened

– 1 cup powdered sugar

– 1 teaspoon vanilla extract

– 2 cups heavy whipping cream

– 1 tablespoon cocoa powder (for garnish)

– Pinch of salt

Ingredient Notes

Using Oreo cookies gives the crust a rich flavor. The melted butter helps bind the crumbs. Make sure your cream cheese is softened. This ensures a smooth filling. Powdered sugar blends well and sweetens the cheesecake nicely. Heavy whipping cream is key for a light and fluffy texture. Cocoa powder adds a lovely finish on top.

Alternatives and Substitutes

If you want a gluten-free option, use gluten-free cookies. You can swap in vegan cream cheese for a dairy-free version. For a lighter option, use low-fat cream cheese. If you don’t have powdered sugar, regular sugar can work, but the texture may be grainy. You can try whipped topping as a substitute for heavy cream, but it may change the taste.

Step-by-Step Instructions

Preparing the Crust

To start, take 24 Oreo cookies and crush them. I love using a food processor for this. It makes fine crumbs in seconds. Then, mix the crumbs with 4 tablespoons of melted butter. Stir until the crumbs are fully coated. Next, grab an 8×8-inch baking pan and line it with parchment paper. Firmly press the Oreo mixture into the bottom. This creates a nice, even crust. Now, place the pan in the refrigerator to set while you work on the filling.

Making the Cream Cheese Filling

For the filling, take 16 ounces of softened cream cheese and place it in a large bowl. Using an electric mixer, beat it until smooth. Then, slowly add 1 cup of powdered sugar and 1 teaspoon of vanilla extract. Mix it until it looks creamy and well-blended. In another bowl, whip 2 cups of heavy cream. Whip until stiff peaks form. This step makes your filling light and airy. Gently fold the whipped cream into the cream cheese mixture. Be careful not to deflate it. Keep folding until no streaks remain.

Final Assembly and Chilling

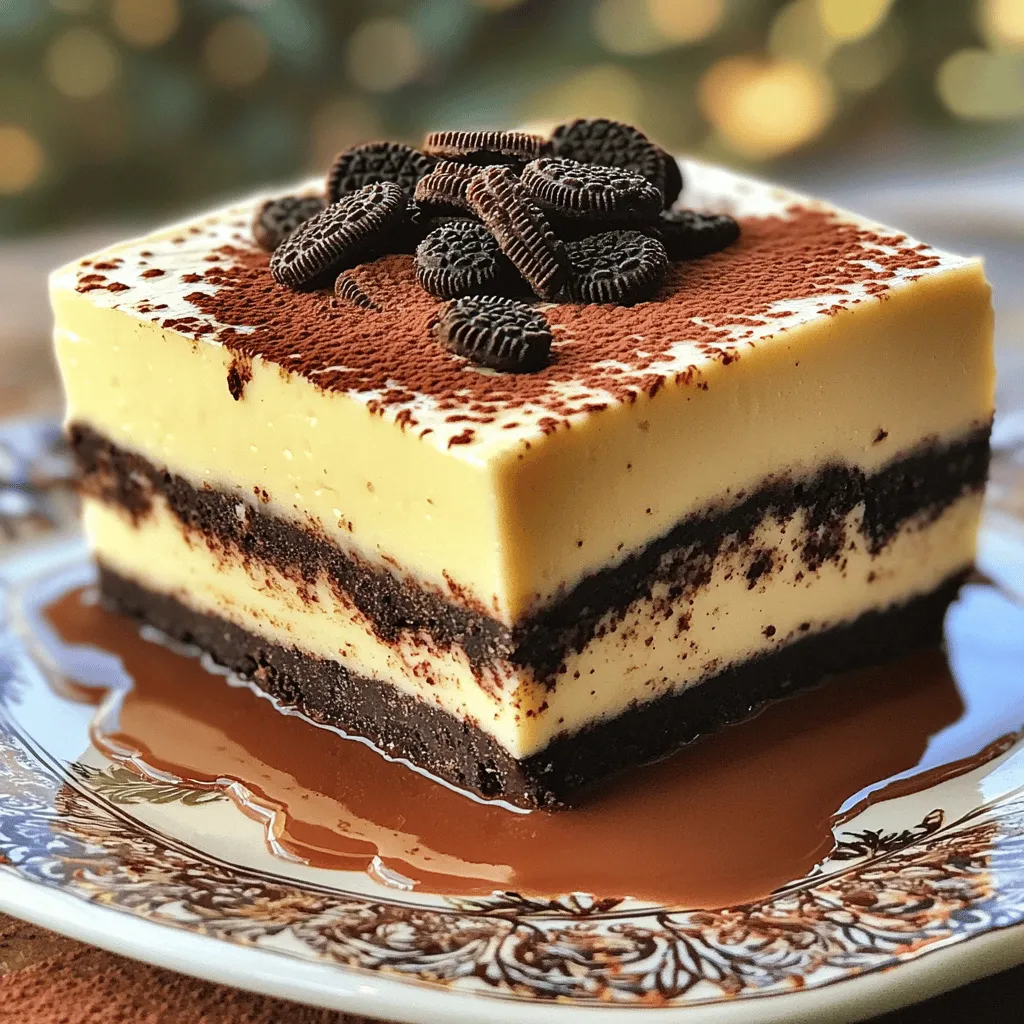
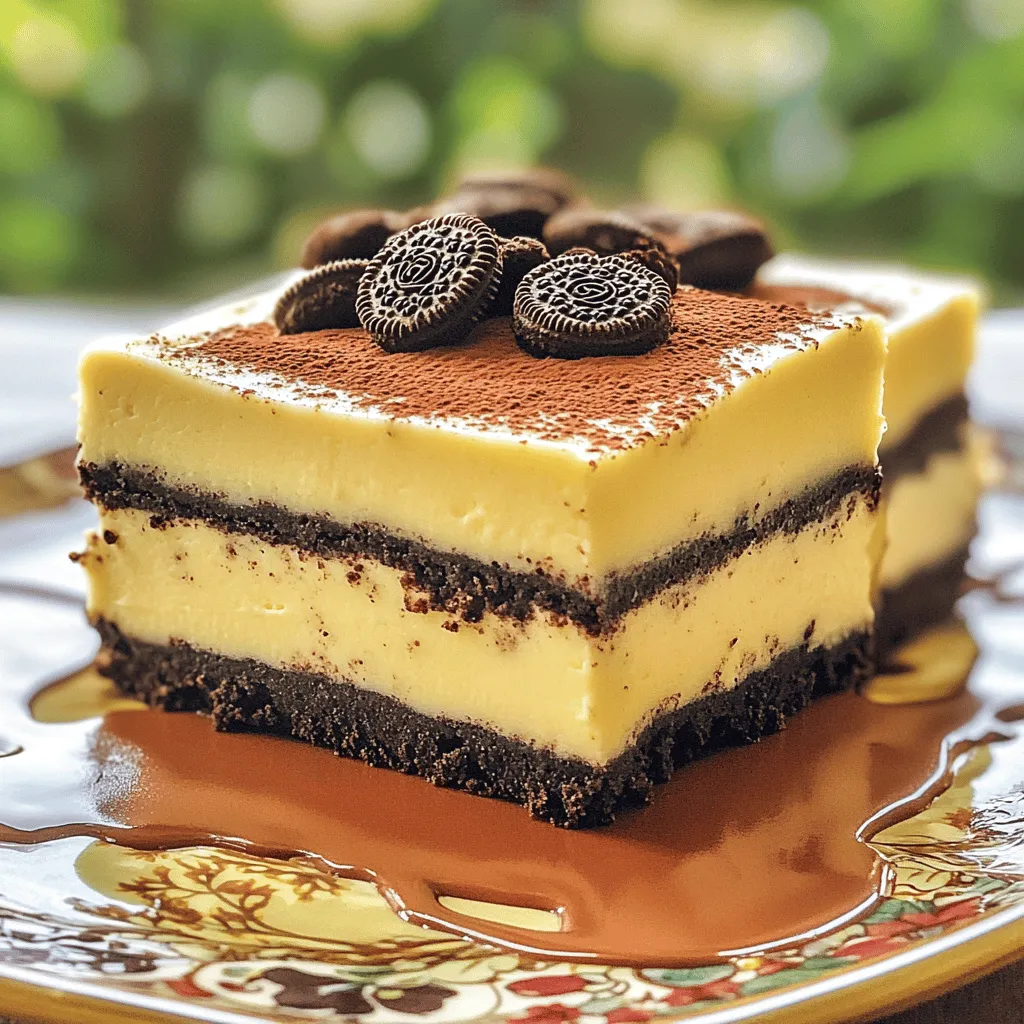
Now, pour the cream cheese filling over your chilled Oreo crust. Use a spatula to spread it evenly. Cover the pan with plastic wrap. Place it back in the refrigerator for at least 4 hours. This step is key to getting the cheesecake bars to set. When ready, lift the cheesecake out using the parchment paper. Cut it into bars and garnish with extra crushed Oreos and cocoa powder. Enjoy your delicious no-bake Oreo cheesecake bars!

Tips & Tricks

Achieving the Perfect Crust

To get a great crust, use fresh Oreo cookies. Crush them into fine crumbs. A food processor works best for this. Mix the crumbs with melted butter until you see no dry bits. Press the mixture firmly into the bottom of your pan. This helps it stay together. Chill the crust while you make the filling. This sets the base and gives it a nice crunch.

How to Whip Cream to Stiff Peaks

Start with cold heavy whipping cream for the best results. Pour it into a clean bowl. Use an electric mixer on medium speed. Whip the cream until it starts to thicken. You want to see soft peaks first. Keep mixing until you see stiff peaks form. This means the cream holds its shape well. Be gentle when folding it into the cream cheese mixture. This keeps your dessert light and fluffy.

Successful Storage Tips

After making your bars, cover them well. Use plastic wrap to keep them fresh. Store them in the fridge for up to five days. If you want to keep them longer, you can freeze them. Cut the bars before freezing for easy servings later. Just wrap them tightly in plastic wrap and foil. When ready to eat, let them thaw in the fridge overnight. Enjoy your tasty treat!
Variations

Adding Flavor Enhancements

You can add fun flavors to your no-bake Oreo cheesecake bars. Try mixing in a bit of instant coffee or espresso powder for a mocha twist. A teaspoon of almond extract can give it a nutty flavor. For a fruity touch, fold in some strawberry puree or crushed raspberries. These small changes can make your bars taste unique!

Alternative Crust Options

If you want to switch things up, you can use different cookies for the crust. Try using chocolate graham crackers or even vanilla wafers. You can also make a nut-based crust with crushed almonds or pecans mixed with butter. This offers a nice crunch and a tasty twist to the bars.

Ingredient Swaps for Dietary Needs

To cater to dietary needs, there are swaps you can make. Use gluten-free Oreo cookies for a gluten-free version. For a dairy-free option, replace the cream cheese with vegan cream cheese and the heavy cream with coconut cream. You can also use maple syrup instead of powdered sugar for a less sweet option. These swaps ensure everyone can enjoy these tasty bars!

Storage Info

Best Storage Practices

To keep your No-Bake Oreo Cheesecake Bars fresh, store them in the fridge. Use an airtight container or cover the pan with plastic wrap. This way, they will not absorb other smells in your fridge. Make sure the bars are completely chilled before you store them.

How Long They Last

These cheesecake bars last up to five days in the fridge. After that, they may lose their texture and flavor. Always check for any signs of spoilage before serving. If they look or smell off, it’s best to toss them.

Freezing Instructions

You can freeze these bars for later enjoyment. Cut them into squares before freezing. Place them in a single layer on a baking sheet, then put them in the freezer for about two hours. Once frozen, wrap each piece in plastic wrap and place them in a freezer-safe bag. They can last up to three months in the freezer. To enjoy, just thaw them in the fridge for a few hours before serving.

FAQs

Can I make No-Bake Oreo Cheesecake Bars ahead of time?

Yes, you can make these bars ahead of time. In fact, they taste better after chilling. I often make them the day before I plan to serve them. This gives the flavors time to blend. Just cover them well with plastic wrap. Store them in the fridge until you are ready to enjoy.

What is the best way to cut these cheesecake bars?

To cut the bars, I recommend using a sharp knife. First, remove the bars from the pan by lifting the parchment paper. Place the bars on a cutting board. For clean cuts, dip the knife in hot water and wipe it dry after each cut. This helps to prevent the cheesecake from sticking to the knife. Aim for even slices for a nice presentation.

Can I use low-fat cream cheese for this recipe?

You can use low-fat cream cheese if you want. It will still taste good, but the texture might be a bit different. The bars may not be as rich and creamy. If you want a lighter option, this is a good choice. Just remember, the flavor may change slightly, so keep that in mind while making your decision.

This article covered all you need for great No-Bake Oreo Cheesecake Bars. We went over the key ingredients and their alternatives. You learned step-by-step methods for making the crust and filling. Tips helped you achieve the best texture. We explored tasty variations and smart storage options.

Now, you can enjoy these bars anytime. Your friends and family will love them. Keep these tips in mind as you bake. Happy creating!
- 24 Oreo cookies (plus extra for garnish) - 4 tablespoons unsalted butter, melted - 16 oz cream cheese, softened - 1 cup powdered sugar - 1 teaspoon vanilla extract - 2 cups heavy whipping cream - 1 tablespoon cocoa powder (for garnish) - Pinch of salt Using Oreo cookies gives the crust a rich flavor. The melted butter helps bind the crumbs. Make sure your cream cheese is softened. This ensures a smooth filling. Powdered sugar blends well and sweetens the cheesecake nicely. Heavy whipping cream is key for a light and fluffy texture. Cocoa powder adds a lovely finish on top. If you want a gluten-free option, use gluten-free cookies. You can swap in vegan cream cheese for a dairy-free version. For a lighter option, use low-fat cream cheese. If you don’t have powdered sugar, regular sugar can work, but the texture may be grainy. You can try whipped topping as a substitute for heavy cream, but it may change the taste. To start, take 24 Oreo cookies and crush them. I love using a food processor for this. It makes fine crumbs in seconds. Then, mix the crumbs with 4 tablespoons of melted butter. Stir until the crumbs are fully coated. Next, grab an 8x8-inch baking pan and line it with parchment paper. Firmly press the Oreo mixture into the bottom. This creates a nice, even crust. Now, place the pan in the refrigerator to set while you work on the filling. For the filling, take 16 ounces of softened cream cheese and place it in a large bowl. Using an electric mixer, beat it until smooth. Then, slowly add 1 cup of powdered sugar and 1 teaspoon of vanilla extract. Mix it until it looks creamy and well-blended. In another bowl, whip 2 cups of heavy cream. Whip until stiff peaks form. This step makes your filling light and airy. Gently fold the whipped cream into the cream cheese mixture. Be careful not to deflate it. Keep folding until no streaks remain. Now, pour the cream cheese filling over your chilled Oreo crust. Use a spatula to spread it evenly. Cover the pan with plastic wrap. Place it back in the refrigerator for at least 4 hours. This step is key to getting the cheesecake bars to set. When ready, lift the cheesecake out using the parchment paper. Cut it into bars and garnish with extra crushed Oreos and cocoa powder. Enjoy your delicious no-bake Oreo cheesecake bars! To get a great crust, use fresh Oreo cookies. Crush them into fine crumbs. A food processor works best for this. Mix the crumbs with melted butter until you see no dry bits. Press the mixture firmly into the bottom of your pan. This helps it stay together. Chill the crust while you make the filling. This sets the base and gives it a nice crunch. Start with cold heavy whipping cream for the best results. Pour it into a clean bowl. Use an electric mixer on medium speed. Whip the cream until it starts to thicken. You want to see soft peaks first. Keep mixing until you see stiff peaks form. This means the cream holds its shape well. Be gentle when folding it into the cream cheese mixture. This keeps your dessert light and fluffy. After making your bars, cover them well. Use plastic wrap to keep them fresh. Store them in the fridge for up to five days. If you want to keep them longer, you can freeze them. Cut the bars before freezing for easy servings later. Just wrap them tightly in plastic wrap and foil. When ready to eat, let them thaw in the fridge overnight. Enjoy your tasty treat! {{image_2}} You can add fun flavors to your no-bake Oreo cheesecake bars. Try mixing in a bit of instant coffee or espresso powder for a mocha twist. A teaspoon of almond extract can give it a nutty flavor. For a fruity touch, fold in some strawberry puree or crushed raspberries. These small changes can make your bars taste unique! If you want to switch things up, you can use different cookies for the crust. Try using chocolate graham crackers or even vanilla wafers. You can also make a nut-based crust with crushed almonds or pecans mixed with butter. This offers a nice crunch and a tasty twist to the bars. To cater to dietary needs, there are swaps you can make. Use gluten-free Oreo cookies for a gluten-free version. For a dairy-free option, replace the cream cheese with vegan cream cheese and the heavy cream with coconut cream. You can also use maple syrup instead of powdered sugar for a less sweet option. These swaps ensure everyone can enjoy these tasty bars! To keep your No-Bake Oreo Cheesecake Bars fresh, store them in the fridge. Use an airtight container or cover the pan with plastic wrap. This way, they will not absorb other smells in your fridge. Make sure the bars are completely chilled before you store them. These cheesecake bars last up to five days in the fridge. After that, they may lose their texture and flavor. Always check for any signs of spoilage before serving. If they look or smell off, it's best to toss them. You can freeze these bars for later enjoyment. Cut them into squares before freezing. Place them in a single layer on a baking sheet, then put them in the freezer for about two hours. Once frozen, wrap each piece in plastic wrap and place them in a freezer-safe bag. They can last up to three months in the freezer. To enjoy, just thaw them in the fridge for a few hours before serving. Yes, you can make these bars ahead of time. In fact, they taste better after chilling. I often make them the day before I plan to serve them. This gives the flavors time to blend. Just cover them well with plastic wrap. Store them in the fridge until you are ready to enjoy. To cut the bars, I recommend using a sharp knife. First, remove the bars from the pan by lifting the parchment paper. Place the bars on a cutting board. For clean cuts, dip the knife in hot water and wipe it dry after each cut. This helps to prevent the cheesecake from sticking to the knife. Aim for even slices for a nice presentation. You can use low-fat cream cheese if you want. It will still taste good, but the texture might be a bit different. The bars may not be as rich and creamy. If you want a lighter option, this is a good choice. Just remember, the flavor may change slightly, so keep that in mind while making your decision. This article covered all you need for great No-Bake Oreo Cheesecake Bars. We went over the key ingredients and their alternatives. You learned step-by-step methods for making the crust and filling. Tips helped you achieve the best texture. We explored tasty variations and smart storage options. Now, you can enjoy these bars anytime. Your friends and family will love them. Keep these tips in mind as you bake. Happy creating!

No-Bake Oreo Cheesecake Bars

Indulge in the ultimate dessert with these No-Bake Oreo Cheesecake Bars! This simple yet decadent recipe features a creamy filling made with cream cheese and real Oreo cookies, all on a delicious cookie crust. Perfect for parties or a sweet treat at home, these bars are easy to make and require no baking. Click through to discover how to whip up this delightful dessert that will impress everyone!

Ingredients
  

24 Oreo cookies (plus extra for garnish)

4 tablespoons unsalted butter, melted

16 oz cream cheese, softened

1 cup powdered sugar

1 teaspoon vanilla extract

2 cups heavy whipping cream

1 tablespoon cocoa powder (for garnish)

Pinch of salt

Instructions
 

Prepare the Crust: In a food processor, crush the 24 Oreo cookies into fine crumbs. Mix the crumbs with the melted butter until well combined.

    Form the Base: Press the Oreo mixture firmly into the bottom of a lined 8x8-inch baking pan to form an even crust. Place in the refrigerator to set while you prepare the filling.

      Make the Cheese Mixture: In a large bowl, beat the softened cream cheese using an electric mixer until smooth. Gradually add the powdered sugar and vanilla extract, mixing until completely blended.

        Whip the Cream: In a separate bowl, whip the heavy whipping cream until stiff peaks form. Gently fold the whipped cream into the cream cheese mixture until no streaks remain, being careful to keep the mixture light and fluffy.

          Combine and Spread: Pour the cream cheese filling over the chilled Oreo crust and spread evenly with a spatula.

            Chill to Set: Cover the pan with plastic wrap and refrigerate for at least 4 hours, or until the cheesecake is firm.

              Serve: Once set, lift the cheesecake out of the pan using the lined edges. Cut it into bars and garnish with additional crushed Oreo cookies and a dusting of cocoa powder if desired.

                Prep Time: 15 minutes | Total Time: 4 hours 15 minutes | Servings: 12

                  - Presentation Tips: Serve the bars on a decorative plate, and drizzle with chocolate sauce for an extra touch. Add a few whole Oreo cookies on top for garnish for a delightful look.

                    WANT TO SAVE THIS RECIPE?