Get ready to indulge in Extra Crispy Buttermilk Fried Chicken like never before! With a juicy, flavorful interior and a delightfully crunchy exterior, this fried chicken dish will please any crowd. You’ll learn to create mouthwatering chicken thighs and drumsticks marinated in buttermilk and spices. Follow my simple steps to achieve a perfect fry. Let’s dive into the crispy goodness that will make your taste buds sing!
Ingredients
Chicken
– 4 chicken thighs, skin-on and bone-in
– 4 chicken drumsticks, skin-on
Marinade
– 2 cups buttermilk
– 2 teaspoons hot sauce (optional)
Coating
– 2 cups all-purpose flour
– 1 tablespoon paprika
– 1 teaspoon garlic powder
– 1 teaspoon onion powder
– 1 teaspoon cayenne pepper
– 1 teaspoon salt
– ½ teaspoon black pepper
– Oil for frying (vegetable or canola oil)
You need fresh chicken for the best flavor. I prefer thighs and drumsticks. The skin adds crispiness and juiciness.
For the marinade, buttermilk works wonders. It keeps the chicken moist. If you like heat, add hot sauce. This gives a nice kick.
Now, let’s talk about the coating. You will mix flour with spices. Paprika adds color. Garlic and onion powders bring depth. Cayenne gives it a spicy edge. Salt and pepper enhance all the flavors.
Oil choice is key. Use vegetable or canola oil for frying. These oils have a high smoke point, perfect for crispy chicken.
For the complete recipe, check out the Full Recipe.
Step-by-Step Instructions
Marinate the Chicken
Start by mixing the buttermilk and hot sauce in a large bowl. The buttermilk gives the chicken a rich flavor and tenderizes it. Make sure to submerge all the chicken pieces in the mixture. Cover the bowl tightly. Refrigerate for at least 4 hours, or overnight for the best taste.
Prepare the Coating
In another bowl, combine the flour with the paprika, garlic powder, onion powder, cayenne pepper, salt, and black pepper. Whisk the mixture until all ingredients blend well together. This coating adds flavor and crunch to the chicken.
Heat the Oil
Pour enough oil into your skillet or deep fryer to create a depth of about 2 inches. Heat the oil to 350°F (175°C). Using a thermometer helps you keep the right temperature. This step is crucial for getting that extra crispy texture.
Coat the Chicken
Remove one piece of chicken from the buttermilk. Allow the excess buttermilk to drip off. Dredge it in the seasoned flour, making sure to coat all sides evenly. Shake off any extra flour and place it on a wire rack. Repeat this for all the chicken pieces.
Fry the Chicken
Carefully lower two pieces of coated chicken into the hot oil. Avoid crowding the pan; this helps fry the chicken evenly. Fry the chicken for 12-15 minutes. Turn the pieces occasionally until they turn a golden brown and are fully cooked through.
Drain and Serve
Once the chicken is done frying, transfer it to a wire rack. Let the chicken rest for about 5 minutes before serving. This helps keep it crispy. You can serve it with your favorite sides, and trust me, it will be a hit! For the complete experience, check the Full Recipe for all the details.
Tips & Tricks
Achieving Maximum Crispiness
To get the best crunch, start with a cold buttermilk marinade. This helps the chicken stay juicy while frying. It also makes the coating stick better. Let your chicken soak for at least four hours. For the crispiest result, keep the oil at the right temperature. Heat it to 350°F (175°C) before adding the chicken. If the oil is too cool, the coating can get soggy. If it’s too hot, it can burn.
Serving Suggestions
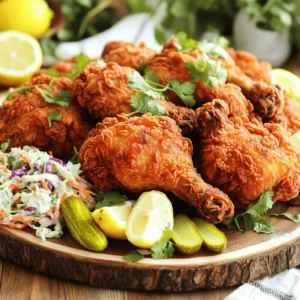
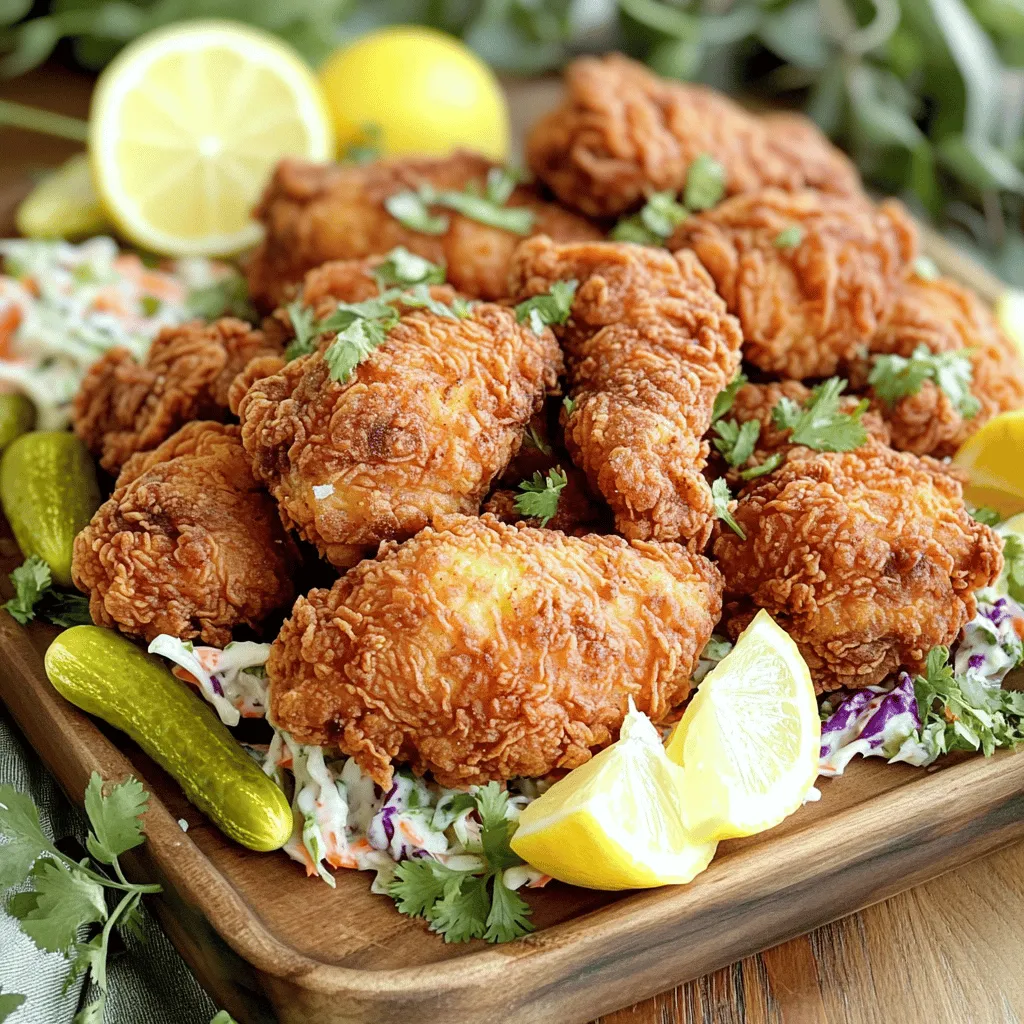
Pair your Extra Crispy Buttermilk Fried Chicken with classic sides. Coleslaw adds a nice crunch, while pickles give a tangy bite. For a great look, arrange the chicken on a wooden platter. Add a side of coleslaw and some pickles. Garnish with fresh herbs or lemon wedges for a pop of color. This makes your meal feel special and inviting.
Equipment Recommendations
Using the right tools is key. A heavy frying pan or a deep fryer works best. Choose a pan that heats evenly for good results. A kitchen thermometer is a must for frying. It helps you monitor the oil temperature. This ensures your chicken fries perfectly each time.
Variations
Spicy Buttermilk Fried Chicken
To make your fried chicken spicy, tweak the marinade and coating. Add more hot sauce to the buttermilk. You can also mix cayenne pepper into the flour coating. This adds heat without losing flavor. Start with one extra teaspoon of cayenne for a mild kick. Adjust to your taste!
Herb-Infused Fried Chicken
For a fresh twist, add herbs to your marinade. Thyme and rosemary work great! Chop a tablespoon of each and mix them into the buttermilk. Let the chicken soak up those flavors. This gives your fried chicken a lovely, aromatic taste.
Gluten-Free Version
If you need a gluten-free option, swap the all-purpose flour. Use rice flour or a gluten-free blend instead. These alternatives still give you a crispy coating. Just make sure to check that all your other ingredients are gluten-free as well. Enjoy your delicious fried chicken without worrying about gluten!
For the complete recipe, check out the Full Recipe section.
Storage Info
Storing Leftovers
To store your Extra Crispy Buttermilk Fried Chicken, place the pieces in an airtight container. Make sure the chicken cools down before sealing it. This helps keep the skin crispy. You can store it in the refrigerator for up to four days.
When you want to reheat, preheat your oven to 375°F. Place the chicken on a baking sheet. Heat for about 15-20 minutes. This method keeps the chicken crispy and juicy. Avoid using the microwave as it can make the chicken soggy.
Freezing Tips
You can freeze cooked chicken for future meals. Let it cool completely, then wrap each piece tightly in plastic wrap. Place the wrapped pieces in a freezer bag. Make sure to remove as much air as possible. This helps prevent freezer burn.
To thaw, move the chicken to the fridge for a few hours or overnight. For quick thawing, use the microwave on low power. Reheat it in the oven at 375°F until hot. This keeps the chicken tasty and crispy.
Shelf Life
In the refrigerator, your Extra Crispy Buttermilk Fried Chicken lasts about four days. If you freeze it properly, it can stay good for up to three months. Always check for any signs of spoilage before eating. Proper storage keeps your chicken fresh and ready to enjoy.
FAQs
How long should I marinate the chicken for Extra Crispy Buttermilk Fried Chicken?
For the best flavor and tenderness, marinate the chicken for at least 4 hours. I recommend marinating overnight. This longer time lets the buttermilk work its magic, breaking down the proteins. The chicken absorbs flavors and stays juicy when cooked.
Can I use chicken breasts instead of thighs and drumsticks?
Yes, you can use chicken breasts, but be aware of some differences. Chicken breasts cook faster than thighs and drumsticks. They can dry out easily if overcooked. If using breasts, check for doneness sooner, usually around 10-12 minutes. This way, you keep them juicy and tender.
What oil is best for frying chicken?
For frying chicken, I suggest vegetable or canola oil. These oils have high smoke points, which means they can get hot without burning. This helps achieve that extra crispy coating we all love. Peanut oil is also a great choice if you enjoy a hint of flavor.
How do I know when the chicken is fully cooked?
To tell if the chicken is done, check the internal temperature. It should reach 165°F (74°C). You can also look for visual cues. The coating should be golden brown and crispy. If juices run clear when pierced, it’s likely ready to eat.
Making crispy buttermilk fried chicken is simple and fun. We covered all you need: cooking ingredients, step-by-step directions, and helpful tips. You learned how to marinate, coat, and fry chicken for the best taste. Remember to keep your oil hot and choose the right sides for a perfect meal. With these techniques, you can impress your family and friends. This dish can be your next tasty project, and you will enjoy it every time. Grab your ingredients, follow the steps, and have fun cooking!