. - Use potato starch for an ultra-crispy coating. - Ensure the oil temperature is consistent during frying. To get that perfect crunch, potato starch is your best friend. This starch gives a light and crispy texture that you won't find with regular flour. It absorbs moisture while frying, creating a lovely crisp shell. Keeping the oil temperature steady is key too. If the oil is too cool, the chicken will soak up oil and become greasy. If it's too hot, the coating can burn before the chicken cooks. Aim for about 180°C (350°F). A thermometer helps keep it just right. - Overcrowding the pan which leads to soggy chicken. - Not allowing chicken to marinate long enough. One common mistake is overcrowding the pan. When you add too many chicken pieces at once, the temperature drops. This results in soggy chicken instead of crispy. Fry in small batches to keep the heat steady. Another mistake is rushing the marinating process. Marinate the chicken for at least 30 minutes. If you have time, go for 2 hours. This longer marination helps the flavors soak in, making the chicken juicy and tasty. - Complement with sides like rice, salad, or pickles. - Pair with dipping sauces like mayonnaise or spicy sauce. When serving, think about sides that balance your meal. Steamed rice, a fresh salad, or tangy pickles make great companions. They add freshness and texture to the crispy chicken. Don’t forget the sauces! Creamy mayonnaise or a spicy dipping sauce can elevate the dish. These options allow everyone to customize their bites. For ideas, check out the Full Recipe for more pairings. {{image_2}} You can switch up the marinade to fit your taste. For a spicy kick, add chili paste or sriracha. These will make your chicken burst with heat. If you prefer sweet, try using honey or increase the mirin. This will add a rich, sweet layer to the dish. You can also play with the type of chicken you use. Swap chicken thighs for chicken breast if you want a leaner dish. Both options taste great in this recipe. You can also experiment with different starches or flours for the coating. Cornstarch, rice flour, or even breadcrumbs can change the texture. How you serve your chicken can change the meal. Try it as a sandwich with your favorite toppings. You can also wrap it in lettuce for a fresh, crunchy bite. Another idea is to add it to a rice bowl with veggies and sauce. Each option offers a new way to enjoy this crispy delight. After enjoying your Japanese fried chicken, store any leftovers in an airtight container. This keeps the chicken fresh. You can refrigerate it for up to 3 days. Make sure to let it cool before sealing it up. This helps keep the flavor and moisture locked in. When it’s time to eat your leftovers, reheating is key. The best way to do this is in an oven or air fryer. Both methods help restore the crispiness you love. Set the oven to 180°C (350°F) and warm the chicken for about 10-15 minutes. If using an air fryer, heat it at the same temperature for about 5-8 minutes. This will bring back that crunchy texture. If you want to save your fried chicken for later, freezing is a great option. Place the cooked chicken in a freezer-safe bag. Remove as much air as possible before sealing. You can freeze it for up to 1 month for future meals. When ready to eat, thaw in the fridge overnight before reheating. Japanese fried chicken, or karaage, is a popular dish in Japan. It features marinated chicken pieces, deep-fried until crispy. This dish symbolizes comfort food in Japanese culture, often served at home or festivals. The marinade usually includes soy sauce, garlic, and ginger, giving it a savory taste. The crispy coating adds texture, making it a favorite among many. Yes, you can prepare Japanese fried chicken ahead of time. Marinate the chicken and coat it, then store it in the fridge. Fry it just before serving for the best results. If you have leftovers, refrigerate them in an airtight container. They will stay fresh for up to three days. When serving Japanese fried chicken, consider these tasty sides: - Steamed rice or fried rice - Fresh salad with a light dressing - Pickled vegetables for a crunchy contrast - Miso soup for a comforting touch - Cold beer or green tea to drink To get the crispiest chicken, follow these tips: - Use potato starch for the coating; it makes a great crunch. - Heat the oil to 180°C (350°F) before frying. - Fry in small batches. This keeps the oil hot and the chicken crispy. - Let the chicken rest on paper towels to drain excess oil. Japanese fried chicken and KFC differ in many ways: - Flavor: Karaage has a savory, umami flavor from the marinade, while KFC is often more seasoned. - Coating: Karaage uses potato starch, making it lighter and crispier than KFC's breaded coating. - Preparation: Japanese fried chicken is marinated first, while KFC has a secret blend of spices. For a full recipe on making this delicious dish, check out the [Full Recipe]. This recipe for Japanese Fried Chicken combines tender chicken thighs with a crispy coating. Marinating enhances the flavors, while simple frying techniques ensure perfect texture. Use potato starch for extra crunch, and avoid overcrowding the pan to keep each piece crispy. You can also explore different marinades and serving options to customize your dish. Remember to store any leftovers properly for delicious meals later. With these tips, you’ll create a crowd-pleasing dish every time. Enjoy your cooking and the tasty results it brings!](https://tossedrecipes.com/wp-content/uploads/2025/06/dc137012-94de-46b7-9848-0106089a4693.webp)
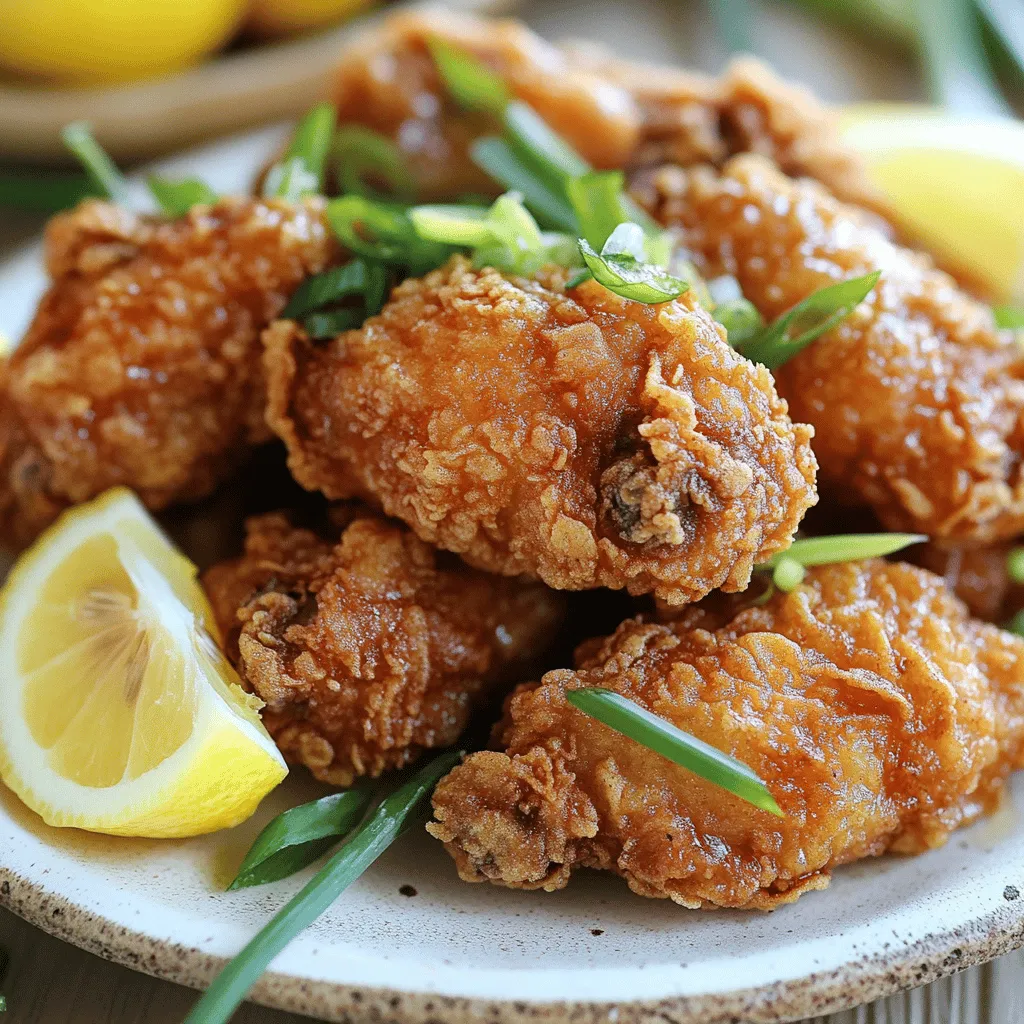
Are you ready to indulge in a crispy treat? Japanese Fried Chicken, or Karaage, is a beloved dish that combines juicy chicken with a crunchy outer layer. In this guide, I’ll share the secrets to perfecting this delight at home. From essential ingredients to frying tips, you’ll learn how to create a dish everyone will love. Let’s dive in and make your next meal unforgettable!
Ingredients
List of Ingredients
– 500g chicken thighs, boneless and skinless
– 1 cup potato starch (or cornstarch)
– 2 tablespoons soy sauce
– 1 tablespoon mirin (or rice vinegar)
– 1 teaspoon garlic powder
– 1 teaspoon ginger powder
– 1 tablespoon sesame oil
– 1 egg, beaten
– 1-2 cups vegetable oil (for frying)
– Salt and pepper to taste
– Freshly chopped green onions (for garnish)
– Lemon wedges (for serving)
Equipment Needed
– Mixing bowls for marinating and coating
– Frying pan or deep fryer
– Thermometer for oil temperature
To make the best Japanese fried chicken, you need to gather these ingredients. Start with chicken thighs. I love using boneless and skinless thighs because they are juicy and tender.
Next, you need potato starch or cornstarch. This is key for that crispy coating. The other flavoring agents are soy sauce, mirin, garlic powder, ginger powder, and sesame oil. Each adds a unique taste to the chicken.
For frying, you will need vegetable oil, salt, and pepper. These are essentials that help with cooking and seasoning.
Now, let’s look at the tools. You need mixing bowls to marinate the chicken and coat it. A frying pan or deep fryer helps you cook the chicken evenly. A thermometer is important to check the oil temperature.
With all these ingredients and tools, you are ready to create a crispy delight that everyone will love. Don’t forget to check the Full Recipe for detailed steps on how to prepare this dish!
Step-by-Step Instructions
Marinate the Chicken
– Combine soy sauce, mirin, garlic powder, ginger powder, sesame oil, salt, and pepper in a bowl.
– Add chicken pieces, mix well, and refrigerate for 30 minutes to 2 hours.
Marinating is key. It adds flavor and keeps the chicken moist. The longer you marinate, the better the taste.
Prepare the Coating
– Set up a dry station with potato starch in one dish and beaten egg in another.
This station helps in getting a great coating. Potato starch gives a crispy texture that everyone loves.
Coat the Chicken
– Dredge chicken in potato starch, dip in egg, then return to potato starch for double coating.
Double coating makes the chicken super crispy. Shake off excess starch, and make sure it gets fully coated in egg.
Heat the Oil
– Heat vegetable oil to 180°C (350°F) and test readiness with a chicken piece.
You can test the oil with a small chicken piece. If it sizzles, it’s ready! This step is crucial for perfect frying.
Fry the Chicken
– Fry chicken in small batches, ensuring even cooking and avoiding overcrowding.
Cook in small batches. This keeps the temperature steady and prevents soggy chicken. Fry each batch for about 6-8 minutes.
Drain and Serve
– Remove from oil, drain on paper towels, garnish, and serve with lemon wedges.
After frying, let the chicken rest on paper towels. This drains excess oil. Garnish with green onions and serve with lemon wedges for a fresh twist. Enjoy your crispy Japanese fried chicken! For the full recipe, check it out [here](#).
Tips & Tricks
Tips for Perfectly Crispy Texture
– Use potato starch for an ultra-crispy coating.
– Ensure the oil temperature is consistent during frying.
To get that perfect crunch, potato starch is your best friend. This starch gives a light and crispy texture that you won’t find with regular flour. It absorbs moisture while frying, creating a lovely crisp shell.
Keeping the oil temperature steady is key too. If the oil is too cool, the chicken will soak up oil and become greasy. If it’s too hot, the coating can burn before the chicken cooks. Aim for about 180°C (350°F). A thermometer helps keep it just right.
Common Mistakes to Avoid
– Overcrowding the pan which leads to soggy chicken.
– Not allowing chicken to marinate long enough.
One common mistake is overcrowding the pan. When you add too many chicken pieces at once, the temperature drops. This results in soggy chicken instead of crispy. Fry in small batches to keep the heat steady.
Another mistake is rushing the marinating process. Marinate the chicken for at least 30 minutes. If you have time, go for 2 hours. This longer marination helps the flavors soak in, making the chicken juicy and tasty.
Serving Suggestions
– Complement with sides like rice, salad, or pickles.
– Pair with dipping sauces like mayonnaise or spicy sauce.
When serving, think about sides that balance your meal. Steamed rice, a fresh salad, or tangy pickles make great companions. They add freshness and texture to the crispy chicken.
Don’t forget the sauces! Creamy mayonnaise or a spicy dipping sauce can elevate the dish. These options allow everyone to customize their bites. For ideas, check out the Full Recipe for more pairings.
Variations
Alternative Marinades
You can switch up the marinade to fit your taste. For a spicy kick, add chili paste or sriracha. These will make your chicken burst with heat. If you prefer sweet, try using honey or increase the mirin. This will add a rich, sweet layer to the dish.
Different Ingredients
You can also play with the type of chicken you use. Swap chicken thighs for chicken breast if you want a leaner dish. Both options taste great in this recipe. You can also experiment with different starches or flours for the coating. Cornstarch, rice flour, or even breadcrumbs can change the texture.
Serving Variants
How you serve your chicken can change the meal. Try it as a sandwich with your favorite toppings. You can also wrap it in lettuce for a fresh, crunchy bite. Another idea is to add it to a rice bowl with veggies and sauce. Each option offers a new way to enjoy this crispy delight.
Storage Info
How to Store Leftovers
After enjoying your Japanese fried chicken, store any leftovers in an airtight container. This keeps the chicken fresh. You can refrigerate it for up to 3 days. Make sure to let it cool before sealing it up. This helps keep the flavor and moisture locked in.
Reheating Suggestions
When it’s time to eat your leftovers, reheating is key. The best way to do this is in an oven or air fryer. Both methods help restore the crispiness you love. Set the oven to 180°C (350°F) and warm the chicken for about 10-15 minutes. If using an air fryer, heat it at the same temperature for about 5-8 minutes. This will bring back that crunchy texture.
Freezing Instructions
If you want to save your fried chicken for later, freezing is a great option. Place the cooked chicken in a freezer-safe bag. Remove as much air as possible before sealing. You can freeze it for up to 1 month for future meals. When ready to eat, thaw in the fridge overnight before reheating.
FAQs
What is Japanese Fried Chicken?
Japanese fried chicken, or karaage, is a popular dish in Japan. It features marinated chicken pieces, deep-fried until crispy. This dish symbolizes comfort food in Japanese culture, often served at home or festivals. The marinade usually includes soy sauce, garlic, and ginger, giving it a savory taste. The crispy coating adds texture, making it a favorite among many.
Can I make Japanese Fried Chicken ahead of time?
Yes, you can prepare Japanese fried chicken ahead of time. Marinate the chicken and coat it, then store it in the fridge. Fry it just before serving for the best results. If you have leftovers, refrigerate them in an airtight container. They will stay fresh for up to three days.
What do I serve with Japanese Fried Chicken?
When serving Japanese fried chicken, consider these tasty sides:
– Steamed rice or fried rice
– Fresh salad with a light dressing
– Pickled vegetables for a crunchy contrast
– Miso soup for a comforting touch
– Cold beer or green tea to drink
How do I achieve the crispiest chicken?
To get the crispiest chicken, follow these tips:
– Use potato starch for the coating; it makes a great crunch.
– Heat the oil to 180°C (350°F) before frying.
– Fry in small batches. This keeps the oil hot and the chicken crispy.
– Let the chicken rest on paper towels to drain excess oil.
What’s the difference between Japanese Fried Chicken and KFC?
Japanese fried chicken and KFC differ in many ways:
– Flavor: Karaage has a savory, umami flavor from the marinade, while KFC is often more seasoned.
– Coating: Karaage uses potato starch, making it lighter and crispier than KFC’s breaded coating.
– Preparation: Japanese fried chicken is marinated first, while KFC has a secret blend of spices.
For a full recipe on making this delicious dish, check out the [Full Recipe].
This recipe for Japanese Fried Chicken combines tender chicken thighs with a crispy coating. Marinating enhances the flavors, while simple frying techniques ensure perfect texture. Use potato starch for extra crunch, and avoid overcrowding the pan to keep each piece crispy. You can also explore different marinades and serving options to customize your dish. Remember to store any leftovers properly for delicious meals later. With these tips, you’ll create a crowd-pleasing dish every time. Enjoy your cooking and the tasty results it brings!
. - Use potato starch for an ultra-crispy coating. - Ensure the oil temperature is consistent during frying. To get that perfect crunch, potato starch is your best friend. This starch gives a light and crispy texture that you won't find with regular flour. It absorbs moisture while frying, creating a lovely crisp shell. Keeping the oil temperature steady is key too. If the oil is too cool, the chicken will soak up oil and become greasy. If it's too hot, the coating can burn before the chicken cooks. Aim for about 180°C (350°F). A thermometer helps keep it just right. - Overcrowding the pan which leads to soggy chicken. - Not allowing chicken to marinate long enough. One common mistake is overcrowding the pan. When you add too many chicken pieces at once, the temperature drops. This results in soggy chicken instead of crispy. Fry in small batches to keep the heat steady. Another mistake is rushing the marinating process. Marinate the chicken for at least 30 minutes. If you have time, go for 2 hours. This longer marination helps the flavors soak in, making the chicken juicy and tasty. - Complement with sides like rice, salad, or pickles. - Pair with dipping sauces like mayonnaise or spicy sauce. When serving, think about sides that balance your meal. Steamed rice, a fresh salad, or tangy pickles make great companions. They add freshness and texture to the crispy chicken. Don’t forget the sauces! Creamy mayonnaise or a spicy dipping sauce can elevate the dish. These options allow everyone to customize their bites. For ideas, check out the Full Recipe for more pairings. {{image_2}} You can switch up the marinade to fit your taste. For a spicy kick, add chili paste or sriracha. These will make your chicken burst with heat. If you prefer sweet, try using honey or increase the mirin. This will add a rich, sweet layer to the dish. You can also play with the type of chicken you use. Swap chicken thighs for chicken breast if you want a leaner dish. Both options taste great in this recipe. You can also experiment with different starches or flours for the coating. Cornstarch, rice flour, or even breadcrumbs can change the texture. How you serve your chicken can change the meal. Try it as a sandwich with your favorite toppings. You can also wrap it in lettuce for a fresh, crunchy bite. Another idea is to add it to a rice bowl with veggies and sauce. Each option offers a new way to enjoy this crispy delight. After enjoying your Japanese fried chicken, store any leftovers in an airtight container. This keeps the chicken fresh. You can refrigerate it for up to 3 days. Make sure to let it cool before sealing it up. This helps keep the flavor and moisture locked in. When it’s time to eat your leftovers, reheating is key. The best way to do this is in an oven or air fryer. Both methods help restore the crispiness you love. Set the oven to 180°C (350°F) and warm the chicken for about 10-15 minutes. If using an air fryer, heat it at the same temperature for about 5-8 minutes. This will bring back that crunchy texture. If you want to save your fried chicken for later, freezing is a great option. Place the cooked chicken in a freezer-safe bag. Remove as much air as possible before sealing. You can freeze it for up to 1 month for future meals. When ready to eat, thaw in the fridge overnight before reheating. Japanese fried chicken, or karaage, is a popular dish in Japan. It features marinated chicken pieces, deep-fried until crispy. This dish symbolizes comfort food in Japanese culture, often served at home or festivals. The marinade usually includes soy sauce, garlic, and ginger, giving it a savory taste. The crispy coating adds texture, making it a favorite among many. Yes, you can prepare Japanese fried chicken ahead of time. Marinate the chicken and coat it, then store it in the fridge. Fry it just before serving for the best results. If you have leftovers, refrigerate them in an airtight container. They will stay fresh for up to three days. When serving Japanese fried chicken, consider these tasty sides: - Steamed rice or fried rice - Fresh salad with a light dressing - Pickled vegetables for a crunchy contrast - Miso soup for a comforting touch - Cold beer or green tea to drink To get the crispiest chicken, follow these tips: - Use potato starch for the coating; it makes a great crunch. - Heat the oil to 180°C (350°F) before frying. - Fry in small batches. This keeps the oil hot and the chicken crispy. - Let the chicken rest on paper towels to drain excess oil. Japanese fried chicken and KFC differ in many ways: - Flavor: Karaage has a savory, umami flavor from the marinade, while KFC is often more seasoned. - Coating: Karaage uses potato starch, making it lighter and crispier than KFC's breaded coating. - Preparation: Japanese fried chicken is marinated first, while KFC has a secret blend of spices. For a full recipe on making this delicious dish, check out the [Full Recipe]. This recipe for Japanese Fried Chicken combines tender chicken thighs with a crispy coating. Marinating enhances the flavors, while simple frying techniques ensure perfect texture. Use potato starch for extra crunch, and avoid overcrowding the pan to keep each piece crispy. You can also explore different marinades and serving options to customize your dish. Remember to store any leftovers properly for delicious meals later. With these tips, you’ll create a crowd-pleasing dish every time. Enjoy your cooking and the tasty results it brings!](https://tossedrecipes.com/wp-content/uploads/2025/06/dc137012-94de-46b7-9848-0106089a4693-300x300.webp)